Tag: SNN Cooking

  • Crack Corn on the Cob

    Crack Corn on the Cob

    My crack corn on the cob takes summer corn to a whole new level! Smothered in a creamy ranch sauce and topped with bacon, cheddar, and green onions, it’s the kind of side dish that disappears before the main course even hits the table.

    Crack corn on the cob on a serving platter, covered in green onions and bacon.

    Prepare for Zero Leftovers

    • Corn just got an upgrade: Sweet summer corn gets the full ‘crack’ treatment with creamy ranch sauce, crispy bacon, and melty cheddar in every bite.
    • Guaranteed to steal the spotlight: Don’t be surprised if this corn disappears before the burgers and grilled ribs. Just like my crack chicken salad and crack chicken pasta, it’s always the first thing gone.

    Ingredients for Crack Corn on the Cob

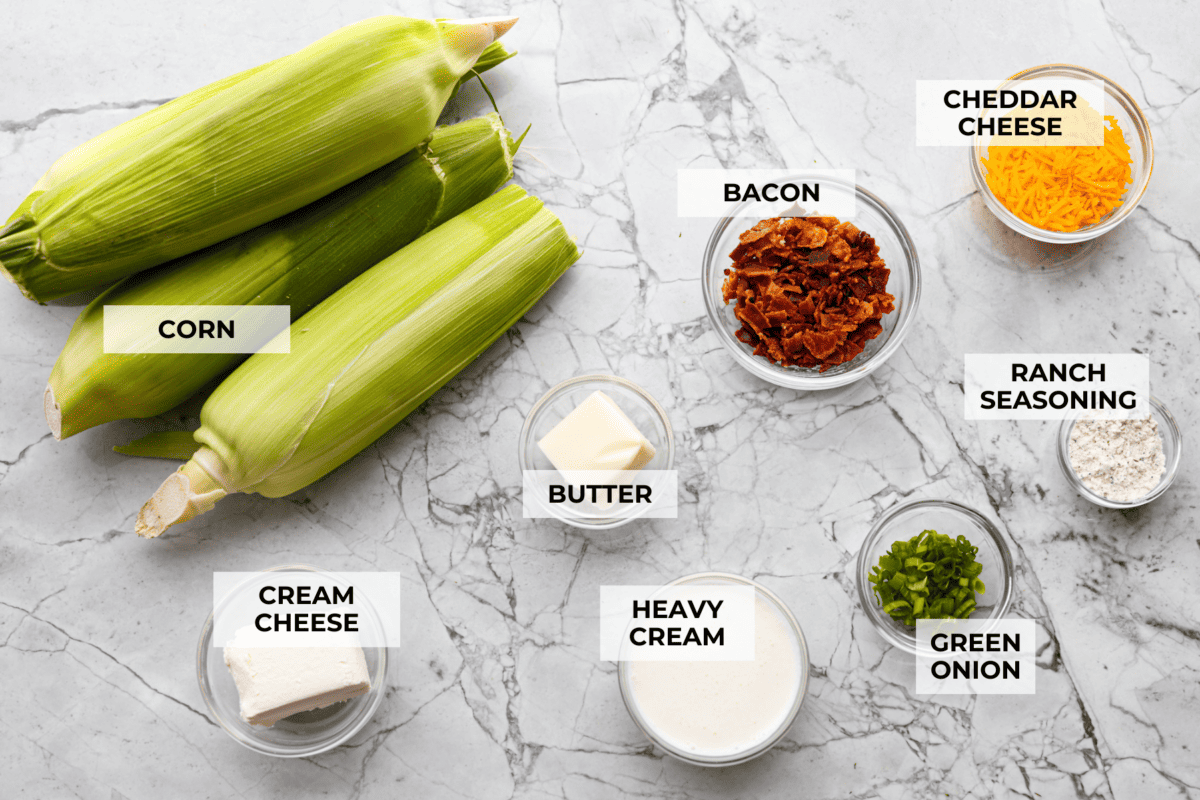
    Overhead shot of labeled ingredients.
    • Corn: Fresh corn on the cob can be found year-round! If it’s not summer, search the frozen section at the grocery store.
    • Cream Cheese: The trick is to use slightly warm cream cheese so it doesn’t separate in the sauce. I like to soften and warm it in the microwave for 10-20 seconds.
    • Bacon: Precooked refrigerated bacon makes it so easy!

    How to Make Crack Corn on the Cob

    Whether you’re serving it alongside grilled chicken or adding it to your BBQ spread, this irresistible side comes together with minimal effort and maximum flavor. You could also serve this crack corn recipe alongside your favorite summer sides like macaroni salad, baked beans, and potato salad for the best cookout!

    1. Prep and Cook the Corn: Remove the husks and silks. Fill a large pot with water and bring it to a boil. Add the corn and cook for 5-7 minutes. Remove the corn using tongs and set aside. Alternatively, you can grill or air-fry the corn.
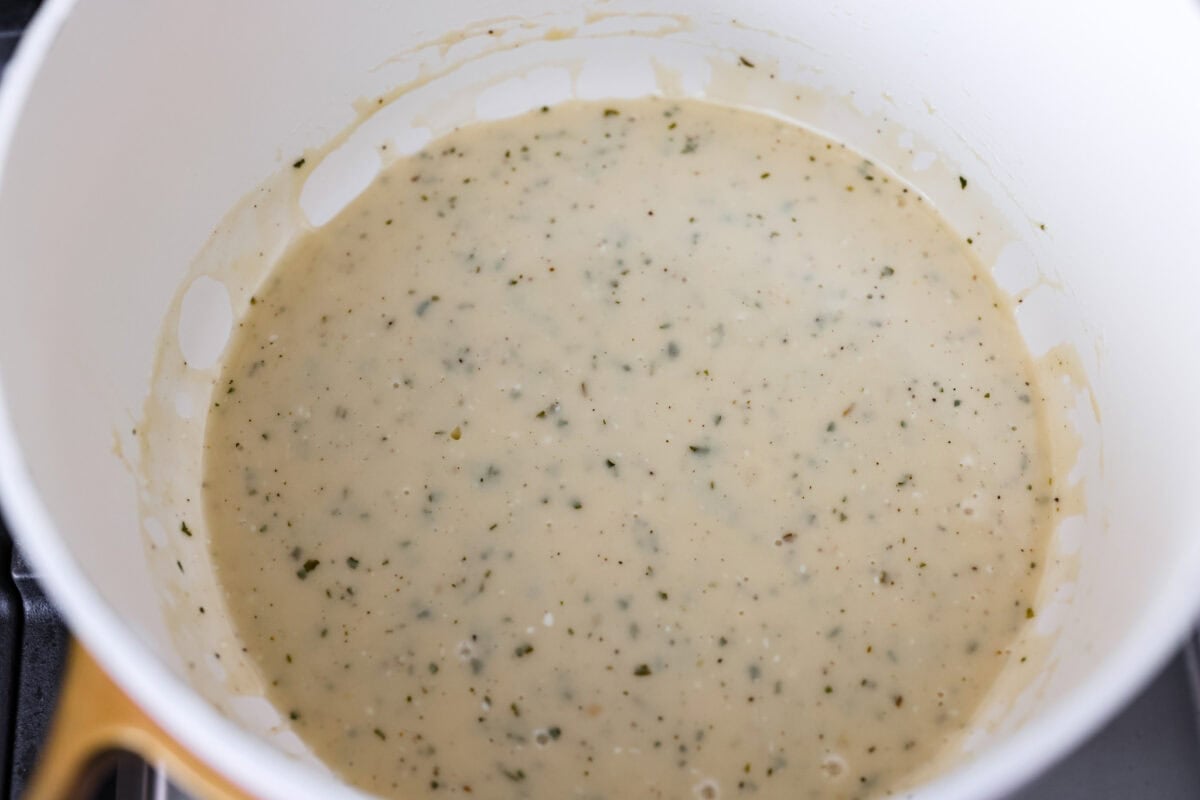
    2. Make Crack Sauce: In a small saucepan, melt the butter over medium heat. Whisk in the heavy cream and ranch seasoning. Slowly whisk in the softened cream cheese and continue cooking until smooth and melted.
    3. Add the Sauce to the Corn: Place the cooked corn on a large platter or in a baking dish. Generously spoon or brush the sauce over the corn.
    4. Add Toppings and Serve: Top crack corn on the cob with shredded cheddar cheese, cooked bacon, fresh cracked pepper, and sliced green onions before serving.

    Must Have Tools For This Recipe

    • Large Pot: You’ll need a large pot to cook the corn until it’s tender.
    • Tongs: The easiest way to pull the corn out of the pot without burning your fingers.

    Print

    Crack Corn on the Cob

    My crack corn on the cob is topped with a creamy ranch sauce, cheddar cheese, bacon, and green onions for an irresistible summer side dish.
    Course Side Dish
    Cuisine American
    Keyword crack corn, crack corn on the cob recipe, cracked out corn
    Prep Time 5 minutes
    Cook Time 5 minutes
    Total Time 10 minutes
    Servings 6 Servings
    Calories 298kcal

    Ingredients

    • 6 ears fresh sweet corn
    • ¼ cup unsalted butter
    • ½ cup heavy cream
    • 2 tablespoons softened cream cheese see notes
    • 1 tablespoon dry ranch seasoning
    • ¼ cup shredded cheddar cheese
    • ¼ cup cooked and chopped bacon
    • ¼ cup sliced green onion for garnish

    Instructions

    • Remove the husks and silks from 6 ears fresh sweet corn. Fill a large pot with water and bring it to a boil. Add the corn and boil for 5-7 minutes. Remove the corn from the water using tongs and set it aside. Alternatively, you can grill or air-fry the corn! I have recipes and instructions for each method; pick your favorite!
    • In a small saucepan, add ¼ cup unsalted butter and melt over medium heat. Whisk in ½ cup heavy cream and 1 tablespoon dry ranch seasoning. Slowly whisk in 2 tablespoons softened cream cheese. Stir and heat over medium heat until melted.
    • Place the cooked corn on a large platter or in a baking dish for serving. Immediately spoon or brush the warm sauce generously over the corn.
    • Top the corn with ¼ cup shredded cheddar cheese, ¼ cup cooked and chopped bacon, and ¼ cup sliced green onion.

    Notes

    Storage and Reheating Instructions

    • Fridge: Crack corn is best served fresh, but leftovers can be wrapped tightly and stored in the fridge for 2-3 days.
    • To Reheat: Microwave leftover corn for 1-2 minutes.


    Nutrition

    Calories: 298kcal | Carbohydrates: 20g | Protein: 6g | Fat: 23g | Saturated Fat: 13g | Polyunsaturated Fat: 2g | Monounsaturated Fat: 7g | Trans Fat: 0.3g | Cholesterol: 59mg | Sodium: 319mg | Potassium: 305mg | Fiber: 2g | Sugar: 7g | Vitamin A: 853IU | Vitamin C: 7mg | Calcium: 59mg | Iron: 1mg
    Someone picking up a crack corn on the cob with wooden tongs.

    More Delicious Corn Recipes to Try

    This post was originally published on this site.

  • 32 Easy Sandwich Recipes

    32 Easy Sandwich Recipes

    Sandwiches are an easy option for those times when you don’t want a huge meal, and they can be so much more than just deli meat and a couple of slices of bread. I’ve pulled together 32 easy and delicious sandwich recipes that are interesting, delicious, customizable, and will have you looking forward to lunch! This list has it ALL, including chicken sandwiches, breakfast sandwiches, wraps, grilled cheese sandwiches, veggie options, and even a couple quesadillas and burgers. So say goodbye to boring sandwiches and get creative with these delicious sandwich recipes!

    Chicken Sandwich Recipes

    Chicken is such a versatile meal option. It’s super filling, it can be paired with a variety of different flavors, plus, you can easily grill it, bake it, or fry it in a skillet. These chicken sandwich recipes are a few of my favorite ways to utilize chicken. They’re all quick and easy, budget-friendly, and will be a hit for the whole family.

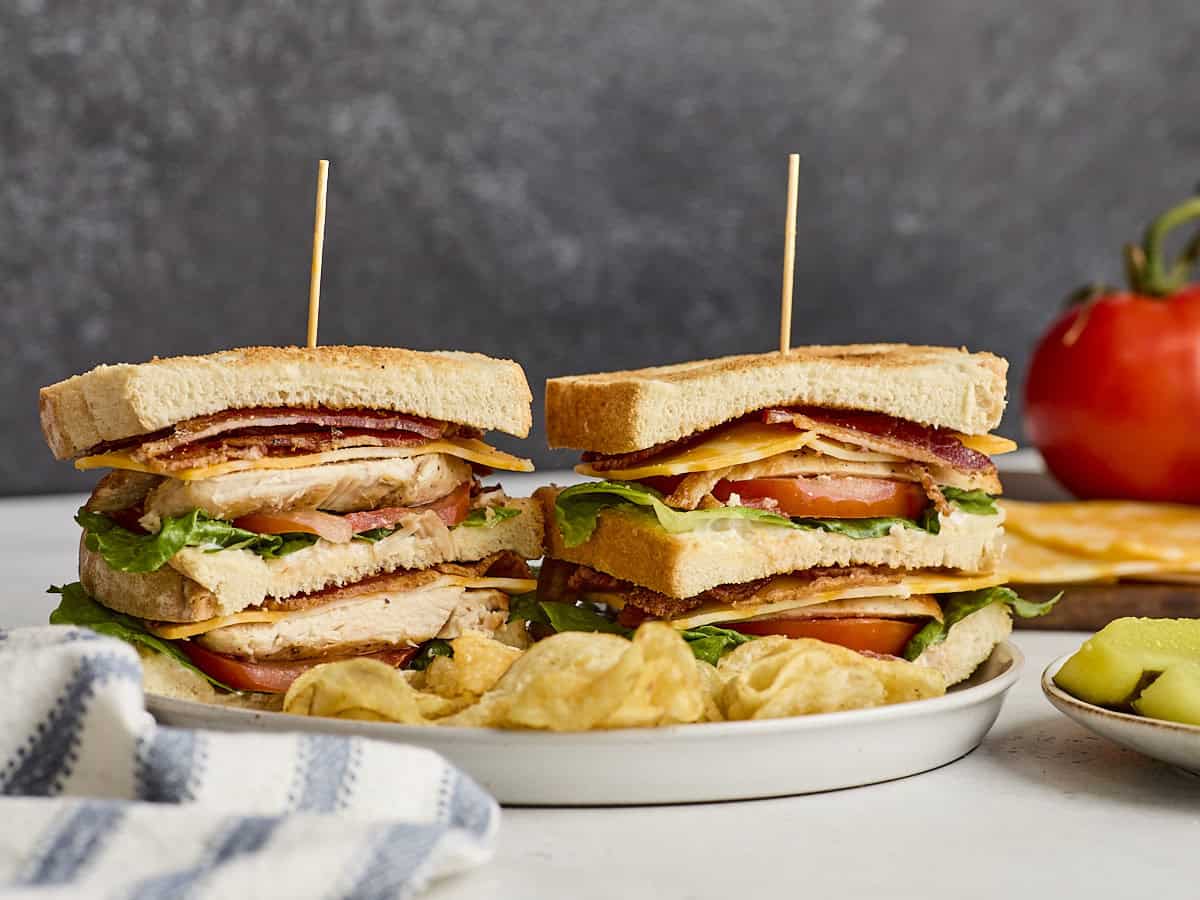
    1. Chicken Club Sandwich

    Chicken Club Sandwich

    Side view of a chicken club sandwich on a plate with chips.

    This easy Chicken Club Sandwich is loaded with juicy pan-seared chicken, crispy bacon, fresh salad, and cheese. It’s a budget-friendly take on the classic!

    5 from 2 votes

    $16.57 recipe / $4.14 serving
    Get the Recipe

    This chicken club sandwich is a restaurant-style stack made at home with juicy pan-seared chicken, crispy oven-baked bacon, lettuce, tomato, cheese, mayo, and toasted bread. I love that it feels like a deli lunch but costs less than buying one out, and you can keep it double-decker or make a simpler single-layer sandwich.

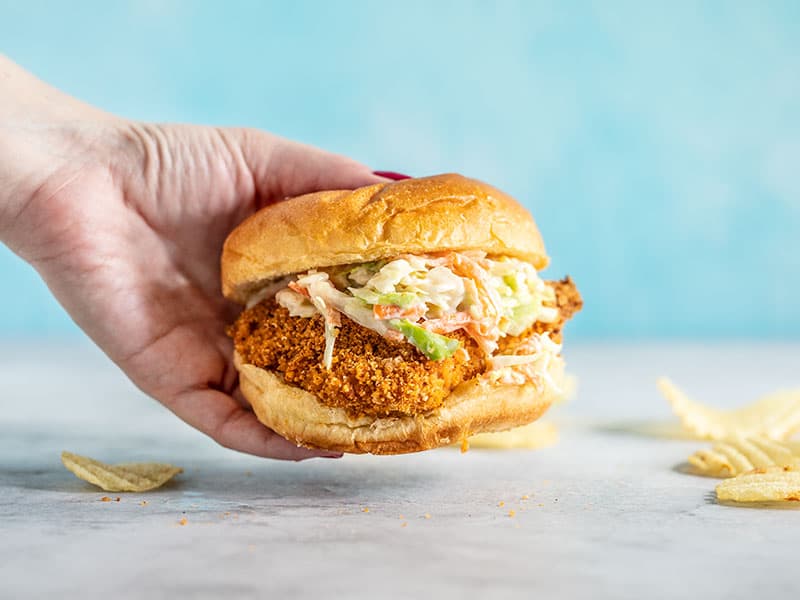
    2. Spicy Baked Chicken Sandwich

    Baked Spicy Chicken Sandwiches

    A hand holding a Baked Spicy Chicken Sandwich against a blue background.

    These baked spicy chicken sandwiches have three layers of heat and are topped with a creamy-sweet quick homemade coleslaw.

    4.95 from 40 votes

    $6.93 recipe / $3.47 serving
    Get the Recipe

    You can never go wrong with a classic chicken sandwich. And this spicy chicken sandwich recipe is a favorite of mine! It gives you the delicious crispy texture of fried chicken sandwiches, but without the excess oil. Serve it on your favorite bun and top it off with my homemade honey yogurt slaw! 

    3. Chicken Caesar Salad Wrap

    Chicken Caesar Wraps

    Side view of a chicken Caesar wrap cut in half and stacked on a cutting board.

    Homemade Chicken Caesar Wraps are a breeze to make, big on flavor, and make a deliciously light and refreshing lunch.

    5 from 8 votes

    $8.36 recipe / $2.09 serving
    Get the Recipe

    These chicken Caesar wraps take everything I like about a Caesar salad (romaine lettuce, chicken, Parmesan, tomatoes, dressing, and crunch), and tuck it into a soft flour tortilla. Use homemade components when you have the time, or grab bottled dressing, rotisserie chicken, and crushed croutons for a faster lunch.

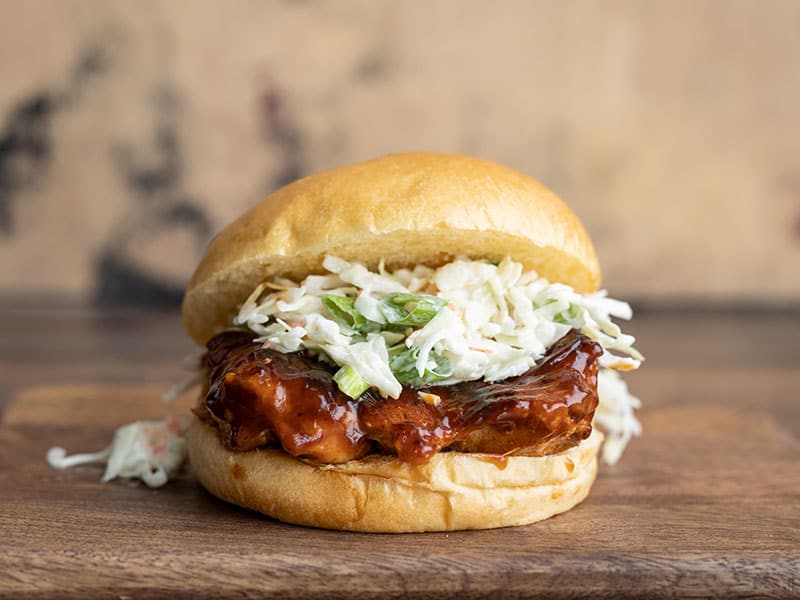
    4. BBQ Chicken Sandwiches

    Easy BBQ Chicken Sandwiches

    Front view of a single Easy BBQ Chicken Sandwich on a wooden cutting board

    These Easy BBQ Chicken Sandwiches are a fast, easy, and delicious way to satisfy your BBQ craving. No grill needed! Perfect for busy weeknights.

    5 from 8 votes

    $7.97 recipe / $1.99 serving
    Get the Recipe

    These BBQ chicken sandwiches are made from juicy chicken thighs coated in simple seasonings and smothered in BBQ sauce. They’re an easy-to-make dinner option that comes together in under 30 minutes. Bonus: the ‘grilled’ chicken is made on the stovetop in a skillet, so you can make this recipe all year round. No actual grill is required!

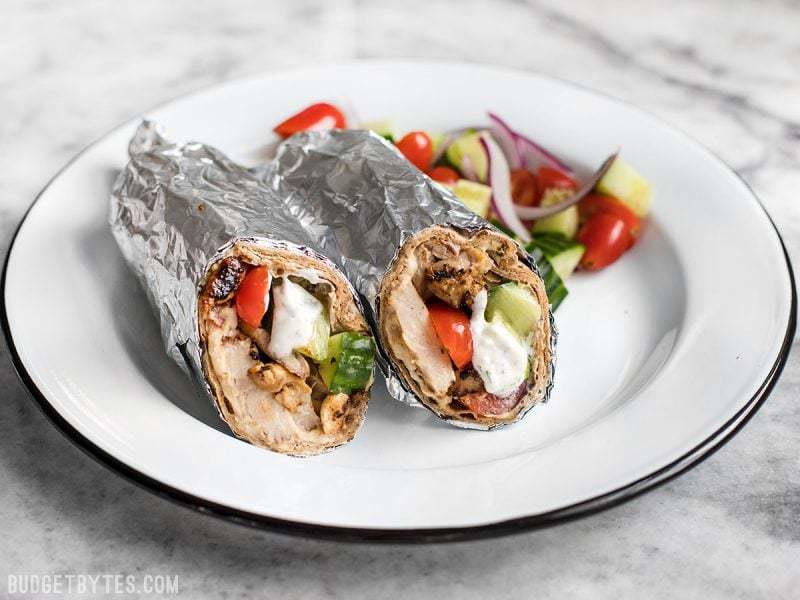
    5. Greek Chicken Wraps

    Greek Chicken Wraps

    Prep the ingredients for these Greek Chicken Wraps to keep on hand to build fresh wraps or salads all week. BudgetBytes.com

    Prep the ingredients for these Greek Chicken Wraps to keep on hand to build fresh wraps or salads all week. 

    4.91 from 31 votes

    $17.78 recipe / $2.96 serving
    Get the Recipe

    Perfectly seasoned grilled chicken thighs, dill yogurt sauce, and fresh veggies make these delicious and good-for-you Greek chicken wraps. I like to prep all the components ahead of time and store them separately in the fridge (for up to 4 days) for an easy lunch option all week long!

    Classic Sandwich Fillings

    These are the classic sandwich fillings I turn to when I need lunches that are creamy, filling, and easy to stretch. Make a batch at the beginning of the week, tuck them into bread, wraps, or a croissant, and lunch gets a whole lot easier!

    6. Traditional Chicken Salad

    Chicken Salad (Traditional)

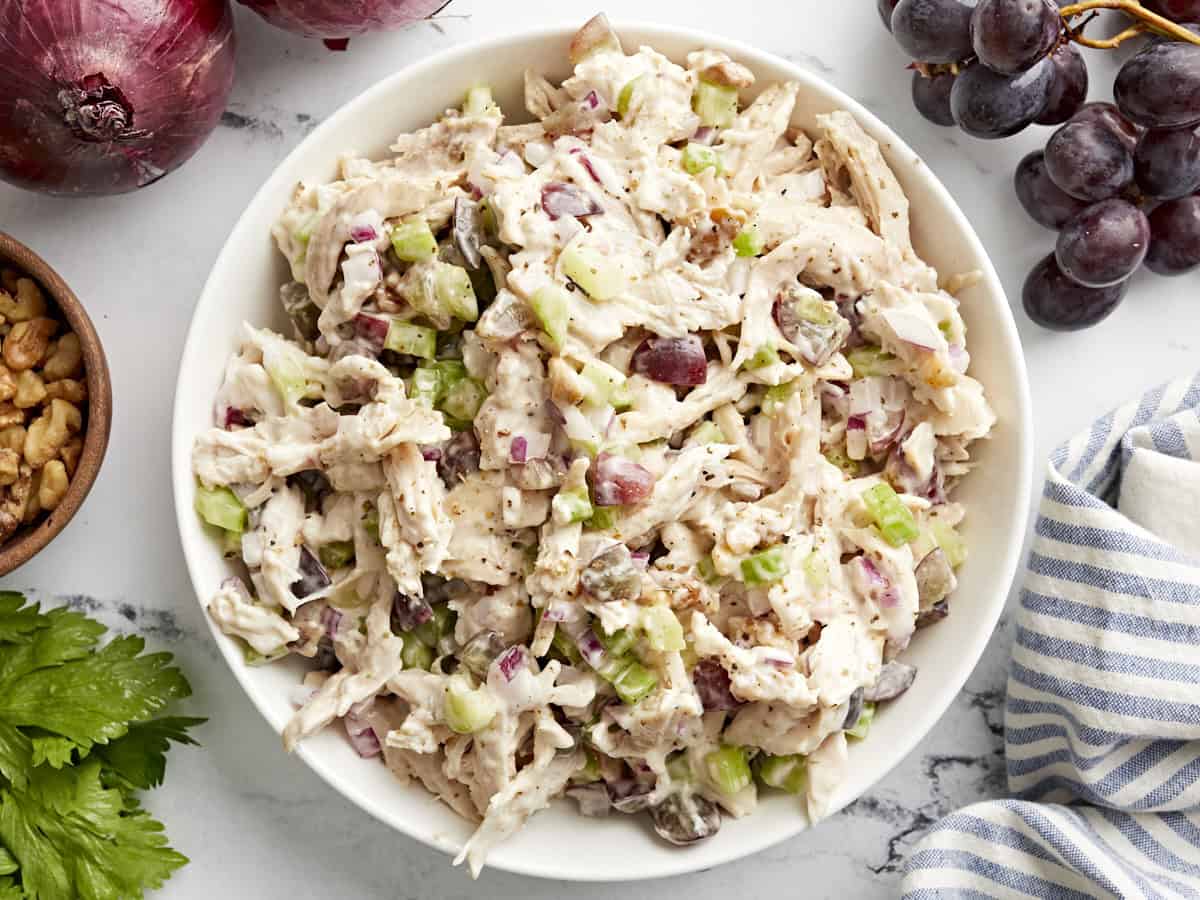
    Overhead view of chicken salad in a bowl.

    This Traditional Chicken Salad is creamy, tangy, and full of tender shredded chicken. It’s like having a taste of the deli counter at home!

    4.75 from 4 votes

    $11.12 recipe / $1.39 serving
    Get the Recipe

    Chicken salad is one of those classic fillings that never lets me down. This traditional chicken salad tastes like a deli-counter favorite without the deli price. It’s got tender shredded chicken, grapes, celery, red onion, and walnuts for a little sweetness, crunch, and creamy-tangy goodness in every bite.

    7. Egg Salad

    Easy Egg Salad

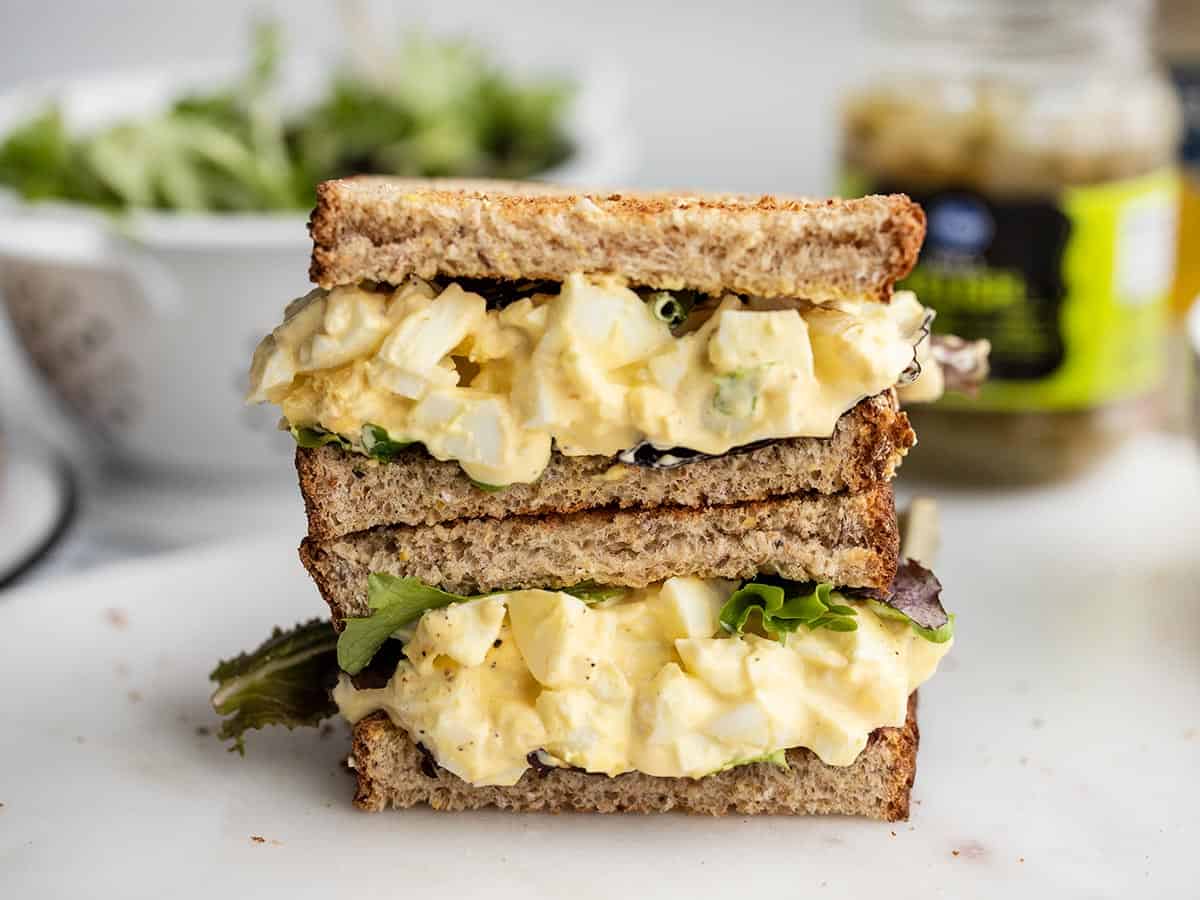
    Egg salad sandwich cut in half and stacked

    This quick and easy egg salad is perfect for busy days or whenever you need a fast, inexpensive, delicious, and filling meal!

    4.46 from 24 votes

    $2.98 recipe / $1.49 serving
    Get the Recipe

    I keep the ingredient list short and classic whenever I make this classic egg salad, with hard-boiled eggs, mayo, Dijon, lemon, and relish for a creamy filling that still tastes bright!

    8. Tuna Salad

    Classic Tuna Salad

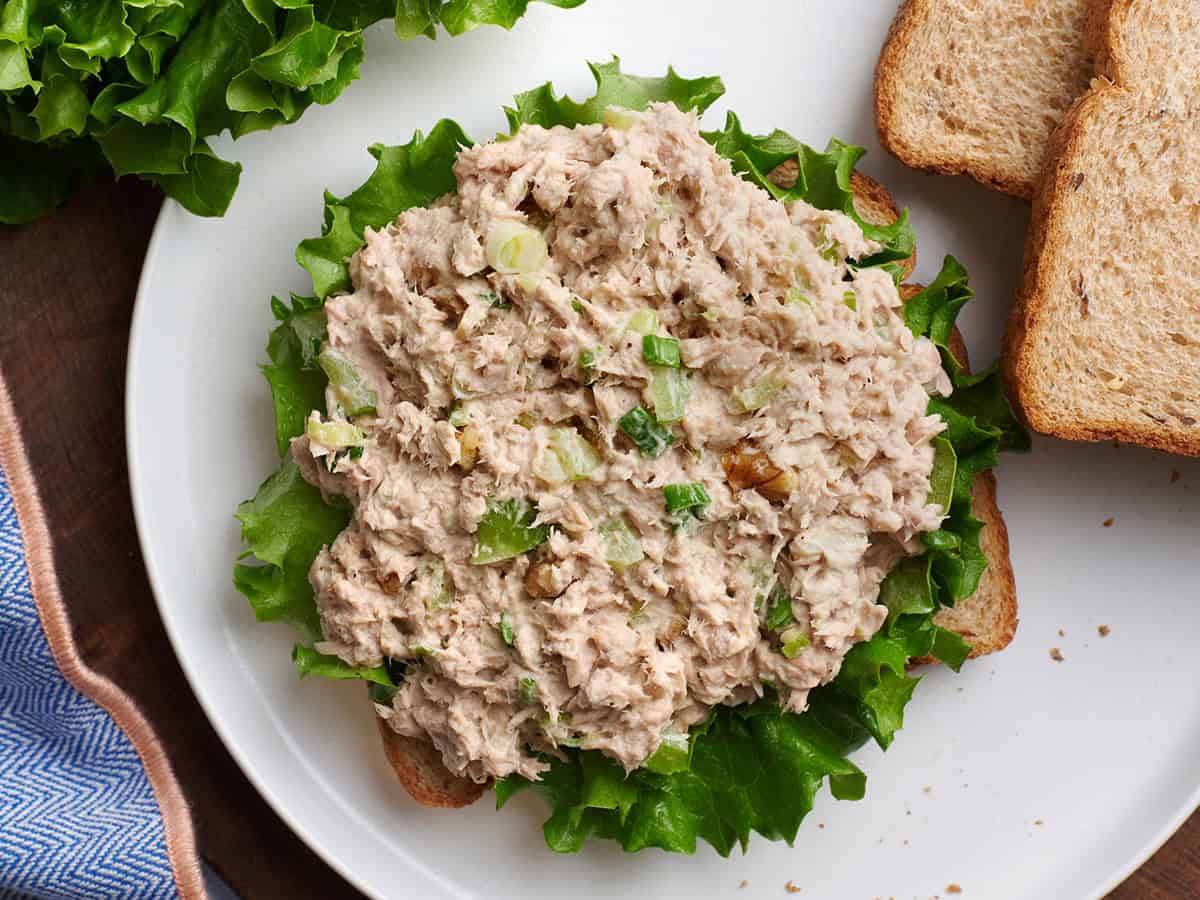
    This Classic Tuna Salad is creamy, fresh, and packed with texture thanks to crunchy walnuts, bright lemon, and simple ingredients. It’s perfect for sandwiches, wraps, salads, or easy lunches.

    5 from 19 votes

    $6.33 recipe / $1.58 serving
    Get the Recipe

    Never underestimate a humble can of tuna! This tuna salad is creamy, fresh, and packed with texture from celery, walnuts, and green onions, with lemon juice to brighten everything up. It’s budget-friendly, filling, and just as good in a sandwich as it is in a wrap, pita, or piled over greens.

    Grilled Cheese Sandwich Recipes

    I think we can all agree that bread just gets that much better when it’s toasted, right? Right. These homemade grilled sandwich recipes take the idea of a grilled cheese sandwich to the next level. Pair these toasty sandwiches with a cup of soup, and you have a restaurant worthy meal.

    9. Air Fryer Grilled Cheese

    Air Fryer Grilled Cheese

    Air Fryer Grilled Cheese on plate, split down middle.

    The secret to the crunchiest, gooiest, air-fryer grilled cheese EVER is first mixing softened butter with Italian seasoning and Parmesan cheese and then spreading it on the outside of your bread. You can’t get results like these from a pan!

    4.75 from 4 votes

    $1.77 each
    Get the Recipe

    My air fryer grilled cheese is for anyone who wants crispy bread and melty cheese without hovering over a skillet. The seasoned Parmesan butter on the outside gets extra crunchy in the air fryer, and the whole thing is ready in about 15 minutes. It’s grilled cheese with a little less babysitting, and I’m here for it.

    10. Classic Tuna Melt

    Classic Tuna Melt

    Tuna melt sandwich cut in half on a white plate.

    A nostalgic diner-style tuna melt with buttery, crisp toast, savory tuna salad, and warm, gooey melted cheddar. Pure comfort food that’s like a next-level grilled cheese.

    5 from 2 votes

    $6.46 recipe / $1.62 serving
    Get the Recipe

    A tuna melt is basically what happens when tuna salad and grilled cheese realize they were always meant to be together. Creamy tuna salad, buttery toasted bread, and gooey melted cheddar make this sandwich pure comfort food. It’s such an easy way to turn a budget-friendly can of tuna into something that feels extra satisfying.

    11. Honey Peach Grilled Cheese

    Honey Peach Grilled Cheese

    A stack of honey peach grilled cheese sandwiches.

    Juicy peaches, fresh basil, and melty mozzarella make this Honey Peach Grilled Cheese a simple, budget-friendly sandwich you’ll crave all summer long.

    5 from 4 votes

    $5.42 recipe / $2.71 serving
    Get the Recipe

    Sweet peaches in a grilled cheese? Trust me on this one. This honey peach grilled cheese has juicy fresh peaches, melty mozzarella, fresh basil, honey, and a little pinch of chili flakes for a sweet, savory, slightly spicy sandwich that tastes like summer between two slices of sourdough.

    12. Spinach Artichoke Grilled Cheese

    Spinach Artichoke Grilled Cheese

    A hand picking up a piece of spinach artichoke grilled cheese with cheese stretching from the slice

    Spinach Artichoke Grilled Cheese is like your favorite restaurant appetizer turned into a meal. Rich, creamy, cheesy, and totally veggilicious!

    4.85 from 38 votes

    $3.63 recipe / $1.82 serving
    Get the Recipe

    My spinach artichoke grilled cheese is a classic appetizer, spinach artichoke dip, made into a meal! It’s a veggie-packed, ultra cheesy play off of classic grilled cheese that you won’t be able to say no to. Stick with the focaccia bread I use in this recipe or switch things up and use the filling in a quesadilla instead!

    13. Pesto Grilled Cheese

    Pesto Grilled Cheese

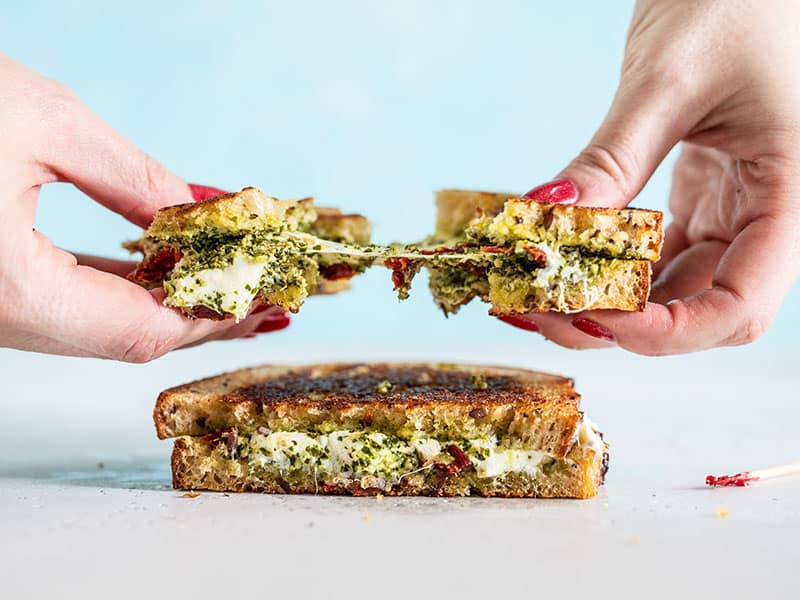
    Two hands pulling the pesto grilled cheese sandwich in half, with the cheese pulling between and sun dried tomato pieces exposed.

    Whether you’re using up leftover pesto or just want to treat yourself to something special, this Pesto Grilled Cheese is next level!

    5 from 8 votes

    $2.45 each
    Get the Recipe

    This pesto grilled cheese sandwich tastes like you bought it at a bistro cafe, but requires just 5 ingredients and is ready in 15 minutes! Mozzarella cheese is melted between two slices of your favorite hearty bread with butter, pesto, and sun-dried tomatoes. Make it with homemade pesto or keep it extra convenient and use your favorite store-bought variety. 

    14. Pizza Melt

    Pizza Melt

    A stack of pizza melts, cut sides facing camera

    Pizza melts are like a cross between your two favorite comfort foods: pizza and grilled cheese. They’re fast, easy, and the perfect quick meal!

    4.64 from 11 votes

    Get the Recipe

    Pizza and grilled cheese are two of everyone’s favorite comfort foods. So what if I told you that you could combine them into one delicious comfort food hybrid? These pizza melts are a pepperoni pizza and grilled cheese sandwich combo. They’re all the best pizza flavors sandwiched between two pieces of toasty bread. Bonus: they’re ready in just 15 minutes!

    Deli-Style Sandwiches

    Deli sandwiches always feel like a treat, but ordering them out can add up fast. The good news? They can be made right at home with simple grocery-store ingredients, smart swaps, and leftovers when you’ve got them!

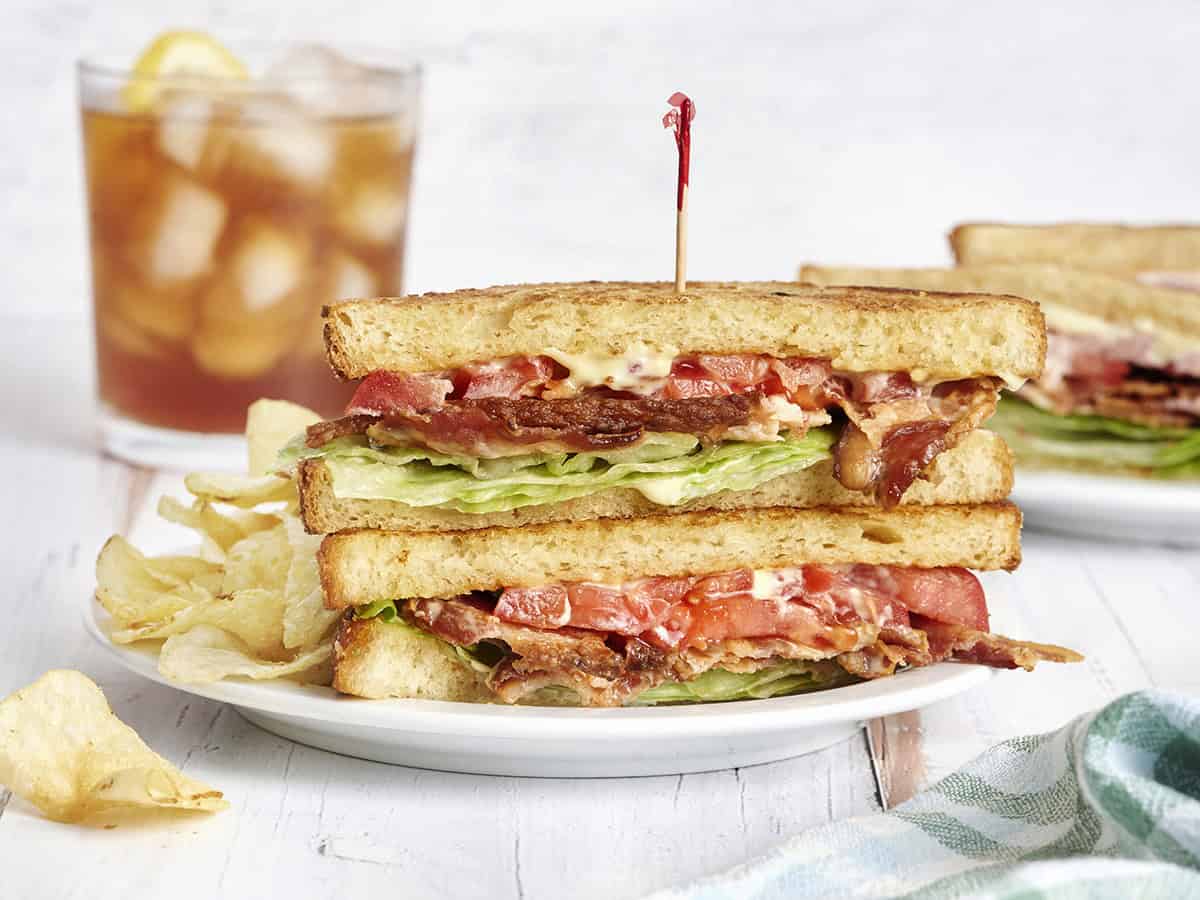
    15. Classic BLT Sandwich

    Classic BLT Sandwich

    This Classic BLT Sandwich recipe is easy, affordable, and full of flavor with crispy bacon, fresh lettuce, ripe tomatoes, and mayo-toasted bread!

    5 from 1 vote

    $4.56 recipe / $2.28 serving
    Get the Recipe

    When the tomatoes are good, a BLT just hits different. Crispy bacon, juicy tomato, crisp lettuce, creamy mayo, and toasted bread come together in the best way. Making this classic BLT sandwich at home keeps it simple, fresh, and way cheaper than grabbing one from a café.

    16. Philly Cheesesteak

    Philly Cheesesteak Recipe

    Overhead view of philly cheesesteak sandwiches on parchment paper with fries on the side.

    This easy Philly Cheesesteak recipe is made with tender, thinly sliced beef, sautéed peppers, onions and mushrooms and gooey, melted cheese on a toasted hoagie roll!

    4.87 from 15 votes

    $15.54 recipe / $3.10 serving
    Get the Recipe

    This Philly cheesesteak uses grocery-store shaved steak to keep things easy and budget-friendly, then bulks up the filling with peppers, onions, and mushrooms. Add melty provolone and a soft hoagie roll, and you’ve got a hearty sandwich that feels like takeout without the takeout price.

    17. Reuben Sandwich

    Reuben Sandwich Recipe

    Side view of a reuben sandwich.

    This easy Reuben Sandwich recipe is made from crispy rye bread, tender corned beef, tangy sauerkraut, melty Swiss cheese, and thousand island dressing.

    5 from 1 vote

    $12.11 recipe / $3.02 serving
    Get the Recipe

    A Reuben sandwich is messy in the best possible way. Think crispy rye bread, tender corned beef, tangy sauerkraut, Thousand Island dressing, and melty Swiss cheese all pressed together until warm and toasty. It’s a great way to use leftover corned beef, but deli corned beef or pastrami works when the craving hits, too.

    Breakfast Sandwich Recipes

    My favorite thing about eggs? Well, besides the fact that they’re pretty inexpensive and delicious, they’re easy to cook and go with just about everything. If you’ve been around for a while, you know I love to say ‘put an egg on it!’ These breakfast sandwich recipes turn simple eggs into something hearty, cheesy, and totally worth getting out of bed for, from make-ahead freezer sandwiches to crispy breakfast quesadillas.

    18. Sausage and Egg Breakfast Quesadilla

    Sausage and Egg Breakfast Quesadillas

    Stacked sausage and egg breakfast quesadillas held close to the camera

    Sausage and egg breakfast quesadillas are an easy and filling breakfast option that is also freezer-friendly, so you can stock up for later!

    4.92 from 12 votes

    $5.02 recipe / $0.84 each
    Get the Recipe

    It doesn’t get better than this. Melty cheese, light and fluffy scrambled egg, and flavorful breakfast sausage sandwiched between a toasty tortilla. These sausage and egg quesadilla ‘sandwiches’ are freezer-friendly, too, so you can have one anytime you get a craving. I seriously love this one, and it’s included in our favorite quesadilla recipes roundup, too!

    19. Brown Sugar Bacon Breakfast Sandwiches

    Brown Sugar Bacon Breakfast Sandwiches with Chipotle Mayo

    Brown sugar bacon breakfast sandwich on a plate.

    Brown Sugar Bacon Breakfast Sandwiches with Chipotle Mayo are the perfect mix of salty, sweet, and spicy for your weekend brunch.

    4.74 from 19 votes

    $9.80 recipe / $2.45 per sandwich
    Get the Recipe

    If anyone says they don’t love sweet and spicy, then they’ve never had this brown sugar bacon and egg breakfast sandwich. Buttery brioche buns, perfect fried eggs, sweet, smoky, and crispy brown sugar bacon, and spicy chipotle mayo. Breakfast has never looked better and is ready in a total of 30 minutes! 

    20. Egg and Cheese Breakfast Sandwiches

    Veggie Packed Freezer Breakfast Sandwiches

    Baked freezer-ready breakfast sandwiches on a plate.

    Meal prep six days of breakfast at once with these Veggie Packed Freezer Ready Breakfast Sandwiches to stay on track on those busy mornings!

    4.73 from 59 votes

    $7.52 recipe / $1.25 each
    Get the Recipe

    Any recipe I can sneak veggies into is a win for me! These sandwiches are like your classic egg and cheese breakfast sandwich, but they’re loaded with spinach and roasted red peppers. They’re the perfect grab-and-go, freezer-friendly breakfast that can be heated up in the microwave in just a few minutes.

    Vegetarian Sandwich Recipes

    A sandwich without meat? Yep. Trust me on this one. These vegetarian sandwich recipes give even the best meaty sandwiches a serious run for their money. Whether you’re in search of a veggie-packed breakfast or lunch, look no further than right here.

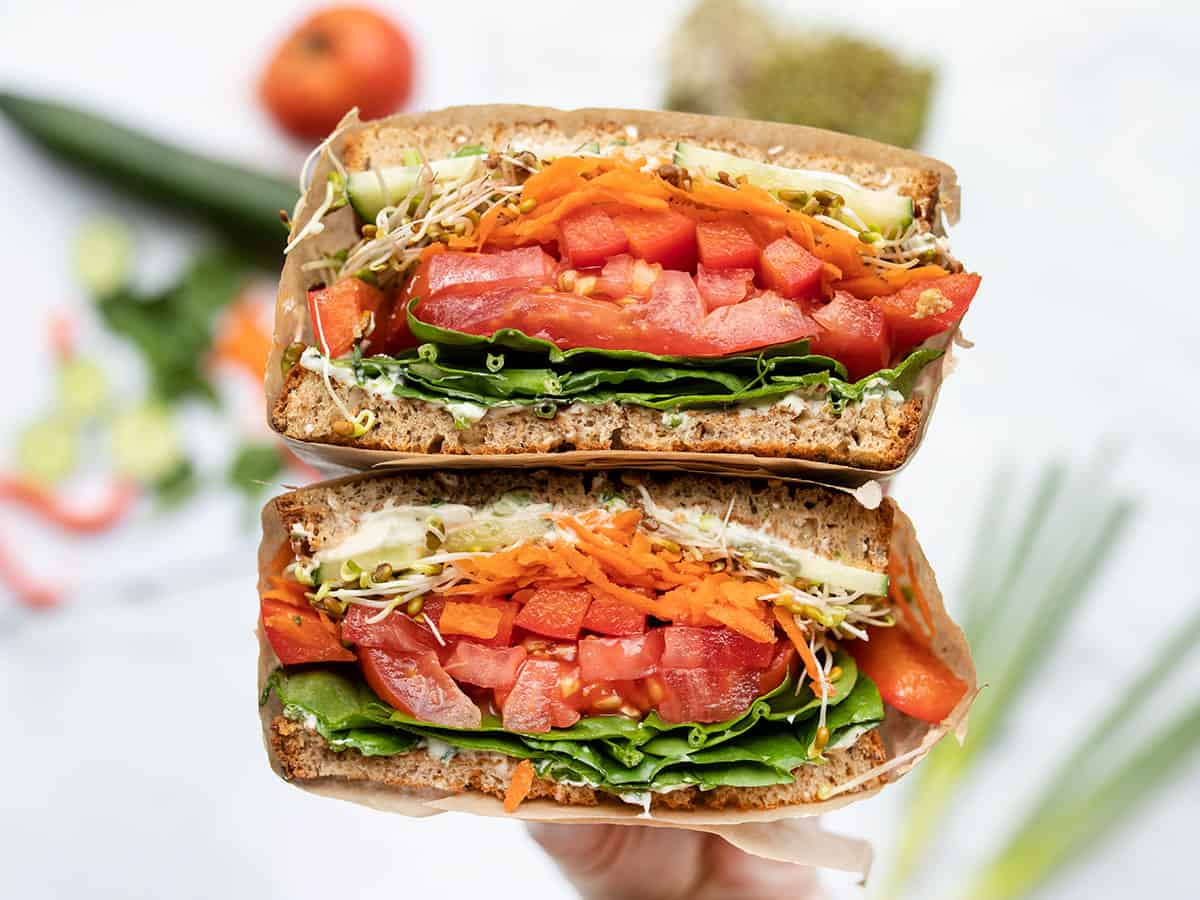
    21. The Ultimate Veggie Sandwich

    The Best Veggie Sandwich

    A hand holding both halves of a cut open ultimate veggie sandwich

    Use what you have on hand to build the best vegetarian sandwich packed with color, flavor, and texture. Eat the rainbow!

    4.95 from 18 votes

    Get the Recipe

    This veggie sandwich is basically a salad on bread (but leveled UP). It’s packed with veggies, takes 10 minutes to throw together, and is the exact reason I feel silly paying for a vegetable sandwich at the deli. This recipe is super customizable and such a great way to pack in all the nutrition!

    22. Classic Tomato Sandwich

    Tomato Sandwiches

    Side view of a sliced and stacked tomato sandwich.

    Tomato sandwiches are a summertime staple. With juicy ripe tomatoes, creamy mayonnaise, and soft bread, they’re a simple summer delight!

    4.89 from 17 votes

    $1.32 each
    Get the Recipe

    If you know, you know. A classic tomato sandwich is all about juicy ripe tomatoes, soft bread, creamy mayo, and a good sprinkle of salt and pepper. It’s simple and best saved for peak tomato season when the tomatoes are so good they basically do all the work for you. I can never eat just one!

    23. Cucumber Sandwich

    Cucumber Sandwiches

    Side view of hands holding a stacked cucumber sandwich.

    Cucumber sandwiches with a dilly cream cheese spread are a light and refreshing lunch or snack to serve with tea or brunch.

    4.91 from 10 votes

    $4.65 recipe / $0.38 serving
    Get the Recipe

    Cucumber sandwiches may be dainty, but they definitely aren’t boring. Cool, crisp cucumbers and a tangy dill cream cheese spread make these little sandwiches fresh, light, and perfect for brunch, or anytime you want an easy sandwich without a lot of effort.

    24. Vegetarian French Dip Sandwiches

    Vegetarian French Dip Sandwiches

    Close up overhead shot of Vegetarian French Dip Sandwiches in a tray.

    These Vegetarian French Dip Sandwiches are fast, easy, and feature a salty-sweet herb infused vegetarian au jus for dipping. 

    4.90 from 98 votes

    $6.58 recipe / $1.65 each
    Get the Recipe

    Turns out, beef isn’t a necessary ingredient for ‘French dip’ sandwiches. These vegetarian French dip sandwiches are made using portobello mushrooms and onion instead! The mushroom and onion filling is seasoned with a delicious and flavorful marinade, then served on your choice of French or ciabatta rolls. This recipe is simple, easy, and oh-so-good!

    25. Eggplant Mozzarella Sandwiches

    Eggplant Mozzarella Sandwiches

    front view of one eggplant mozzarella sandwich

    These Eggplant Mozzarella Sandwiches are an easy vegetarian dish with plenty of options for customizing to fit your tastes and budget.

    5 from 13 votes

    $6.41 recipe / $2.14 serving
    Get the Recipe

    Who needs chicken parmesan sandwiches when you have eggplant?! These vegetarian eggplant mozzarella sandwiches are made with sautéed eggplant, melty mozzarella cheese, marinara sauce, and a simple yet flavorful blend of seasonings.

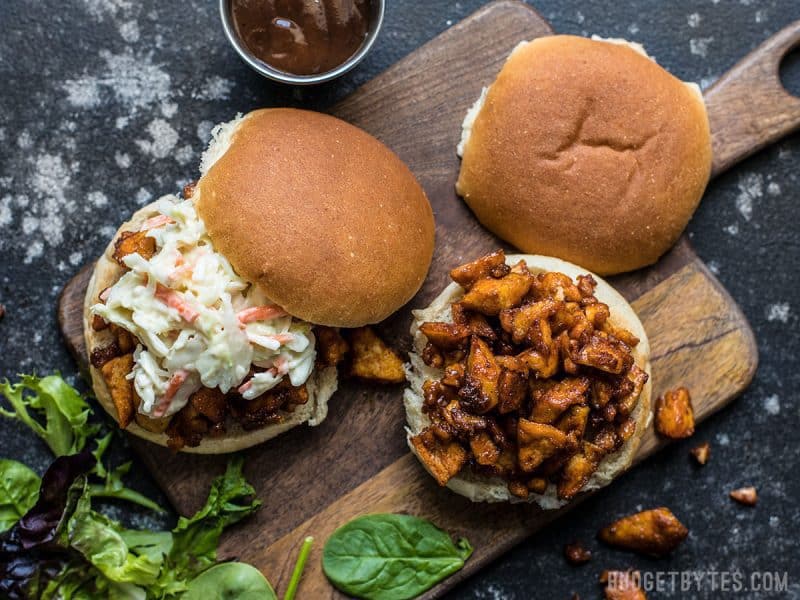
    26. BBQ Tofu Sliders

    BBQ Tofu Sliders

    BBQ Tofu Sliders are an easy and inexpensive alternative to pulled meat sandwiches. With a simple and uncomplicated ingredient list, this is a tofu dish anyone can master! Budgetbytes.com

    BBQ Tofu Sliders are an easy and inexpensive alternative to pulled meat sandwiches. With a simple and uncomplicated ingredient list, this is a tofu dish anyone can master!

    4.67 from 63 votes

    $4.33 recipe / $1.44 serving
    Get the Recipe

    If you think you can’t enjoy good BBQ if you’re vegetarian, think again! These BBQ tofu sliders are surprisingly easy to make and will totally feed that BBQ craving. Heavily spiced tofu, tangy BBQ sauce, and a simple homemade coleslaw make these sliders absolutely addictive.

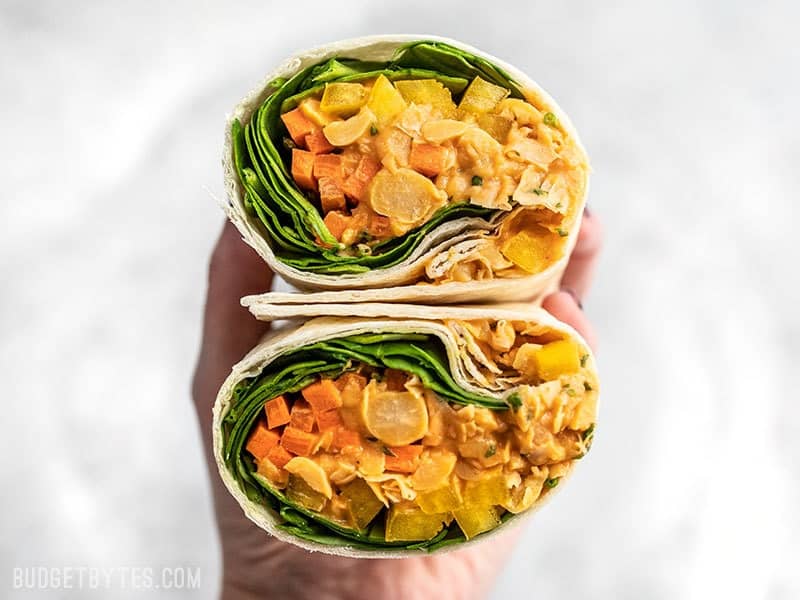
    27. Sriracha Chickpea Salad Wraps

    Sriracha Chickpea Salad Wraps

    A Sriracha Chickpea Salad Wrap cut open, with open sides facing viewer.

    Creamy, spicy, and filling, these Sriracha Chickpea Salad Wraps are an easy option for your brown bag lunch. Customize to use whatever vegetables you have!

    4.91 from 32 votes

    $3.37 recipe / $1.69 each
    Get the Recipe

    If you like spicy, you’ll LOVE these sriracha chickpea salad wraps! They’re creamy, crunchy, packed with veggies, and totally filling, with just enough heat to keep lunch interesting. The chickpea salad holds up well in the fridge for about 4 days, but I like to keep the wraps separate until serving so the tortillas stay soft and fresh instead of soggy.

    28. BBQ Bean Sliders

    BBQ Bean Sliders

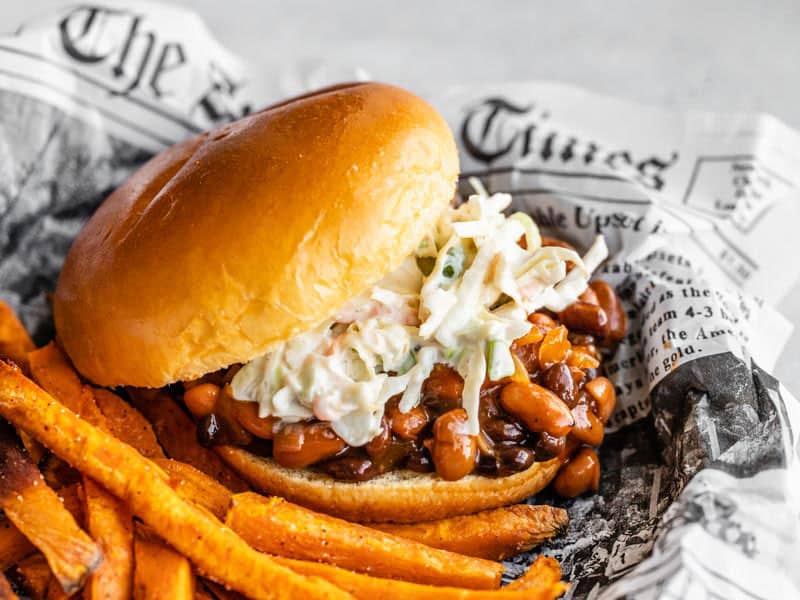
    Side view of a BBQ Bean Slider on a plate with some sweet potato fries

    These BBQ Bean Sliders topped with a homemade creamy coleslaw are a quick dinner fix when you’re craving BBQ and don’t have time for slow cooking meat!

    4.86 from 35 votes

    $5.85 recipe / $1.46 serving
    Get the Recipe

    These quick and easy BBQ bean sliders are another easy way to get that BBQ fix without the meat. A medley of beans is combined with a tangy BBQ sauce, then topped with a simple creamy homemade coleslaw. They only take 30 minutes to make and will totally leave you licking your fingers.

    Burger Recipes

    Burgers are the king of the sandwich world! They’re hot, juicy, and piled high with delicious toppings. We like to get creative with burgers around here, so I’ve got several easy, unique, and flavorful burgers for you to try. Whether you want to make your burger with beef, turkey, pork, or even a vegetarian patty, I highly recommend you check out all our favorite burger recipes next!

    29. Sliders

    Sliders

    Overhead view of sliders on parchment paper.

    This easy recipe for Sliders is perfect for feeding a group or serving at parties, game day, or a quick family dinner! A delicious and simple appetizer.

    4.56 from 9 votes

    $11.44 recipe / $1.91 serving
    Get the Recipe

    Sliders are basically mini cheeseburgers made for sharing, which means they’re always a good idea. These are baked party-style on Hawaiian sweet rolls with seasoned beef, cheddar, pickles, and an everything bagel butter topping. No shaping a dozen tiny patties, no flipping at the stove, just one pan of melty little burgers ready to disappear fast.

    30. Mediterranean Turkey Burgers

    Mediterranean Turkey Burgers

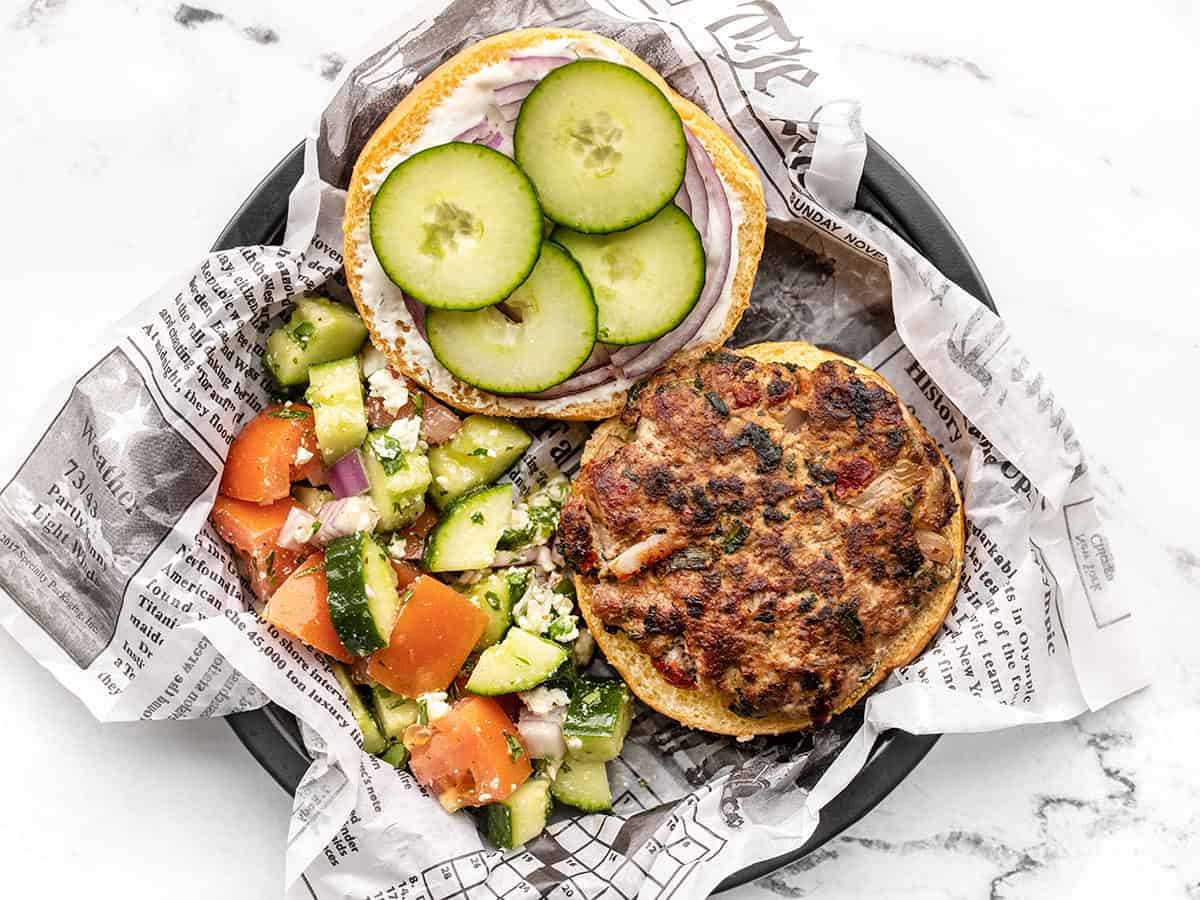
    Overhead view of an open faced Mediterranean Turkey Burger on a paper lined plate with cucumber salad on the side

    Spinach, sun dried tomatoes, feta, and a dilly yogurt sauce make these Mediterranean Turkey Burgers full of flavor and color.

    4.91 from 100 votes

    $11.47 recipe / $1.91 serving
    Get the Recipe

    These Mediterranean turkey burgers are a healthy, super fresh alternative to beef burgers. With all of the fresh flavors of Mediterranean food packed into a turkey burger patty, you would think these burgers couldn’t get any better. Think again! I top them off with a tangy, creamy lemon dill sauce. This recipe makes the best easy and healthy dinner!

    31. Cajun Salmon Burger

    Cajun Salmon Burgers

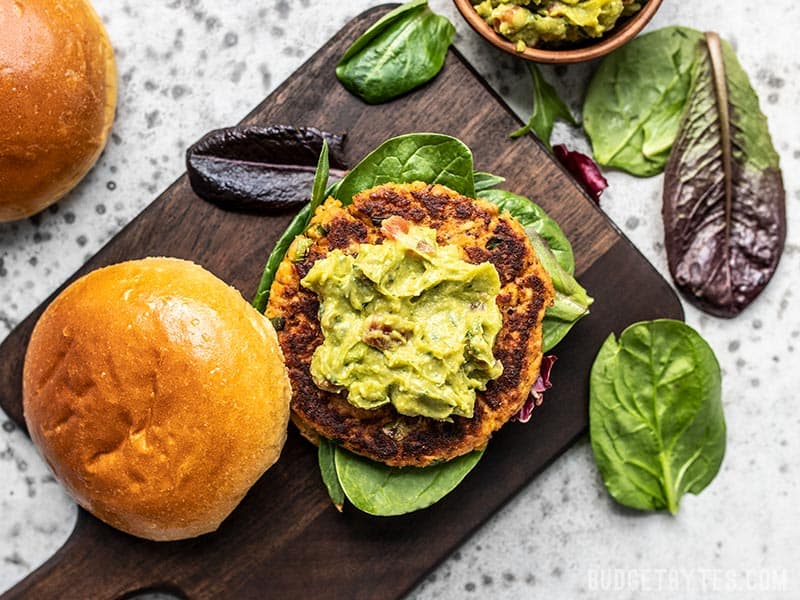
    Cajun Salmon Burgers with guac from above on a cutting board

    Shelf-stable canned salmon plus a few more pantry staples make an incredibly easy and flavorful Cajun Salmon Burger perfect for weeknight dinners. 

    4.87 from 29 votes

    $7.19 recipe / $3.60 per burger
    Get the Recipe

    How do you turn canned salmon into a truly drool-worthy sandwich? Mix in a hefty dose of Cajun seasoning and top with creamy guacamole, of course. Keep a couple cans of salmon on hand so you can whip these Cajun salmon burgers up at any time!

    32. Black Bean Burgers

    Homemade Black Bean Burgers

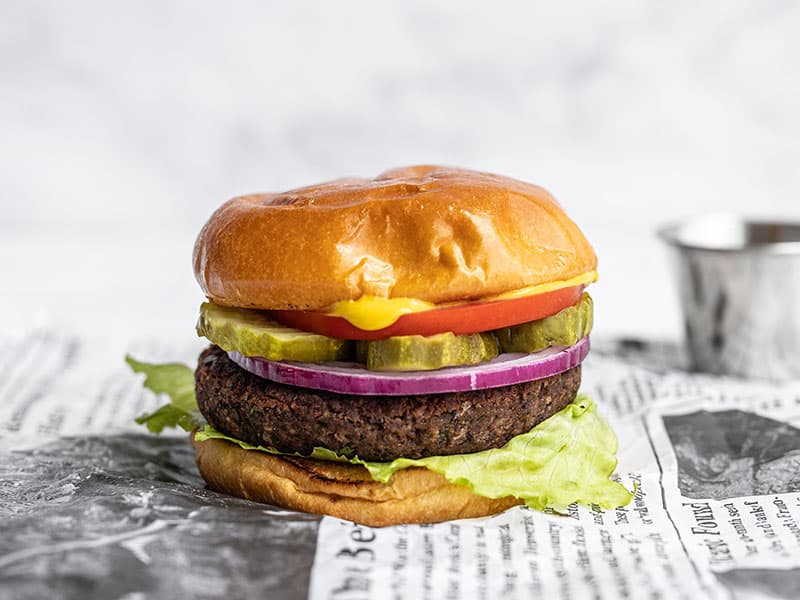
    Side view of a single black bean burger on a bun, fully dressed, sitting on newsprint

    Black beans, cumin, sriracha, garlic, and fresh red onion make these homemade black bean burgers a flavorful and filling vegetarian meal.

    4.78 from 71 votes

    $3.74 recipe / $0.62 serving
    Get the Recipe

    You don’t need meat to enjoy a good burger! These black bean burgers are the perfect vegetarian dinner that will even have meat-eaters drooling. They’re also freezer-friendly, so they can be prepped ahead of time and reheated later on. Serve them with mayonnaise, lettuce, tomato, and all of your favorite burger toppings. No one will be wondering where the meat is with these sandwiches for dinner.

    The post 32 Easy Sandwich Recipes appeared first on Budget Bytes.

    This post was originally published on this site.

  • Crispy Zucchini Strings

    Crispy Zucchini Strings

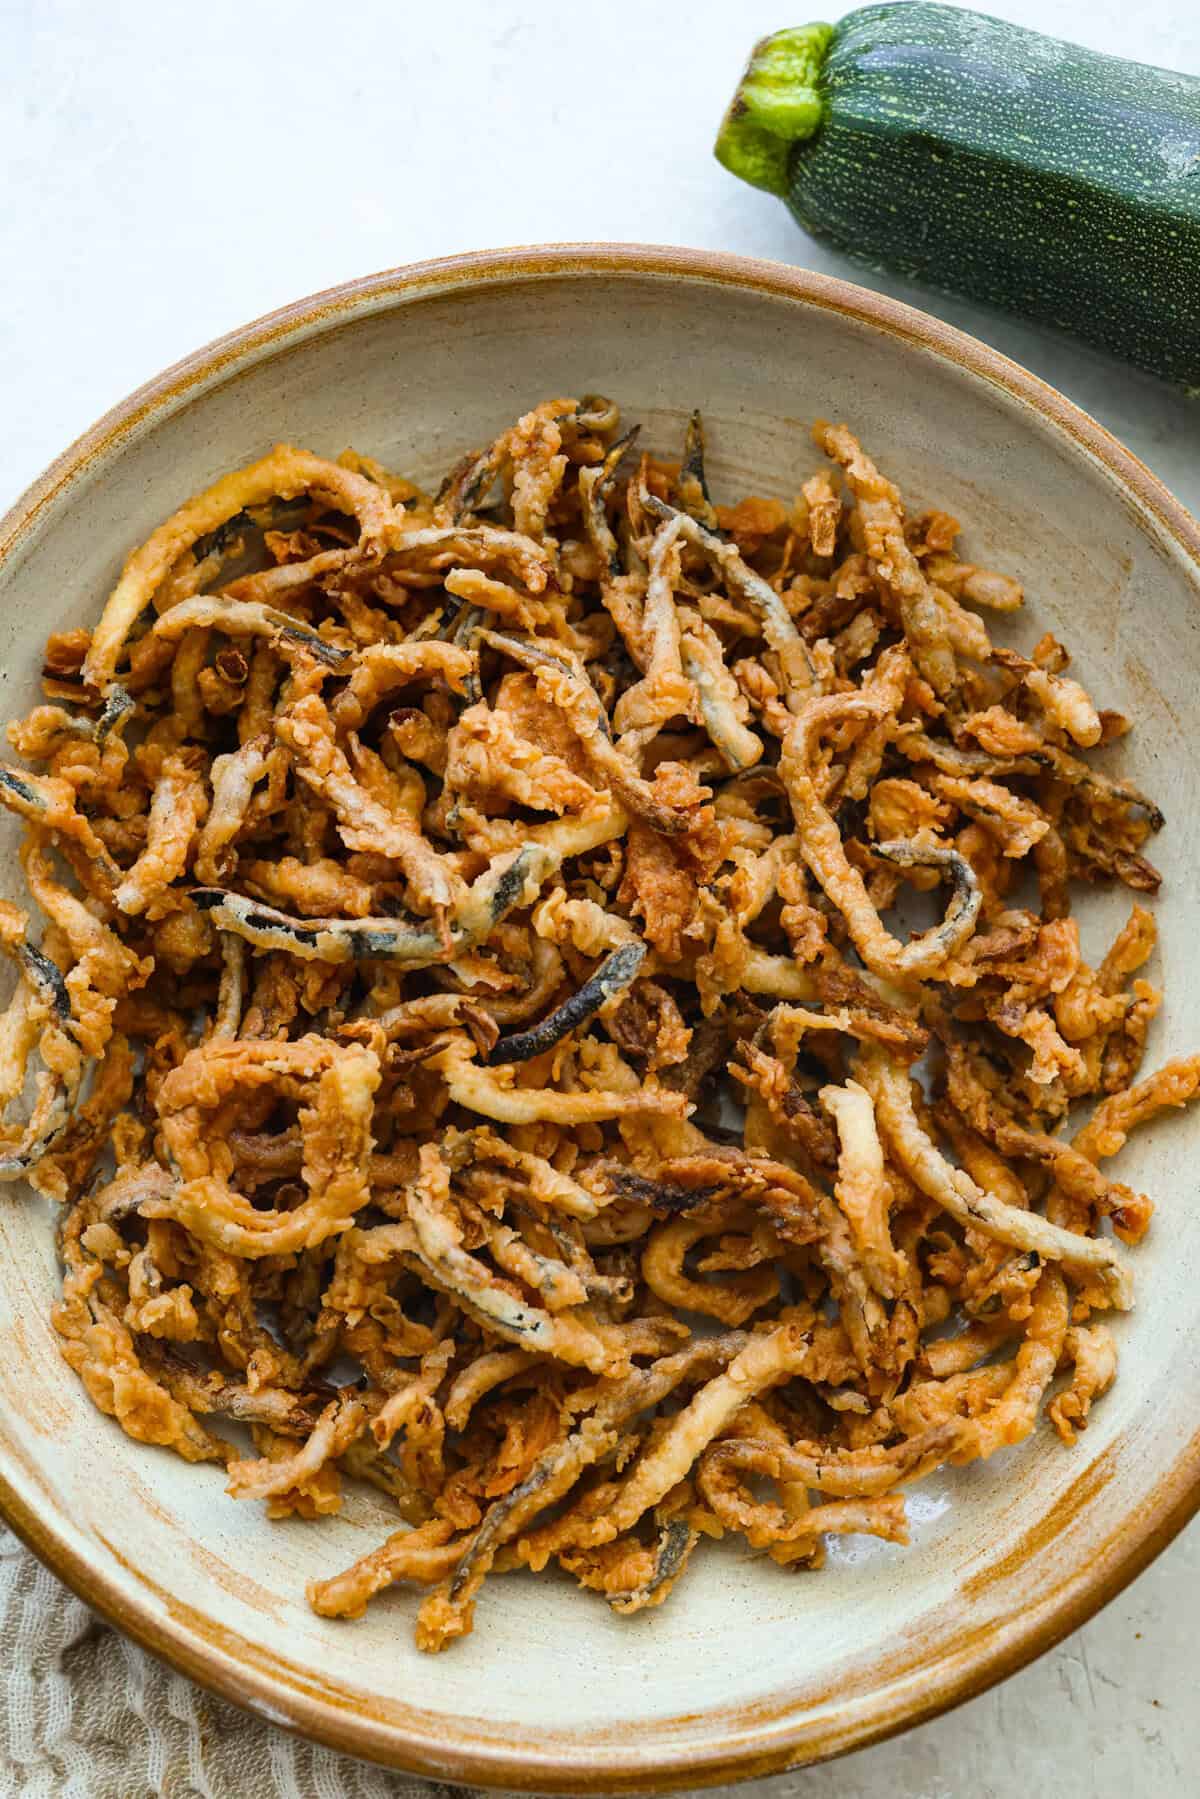
    These crispy zucchini strings are golden, crunchy, and seriously hard to stop eating. Lightly battered and fried until perfectly crisp, they turn simple zucchini into an addictive snack or side dish that everyone will reach for first.

    The Ultimate Summer Zucchini Fix

    • Ultra Crispy and Golden: These zucchini strips fry up light and crunchy on the outside while staying tender inside. They are SO good!!
    • Simple Ingredients!: A few pantry staples turn fresh zucchini into a fun snack that tastes incredible.
    • Endless ways to serve: Pile them on salads, tuck them into burgers, or serve with garlic aioli, ranch, or your favorite dipping sauce.

    Ingredients Needed for Zucchini Strings

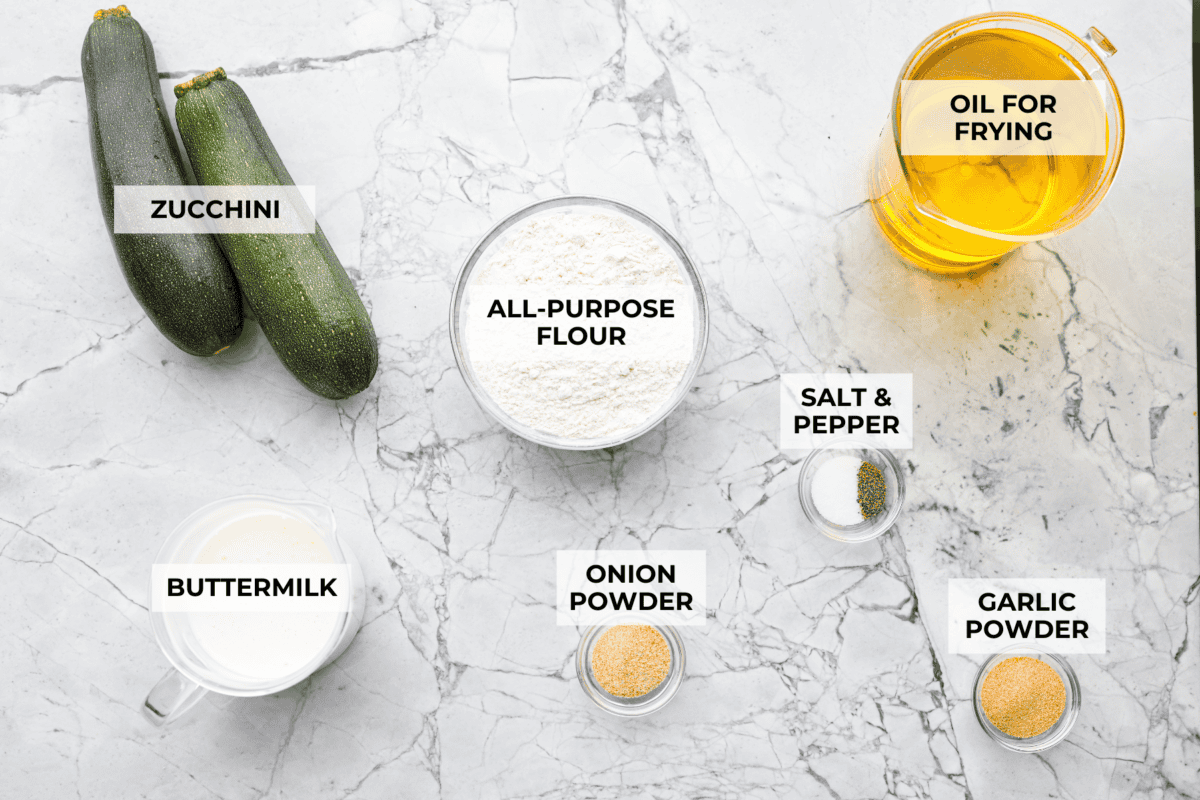
    Overhead shot of labeled ingredients for crispy zucchini strings.
    • Oil: Use any neutral oil for frying. Vegetable, avocado, or peanut oil will all work great.

    How to Make Crispy Zucchini Strings

    If you have garden zucchini to use up (or even if you don’t!), these crispy zucchini strips are a must-try! It’s a fun way to serve zucchini, turning a simple summer veggie into a crunchy snack everyone will love. Try my zucchini chips and grilled zucchini next!

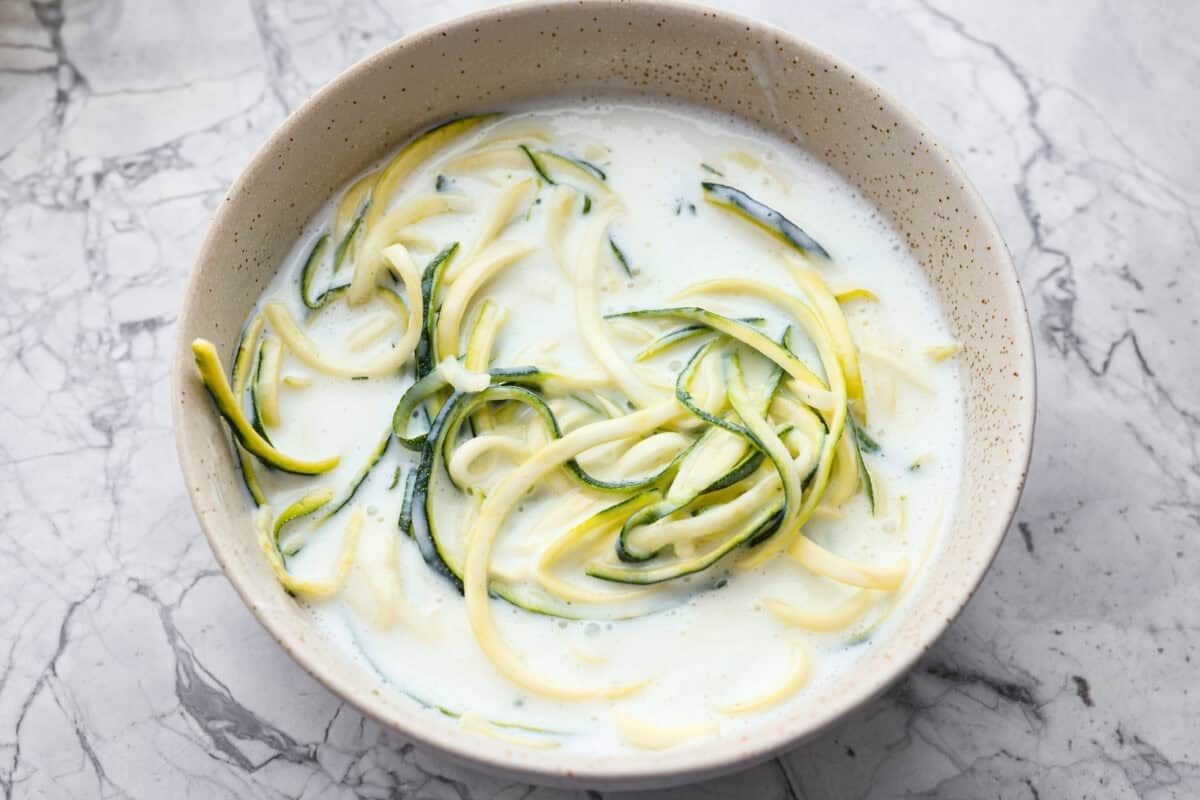
    1. Prep: Heat the oil for frying in a deep fryer or a large, heavy-bottomed pot to 350ºF. Use a spiralizer or a mandolin to slice the zucchini into thin strips. Add the buttermilk to a medium bowl. Use tongs to dip the slices into the buttermilk.
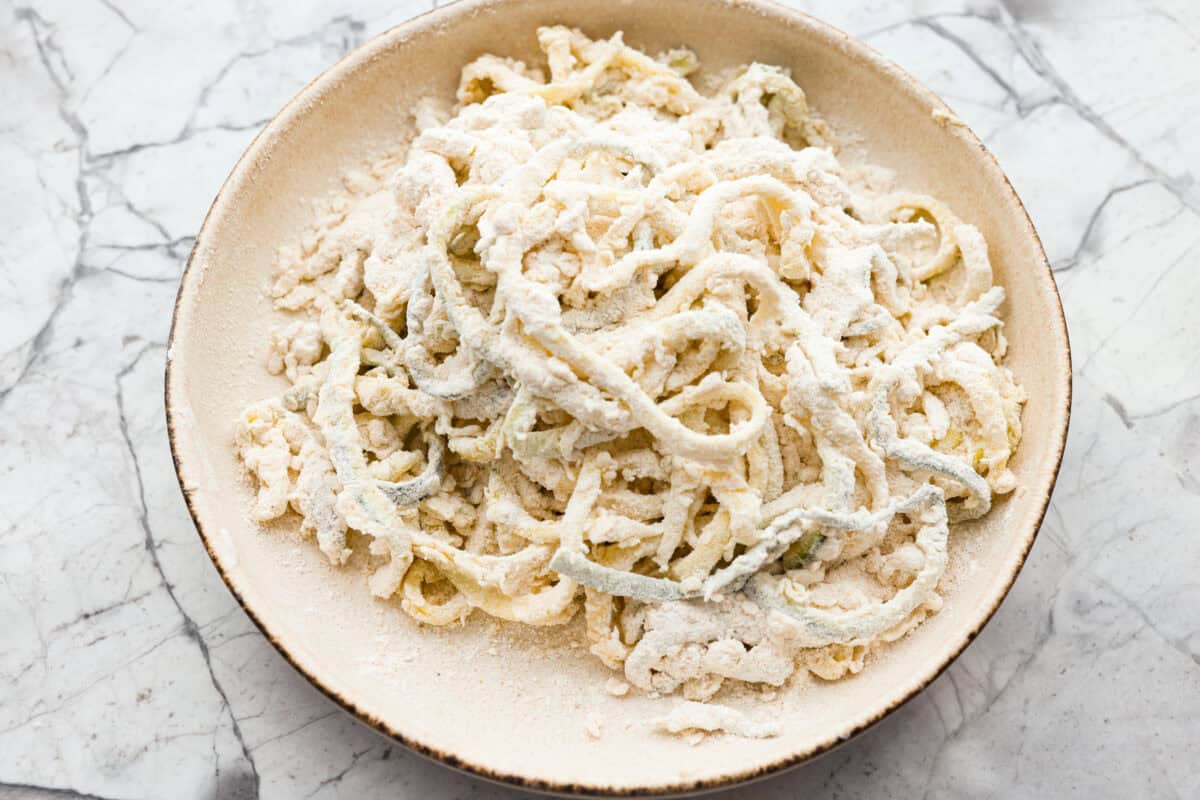
    2. Toss in Flour: In another bowl, combine all-purpose flour, garlic powder, onion powder, salt, and black pepper. Toss the zucchini in the flour mixture until evenly coated.
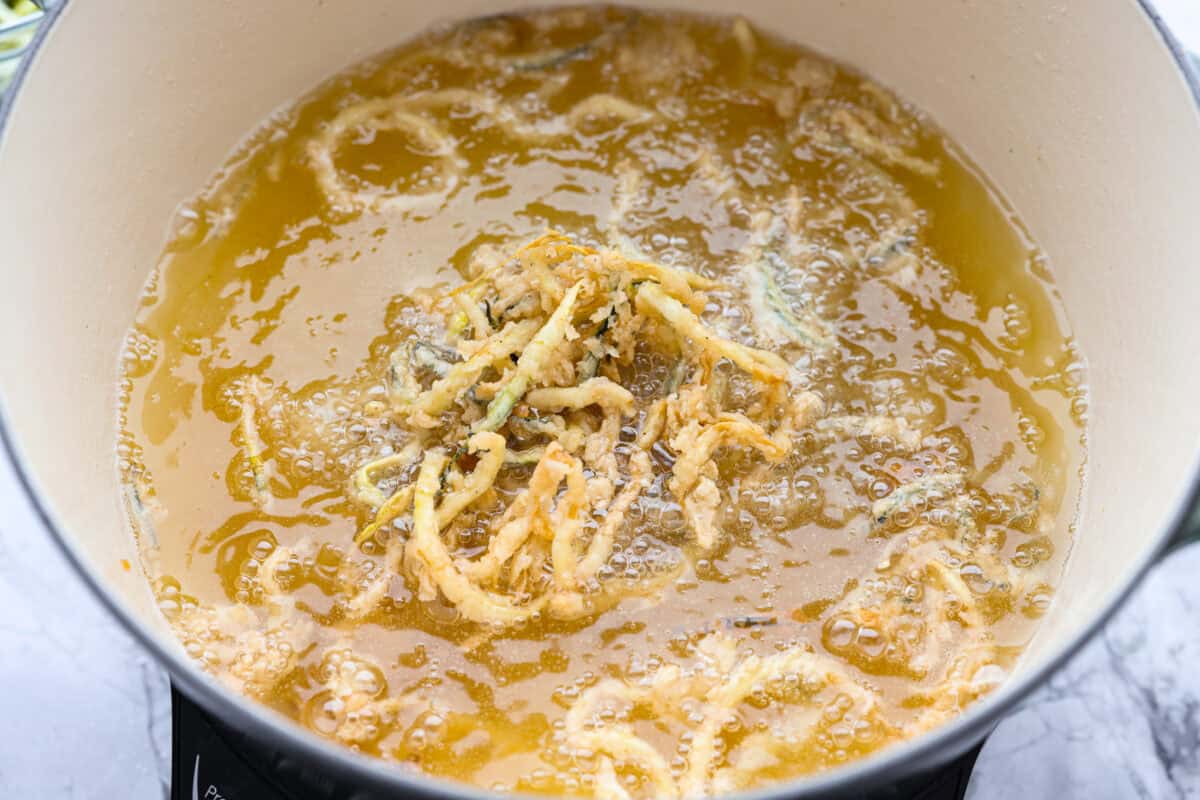
    3. Fry: Shake off any excess flour, then gently add the zucchini to the hot oil. Do this in batches, so you don’t overcrowd the pan. Fry for 3-4 minutes, until golden brown and crispy.
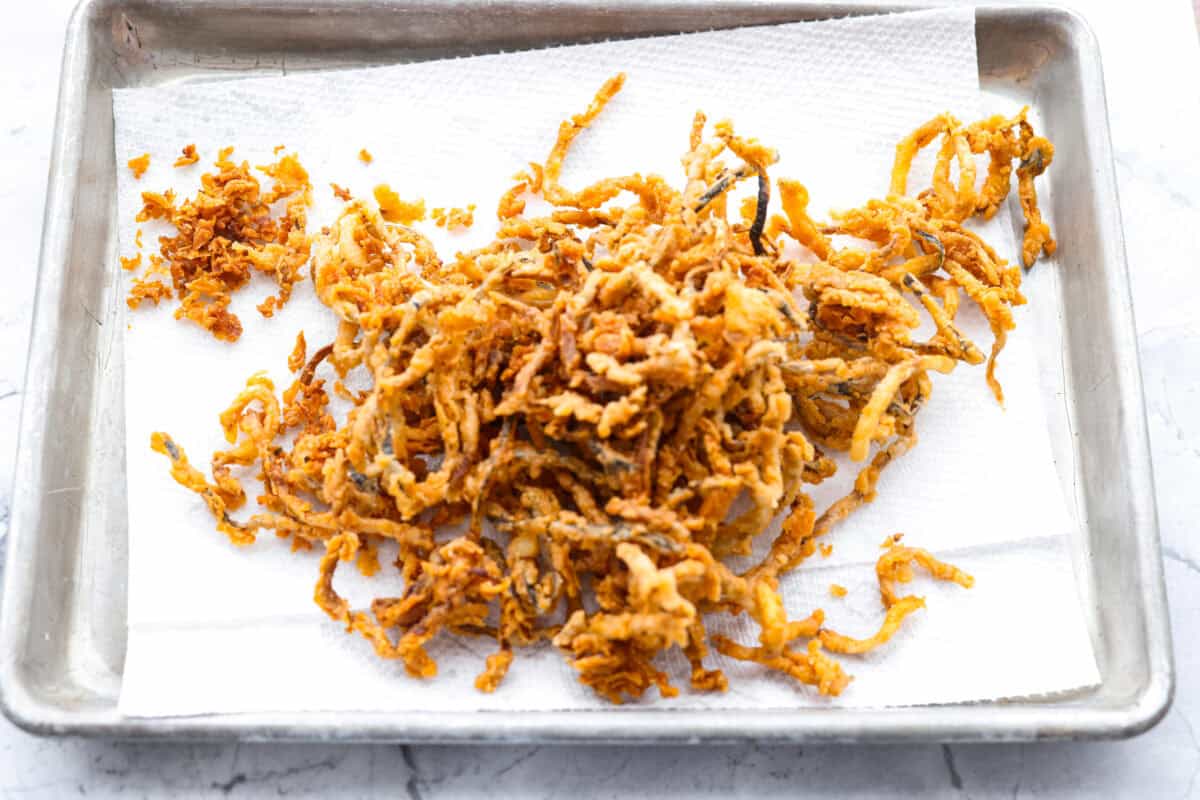
    4. Serve: Remove the zucchini strings to a paper towel-lined baking sheet and sprinkle with additional salt and pepper if desired, and serve.

    Air Fryer Option

    For a slightly healthier version, Crispy Zucchini Strings can be made in an air fryer, but they just won’t be as crisp.

    1. Add to Air Fryer: Place the breaded zucchini in a single layer in the air fryer basket.
    2. Spray: Spray lightly with oil.
    3. Cook: Air fry at 400°F for 10 minutes.
    4. Shake: Shake the basket halfway through cooking.

    Must Have Tools For This Recipe

    • Vegetable Spiralizer: Makes thin, even zucchini strips. A mandoline or sharp knife works too.
    • Dutch Oven: Keeps the oil temperature steady while frying.
    • Thermometer: Helps keep the oil at 350°F for crispy zucchini.
    • Tongs: Makes coating and handling the zucchini easier.
    • Spider Strainer: Quickly lifts the zucchini out while excess oil drains.

    Print

    Zucchini Strings

    My crispy zucchini strings are thin, golden, and perfectly crunchy. Serve them as a fun appetizer, snack, or side dish with your favorite dipping sauce.
    Course Appetizer, Side Dish
    Cuisine American
    Keyword crispy zucchini fries, crispy zucchini strings, fried zucchini, fried zucchini strings
    Prep Time 15 minutes
    Cook Time 9 minutes
    Total Time 24 minutes
    Servings 4 servings
    Calories 556kcal

    Equipment

    • 1 Large Pot or Dutch Oven

    Ingredients

    • oil for frying about 5-6 cups
    • 2 medium zucchinis spiralized or cut into thin strips
    • 1 ½ cups buttermilk
    • 2 cups all-purpose flour
    • 2 teaspoons garlic powder
    • 2 teaspoons onion powder
    • ½ teaspoon salt
    • ¼ teaspoon black pepper

    Instructions

    • Heat the oil for frying in a deep fryer or a large, heavy-bottomed pot to 350 degrees Fahrenheit.
    • Use a spiralizer or a mandolin to slice 2 medium zucchinis into thin strips.
    • Add 1 ½ cups buttermilk to a medium bowl. In another bowl, combine 2 cups all-purpose flour, 2 teaspoons garlic powder, 2 teaspoons onion powder, ½ teaspoon salt, and ¼ teaspoon black pepper.
    • Use tongs to add the sliced zucchini to the buttermilk, and then into the flour mixture. Toss the zucchini so it is evenly coated in the flour.
    • Shake off excess flour and gently add the zucchini to the hot oil. Do this in batches, so you don’t overcrowd the pan. Fry for 3-4 minutes, until golden brown and crispy.
    • Remove the zucchini to a paper-towel-lined baking sheet and sprinkle with additional salt and pepper if desired, and serve.

    Notes

    Storage and Make Ahead Instructions

    • Leftovers: Store in an airtight container in the fridge for up to 4 days. Reheat in the air fryer at 360ºF for 4-6 minutes.
    • Make Ahead: Prep the zucchini by slicing it into thin strips and refrigerating it for up to 24 hours in advance. Mix together the flour and spices in advance and store at room temperature until ready to use.

    Nutrition

    Calories: 556kcal | Carbohydrates: 57g | Protein: 11g | Fat: 32g | Saturated Fat: 4g | Polyunsaturated Fat: 8g | Monounsaturated Fat: 19g | Trans Fat: 0.1g | Cholesterol: 10mg | Sodium: 396mg | Potassium: 474mg | Fiber: 3g | Sugar: 7g | Vitamin A: 346IU | Vitamin C: 18mg | Calcium: 134mg | Iron: 3mg
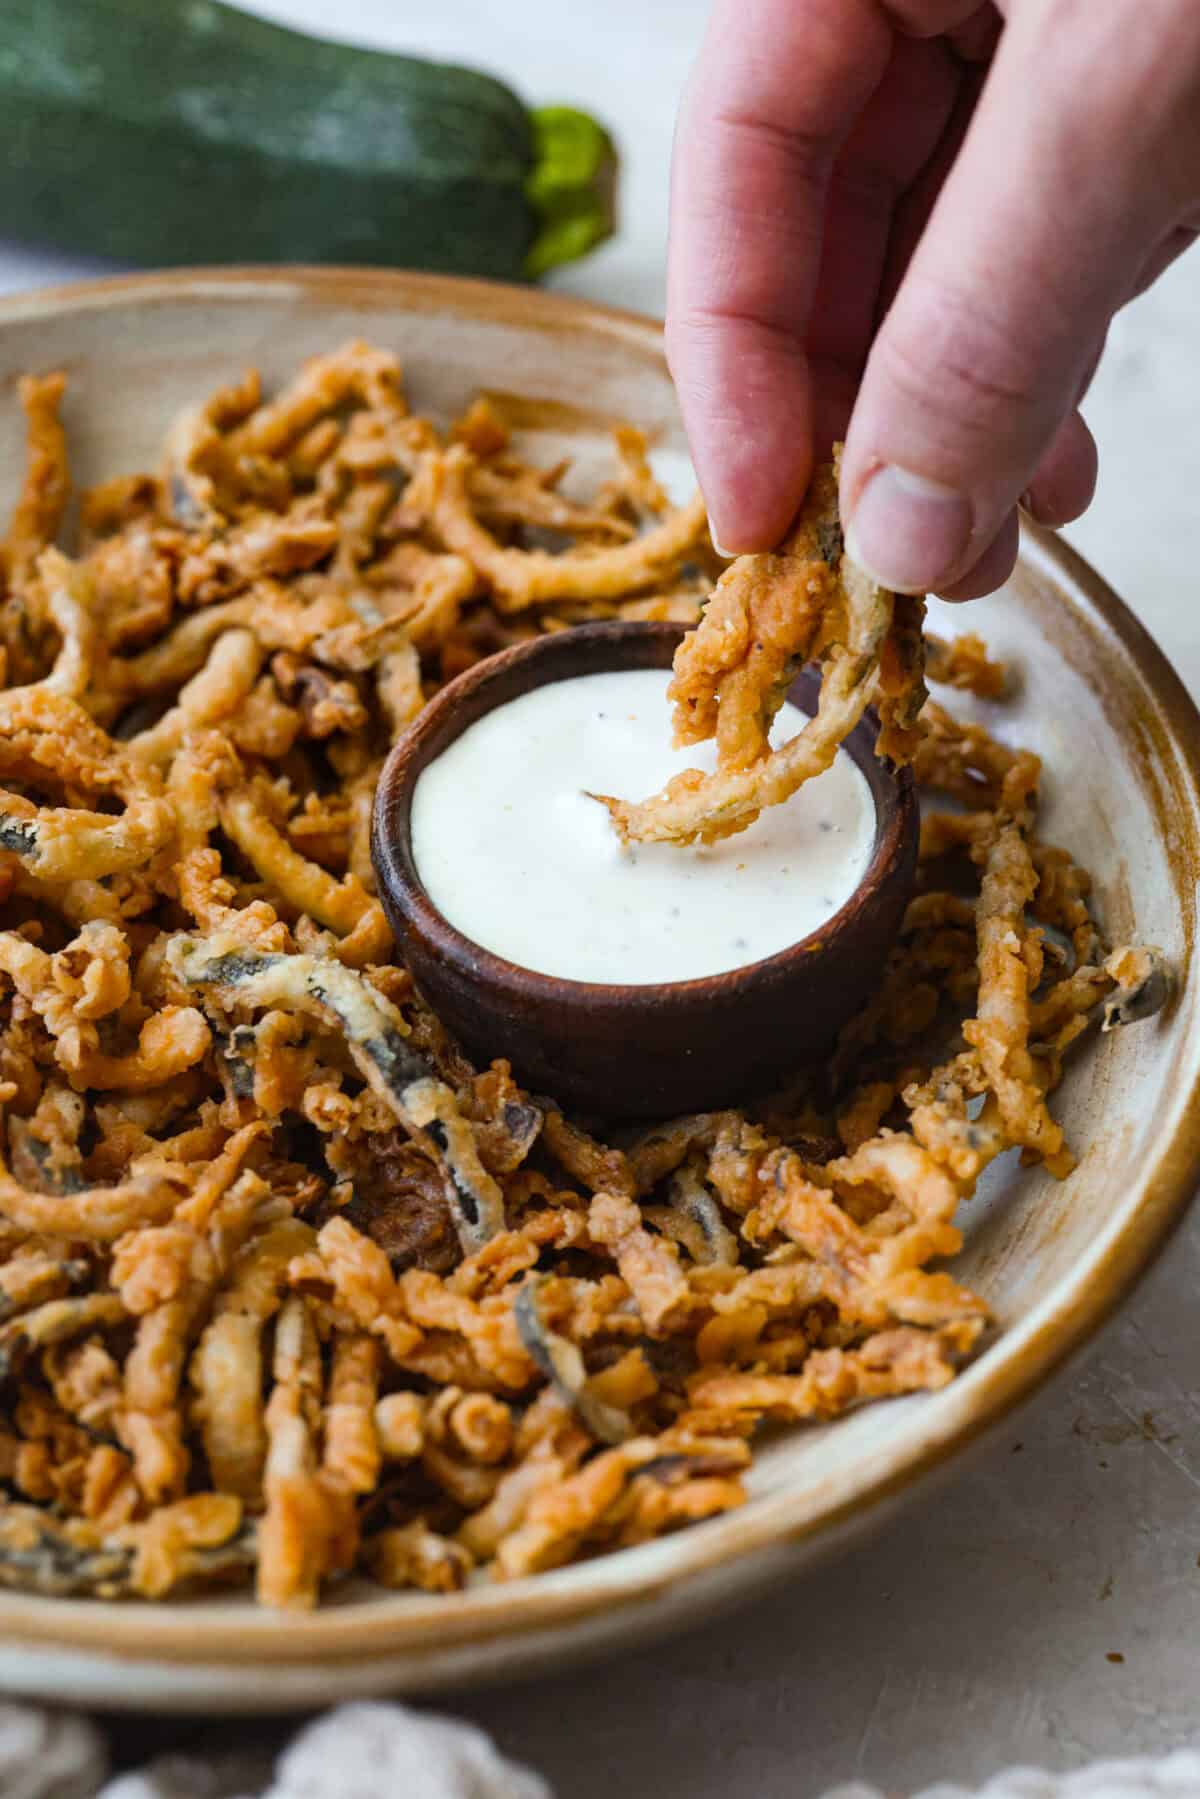
    Someone dipping zucchini strings in ranch dressing.

    More Fun Appetizers to Try

    Looking for more snack ideas? Here are a few easy appetizers that are always a hit.

    This post was originally published on this site.

  • Garlic Aioli

    Garlic Aioli

    There’s nothing like having a batch of homemade Garlic Aioli in the fridge to make fries, burgers, sammys, wraps, and roasted veggies instantly better. This budget-friendly aioli is made from scratch in a food processor (not just mayo with garlic stirred in!), and it only takes a handful of basic ingredients to pull together. It’s rich, lightly tangy, and balanced with a touch of honey for a sauce that tastes SO much better than store-bought. It only takes 5 minutes, and I love keeping it on hand for anything that needs a creamy, garlicky boost!

    A Sauce Worth Making From Scratch

    I know aioli sounds a little fancy, but this version is really just simple ingredients, a food processor, and a slow drizzle of oil doing their thing. Aioli traditionally comes from the northwestern Mediterranean and started as a simple garlic-and-oil emulsion (aioli actually means garlic and oil!). Today, a lot of garlic aioli recipes are really more like garlic mayo, and this version is built from scratch with egg and oil blended into a thick, smooth, and glossy emulsion. The fresh garlic makes it unmistakably aioli, the Dijon adds savory flavor and helps the emulsion hold together, and the lemon juice keeps it bright instead of heavy.

    I use vegetable oil here because it keeps the flavor mellow and lets the garlic shine. Extra virgin olive oil can turn bitter when blended hard in a food processor, so I don’t use it for this method. The two big things that make this sauce extra creamy are starting with a room-temperature egg and streaming the oil in slowly. Once you see it turn pale, thick, and glossy, you’ll know you nailed it!

    Recipe Success Tips

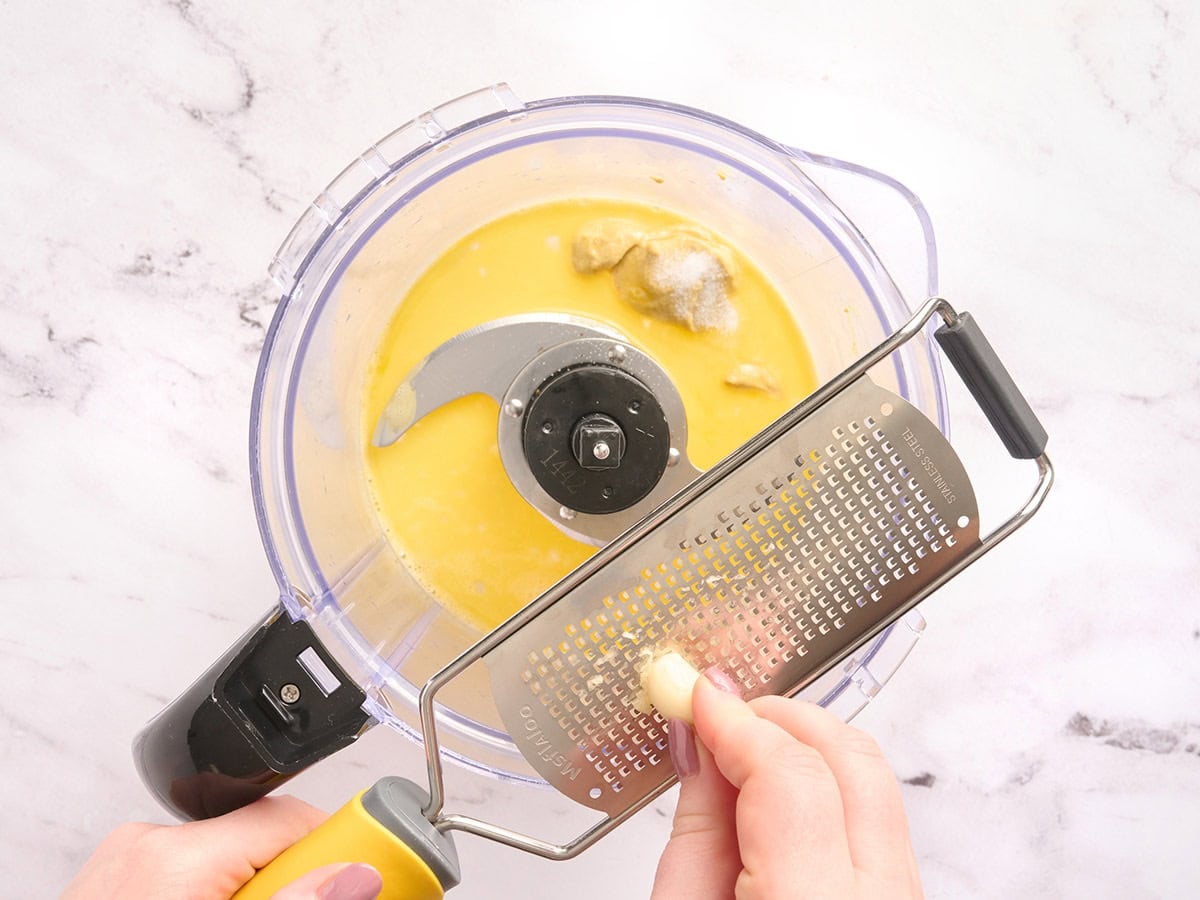
    1. Grate the garlic. I grate the garlic directly into the food processor so it blends smoothly into the sauce. This gives you big garlic flavor without crunchy pieces or sharp bits of raw garlic throughout.
    2. Chill before serving if you have time. You can use this garlic aioli right away, but 30 minutes in the fridge gives the garlic time to settle into the sauce and makes the flavor even better!
    3. Try roasted garlic for a sweeter flavor. For a softer, more mellow sauce, swap the raw garlic for roasted garlic. Roasted garlic is sweeter and less sharp, so you can use a few extra cloves if you want a deeper garlic flavor without the bite.

    Two Simple Tricks for the Creamiest Aioli

    A good aioli is less about effort and more about patience with the oil. The food processor does most of the work here, and these two simple steps help the sauce blend into the thick, glossy texture you’re looking for:

    • Start with room-temperature ingredients. A room-temperature egg blends more easily with the oil, which helps it emulsify into a smooth, creamy sauce.
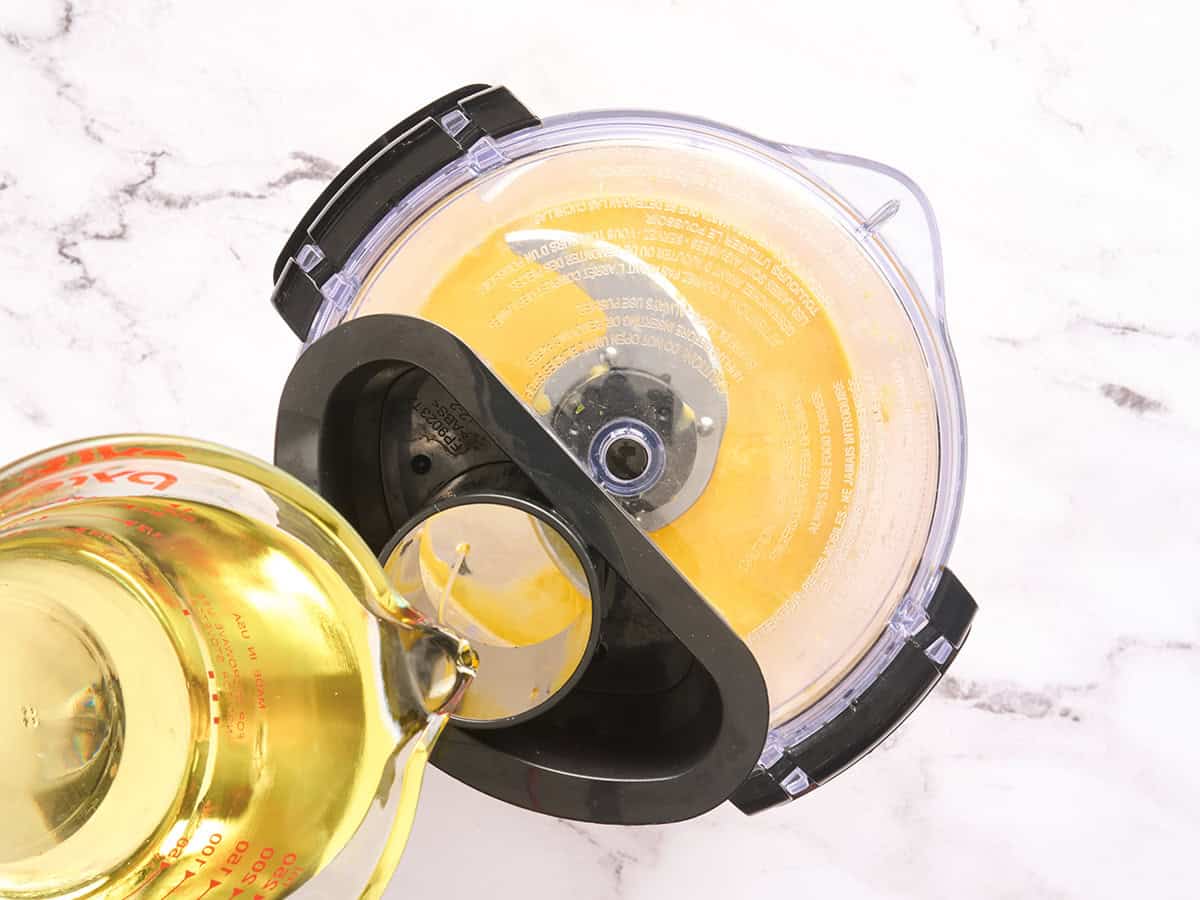
    • Pour the oil in slowly. Keep the food processor running and drizzle the oil in a thin, steady stream. Go slowly and don’t rush it at the beginning. Once you see the mixture turn pale, thicker, and glossy, you can drizzle the oil a little faster.

    How to Fix a Broken Emulsion

    If the sauce looks loose, oily, or separated, don’t panic. It just means the oil joined the party a little faster than the egg could handle it. The first thing I try is adding 1 teaspoon of ice-cold water while the food processor is running. Sometimes that’s enough to bring everything back together without wasting any ingredients.

    If it still doesn’t come together, add one room-temperature egg yolk to a clean food processor bowl and blend it for a few seconds. Then, with the machine running, slowly drizzle the separated aioli back in. It should thicken back up into a smooth, creamy sauce.

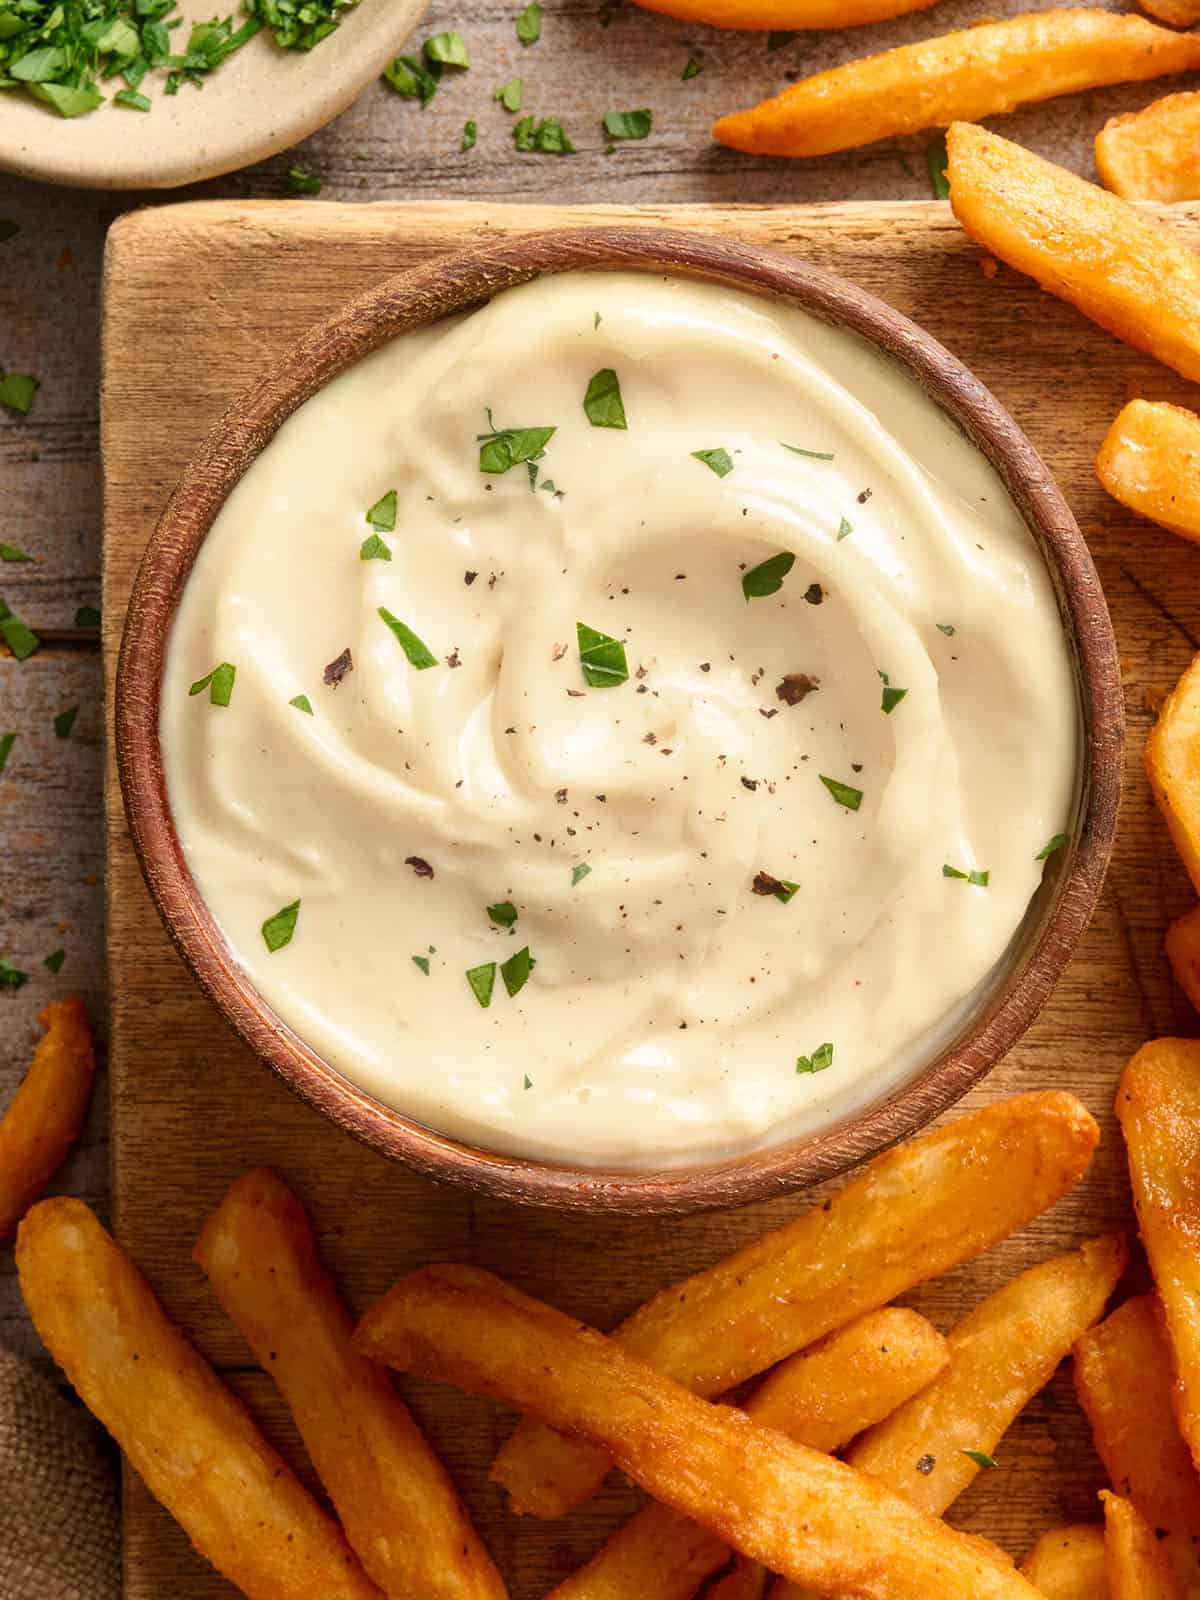
    Overhead view of a bowl of homemade garlic aioli with fries.

    Print
    Add to Collection Go to Collections

    Garlic Aioli

    This creamy Garlic Aioli recipe is made from scratch in a food processor with fresh garlic, Dijon, lemon juice, honey, egg, and oil in just 5 minutes!
    Course Sauce
    Cuisine Mediterranean
    Total Cost $1.06 recipe / $0.07 serving
    Prep Time 5 minutes
    Total Time 5 minutes
    Servings 16 servings (1 Tbsp each)
    Calories 127kcal

    Equipment

    • Food Processor

    Ingredients

    • 1 large egg room temperature, $0.12*
    • 2 garlic cloves peeled and grated, $0.18
    • 2 tsp Dijon mustard $0.05
    • ¼ tsp salt $0.02
    • 1 cup vegetable oil 8 oz., $0.60**
    • 1 tsp lemon juice $0.02
    • 1 tsp honey $0.07

    Instructions

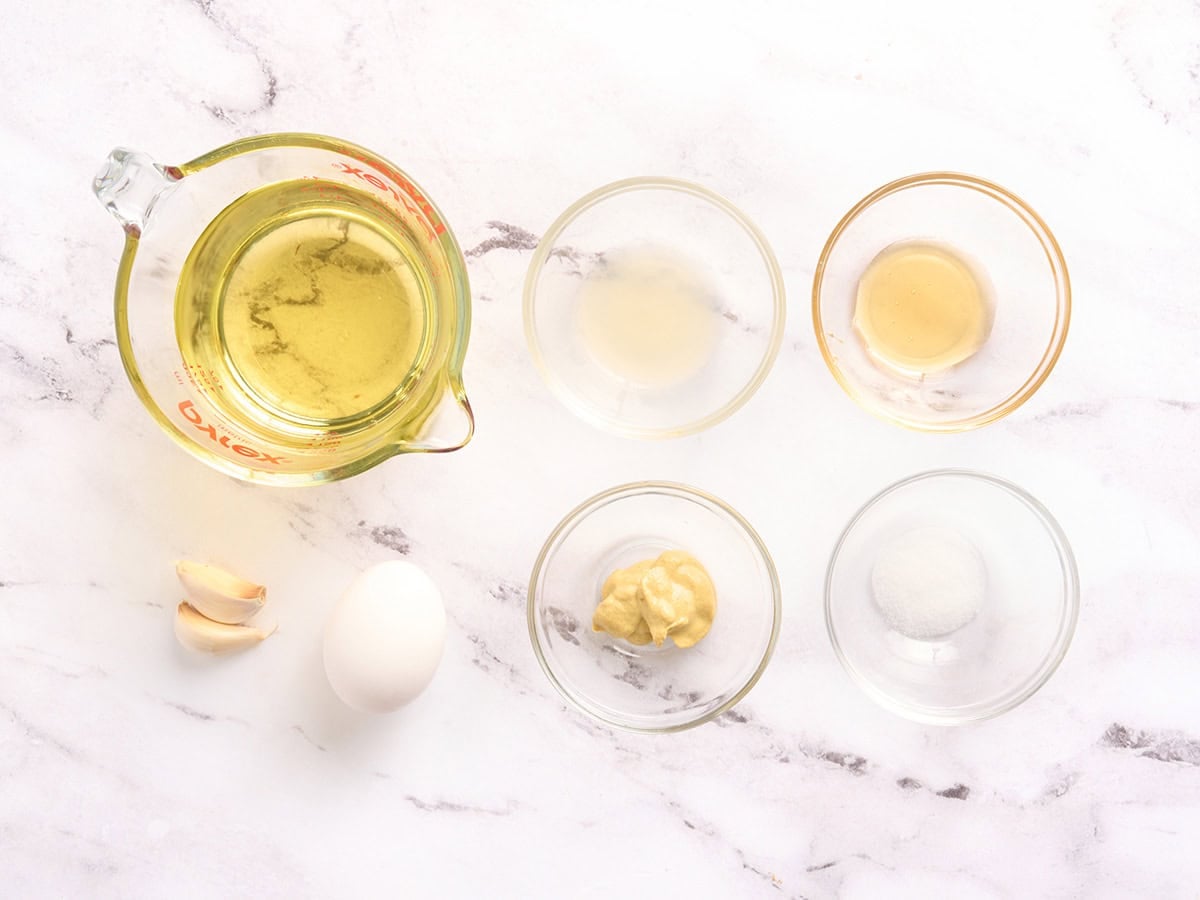
    • Gather all of your ingredients.
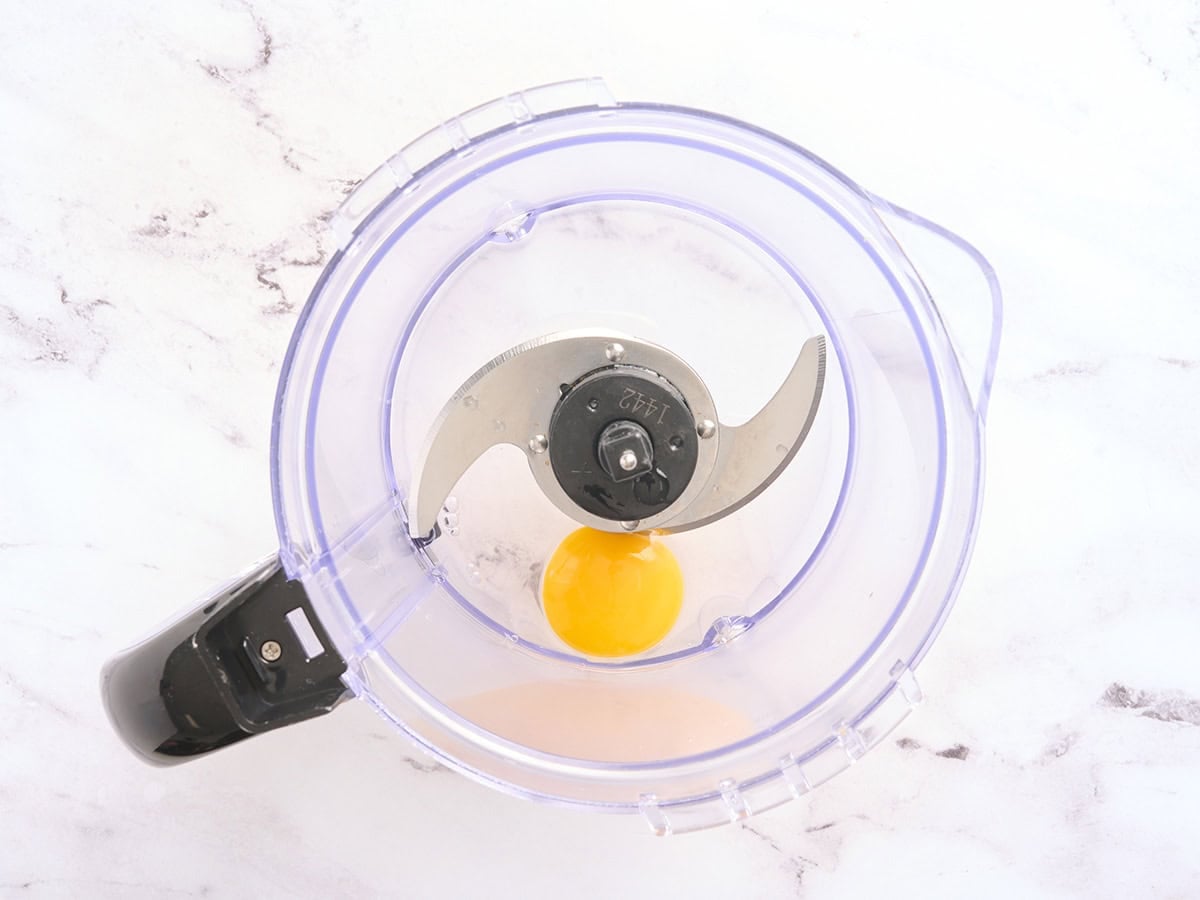
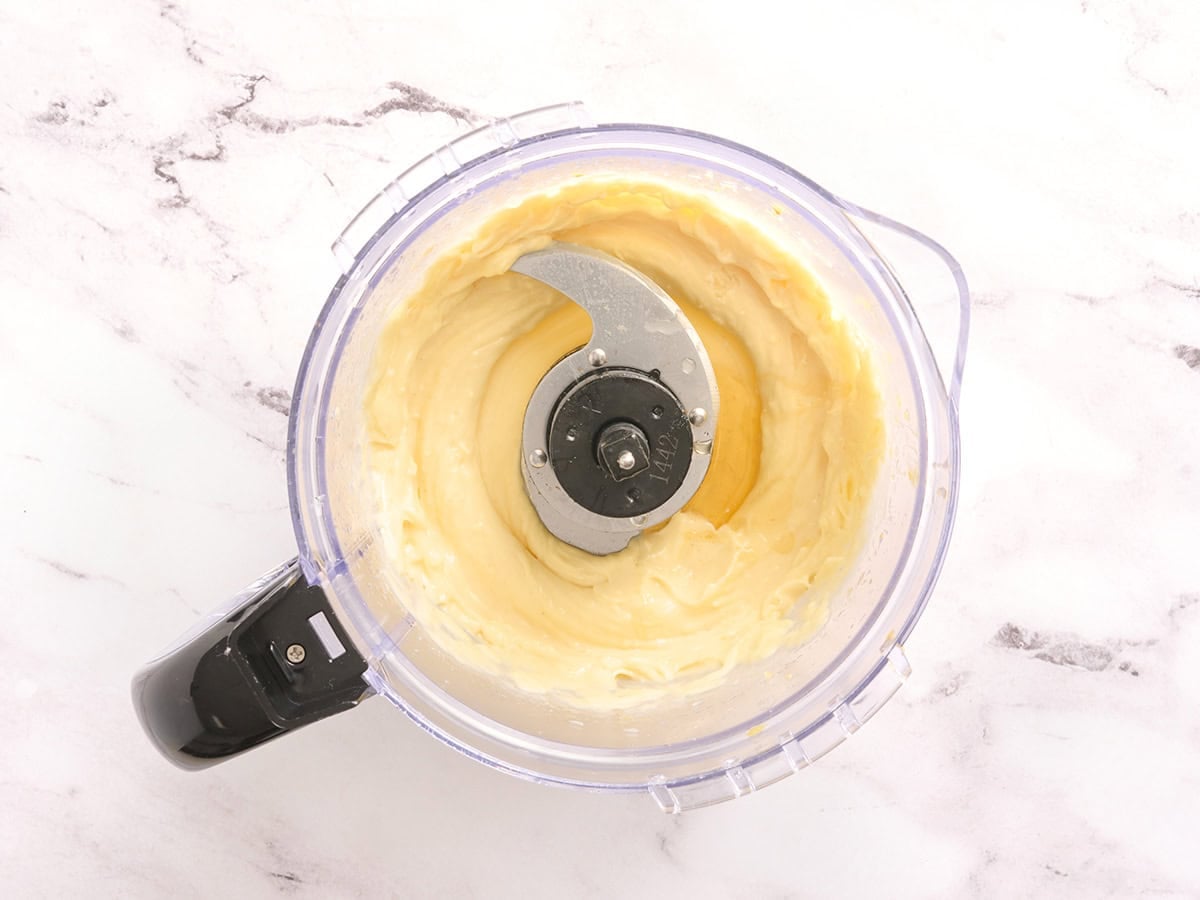
    • Place the room-temperature egg in the bowl of a food processor and blend for about 20 seconds to break it down.
    • Add the dijon mustard, salt, and grate the garlic cloves directly into the food processor. Blend again for another 20-30 seconds until well combined.
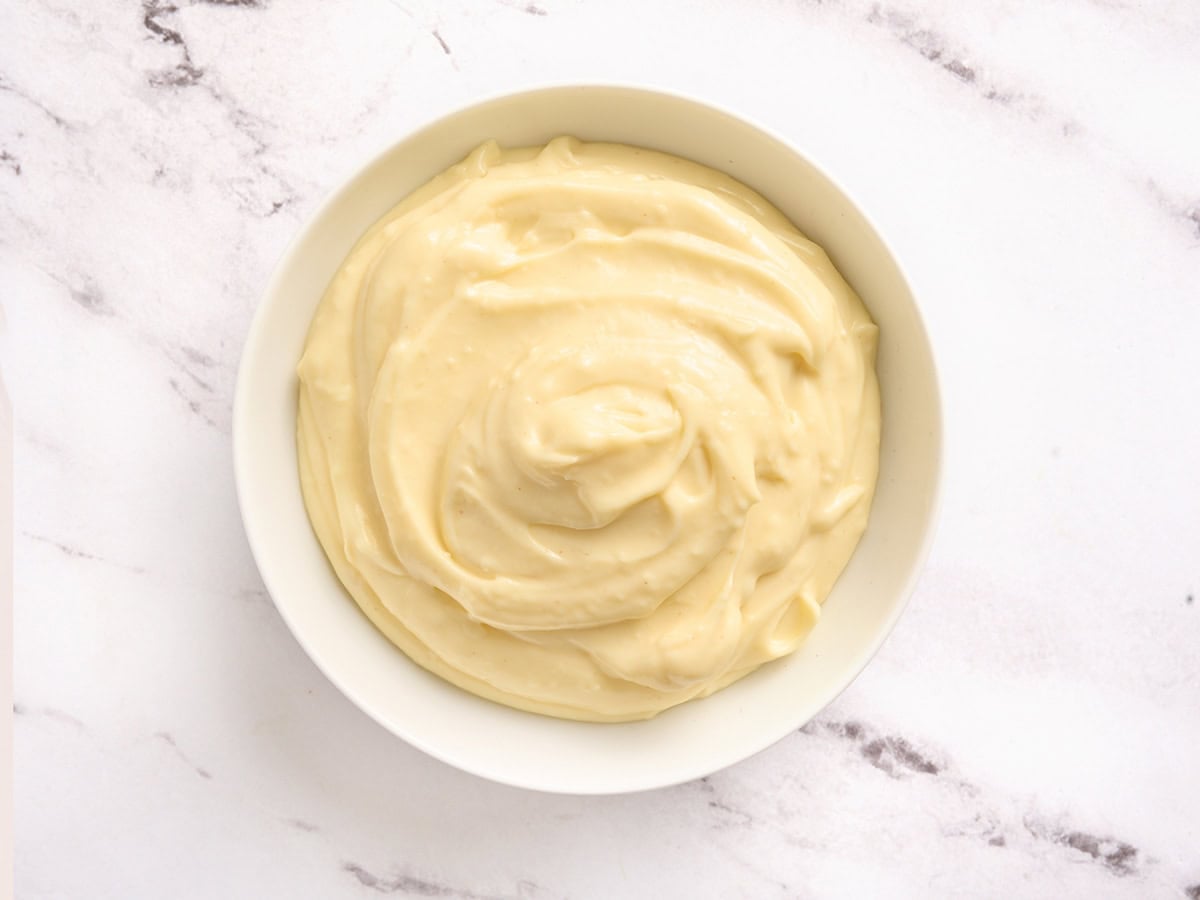
    • With the processor running, very slowly drizzle in the vegetable oil in a thin stream.*** Continue blending until the mixture turns pale, thick, and creamy-about 30 seconds after the oil is fully incorporated.
    • Add the lemon juice and honey, then blend briefly to combine. Taste and adjust salt or lemon juice as needed.
    • Transfer to a clean airtight container and refrigerate.**** Use within 4 days for best quality.

    See how we calculate recipe costs here.

    Notes

    *Room-temperature ingredients are important for a smooth, stable emulsion. If needed, place the whole egg in a bowl of warm (not hot!) water for a few minutes before starting. Since this recipe uses raw egg, I highly recommend using a pasteurized egg. Pasteurized eggs are gently heat-treated to reduce the risk of harmful bacteria without cooking the egg, which makes them a better choice for uncooked sauces like this one.

    **Use a neutral oil, such as vegetable, canola, or avocado oil, for the smoothest flavor. I don’t recommend extra virgin olive oil for this food processor method because it can turn bitter when blended at high speed.

    ***Add the oil slowly while blending to prevent the aioli from breaking. Once the emulsion starts forming, you can drizzle slightly faster.

    ****For a stronger garlic flavor, refrigerate the sauce for 30 minutes before serving.

    Nutrition

    Serving: 1Tbsp | Calories: 127kcal | Carbohydrates: 1g | Protein: 0.4g | Fat: 14g | Sodium: 48mg | Fiber: 0.04g

    how to make Garlic Aioli Step-by-Step Photos

    The ingredients to make homemade garlic aioli.

    Gather all of your ingredients. Having everything ready makes the emulsifying step much easier!

    An egg in a food processor.

    Blend the egg: Add the room-temperature egg to the bowl of a food processor. Blend for about 20 seconds, or until the yolk and white are fully broken down and the mixture looks smooth and slightly foamy. A room-temperature egg blends more easily and helps the sauce emulsify.

    Hands grating a garlic glove into a food processor.

    Add the mustard and garlic: Add 2 teaspoons Dijon mustard and ¼ teaspoon salt to the food processor. Grate 2 peeled garlic cloves directly into the bowl so the garlic blends in smoothly without leaving large pieces behind. Blend for another 20-30 seconds, or until everything is well combined and the garlic is evenly mixed through.

    Oil being streamed into a food processor to make an emulsion for garlic aioli.

    Make the emulsion: With the food processor running, very slowly drizzle in 1 cup vegetable oil in a thin, steady stream. Don’t rush this step. Adding the oil too quickly can cause the mixture to separate instead of turning creamy. As the oil blends in, the mixture should start to turn pale, thick, glossy, and creamy. Continue blending for about 30 seconds after all the oil has been added.

    Honey and lemon juice added to a food processor with garlic aioli.

    Add the lemon and honey: Add 1 teaspoon lemon juice and 1 teaspoon honey, then blend briefly just until combined. The lemon juice brightens the flavor, and the honey softens the sharpness from the garlic and Dijon. Taste and adjust with a little more salt or lemon juice if needed.

    Overhead view of a bowl of homemade garlic aioli.

    Serve or store: Transfer the sauce to a clean airtight container and refrigerate. It’ll thicken slightly as it chills. You can enjoy your homemade garlic aioli right away, but chilling it for at least 30 minutes will give you a stronger garlic flavor! Use within 4 days for the best quality.

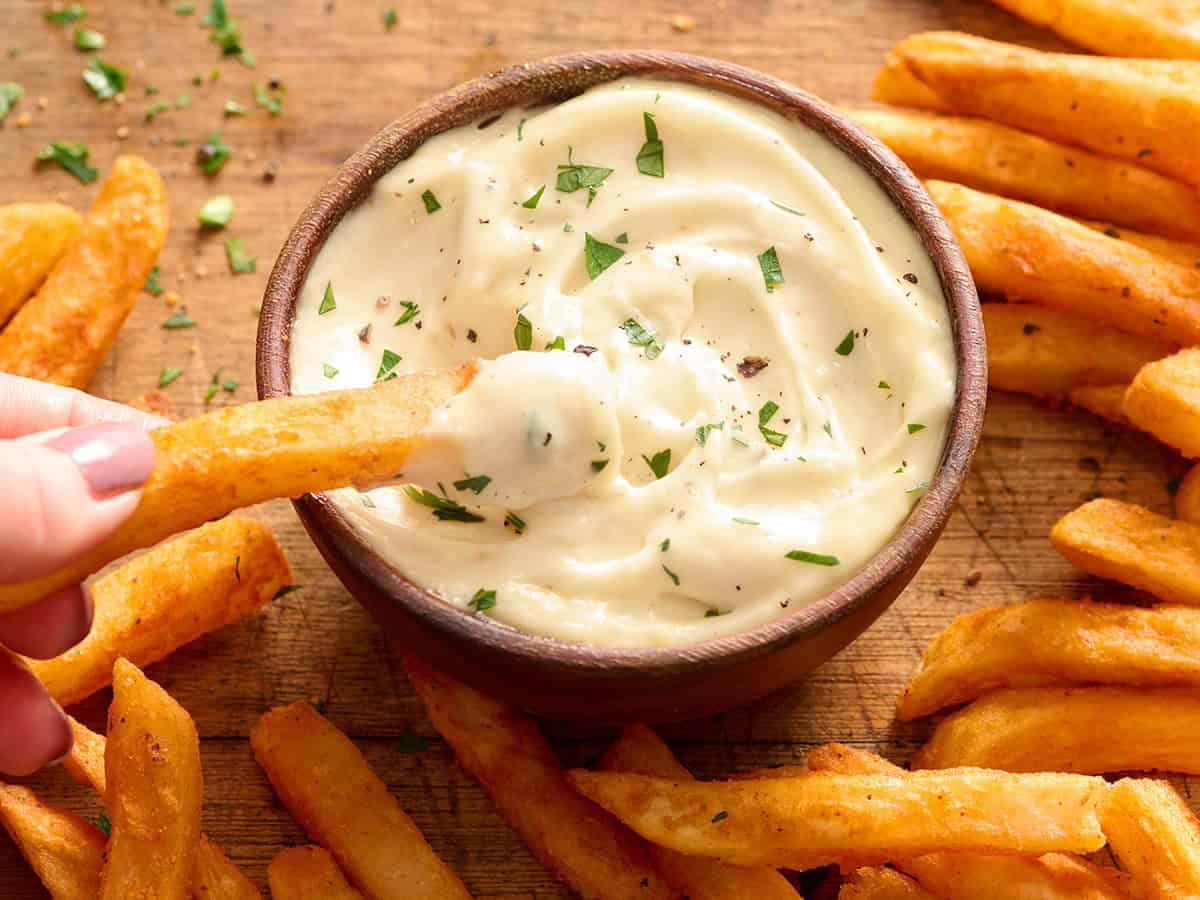
    Overhead side view of a bowl of homemade garlic aioli with a French fry being dipped into it.

    Serving Suggestions

    Garlic aioli works as a dip or spread, so it’s an easy way to make whatever you’re already serving feel a little more special. Keep it simple with fries and potatoes, or use it anywhere you’d normally reach for mayo or ranch:

    • Fries and potatoes: This is the classic pairing you’ll often see on a restaurant menu! Serve it with fries, tater tots, potato wedges, or crispy roasted potatoes.
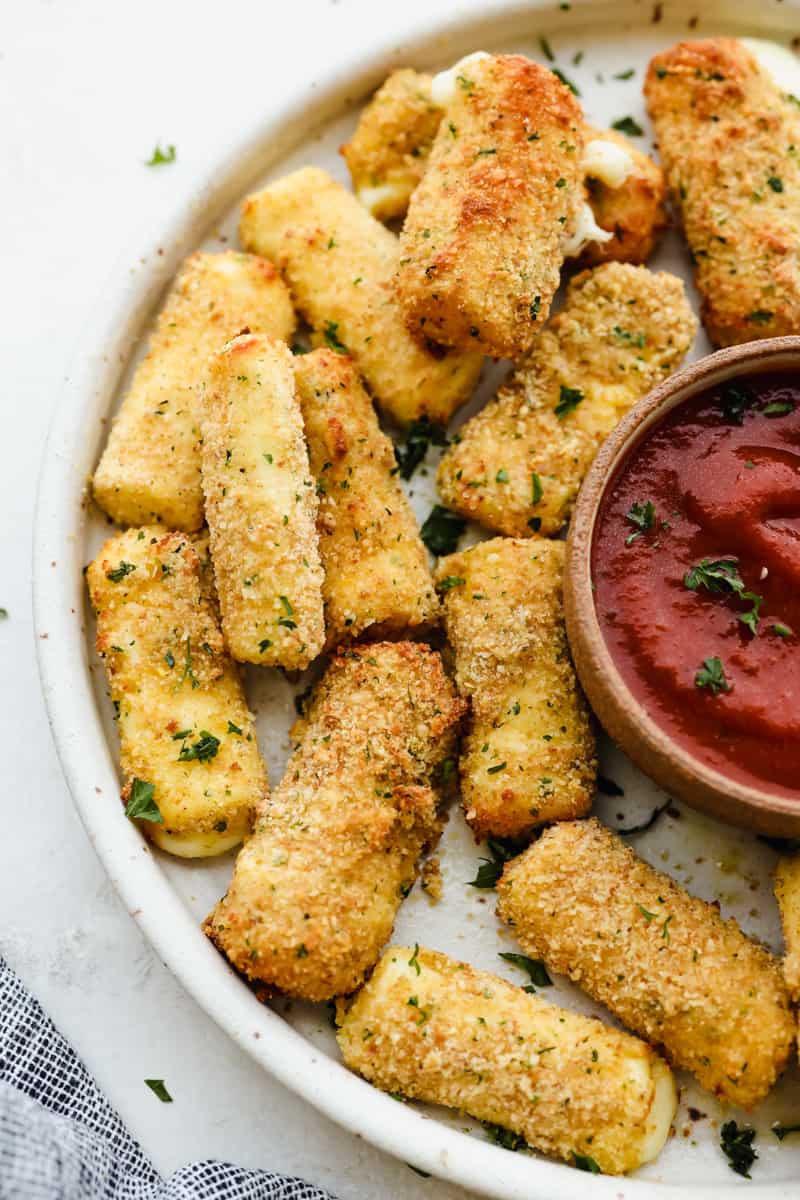
    • Crispy appetizers: Use it as a dip for zucchini fries, onion rings, mozzarella sticks, or any snacky finger food that needs a creamy garlic sauce on the side.
    • Sandwiches, burgers, and wraps: Spread it onto hamburgers, chicken sandwiches, veggie sandwiches, or wraps instead of plain mayo.
    • Bowl meals: Add a spoonful to a simple grain bowl with rice or quinoa, roasted vegetables, greens, and chickpeas or grilled chicken. The sauce adds enough richness and flavor that you don’t need much to make a delicious meal!
    • Roasted or grilled vegetables: Drizzle it over roasted or grilled asparagus, Brussels sprouts, zucchini, roasted cauliflower, or broccoli right before serving. The warm vegetables soften the aioli slightly and make it extra delicious.
    • Fish and seafood: This sauce is a great swap for tartar sauce with salmon, cod, fish and chips, shrimp, or crab cakes.
    • Raw veggies: Serve it as a creamy dip with cucumbers, carrots, radishes, bell peppers, or any simple veggie tray.
    • Salads and pasta salads: Thin it with a little extra lemon juice or cold water to turn it into a creamy garlic dressing for leafy greens or pasta salad.

    Storage Instructions

    Store homemade garlic aioli in a clean airtight container in the refrigerator for up to 4 days, as per USDA guidance on storing emulsions made with raw pasteurized eggs. Since this recipe is made with raw egg and raw garlic, keep it chilled whenever you’re not using it. Use a clean spoon each time you scoop from the container, and give it a quick stir before serving if it separates slightly during storage.

    Room Temperature

    Don’t leave this sauce sitting out for extended periods of time. Raw garlic stored in oil at room temperature can create an environment where harmful bacteria can grow, and the raw egg also needs to stay chilled. As a general food safety rule, don’t leave it out for more than 2 hours, or more than 1 hour if the temperature is 90°F or above. I’d keep it refrigerated until you’re ready to serve, then just return it to the fridge after using.

    Freezer

    I don’t recommend freezing this from-scratch aioli. The egg-and-oil emulsion can separate after thawing, leaving the texture grainy, oily, or broken instead of smooth and creamy.

    Try These Creamy Sauces Next:

    • I’d bring Alabama White Sauce to any cookout when the table needs something different from classic BBQ sauce.
    • Tzatziki Sauce tastes even better after a short chill, once the lemon, garlic, dill, and yogurt blend together.
    • Our easy Homemade Tartar Sauce takes just 5 minutes and tastes so much fresher than the bottled kind.

    The post Garlic Aioli appeared first on Budget Bytes.

    This post was originally published on this site.

  • Weekly Meal Plan #94

    Weekly Meal Plan #94

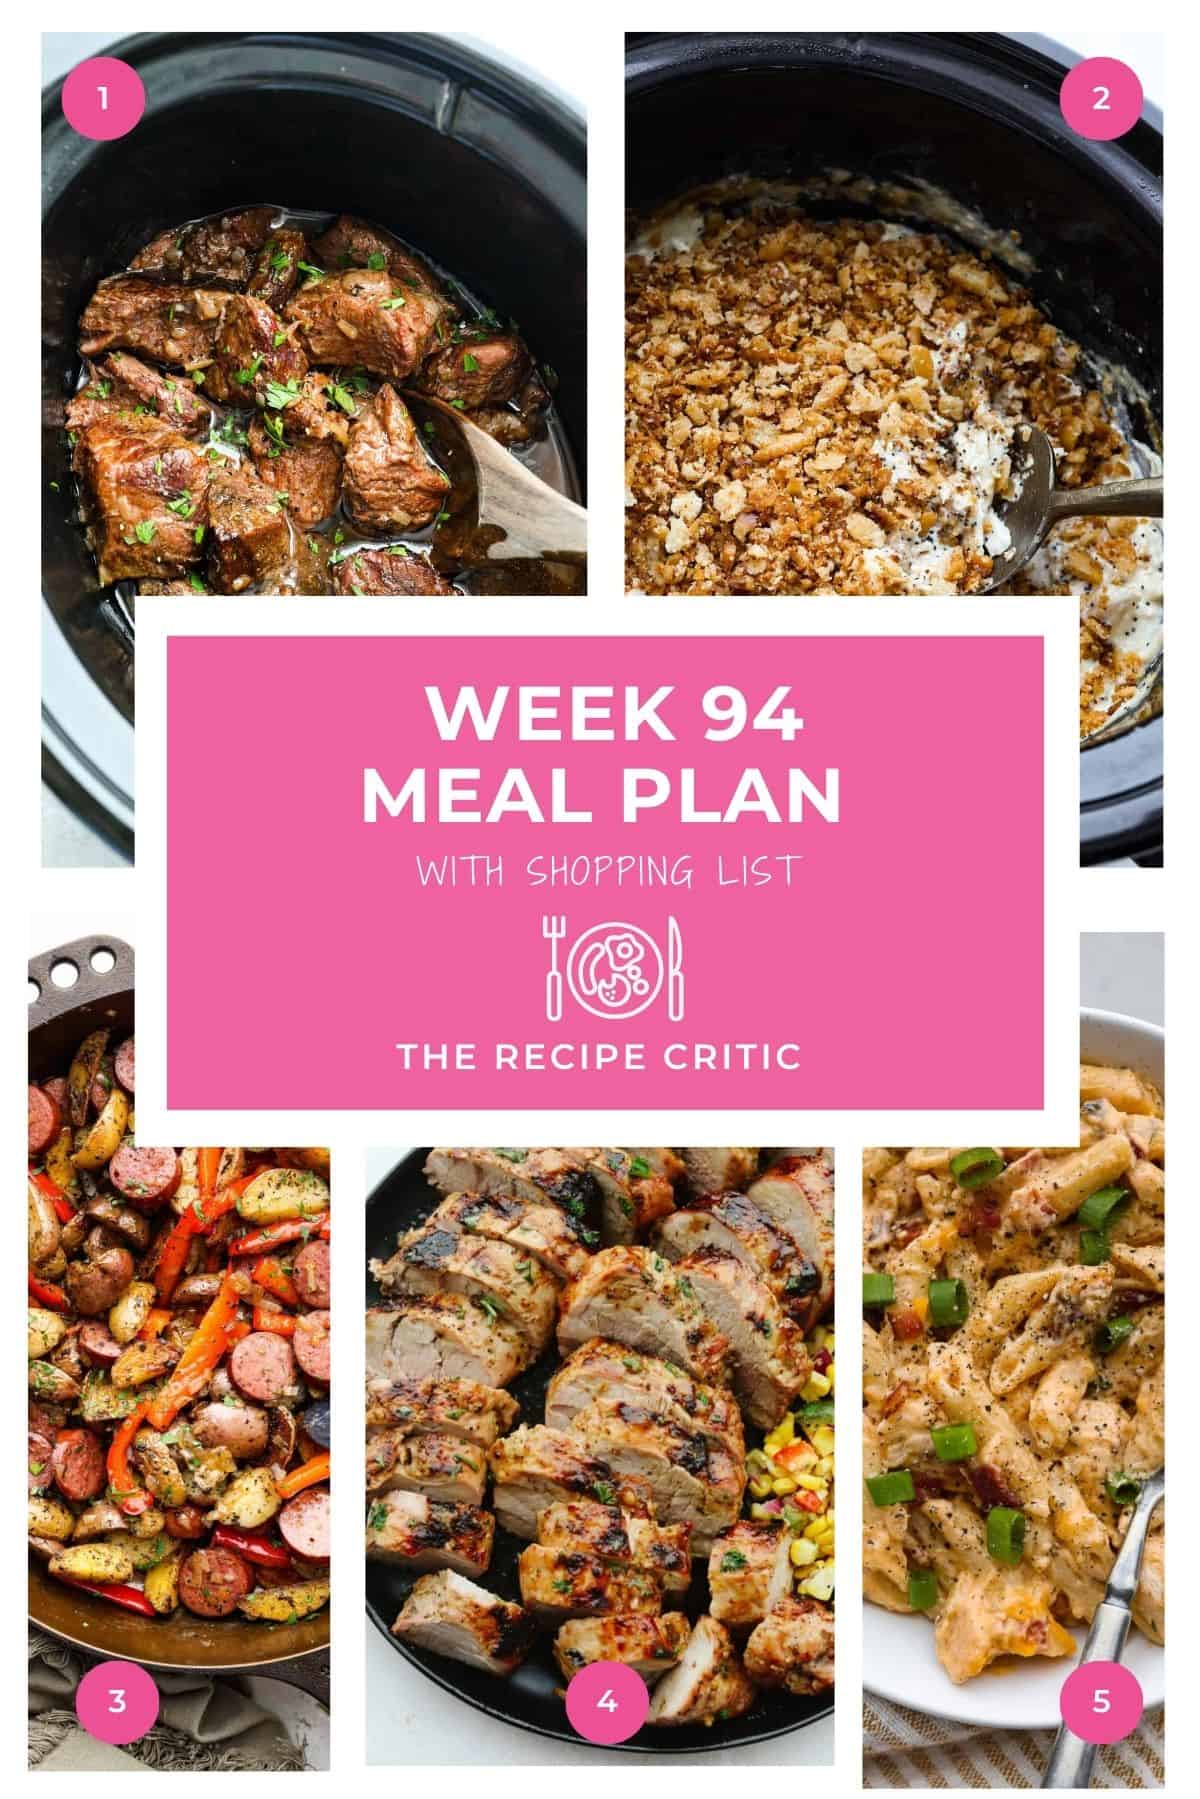
    This week’s meal plan is full of easy, comforting dinners that keep things simple, filling, and family-friendly. A little planning now means less chaos later, fewer last-minute takeout runs, and one less thing to think about at 5 p.m.

    What’s on This Week’s Meal Plan

    This week is all about cozy, easy dinners that actually make sense for real life. We’ve got slow cooker favorites, simple skillet meals, grilled goodness, and creamy comfort food that will make the whole family happy. Pick your nights, grab your groceries, and let dinner be one less thing bossing you around this week.

    Monday: 3 Ingredient Butter Beef
    Tuesday: Crockpot Poppy Seed Chicken
    Wednesday: Sausage and Potato Skillet
    Thursday: Grilled Honey Dijon Garlic Pork Tenderloin
    Friday: Crack Chicken Pasta

    3 Ingredient Butter Beef

    5 from 1 vote
    My 3 ingredient butter beef is slow cooked until fall apart tender with rich butter and savory onion soup mix.

    View Recipe

    Crockpot Poppy Seed Chicken Casserole

    5 from 1 vote
    Million Dollar Chicken is juicy baked chicken topped with a creamy, cheesy layer, crispy bacon, and crunchy almonds.

    View Recipe

    Sausage and Potato Skillet

    5 from 2 votes
    This sausage and potato skillet recipe is meant to be a simple one skillet meal! It has tender baby potatoes, smoked sausage, peppers, and delicious seasonings that take it over the top. It’s hearty, satisfying and loaded with flavor!

    View Recipe

    Grilled Honey Dijon Garlic Pork Tenderloin

    No ratings yet
    Grilled Honey Dijon Garlic Pork Tenderloin is juicy, tangy, flavorful, and cooks up quickly and easily. With a dish this healthy and delicious, you will love having it in your weekly dinner lineup!

    View Recipe

    Crack Chicken Pasta

    5 from 1 vote
    Cheesy, creamy, and loaded with ranch flavor and chunks of juicy chicken, ‘Crack Chicken’ pasta is a dinner that will have everyone raving! And as if you needed more reason to make it, it’s ready in 30 minutes from start to finish!

    View Recipe

    How Many Does It Feed?

    This week’s meal plan includes five easy dinners that feed 4–6 people (depending on whether you’re feeding adults or kids), plus a complete shopping list to keep things simple.

    Why Should I Meal Prep?

    If you haven’t tried planning your meals ahead of time, it really can make the whole week feel less chaotic. Here’s why I swear by it:

    • Saves Time: No more 4:00 PM dinner panic. You already know what’s on the menu, what you need, and how long it takes.
    • Saves Money: A planned grocery list helps you shop smarter, use what you already have, and make the most of leftovers.
    • Less Takeout: When dinner is planned and the groceries are ready, it’s so much easier to skip the drive-thru and cook at home.

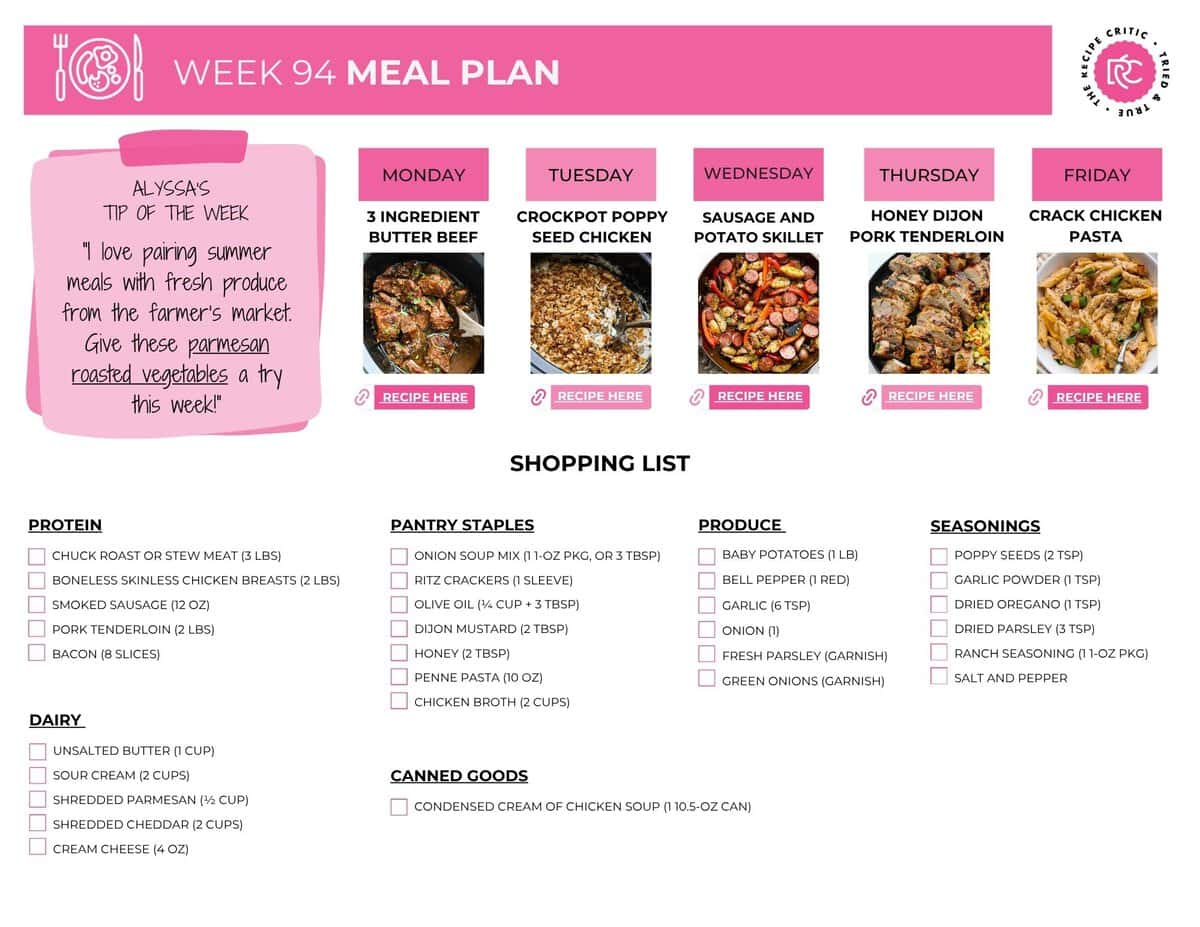
    This week’s meal plan includes a free printable shopping list, measured out and ready to go. It makes things so easy! If you don’t see something you like, check out my other weekly meal plans here.

    Image of the free printable shopping list for this week's meal plan.

    Easy Sides for This Week’s Meal Plan

    Storing Leftovers for Meal Planning

    I only meal plan Monday-Friday because we usually have plans over the weekend! And I always have leftovers we can use to finish off the week! If you do have leftovers, make sure to store them properly in an airtight container in your fridge.

    This post was originally published on this site.

  • Sub in a Tub Dip

    Sub in a Tub Dip

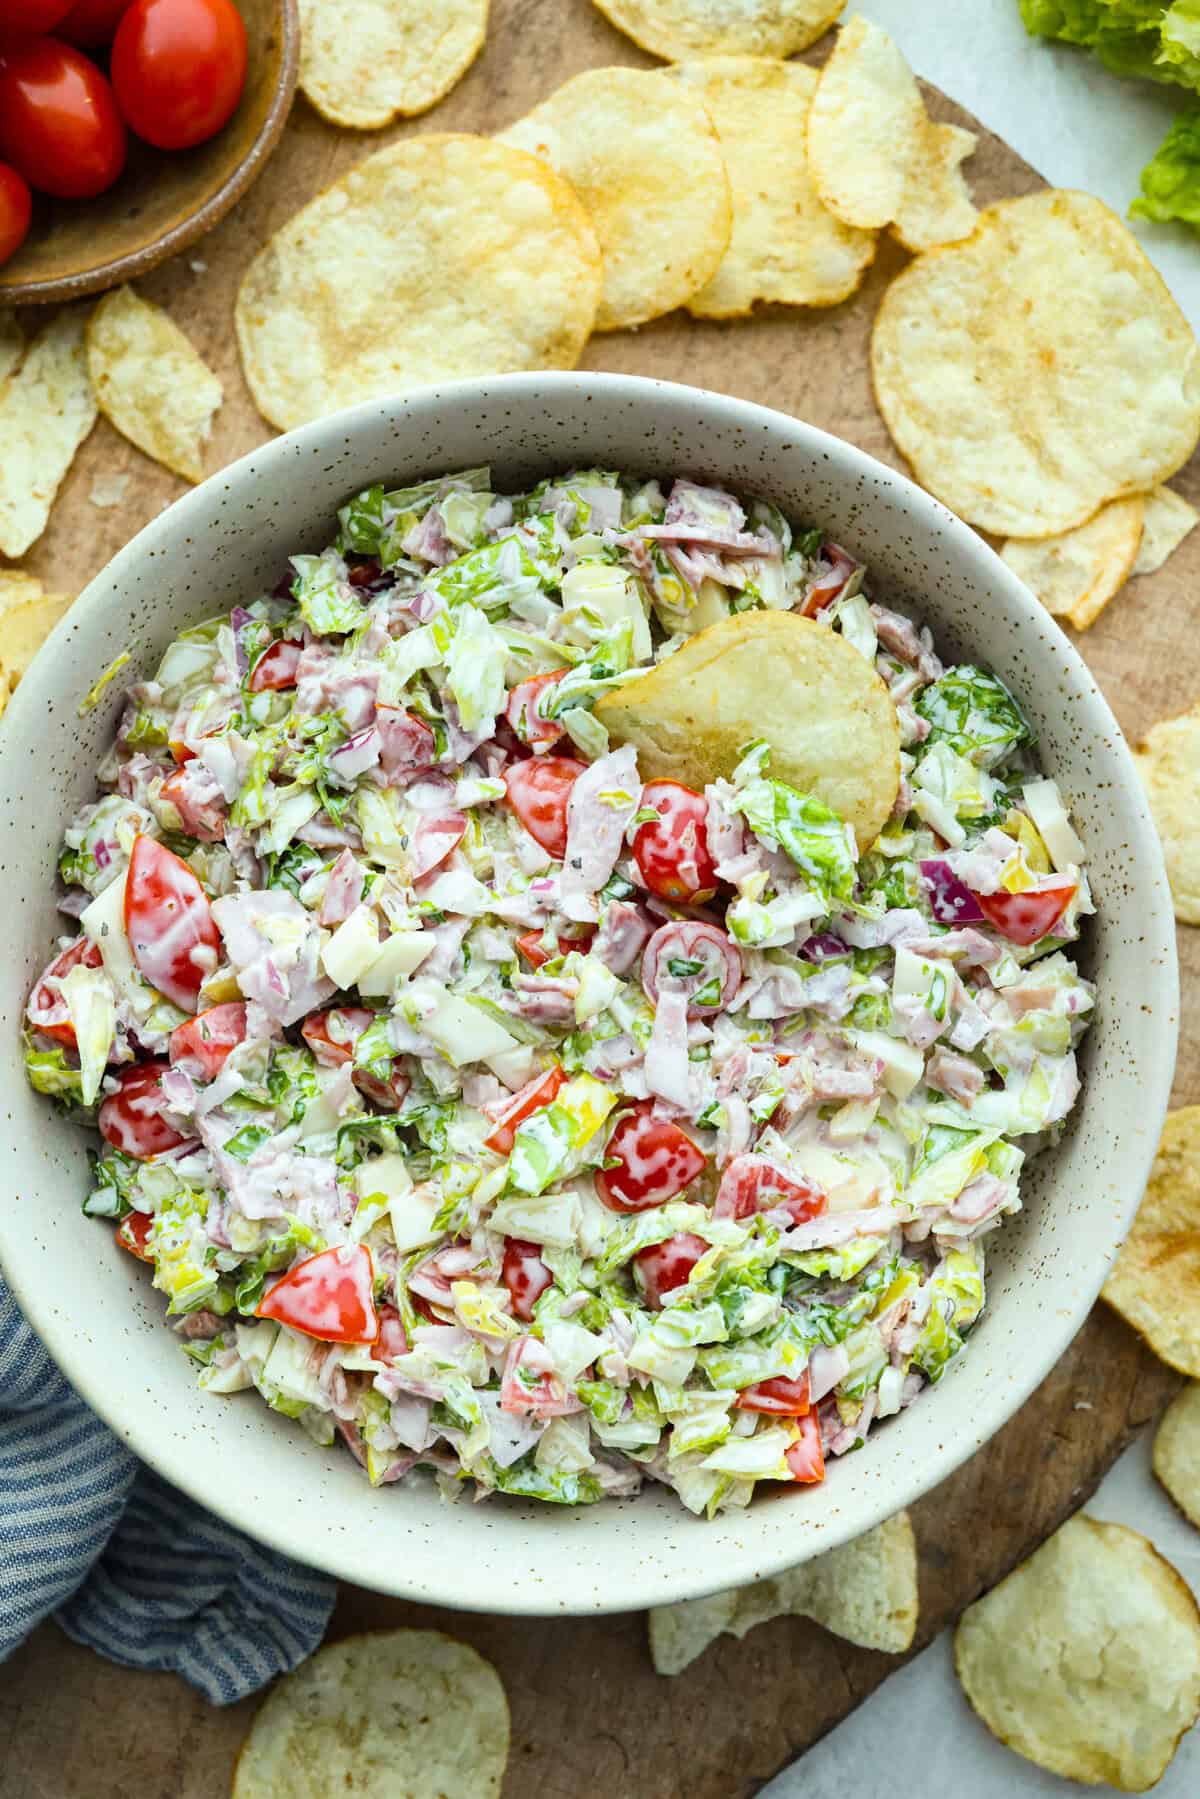
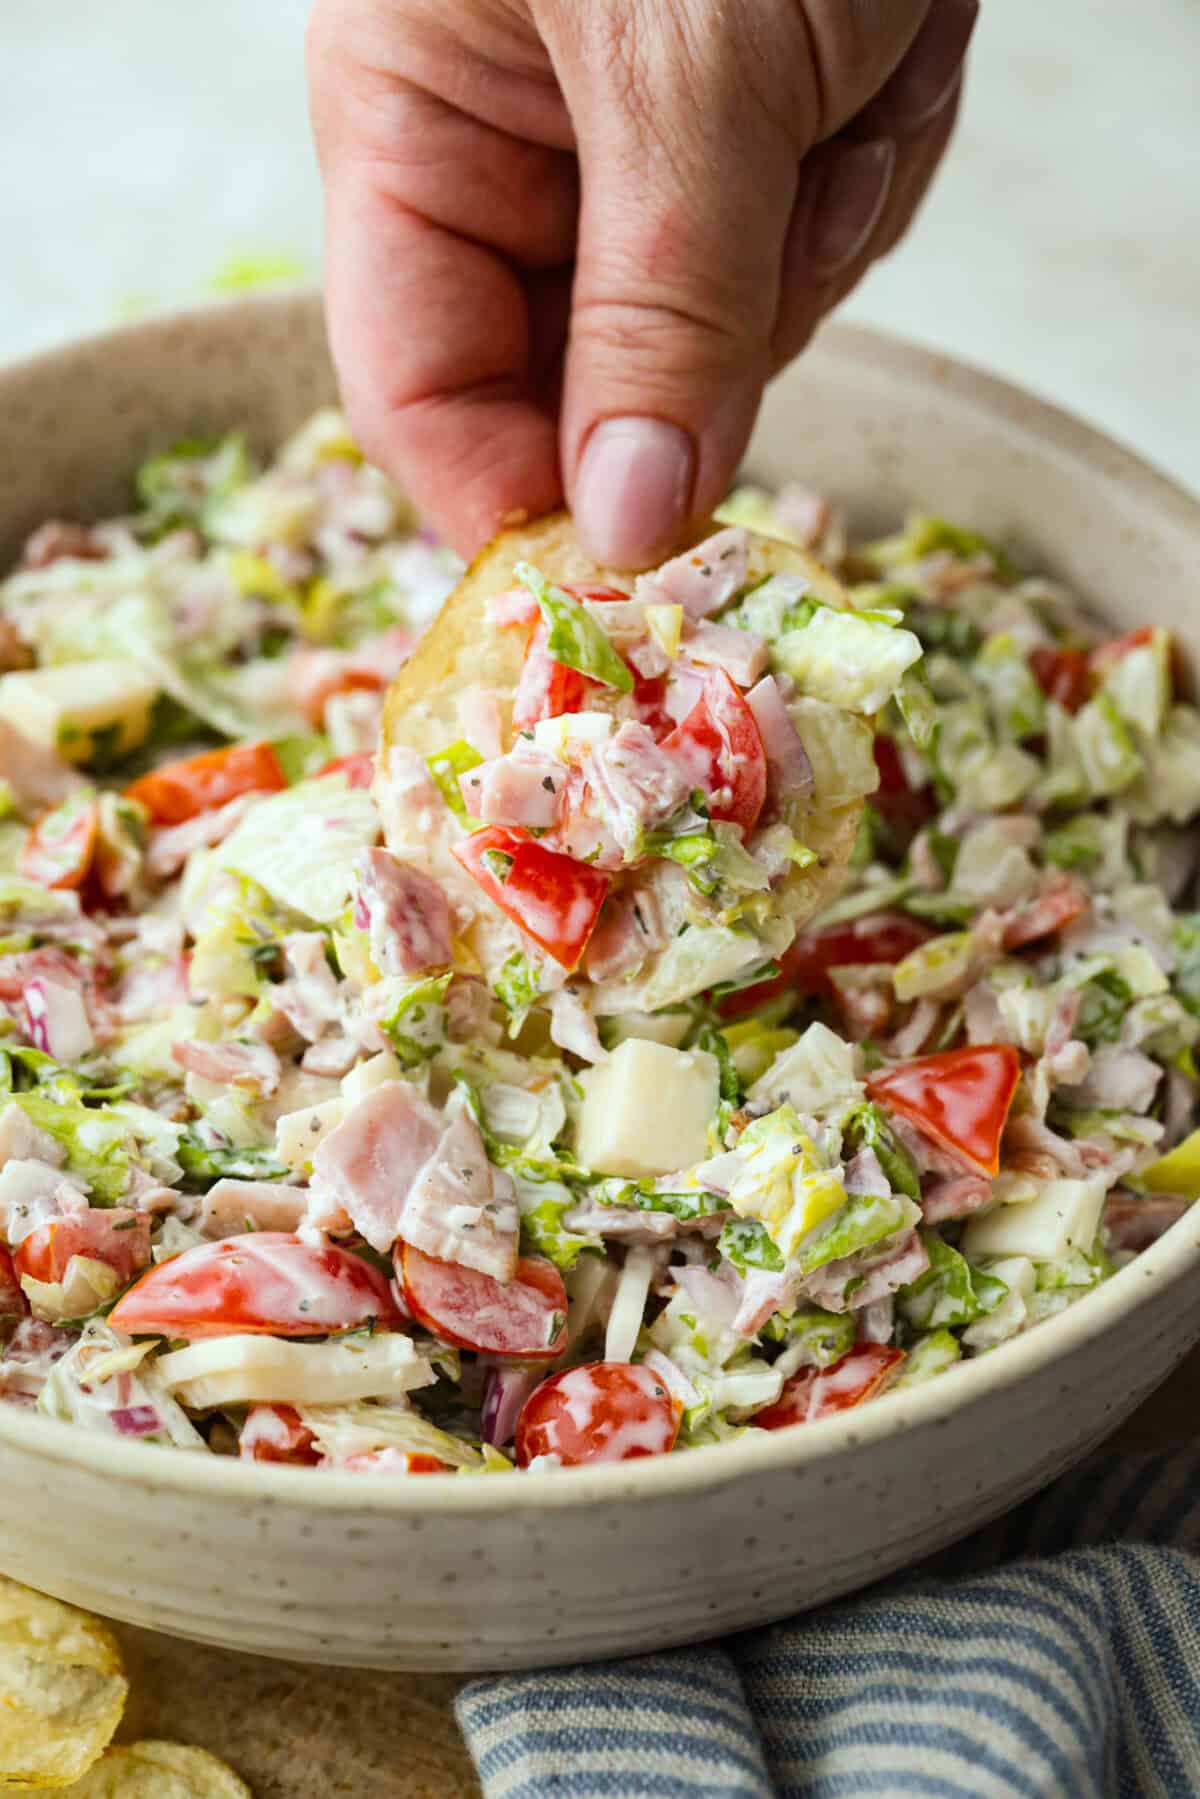
    If you’re a fan of deli sandwiches, you will love this sub in a tub dip! Made with deli meats, cheese, crisp veggies, and a creamy tangy dressing, it tastes just like your favorite sandwich shop sub in dip form!

    Why Everyone Goes Back for Another Scoop

    • Deli Shop Flavor at Home: This tastes like something you’d grab from a specialty sandwich counter, but you can throw it together in minutes.
    • Made for Scooping: Thick, creamy, and loaded with texture, this dip clings perfectly to chips, bread, or crunchy veggies.
    • Always a Hit: This dip will go fast at parties, game days, and potlucks. It has the best flavor and is a major crowd favorite.

    Sub in a Tub Ingredients

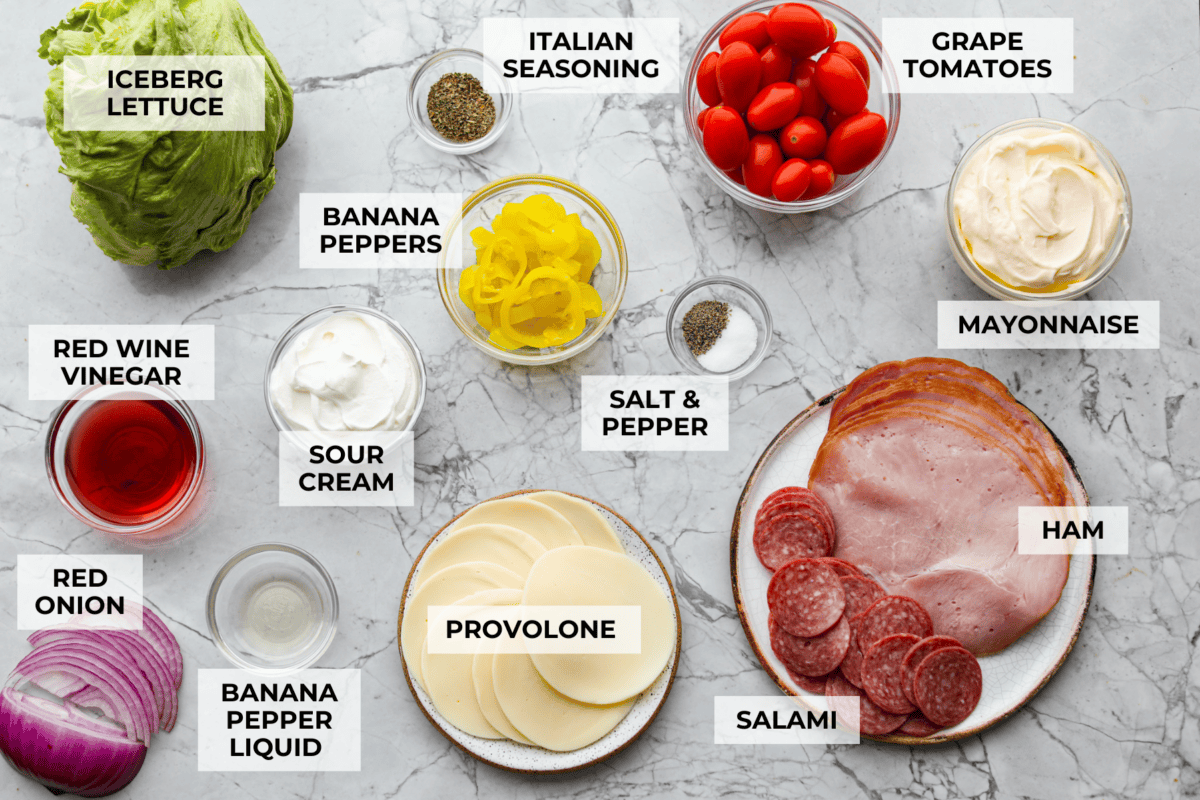
    Overhead shot of labeled ingredients.
    • Dressing: Add as much as you like. I use the full amount for more of a dip consistency.
    • Lettuce: Iceberg gives the best crunch, but romaine hearts work too.
    • Pepperoncini: Use sweet or hot, or leave them out.
    • Deli Meats and Cheese: Swap or omit based on what you love. Deli turkey, chicken, roast beef, pepperoni, or extra cheese are all great.
    • Extra Mix-Ins: Try bacon, cucumbers, bell peppers, olives, avocado, pepper jack, or Parmesan.

    How to Make Italian Hoagie Dip

    If you love Jersey Mike’s Sub in a Tub, this Italian hoagie dip gives you that same creamy, crunchy, deli-style flavor but made for scooping with chips. It’s loaded with chopped meats, cheese, lettuce, tomatoes, banana peppers, and dressing, so every bite tastes like the best part of a sub sandwich.

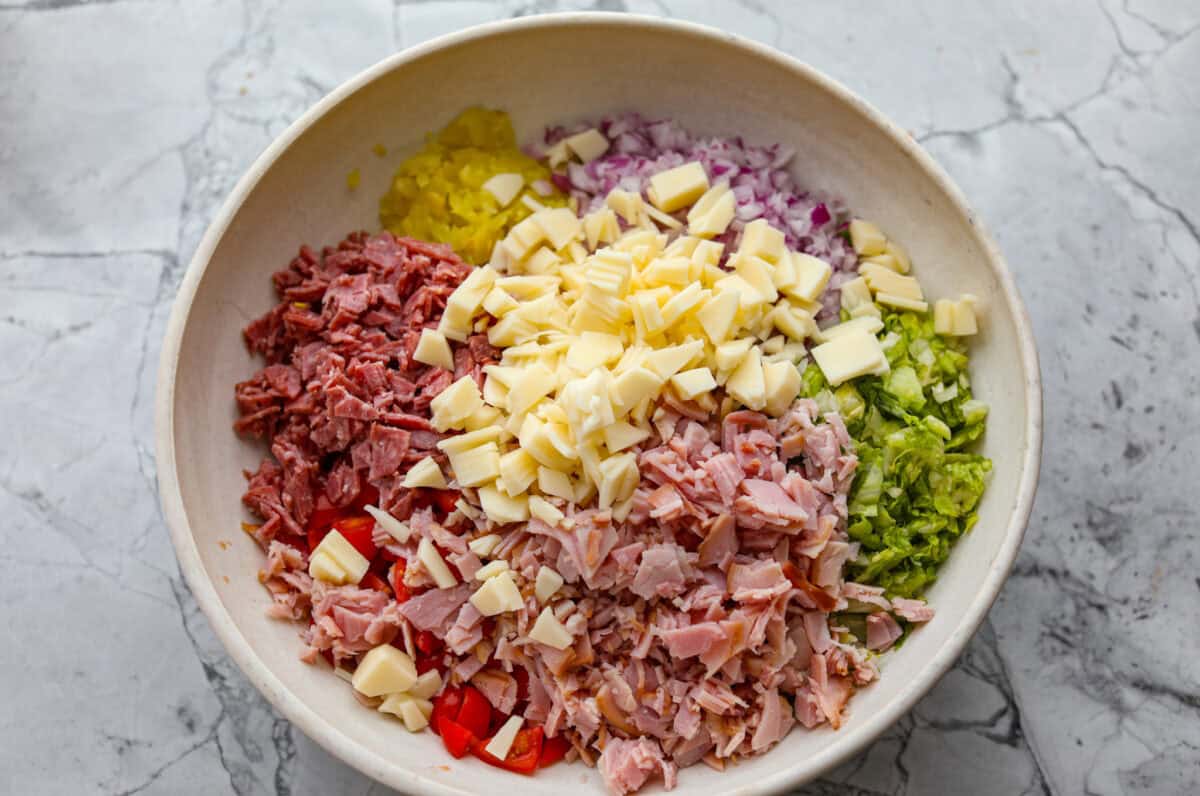
    1. Toss: Add the lettuce, ham, provolone cheese, salami, tomatoes, red onion, and banana peppers to a large bowl, then toss to combine.
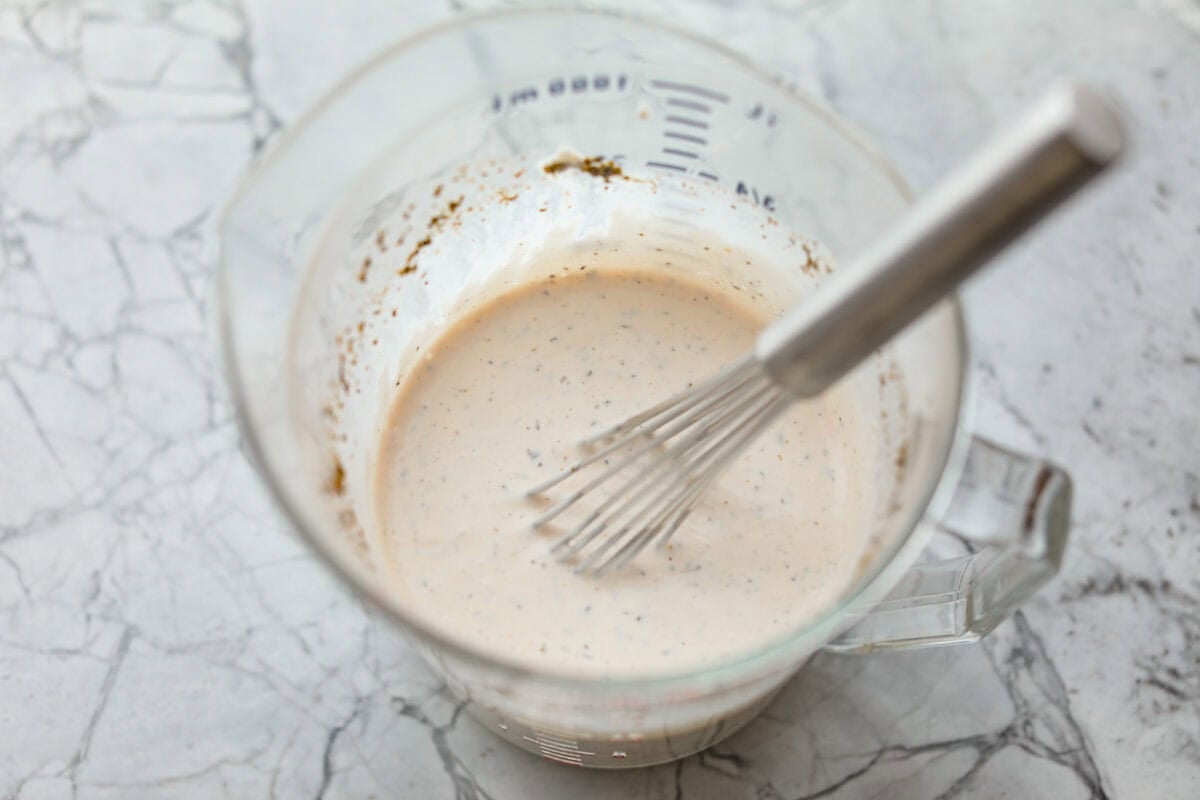
    2. Make the Dressing: In a separate bowl, whisk together the mayo, sour cream, vinegar, banana pepper liquid, Italian seasoning, salt, and pepper.
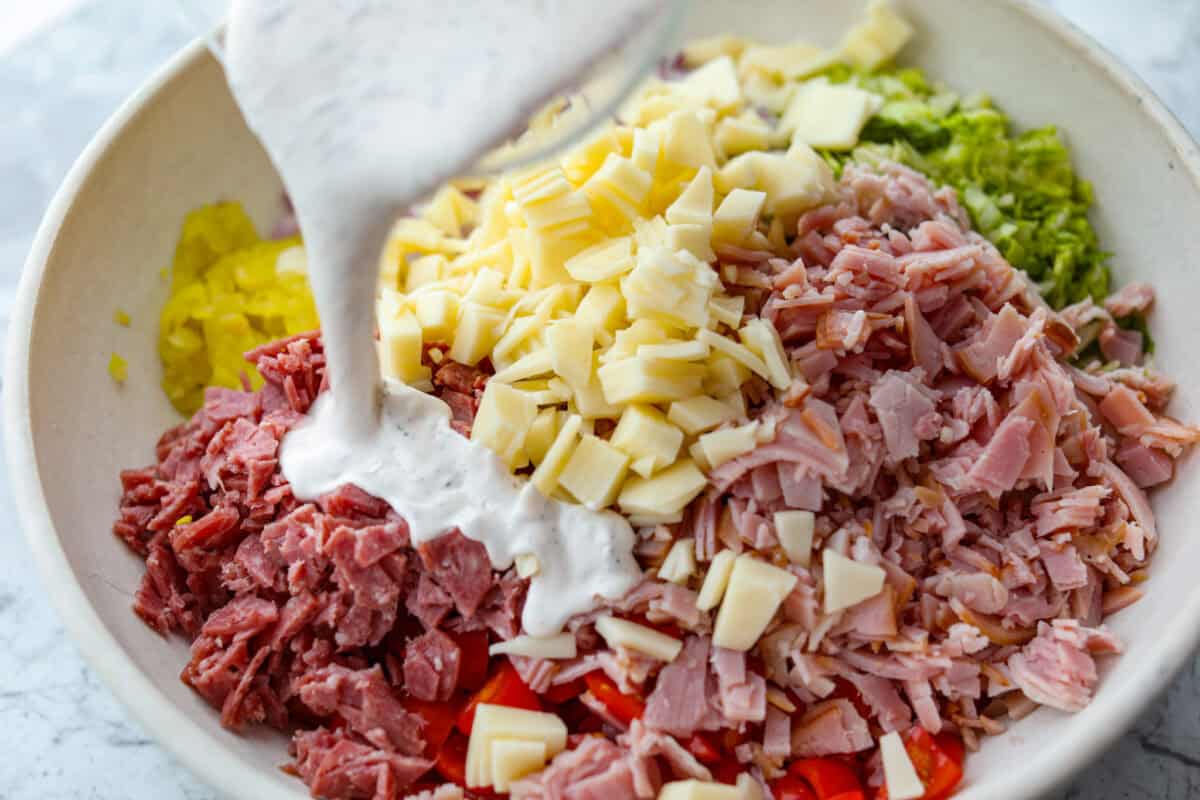
    3. Pour: Add the dressing to the meat and vegetable mixture.
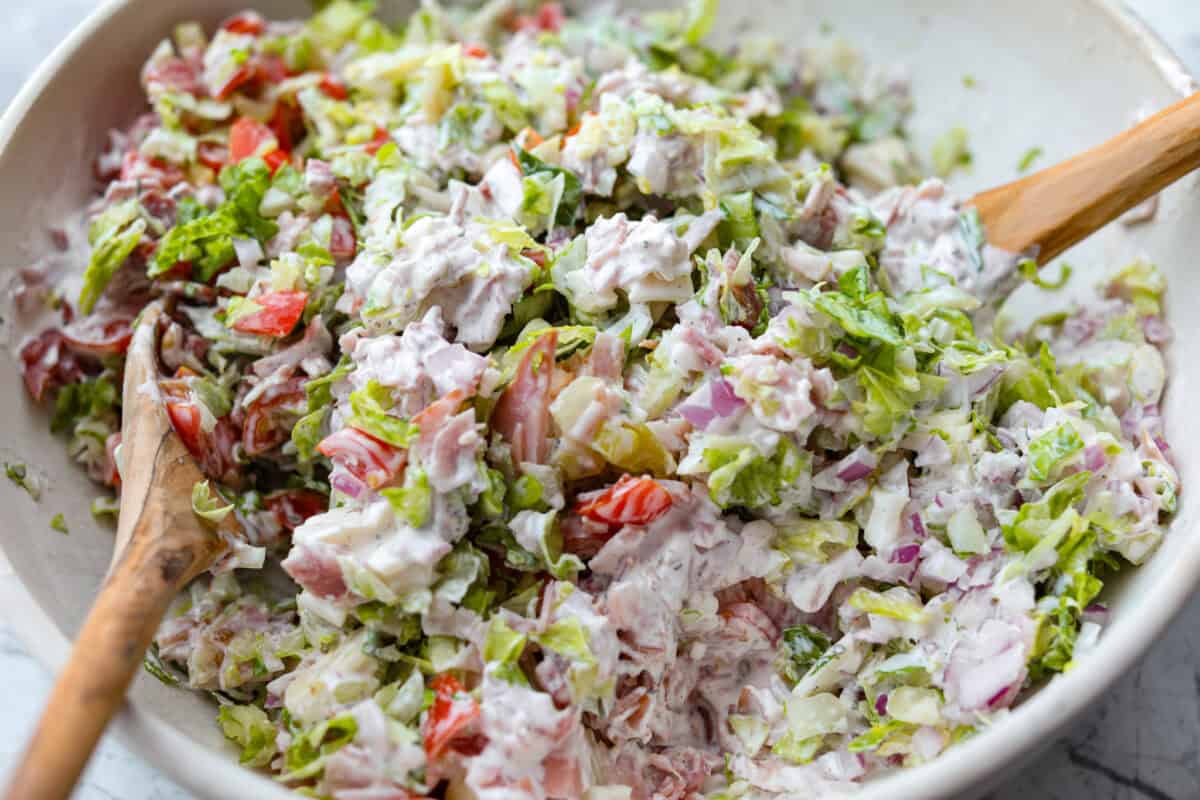
    4. Stir: Toss to combine. Serve sub in a tub dip immediately.

    Must Have Tools For This Recipe

    Print

    Sub in a Tub Dip

    This sub in a tub dip is packed with deli meats, cheese, crisp veggies, and a creamy, tangy dressing for all the flavors of your favorite sandwich!
    Course Appetizer
    Cuisine American
    Keyword chopped sub dip, chopped sub salad, hoagie dip, hoagie dip recipe, Italian Hoagie Dip, jersey mikes copycat, jersey mikes copycat sub in a tub, jimmy john’s unwich dip, jimmy johns unwich copycat, Sub in a tub, Sub in a tub recipe
    Prep Time 20 minutes
    Total Time 20 minutes
    Servings 10 servings
    Calories 348kcal

    Ingredients

    • 4 cups chopped Iceberg lettuce or Romaine lettuce hearts
    • 8 slices chopped deli ham
    • 8 slices chopped provolone
    • 1 cup chopped salami
    • 1 pint halved cherry or grape tomatoes
    • ½ cup finely chopped red onion about half a medium onion
    • ½ cup finely chopped banana peppers

    Dressing

    • 1 cup mayonnaise
    • ½ cup sour cream
    • ¼ cup red wine vinegar
    • 1 tablespoon banana pepper liquid
    • 1 teaspoon Italian seasoning
    • ½ teaspoon salt
    • ¼ teaspoon ground black pepper

    Instructions

    • Add 4 cups chopped Iceberg lettuce, 8 slices chopped deli ham, 8 slices chopped provolone, 1 cup chopped salami, 1 pint halved cherry or grape tomatoes, ½ cup finely chopped red onion, and ½ cup finely chopped banana peppers to a large bowl.
    • In a separate bowl, whisk together 1 cup mayonnaise, ½ cup sour cream, ¼ cup red wine vinegar, 1 tablespoon banana pepper liquid, 1 teaspoon Italian seasoning, ½ teaspoon salt, and ¼ teaspoon ground black pepper.
    • Add the dressing to the meat and vegetable mixture, then toss to combine.

    Notes

    Storage & Make Ahead Instructions

    • Fridge: Store leftovers in an airtight container in the refrigerator for up to 3 days. The longer it sits, the more wilted the dip will become, so it is best consumed within 24 hours of being mixed with the dressing. 
    • Make Ahead: All the ingredients except the lettuce may be chopped and mixed up to 24 hours in advance. Just before serving, stir in the dressing and the lettuce.


    Nutrition

    Calories: 348kcal | Carbohydrates: 5g | Protein: 13g | Fat: 31g | Saturated Fat: 9g | Polyunsaturated Fat: 11g | Monounsaturated Fat: 9g | Trans Fat: 0.04g | Cholesterol: 49mg | Sodium: 901mg | Potassium: 332mg | Fiber: 1g | Sugar: 3g | Vitamin A: 784IU | Vitamin C: 13mg | Calcium: 148mg | Iron: 1mg
    Someone scooping a bite of the sub in a tub dip with a potato chip.

    More Dip Recipes to Try

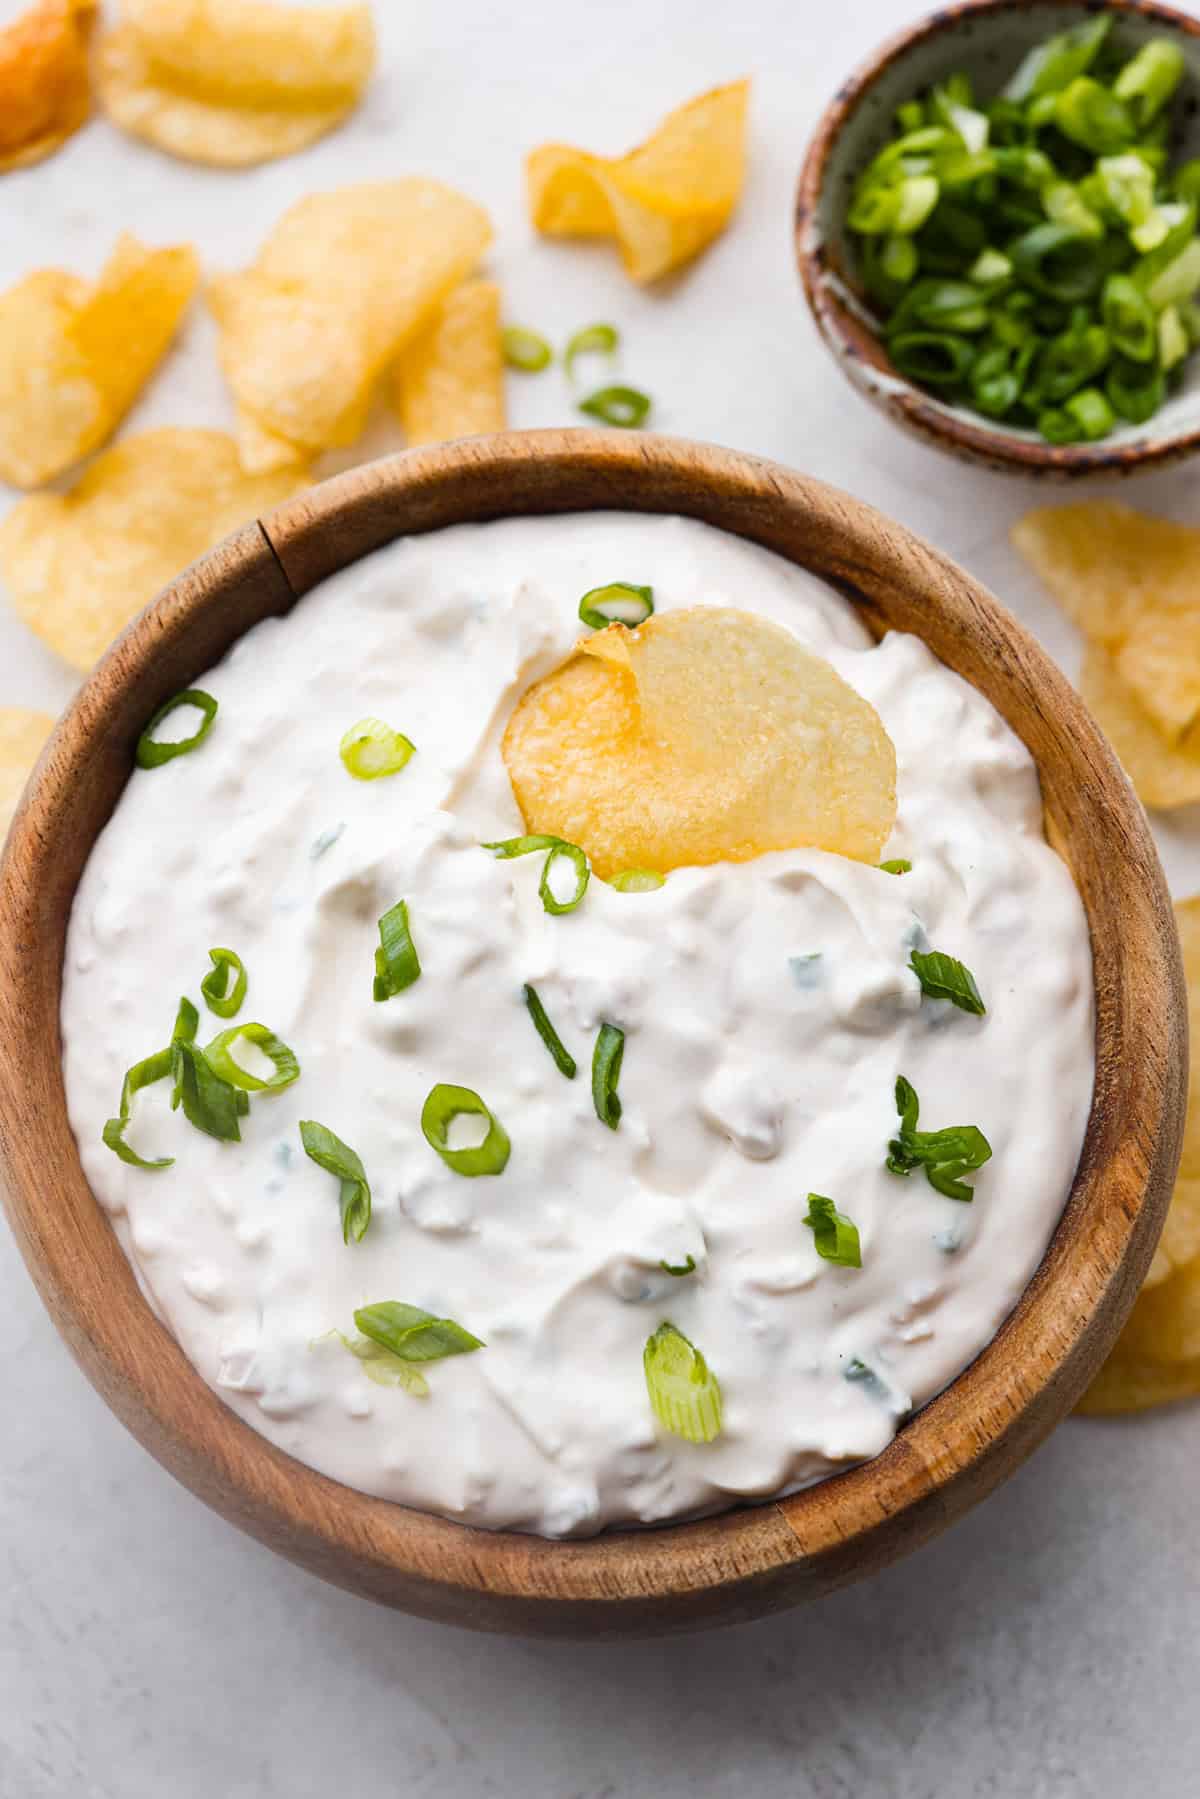
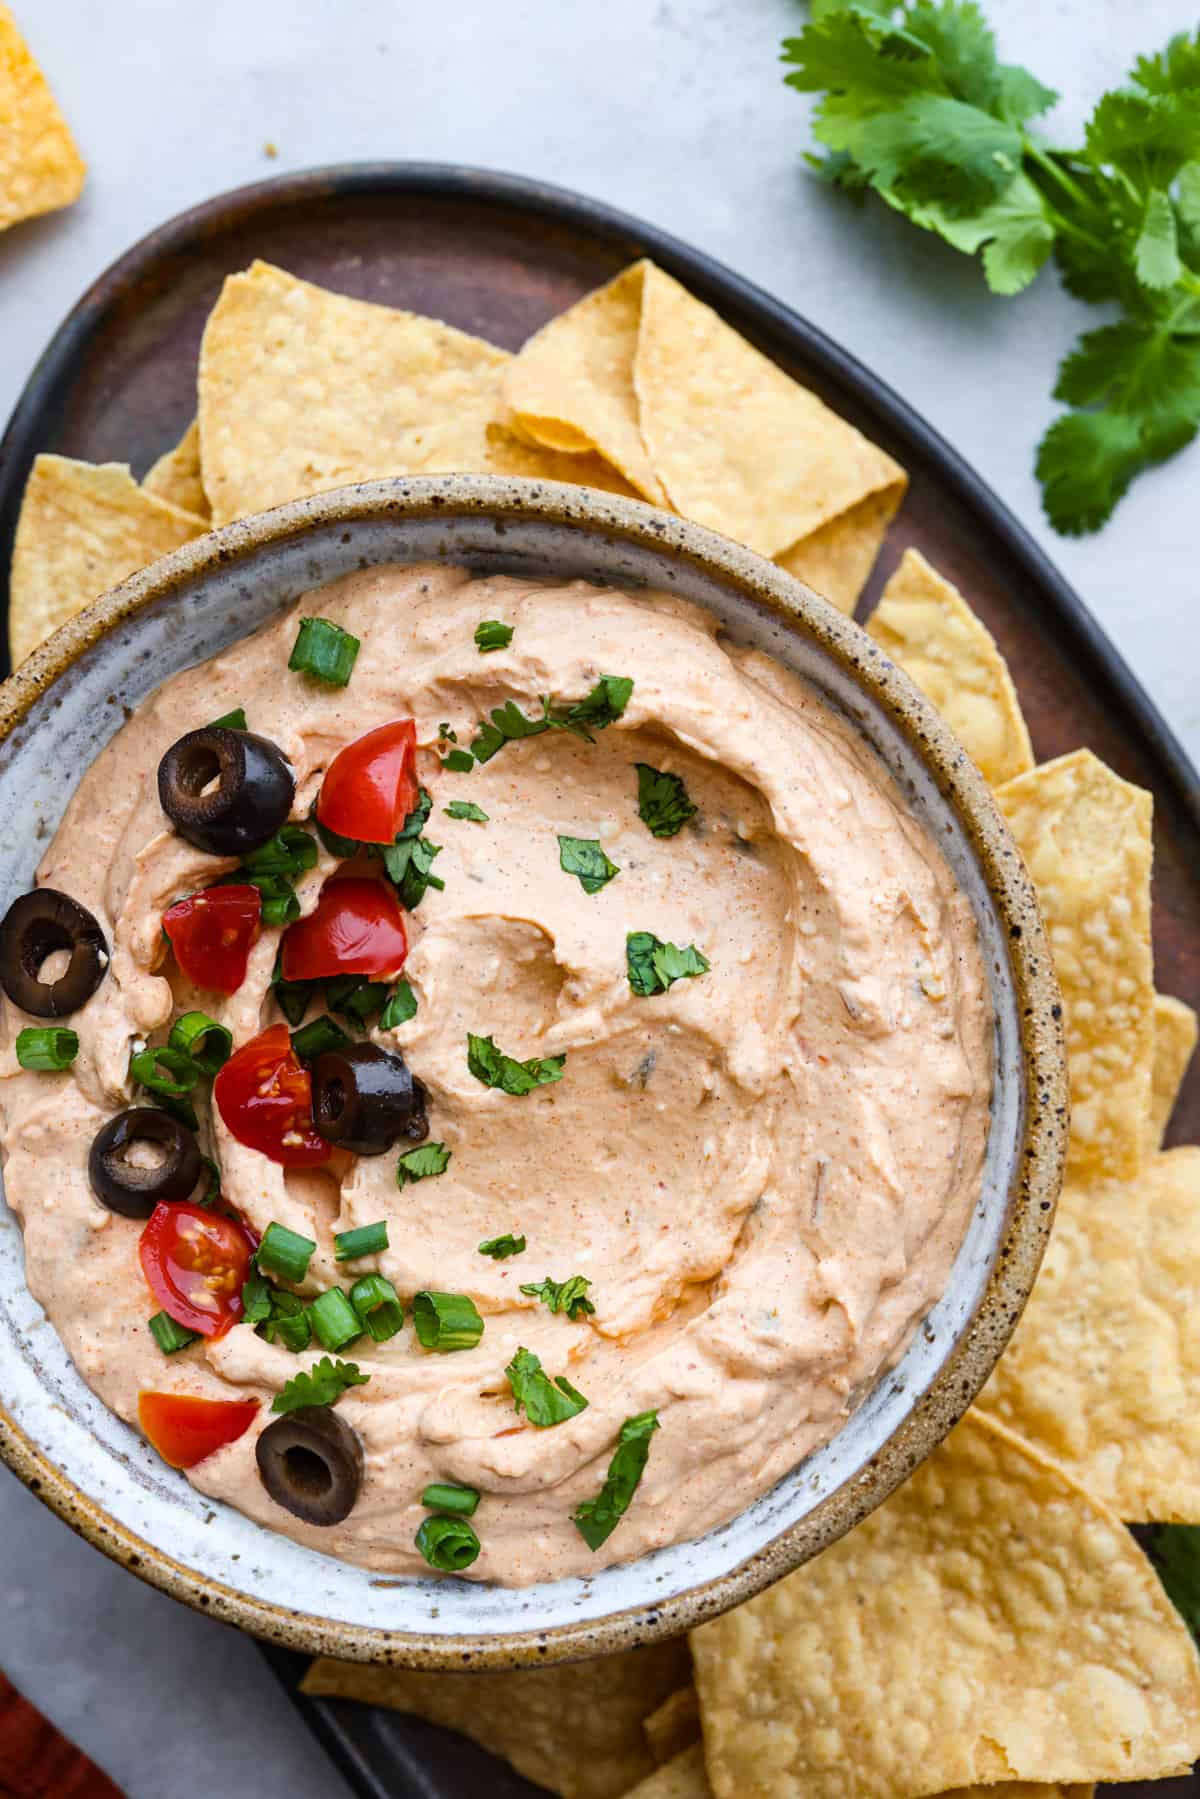
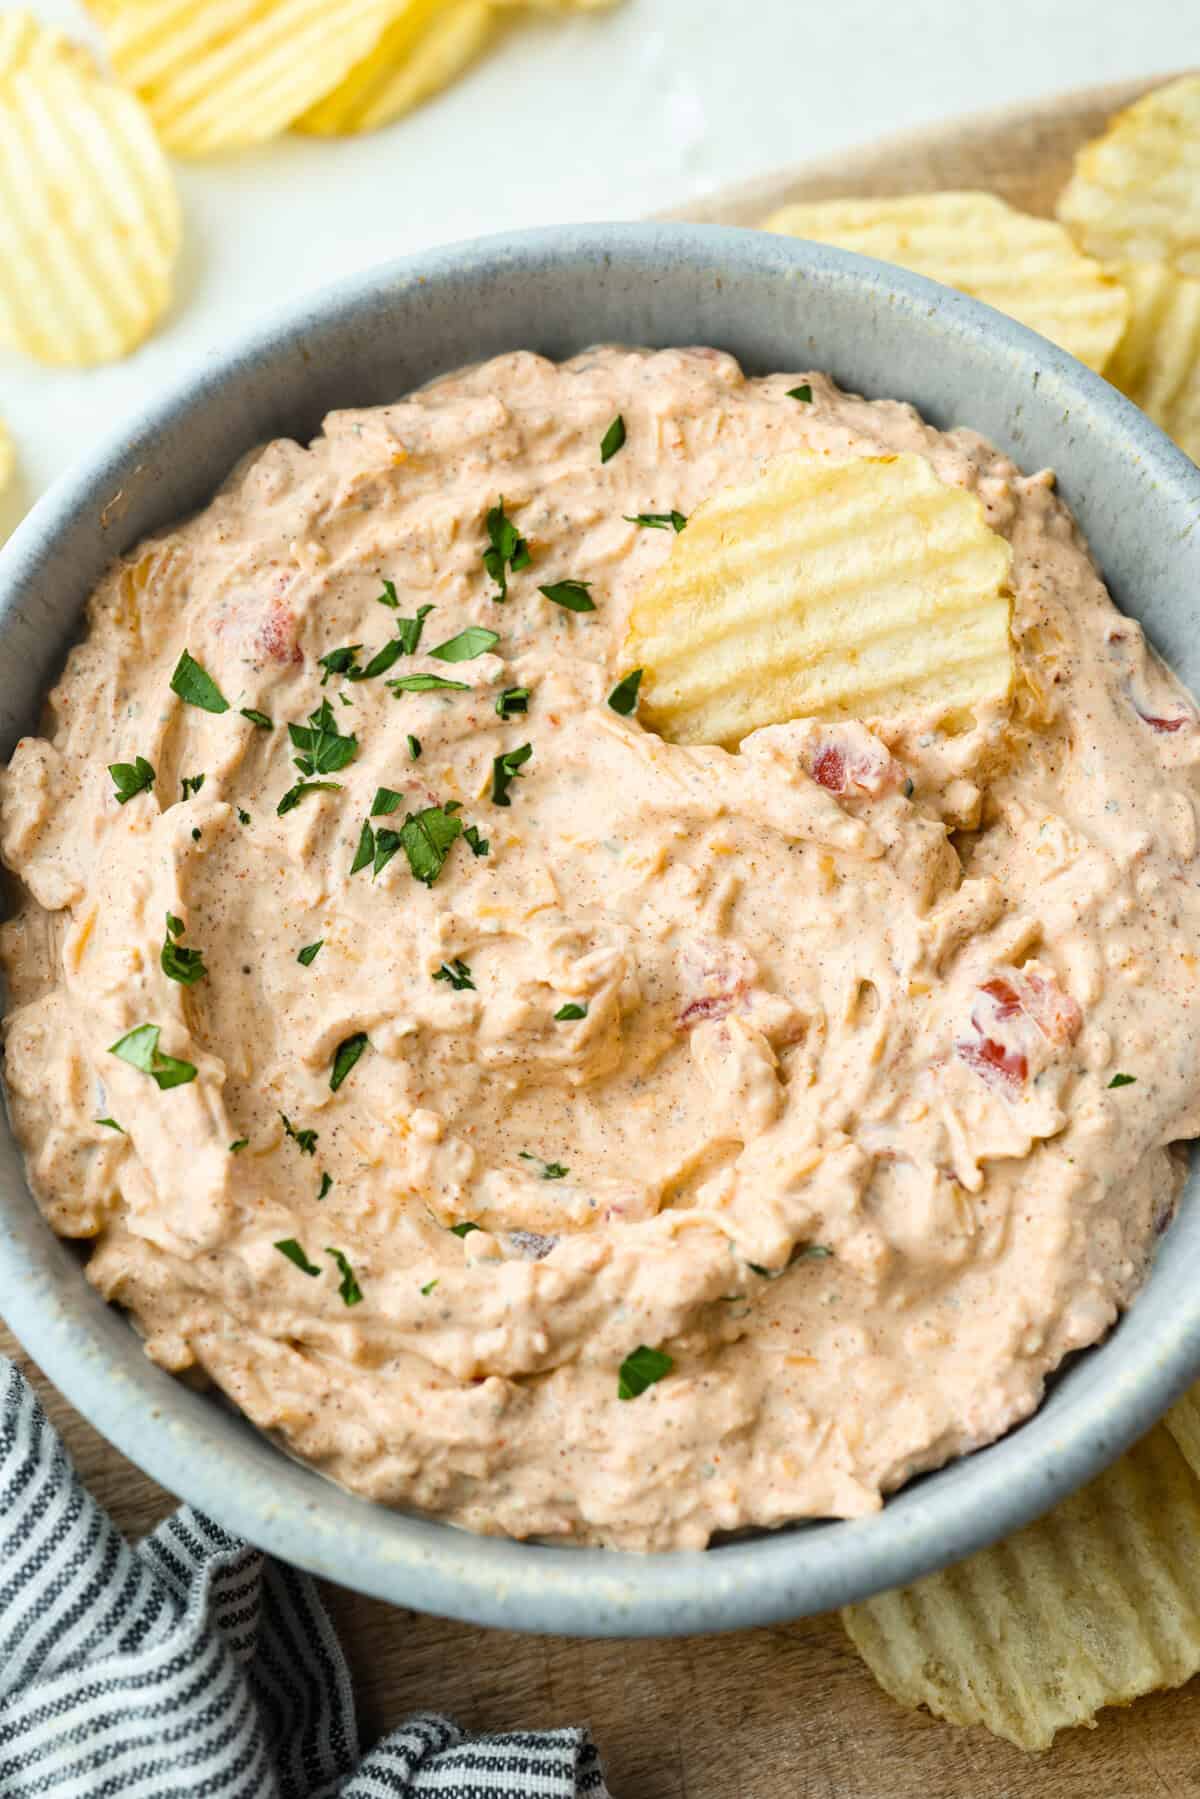
    If I could live on dip alone, I honestly might! This creamy crack dip is a family favorite, right alongside my French onion dip, Rotel dip, and my go-to 5-minute million dollar dip.

    Taco Dip

    5 minutes

    This post was originally published on this site.

  • Homemade Burger Seasoning

    Homemade Burger Seasoning

    Whether you’re cooking homemade burgers outside on a grill or inside on the stove, the first step to making a knock-it-out-of-the-park burger is to season it properly. This super simple Homemade Burger Seasoning takes seconds to make, uses budget-friendly spices you probably already have, and gives your patties a smoky, savory, slightly peppery flavor without needing a store-bought mix. I like to sprinkle it over the outside of the patties right before cooking so the seasoning hits the heat first, helps build a flavorful crust, and keeps the burger tender and juicy!

    “This is hands down the best burger seasoning I’ve ever had! Amazing and the hubby loved it. Said he felt like he was eating at a restaurant.”

    GINGER

    The Easiest Way To Season Burgers

    I always use this burger seasoning on our homemade hamburgers, but it’s just as useful for chicken burgers, veggie burgers, or any simple patty that needs a little more savory, smoky flavor! The sweet paprika, smoked paprika, garlic powder, onion powder, black pepper, cayenne, and salt all do their own jobs, but the two paprikas make the blend taste more layered by adding an earthy sweetness and a deeper, cookout-style smokiness.

    The cooking method brings out different sides of the seasoning, too. On the grill, the smoked paprika plays up that smoky BBQ flavor, cast iron helps the seasoning toast against the hot surface for a deeper savory crust, and a regular skillet still gives the seasoning enough heat to bloom and flavor the patty.

    A good burger still starts with the meat, though, and the seasoning should work with it. Fat adds richness and moisture, while salt enhances the savory flavor in the patty, which is why 80/20 ground beef is such a great choice for juicy, flavorful burgers. Leaner patties, like chicken burgers or extra-lean beef burgers, usually need a little more seasoning help because they don’t have as much fat to carry the flavor. I like to sprinkle this blend over the outside of the patties right before cooking instead of mixing it into the raw meat, since too much salt worked directly into the meat can draw out moisture and create a firm, bouncy texture instead of a tender burger.

    recipe developer stirring homemade burger seasoning in a bowl

    Recipe Success Tips

    1. A little goes a long way! A thin, even coating of seasoning is what you want. If the seasoning is heavily caked on the surface of your burgers, it may taste too salty or leave the outside a little gritty after cooking. I use about ¾ teaspoon per ¼-lb burger, divided between both sides.
    2. Make a bigger batch. This recipe makes about 1 tablespoon of burger seasoning, which is enough for about 4 burgers (¼ lb each). If you want to make more at once, you can adjust the number of servings in the recipe card below, and the ingredient amounts will automatically update!

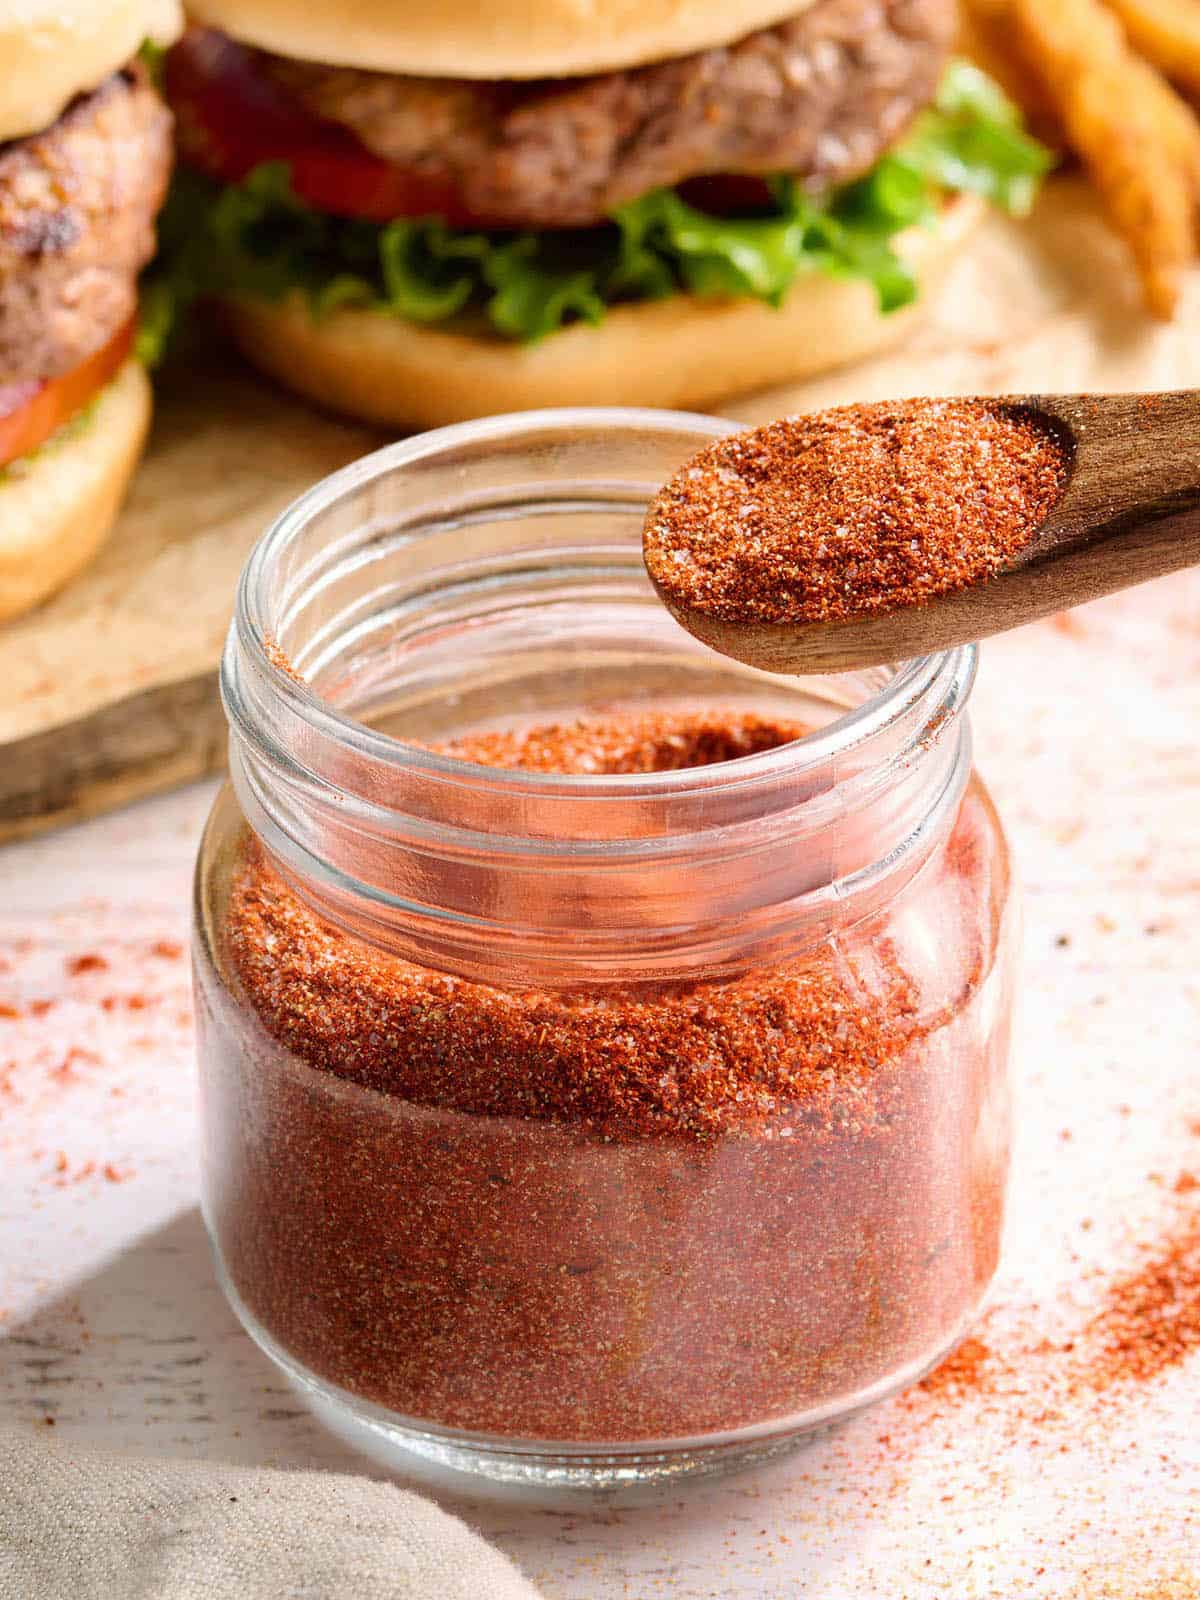
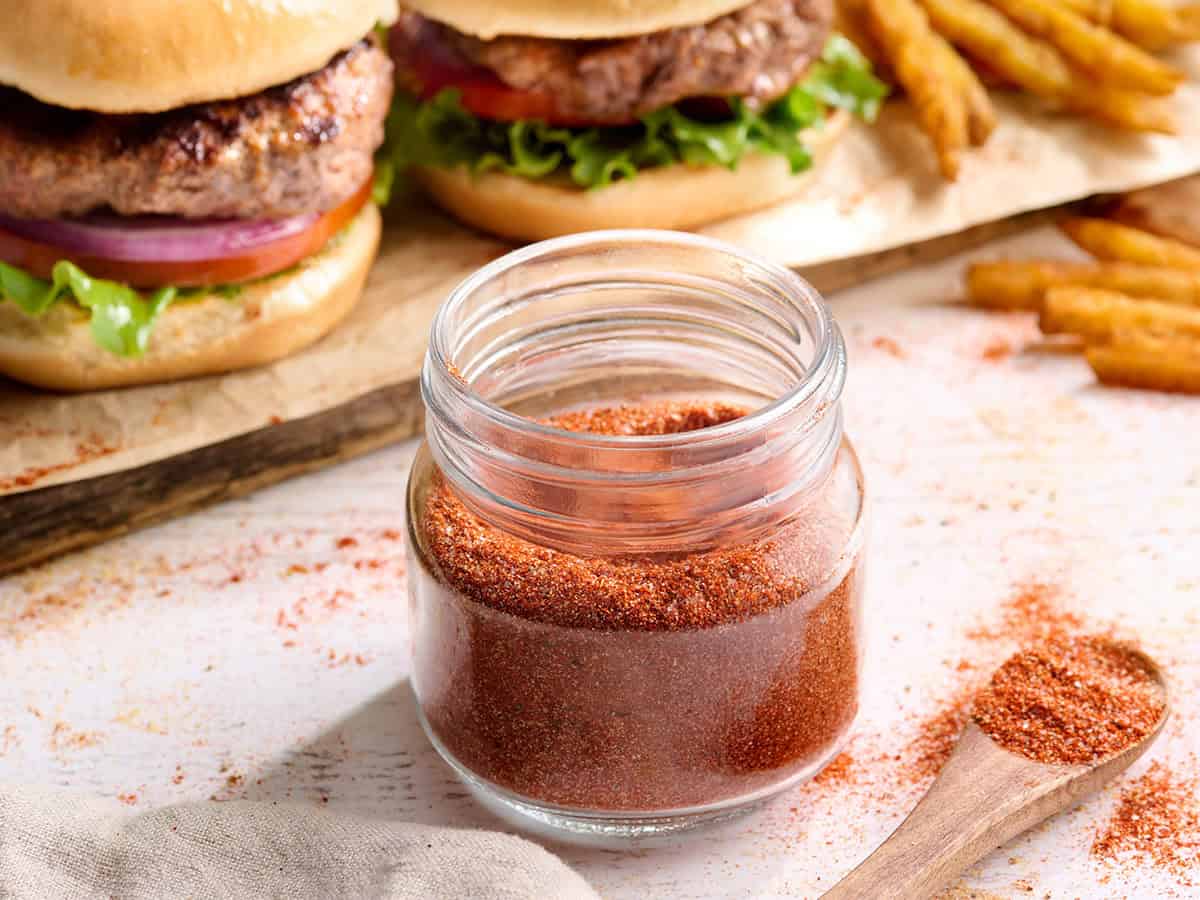
    Side view of homemade burger seasoning in a jar.

    Print
    Add to Collection Go to Collections

    Burger Seasoning

    Make the best hamburgers ever with this easy homemade burger seasoning recipe that will add flavor and depth to your burgers.
    Course Seasoning
    Cuisine American
    Total Cost $0.20 recipe / $0.05 serving
    Prep Time 3 minutes
    Total Time 3 minutes
    Servings 4 (about ¾ tsp per burger)
    Calories 5kcal

    Equipment

    • Small Bowl

    Ingredients

    • 1 tsp sweet paprika 14g, $0.04*
    • ½ tsp smoked paprika 10g, $0.02*
    • ½ tsp onion powder 12g, $0.04
    • ½ tsp garlic powder 12g, $0.02
    • ¼ tsp black pepper freshly cracked, (10g) $0.04
    • tsp cayenne pepper 8g, $0.02
    • ½ tsp salt 4g, $0.02

    Instructions

    • Combine all of the ingredients in a bowl. Use immediately or store in a an airtight container, away from light and heat, until ready to use.
    • To use the burger seasoning, sprinkle about ¼ to ½ tsp of seasoning over each side of a burger patty before cooking.

    See how we calculate recipe costs here.

    Video

    Notes

    *Sweet paprika adds earthy, mild sweetness, while smoked paprika adds a smoky, freshly grilled flavor (even if you cook your burgers inside!). Using both gives this blend more dimension than using one paprika alone.

    Keep it savory for better browning. I skipped adding any sugar because it can burn quickly on a hot grill or in a very hot pan, leaving the burger bitter or browned on the outside before it’s cooked through. If you want a sweeter BBQ-style burger, add a small pinch of brown sugar only to the amount of seasoning you’re using that day.

    If you want to add some herbs, choose dried herbs over fresh. Dried herbs like oregano, thyme, or parsley distribute more evenly in a seasoning blend and hold up better to high heat. Fresh herbs add moisture, may scorch on the grill, and don’t store well if you’re making a bigger batch, so I prefer using them sparingly as a fresh garnish after cooking.

    A hot surface makes the seasoning work harder. Grilling burger patties over open flames gives them a naturally smoky, charred flavor. Because of that, the simple seasonings in this blend work well without overpowering the meat. Cast irons create deep browning and a flavorful crust through direct contact with the pan, which helps savory spices taste richer and more developed. Standard skillets work similarly, though they can create a softer crust since they don’t hold heat as well as cast iron. No matter how you cook them, seasoning the patties evenly and starting with a properly preheated grill/cast iron/skillet will help create the best flavor and crust.

    How Much Burger Seasoning to Use:

    I suggest using ¾ tsp of this seasoning per ¼ lb. burger patty, but you can add more or less to taste. The recipe makes about 1 Tbsp of burger seasoning, so that should be enough for about four burger patties.

    How to Use:

    Sprinkle about ¾ tsp of burger seasoning over the outside of each patty, dividing it between both sides, then gently press it onto the surface right before cooking. I prefer seasoning the outside instead of mixing it into the raw meat for the juiciest texture, but you can also stir this blend into recipes (like sloppy joes or stews) when you want a seasoning shortcut.
    Season the patties right before cooking for the juiciest texture. If you want a slightly better crust, season the outside of the patties and let them rest uncovered in the refrigerator for up to 1 hour before cooking to create a slight dry-brining effect.

    Nutrition

    Serving: 1serving | Calories: 5kcal | Carbohydrates: 1g | Protein: 0.2g | Fat: 0.1g | Sodium: 292mg | Fiber: 0.4g

    How to Make burger seasoning Step-by-Step Photos

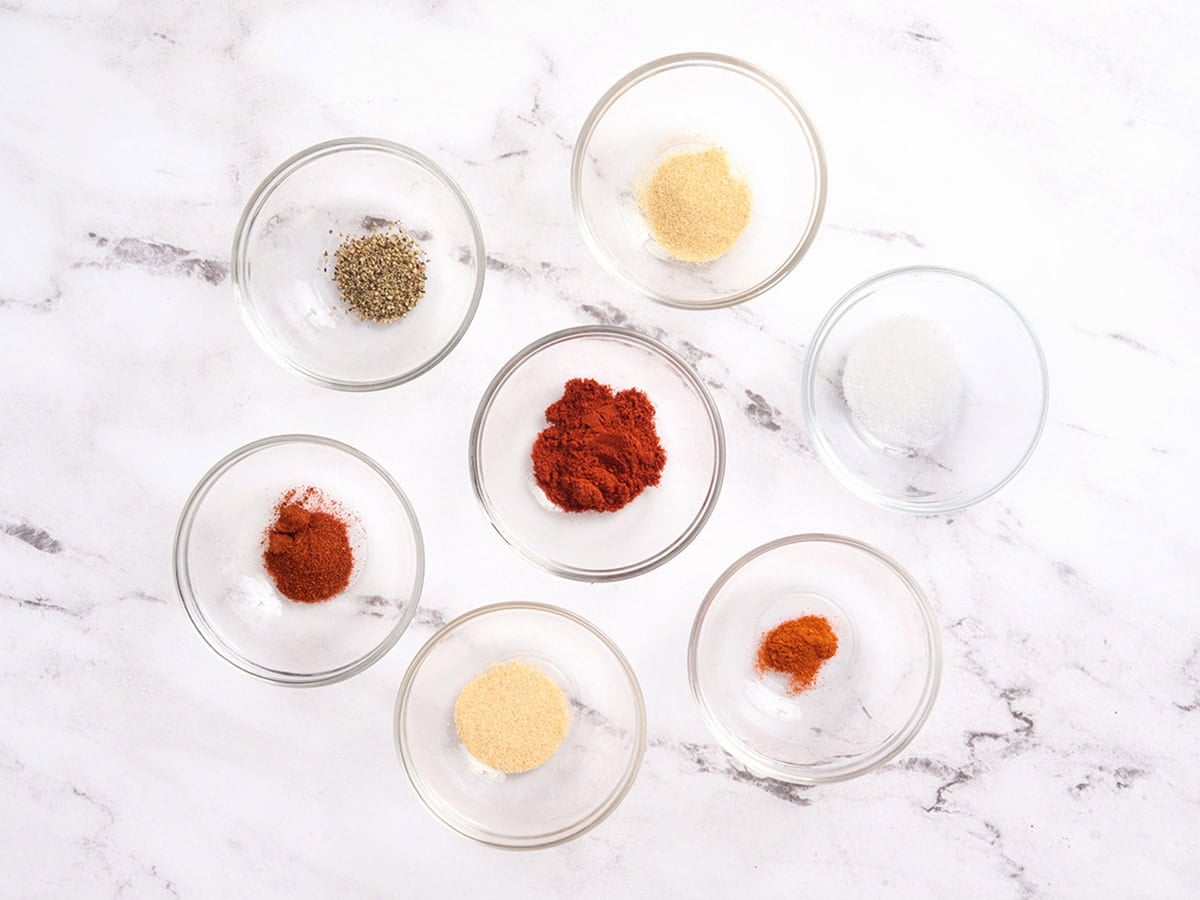
    The ingredient to make burger seasoning.

    Gather all of your ingredients.

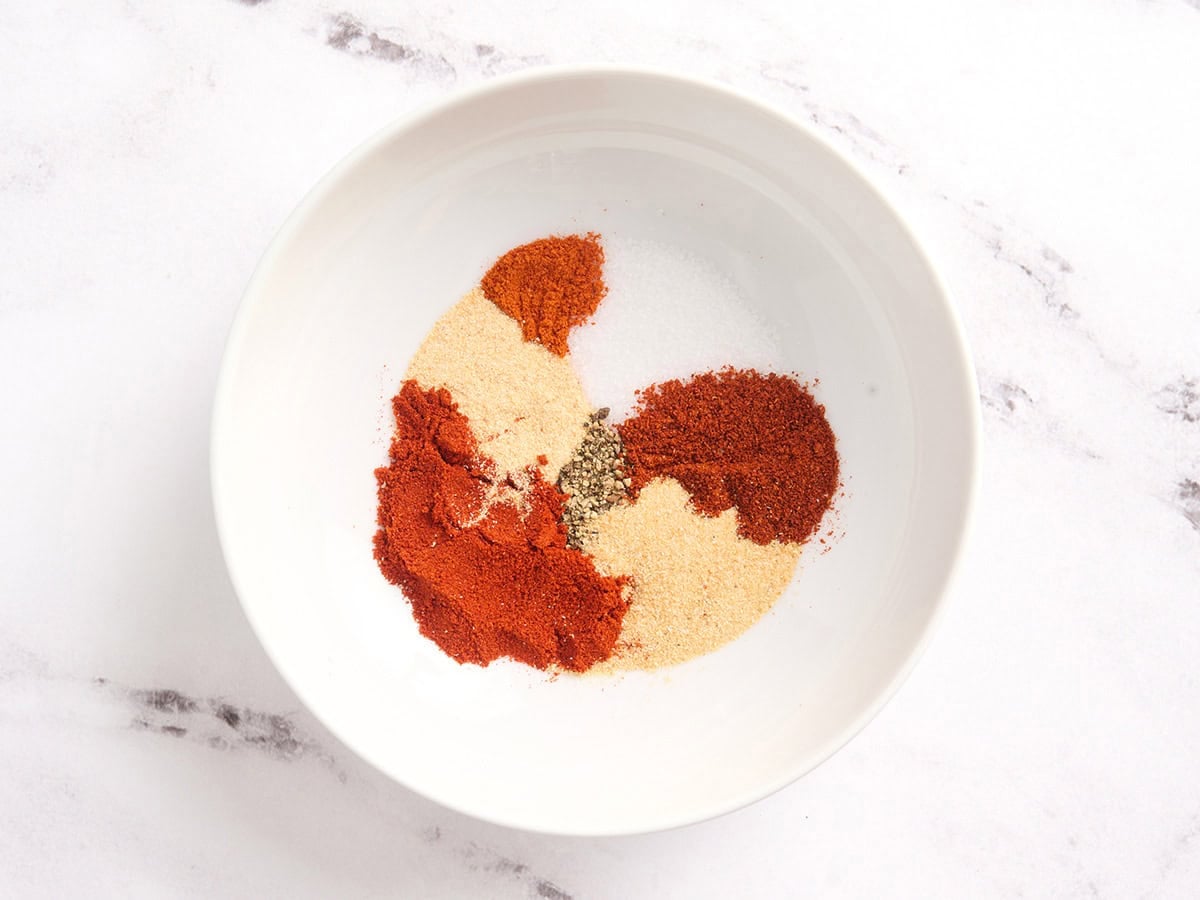
    Seasonings for homemade burger seasoning in a bowl.

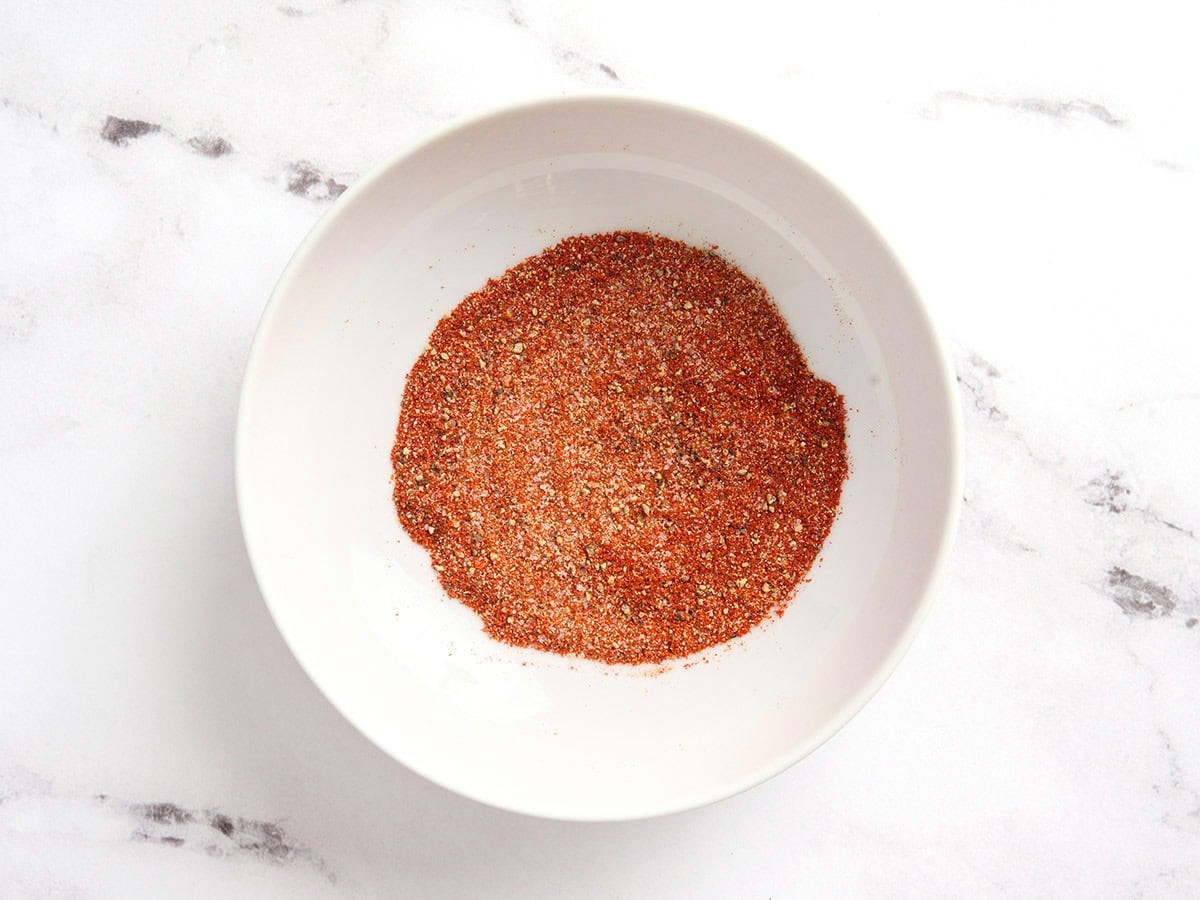
    Combine: Add 1 tsp sweet paprika, ½ tsp smoked paprika, ½ tsp onion powder, ½ tsp garlic powder, ¼ tsp black pepper, ⅛ tsp cayenne, and ½ tsp salt to a small bowl. If any of the spices are clumpy, break them up with a fork so the seasoning mixes evenly.

    Homemade burger seasoning in a bowl.

    Stir using a fork until the blend looks evenly combined, and you don’t see streaks of one spice sitting in the bowl unmixed.

    To season burgers, sprinkle about ¾ teaspoon of burger seasoning over each patty, dividing it between both sides. Gently press the seasoning onto the surface so it sticks without compacting the meat. This gives the patty an even layer of flavor and helps the seasoning stay put when it hits the hot pan or grill, without making the outside taste overly salty or gritty.

    Side view of homemade burger seasoning in a jar.

    Serving Suggestions

    This simple burger seasoning is great on more than just classic beef burgers. I use it anywhere I want a savory, cookout-style flavor without pulling out a bunch of separate spices, especially when the rest of the meal is already simple and just needs a little flavor boost. For burgers, try it on my black bean burgers for a vegetarian patty with extra smoky flavor, or sprinkle it over these turkey burgers since leaner patties can benefit from a little more seasoning help. It’s also delicious on smash burger tacos because the seasoning hits the hot pan directly and helps create those browned edges.

    For easy sides, I’ll swap the seasonings in these oven baked steak fries for 1 tablespoon of this burger seasoning, or toss it with grilled vegetables for a delicious (and EASY!) summer side. You can also think outside the burger bun and use this blend in sloppy joes, shredded beef, meatballs, or pulled pork for a super quick seasoning shortcut.

    A collage of burgers for burger seasoning.

    how to store

    This recipe makes around 1 tablespoon of seasoning, but I love making a large batch to make my life easier and save time. Store leftover hamburger seasoning in an airtight container and place it in a cool, dry spot like a pantry or cupboard. It should be good for about 6 months. After 6 months, it starts to lose its potency and become less flavorful. Make sure to give leftovers a small shake or stir, as some heavier seasonings may have settled at the bottom.

    Try These Homemade Seasoning Recipes Next:

    • This Homemade Fajita Seasoning gets its warm, smoky flavor from chili powder, cumin, smoked paprika, and garlic powder.
    • Homemade Taco Seasoning makes enough to replace one store-bought packet, which is perfect for taco night without an extra grocery run.
    • I like making this Homemade Cajun Seasoning because you can adjust the cayenne and keep the heat exactly where you want it.

    Our Homemade Burger Seasoning recipe was originally published 5/22/23. It was retested, reworked, and republished to be better than ever 7/1/26.

    The post Homemade Burger Seasoning appeared first on Budget Bytes.

    This post was originally published on this site.

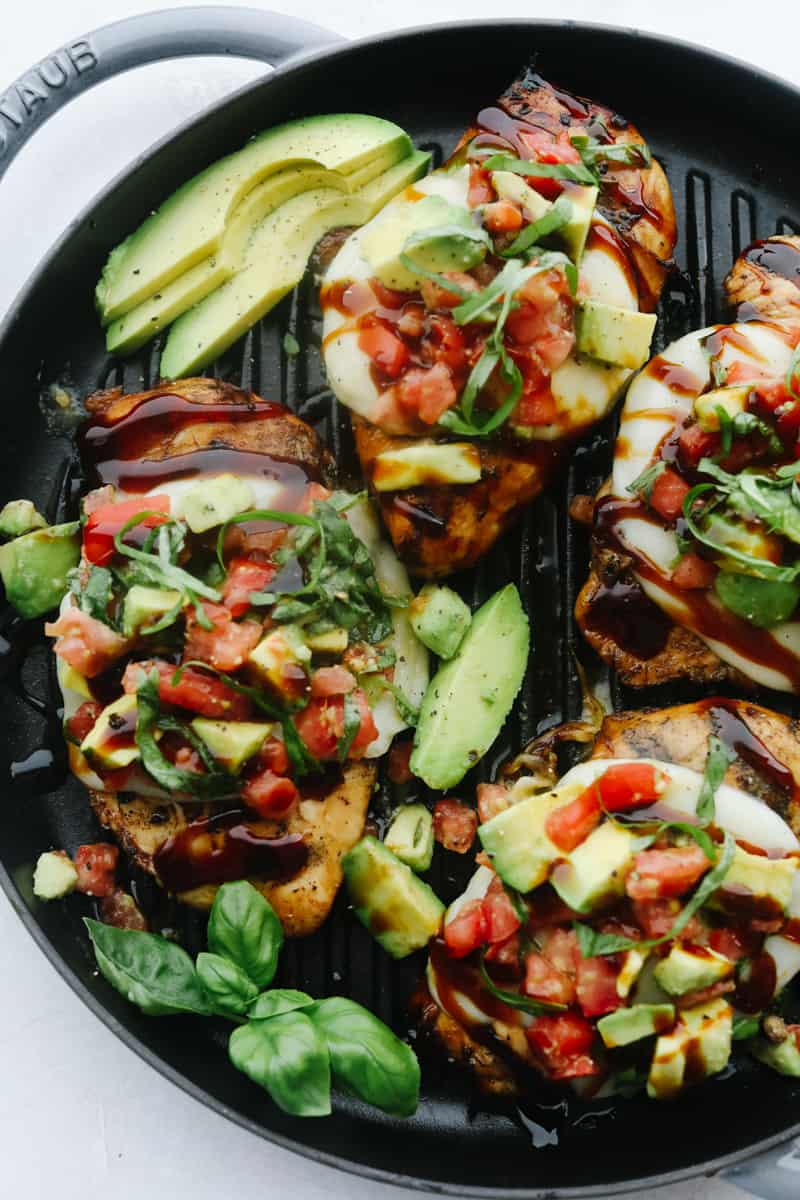
  • Baked Caprese Chicken

    Baked Caprese Chicken

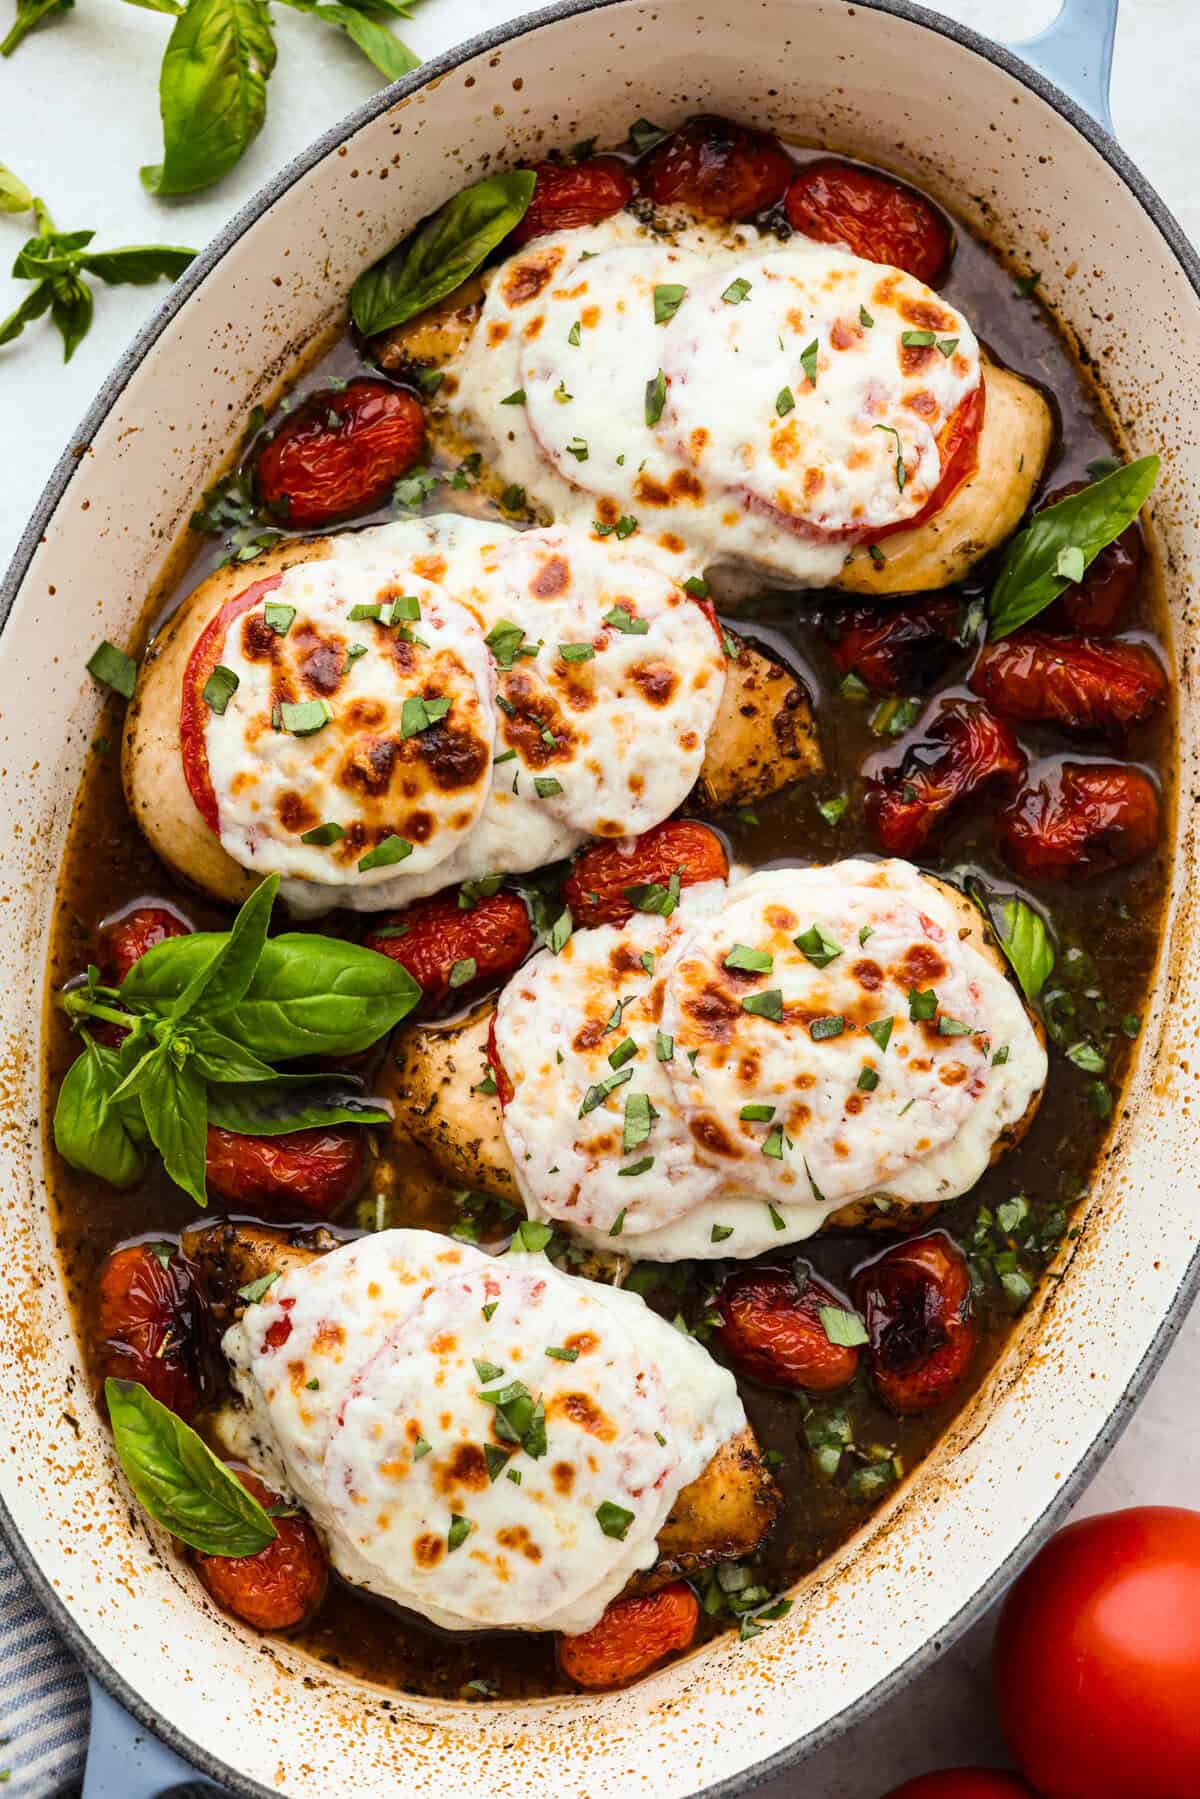
    This baked caprese chicken is one of those dinners that checks all the boxes. It’s easy to throw together, full of fresh flavor, and hearty. The chicken stays juicy, the mozzarella gets perfectly melty, and the tomatoes and basil make every bite so good.

    Why This Chicken is a Weeknight Win

    • So Much Flavor: Juicy chicken, melty mozzarella, sweet tomatoes, and fresh basil come together with a drizzle of balsamic glaze. YUM!
    • Easy Weeknight Dinner: This baked caprese chicken comes together fast and bakes in one dish, which means less mess and less stress.
    • Fresh But Filling: It has all the bright caprese flavors you love, but the chicken makes it hearty enough for dinner. Serve it with orzo pasta, rice, or a simple salad!

    A Reader’s Review

    I literally NEVER leave reviews but holy cow was this the best recipe I’ve had in awhile. I cut my chicken super thin and used the broiler at the end to get the cheese extra melty. This will be a weekly dish in my house for sure. Feels like it came straight from a restaurant!

    – Kayla

    Baked Caprese Chicken Ingredients

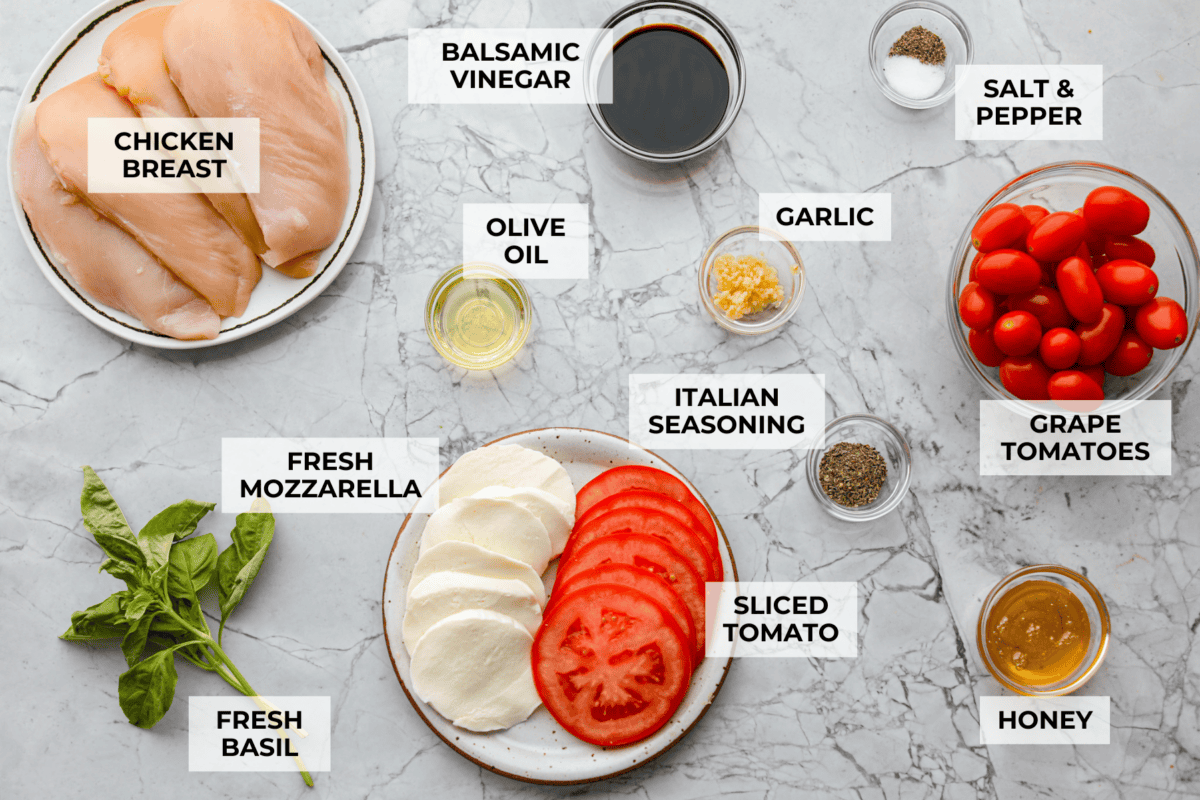
    Overhead shot of labeled ingredients.
    • Cheese: Use fresh mozzarella if you can, but sliced block mozzarella or a scant ¼ cup shredded mozzarella will work. For the best melt, shred it yourself instead of using pre-shredded.
    • Tomatoes: Grape tomatoes, cherry tomatoes, or ripe sliced tomatoes all work! Sweeter tomatoes may need a little less honey.

    How to Make Baked Caprese Chicken

    You need this baked caprese chicken in your dinner arsenal for those nights when you want something easy but still really good. It uses simple ingredients, bakes in one pan, and gives you juicy chicken, melty mozzarella, and fresh tomato basil flavor. Just like in my Caprese skewers and Caprese Salad.

    1. Prep: Preheat the oven to 400°F. Lightly grease a 9 x 13-inch or 3-quart baking dish with nonstick cooking spray, then lay the chicken in it.
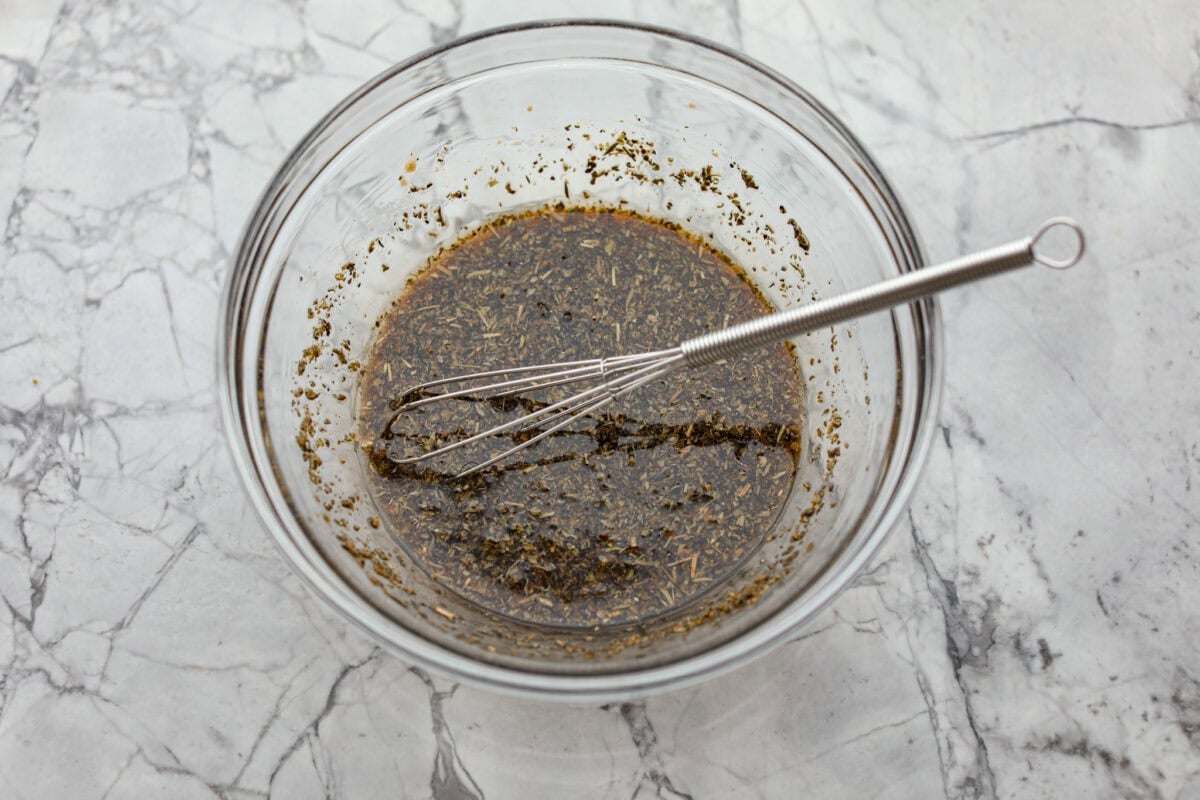
    2. Make Sauce: Combine the balsamic vinegar, honey, garlic, olive oil, Italian seasoning, salt, and pepper in a small bowl. 
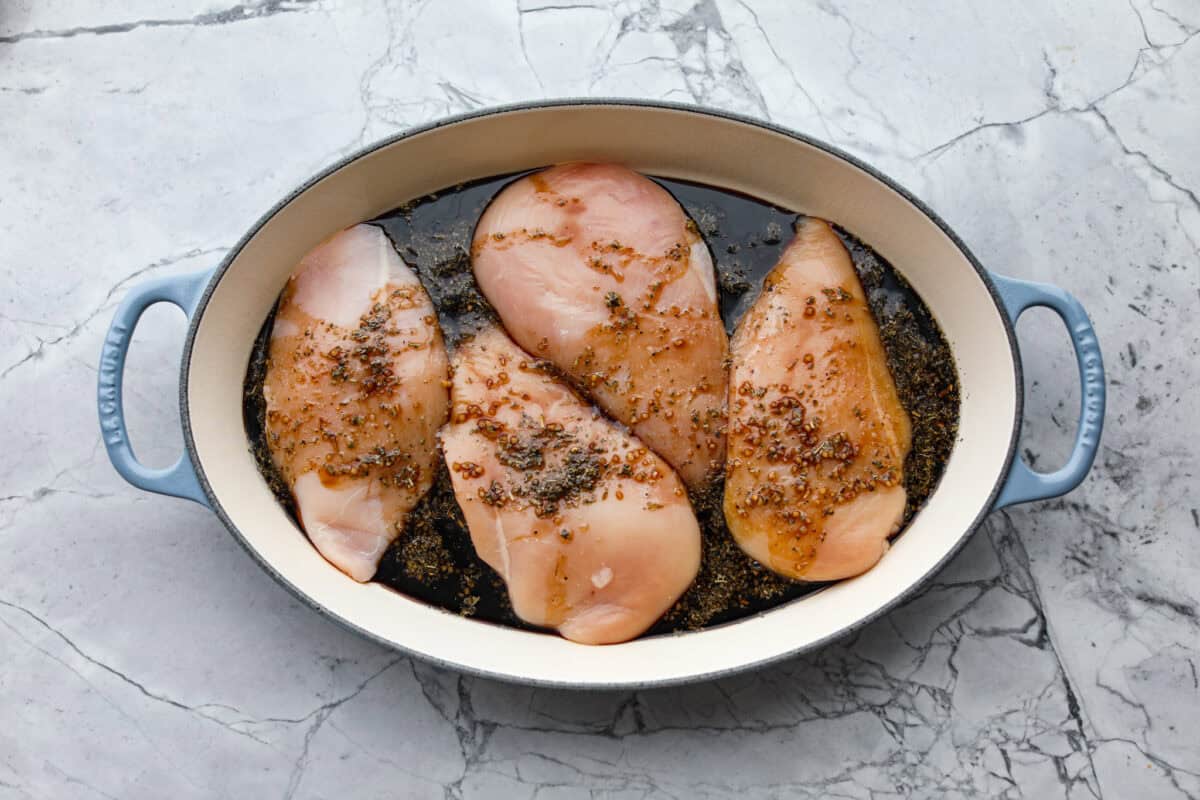
    3. Add Sauce: Pour the sauce over the chicken.
    4. Soak Chicken: Flip the chicken over in the sauce to coat both sides. 
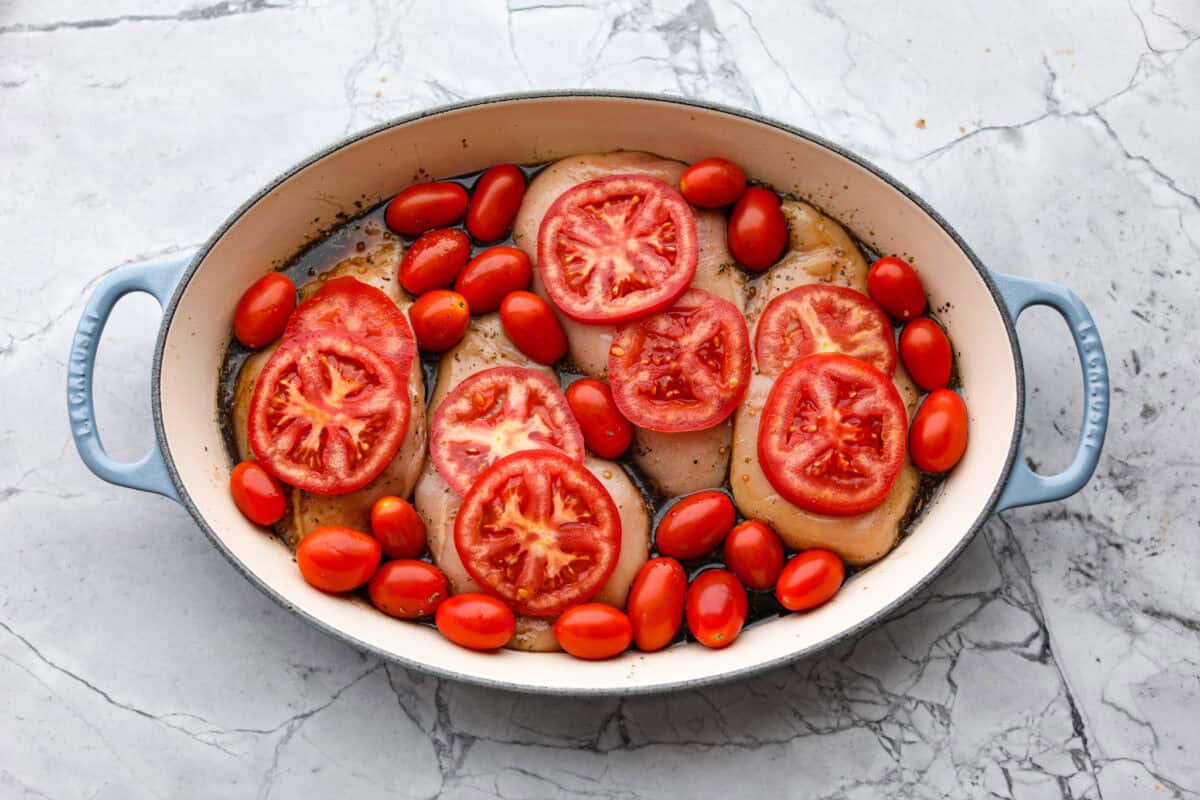
    5. Add: Add the grape tomatoes around the chicken, and lay the tomato slices on top of the breasts.
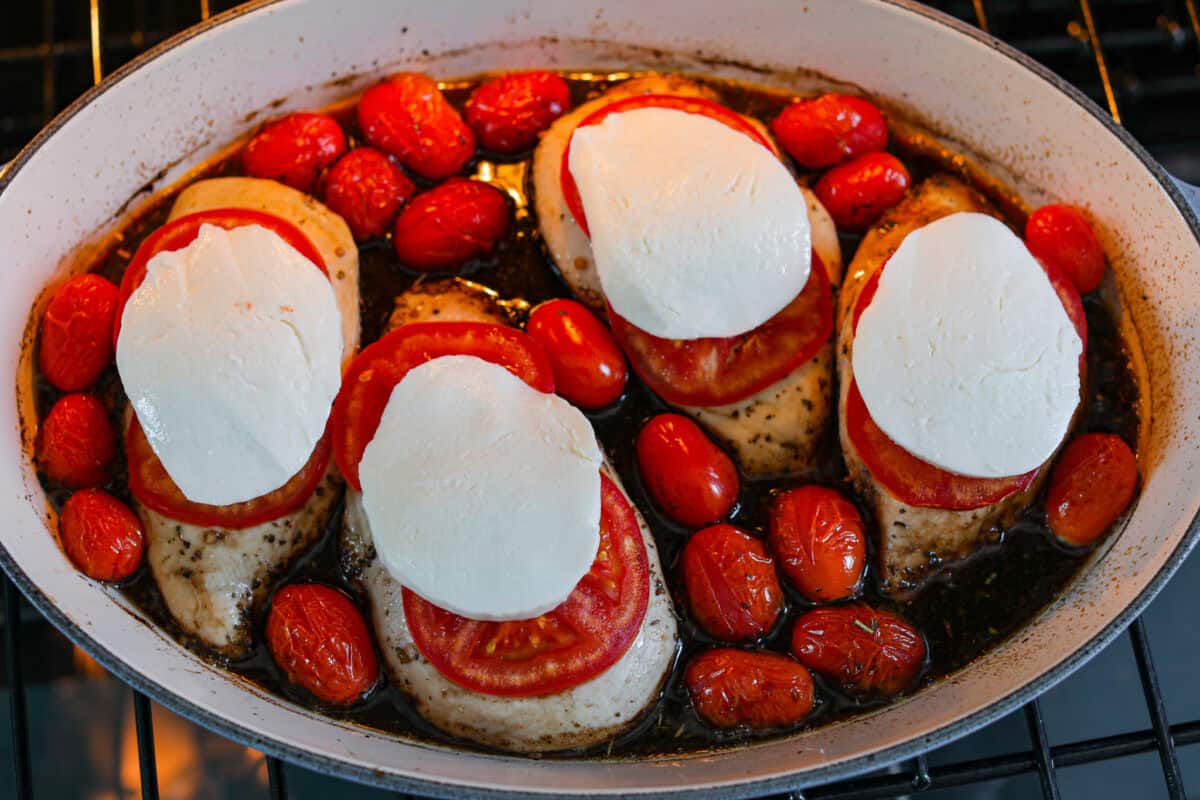
    6. Bake: Bake uncovered for 20-25 minutes, until the chicken’s internal temperature reaches 165°. In the last 5 minutes, add the mozzarella on top of the chicken.  If desired, broil on HIGH for 2-3 minutes, until the cheese is bubbling and browning. Top Baked Caprese Chicken with basil and serve. 

    Serving Ideas

    • Sandwich: Serve it as an open-face sandwich. Slice the chicken and add it to a crusty piece of bread 
    • Pesto: Add a drizzle of balsamic glaze, or a couple of spoonfuls of prepared pesto on top!

    Must Have Tools For This Recipe

    9×13-inch Baking Dish, or a 3-Quart Baking Dish: Gives the chicken plenty of room to bake evenly without crowding.

    Print

    Baked Caprese Chicken

    Easy baked caprese chicken with juicy chicken, mozzarella, tomatoes, basil, and balsamic sauce.
    Course Dinner, entree, main, Main Course, main dish
    Cuisine American, Italian American
    Keyword baked caprese chicken, baked caprese chicken recipe, caprese chicken, caprese chicken recipe, chicken caprese, easy chicken caprese, summer dinners
    Prep Time 10 minutes
    Cook Time 30 minutes
    Total Time 40 minutes
    Servings 4 servings
    Calories 305kcal

    Ingredients

    • 4 boneless skinless chicken breasts about 2 ½ pounds
    • ¼ cup balsamic vinegar
    • 2 tablespoons honey
    • 1 teaspoon minced garlic about.1 clove
    • 1 tablespoon olive oil
    • 1 teaspoon Italian seasoning
    • ½ teaspoon salt
    • ¼ teaspoon ground black pepper
    • 1 cup grape tomatoes nearly 1 full pint
    • 4-8 slices of tomato 1-2 large tomatoes
    • 4 slices fresh mozzarella about 8 ounces
    • chopped fresh basil for garnish

    Instructions

    • Preheat the oven to 400 degrees Fahrenheit. Lightly grease a 9 x 13-inch or 3-quart baking dish with nonstick cooking spray, then lay 4 boneless skinless chicken breasts in it.
    • Combine ¼ cup balsamic vinegar, 2 tablespoons honey, 1 teaspoon minced garlic, 1 tablespoon olive oil, 1 teaspoon Italian seasoning, ½ teaspoon salt, and ¼ teaspoon ground black pepper together in a small bowl.
    • Pour the sauce over the chicken, then flip the chicken over in the sauce in order to fully coat each breast.
    • Add 1 cup grape tomatoes to the dish around the chicken, and lay 4-8 slices of tomato on top of the breasts.
    • Bake uncovered for 20-25 minutes, until the internal temperature of the chicken reaches 165 degrees Fahrenheit. In the last 5 minutes, add 4 slices fresh mozzarella on top of the chicken.
    • If desired, broil on HIGH for 2-3 minutes, until the cheese is bubbling and browning. Top with chopped fresh basil and serve.

    Video

    Notes

    Leftover Instructions

    • Fridge: Store leftovers in an airtight container in the refrigerator for up to 5 days.
    • Freezer: Freeze the chicken with the balsamic sauce in an airtight freezer container for up to 3 months. Thaw completely before reheating. Add fresh tomatoes and mozzarella when reheating for the best texture.
    • Reheat: Reheat in the microwave in 30-second intervals, or bake at 375°F for 20-30 minutes, until the chicken reaches 165°F. Add fresh tomato slices and mozzarella on top before reheating, if desired.

    Nutrition

    Calories: 305kcal | Carbohydrates: 15g | Protein: 31g | Fat: 13g | Saturated Fat: 5g | Polyunsaturated Fat: 1g | Monounsaturated Fat: 5g | Trans Fat: 0.01g | Cholesterol: 95mg | Sodium: 607mg | Potassium: 626mg | Fiber: 1g | Sugar: 13g | Vitamin A: 770IU | Vitamin C: 10mg | Calcium: 170mg | Iron: 1mg
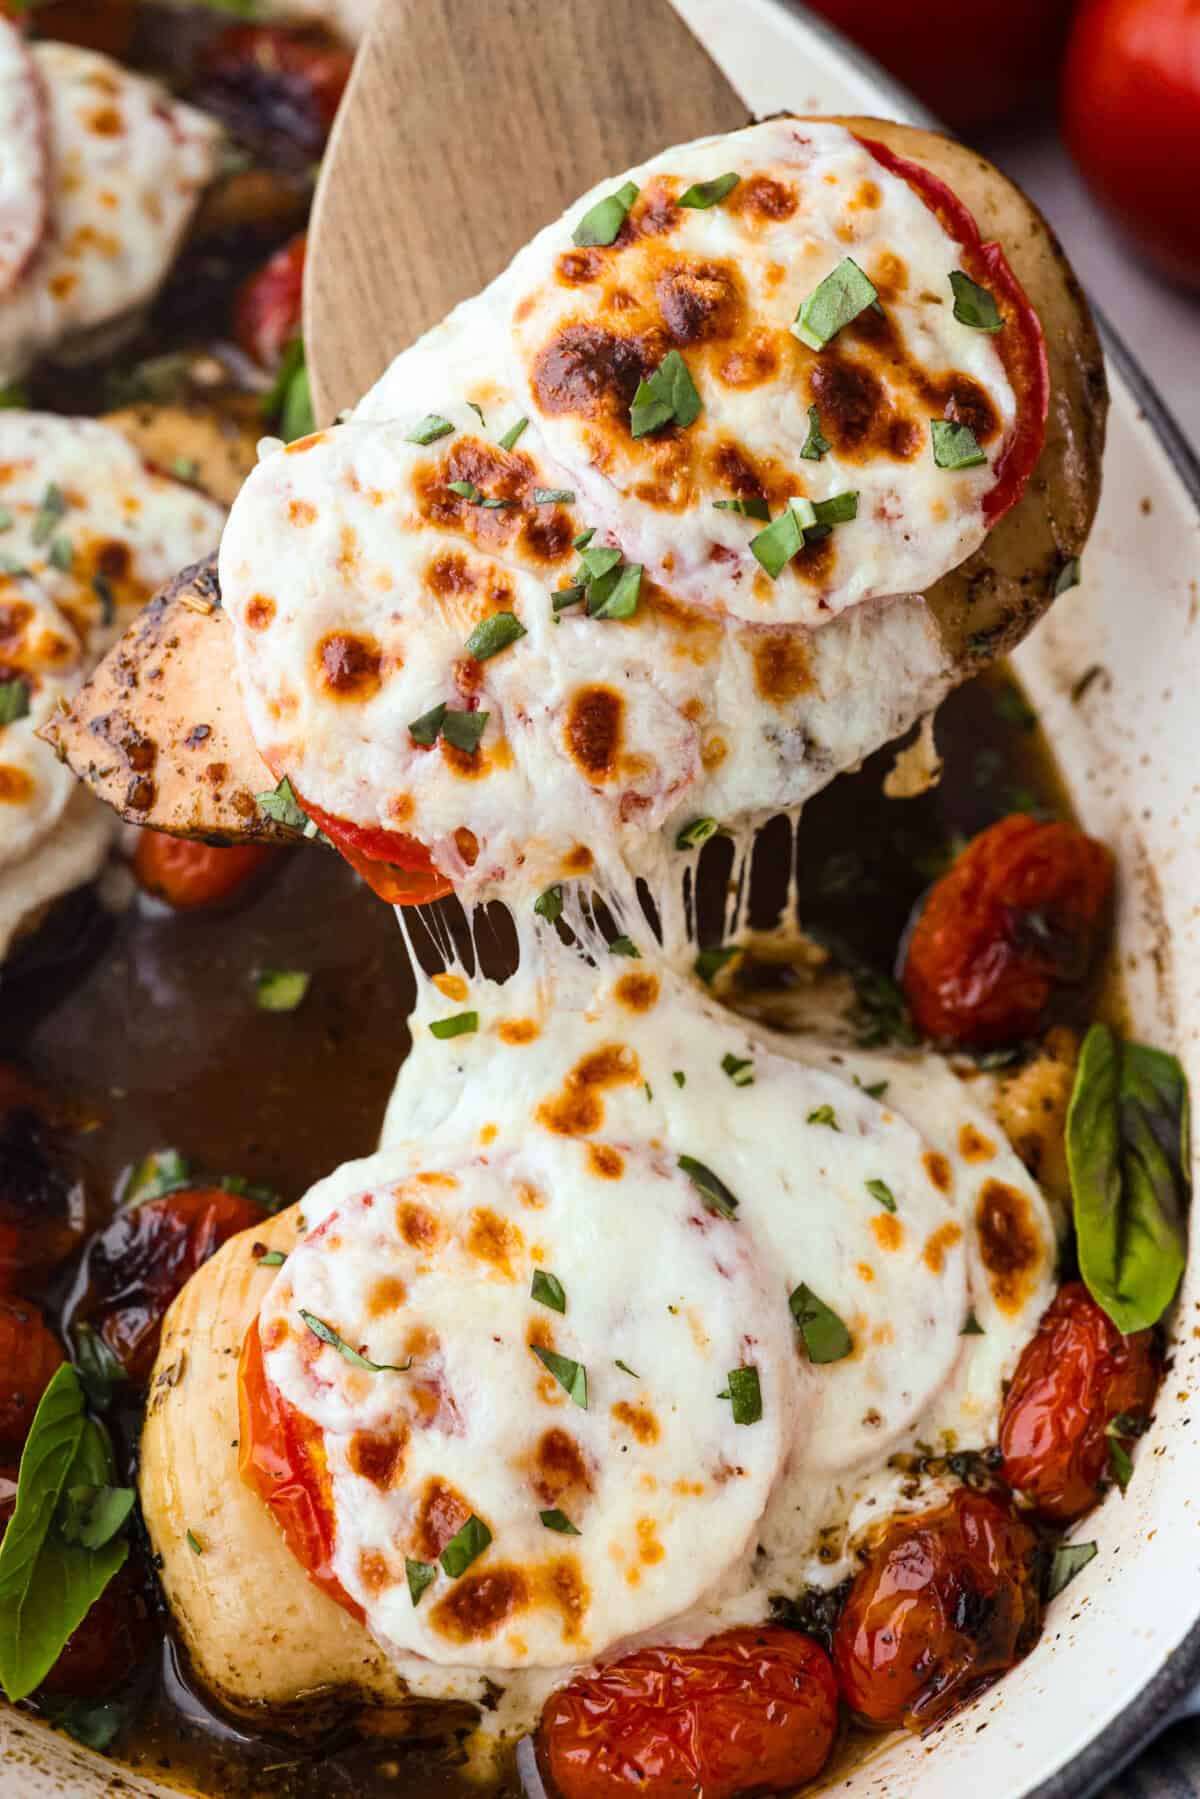
    Someone lifting the baked caprese chicken out of the pan with a wooden spatula.

    This post was originally published on this site.

  • Slow Cooker Thai Peanut Chicken

    Slow Cooker Thai Peanut Chicken

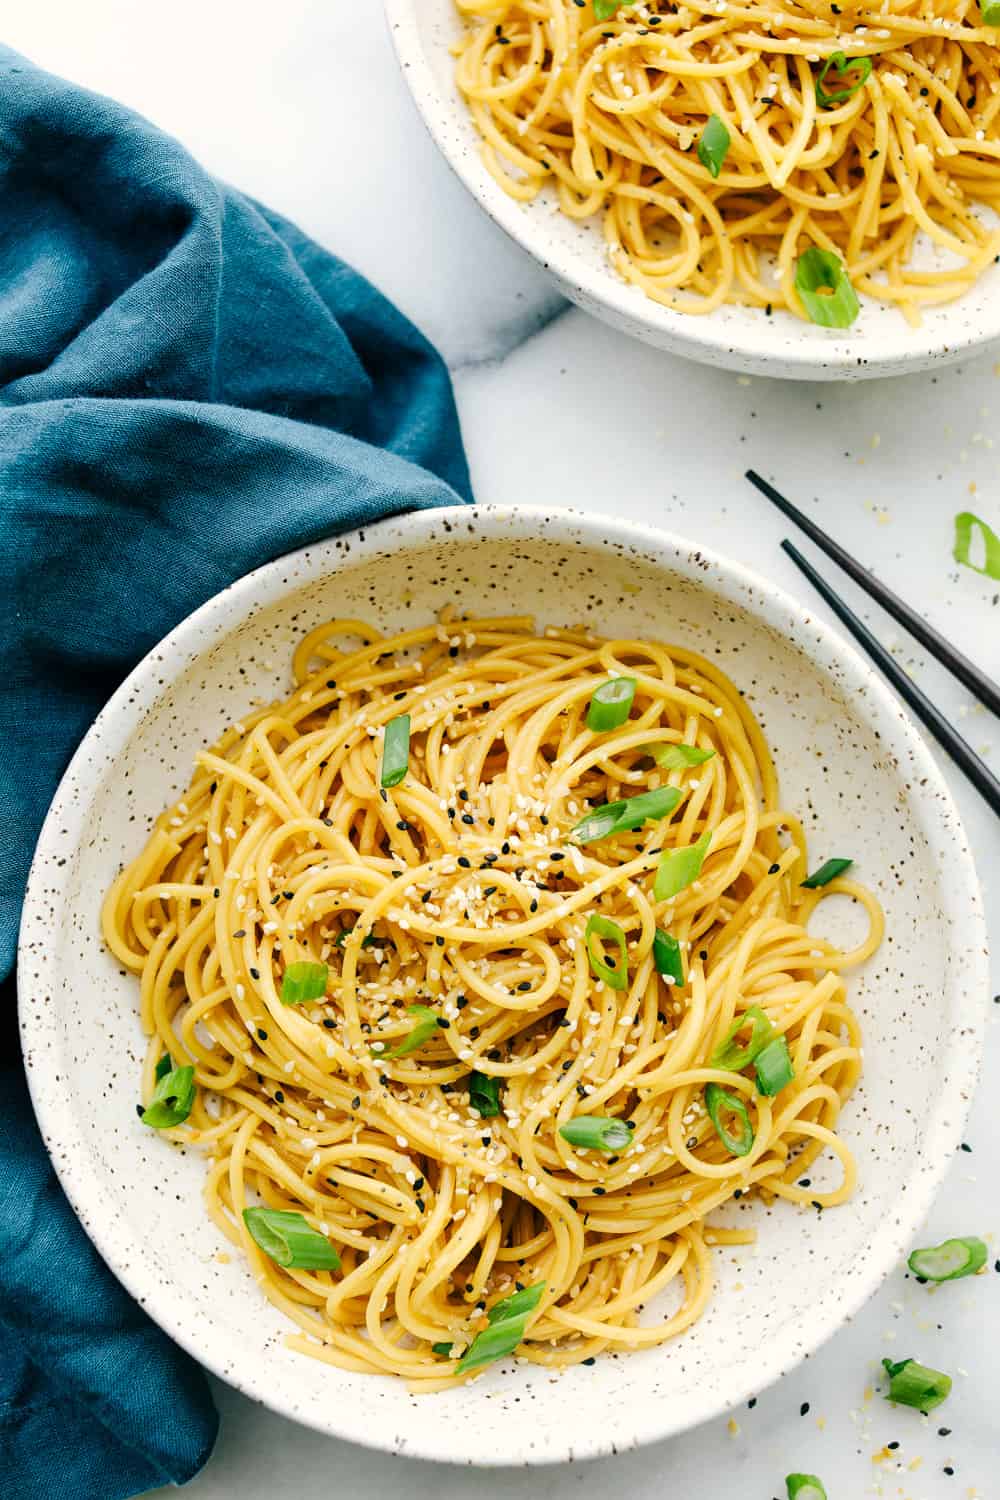
    You asked, I listened! This slow cooker Thai peanut chicken got a serious glow-up! The sauce is creamy, savory, a little sweet, and packed with peanut coconut flavor. I’d drink it with a straw if that were socially acceptable, but spooning it over rice, noodles or adding it to lettuce wraps is probably the better dinner move.

    What Makes This So Good!

    • Better Texture: The sauce cooks up creamy and smooth, not watery or too thick.
    • Family-Friendly: It has tons of flavor without being too spicy, so everyone can add their own heat at the end.
    • Great Leftovers: The flavor gets even better the next day, making lunch easy and delicious.

    A Reader’s Review

    Made this recipe last night for 6 of us, clean plates all round. Absolutely delicious.
    Thank you

    – Lozzie

    Crockpot Thai Peanut Chicken Ingredients

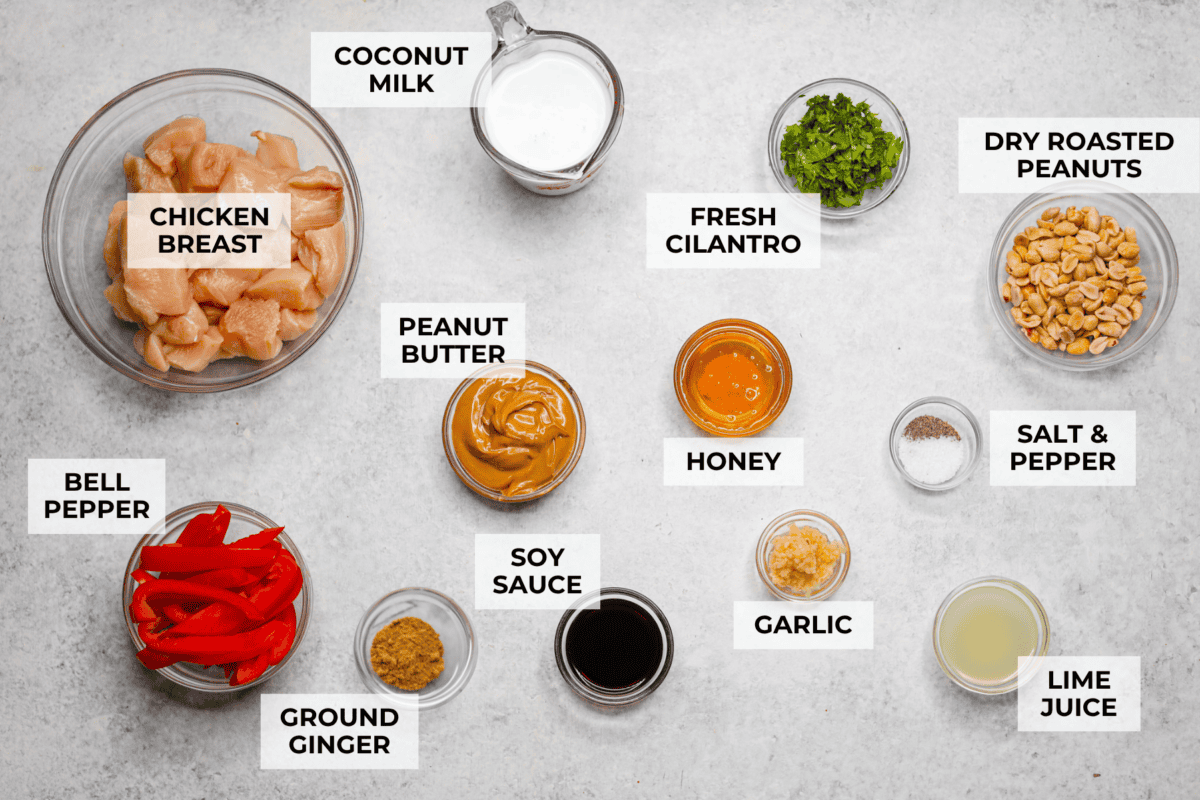
    Overhead shot of labeled ingredients.
    • Chicken: Chicken thighs work too, but they may release extra fat. Skim it off before adding the lime juice and cilantro.
    • Want More Veggies? Add diced red onion, mushrooms, matchstick carrots, or water chestnuts.
    • Coconut Milk: Use canned, full-fat coconut milk. Shake it well before measuring.
    • Spice: Add sriracha, chili crisp, or red pepper flakes for heat.
    • Peanut Butter: Natural peanut butter lets you control the sweetness. If yours has sugar, taste the sauce before adding all the honey.
    • More Flavor: Add fish sauce or sliced Thai basil for extra flavor.

    Slow Cooker Thai Peanut Chicken Recipe

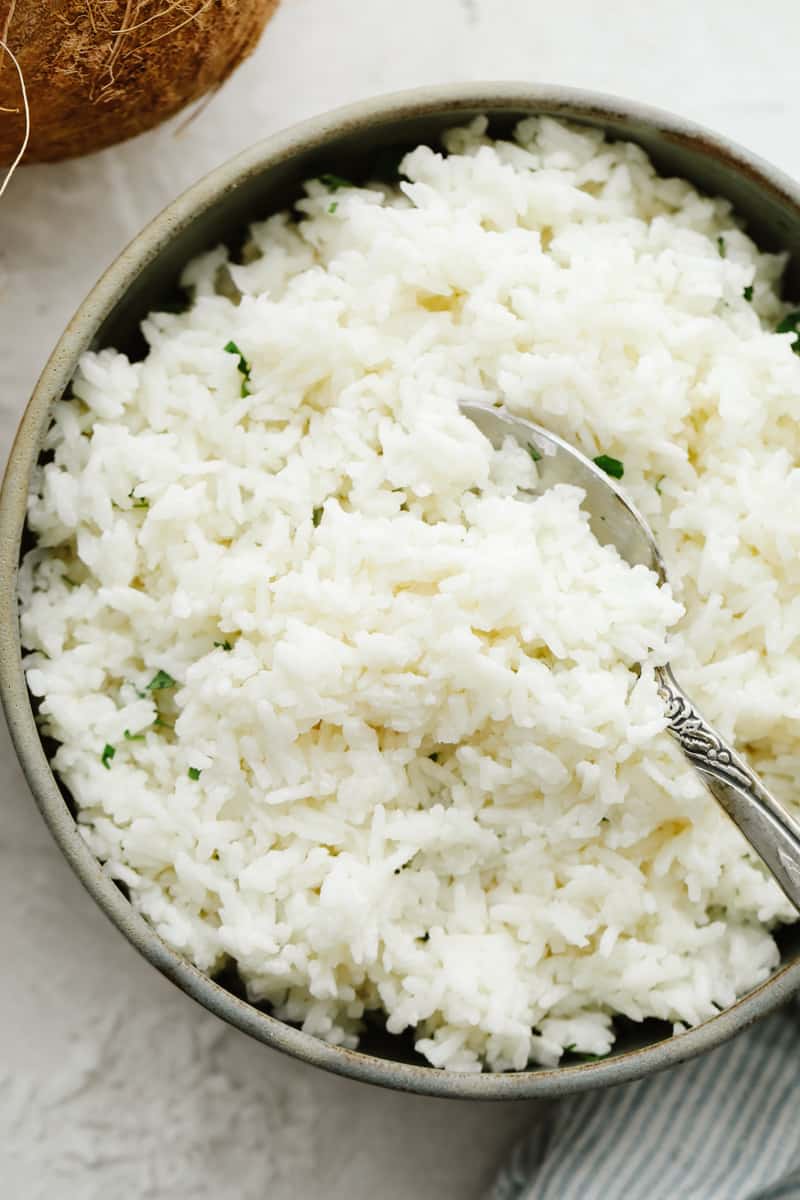
    This slow cooker Thai peanut chicken is so easy, and the slow cooker does most of the work. Serve it with coconut rice, air fryer broccoli, or a fresh cucumber salad.

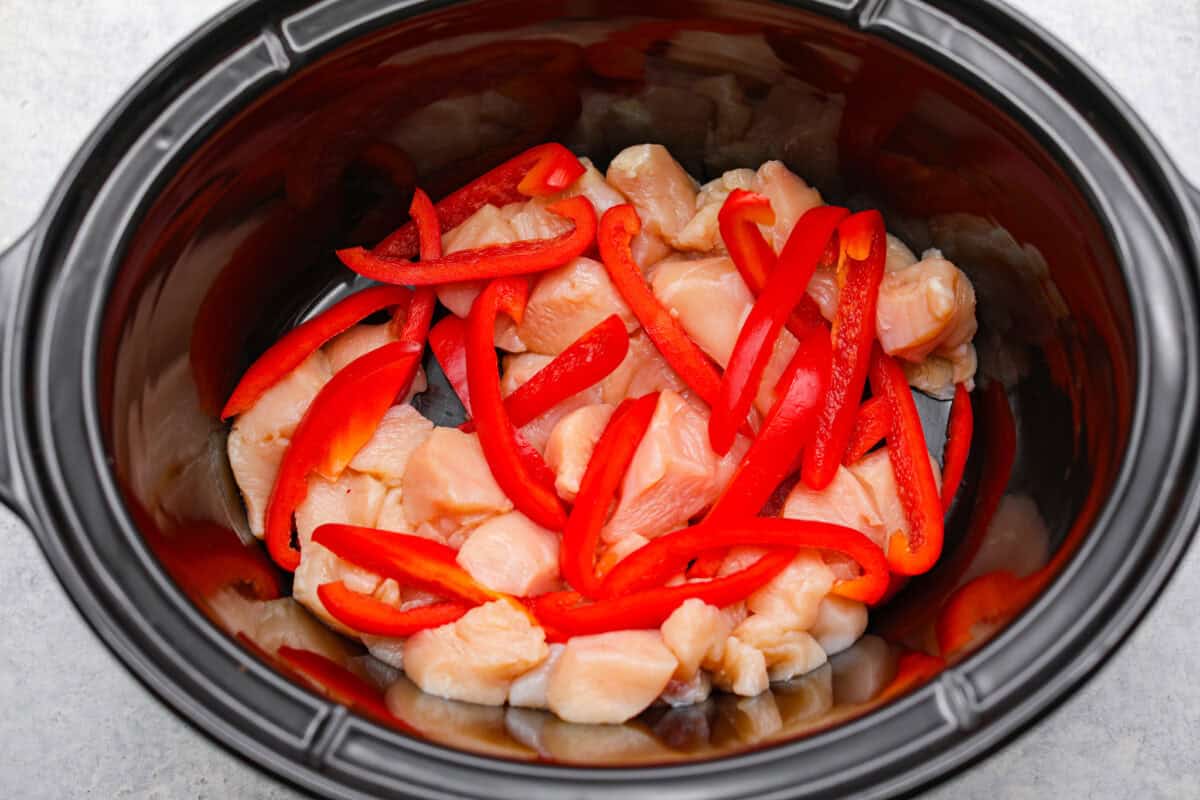
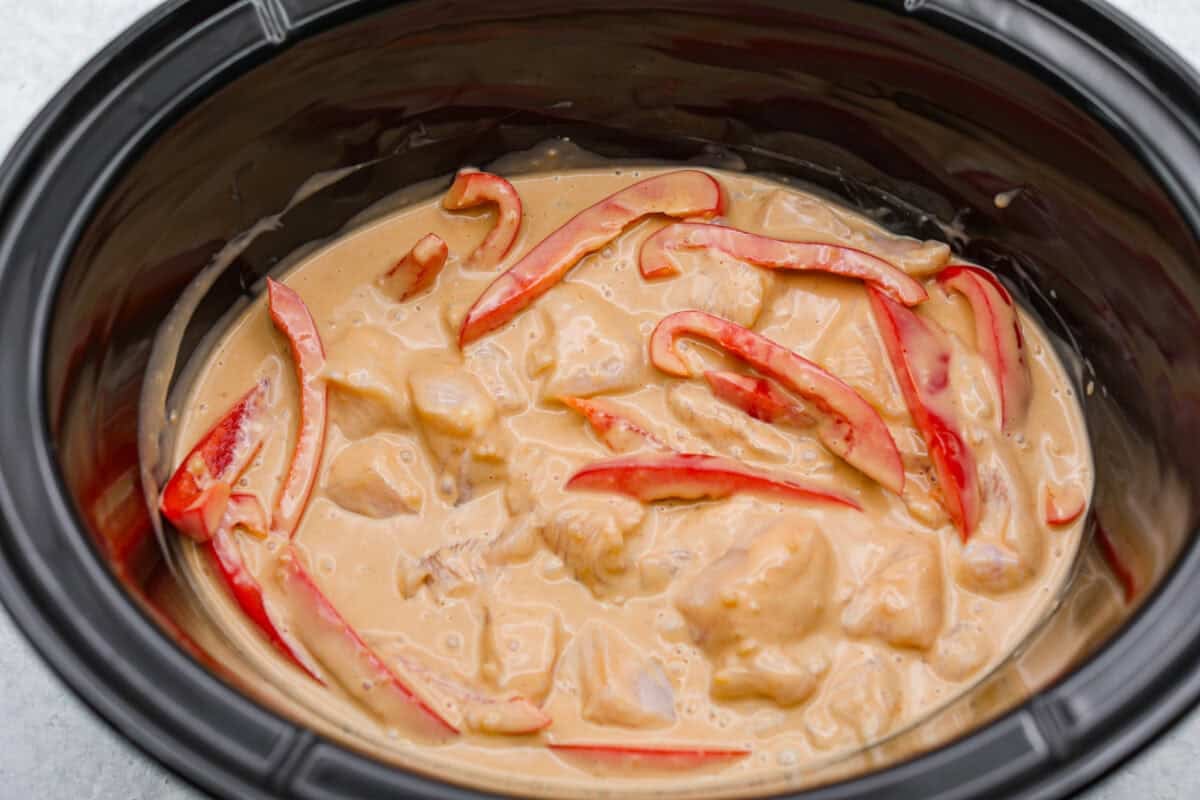
    1. Add: Add the chicken and peppers to the bowl of a larger crock pot.
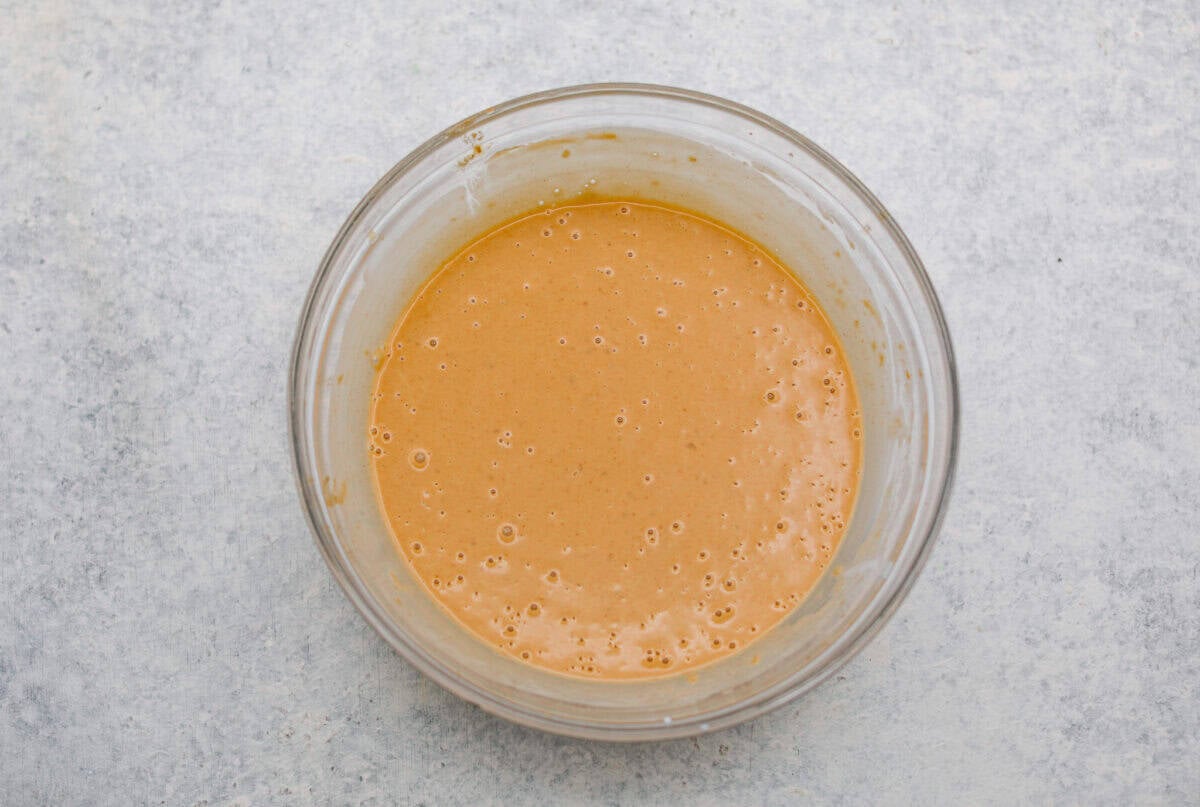
    2. Thai Peanut Sauce: Whisk together the coconut milk, peanut butter, soy sauce, honey, garlic, ginger, salt, and pepper in a bowl.
    3. Add Sauce: Pour the sauce over the chicken and peppers.
    4. Cook: Cover and cook on LOW for 4-5 hours, or on HIGH for 2-3 hours. About an hour before serving, stir in the fresh cilantro and lime juice, then cover and continue cooking for the remaining time. Garnish with chopped peanuts before serving.

    Must Have Tools For This Recipe

    • Slow Cooker: Cooks everything together low and slow for the perfect creamy bite.

    Stove Top Cooking Instructions

    1. Heat the Pan: Heat a large, deep skillet or pot over medium heat.
    2. Cook the Chicken: Add the chicken and cook for 4-5 minutes, until no pink remains on the outside.
    3. Make the Sauce: In a bowl, combine the sauce ingredients.
    4. Add Sauce and Peppers: Add the sauce and bell peppers to the pan with the chicken.
    5. Simmer: Reduce the heat, cover, and cook for 15-20 minutes, until the chicken reaches 165°F.

    Print

    Slow Cooker Thai Peanut Chicken

    Tender, slow cooked chicken in a creamy Thai peanut coconut sauce with bell peppers, lime, and cilantro.
    Course Dinner, entree, main, Main Course, main dish
    Cuisine American, Asian American, Thai, Thai American
    Keyword peanut chicken, slow cooker asian chicken, slow cooker peanut chicken, slow cooker thai peanut chicken, slow cooker thai peanut chicken recipe, thai chicken, thai peanut chicken
    Prep Time 15 minutes
    Cook Time 5 hours
    Total Time 5 hours 15 minutes
    Servings 4 servings
    Calories 505kcal

    Equipment

    • 1 4-8 quart slow cooker

    Ingredients

    • 1 pound cubed boneless skinless chicken breasts 1-inch pieces
    • 1 sliced red pepper about 1 ½ cups
    • 1 cup high-fat coconut milk
    • ½ cup natural peanut butter smooth or crunchy
    • 3 tablespoons soy sauce
    • 3 tablespoons honey
    • 1 tablespoon minced garlic about 3 cloves
    • ½ teaspoon ground ginger or 2 teaspoons fresh ginger
    • ½ teaspoon salt more or less to taste
    • ¼ teaspoon ground black pepper more or less to taste
    • ½ cup chopped cilantro more for garnish
    • 3 tablespoons lime juice
    • chopped dry-roasted peanuts for garnish

    Instructions

    • Add 1 pound cubed boneless skinless chicken breasts and 1 sliced red pepper to the bowl of a larger slow cooker.
    • Whisk together 1 cup high-fat coconut milk, ½ cup natural peanut butter, 3 tablespoons soy sauce, 3 tablespoons honey, 1 tablespoon minced garlic, ½ teaspoon ground ginger, ½ teaspoon salt, and ¼ teaspoon ground black pepper in a bowl to make the sauce.
    • Pour the sauce over the chicken and peppers. Cover and cook on LOW for 4-5 hours, or on HIGH for 2-3 hours. About an hour before serving, stir in ½ cup chopped cilantro and 3 tablespoons lime juice, then cover and continue cooking for the remaining time. Garnish with chopped dry-roasted peanuts before serving.

    Video

    Notes

    Leftover and Make Ahead Instructions

    • Fridge: Store leftovers in an airtight container in the refrigerator for up to 5 days.
    • Reheat: Reheat in the microwave in 30-second intervals or on the stovetop over medium heat, stirring often, until warmed through.
    • Freeze: Add the diced chicken, bell pepper, and sauce to a large freezer bag. Freeze for up to 3 months. Thaw overnight in the refrigerator, then cook in the slow cooker as directed.
    • Make Ahead: Add everything to the slow cooker insert, cover, and refrigerate until ready to cook.

    Nutrition

    Calories: 505kcal | Carbohydrates: 26g | Protein: 34g | Fat: 32g | Saturated Fat: 15g | Polyunsaturated Fat: 5g | Monounsaturated Fat: 10g | Trans Fat: 0.01g | Cholesterol: 73mg | Sodium: 1193mg | Potassium: 860mg | Fiber: 3g | Sugar: 18g | Vitamin A: 1107IU | Vitamin C: 45mg | Calcium: 45mg | Iron: 4mg
    Plate of slow cooker Thai peanut chicken over a bed of rice.

    What to Serve With Thai Peanut Chicken

    You can serve this over jasmine rice, brown rice, cauliflower rice, or even rice noodles. Here are a few more options.

    This post was originally published on this site.

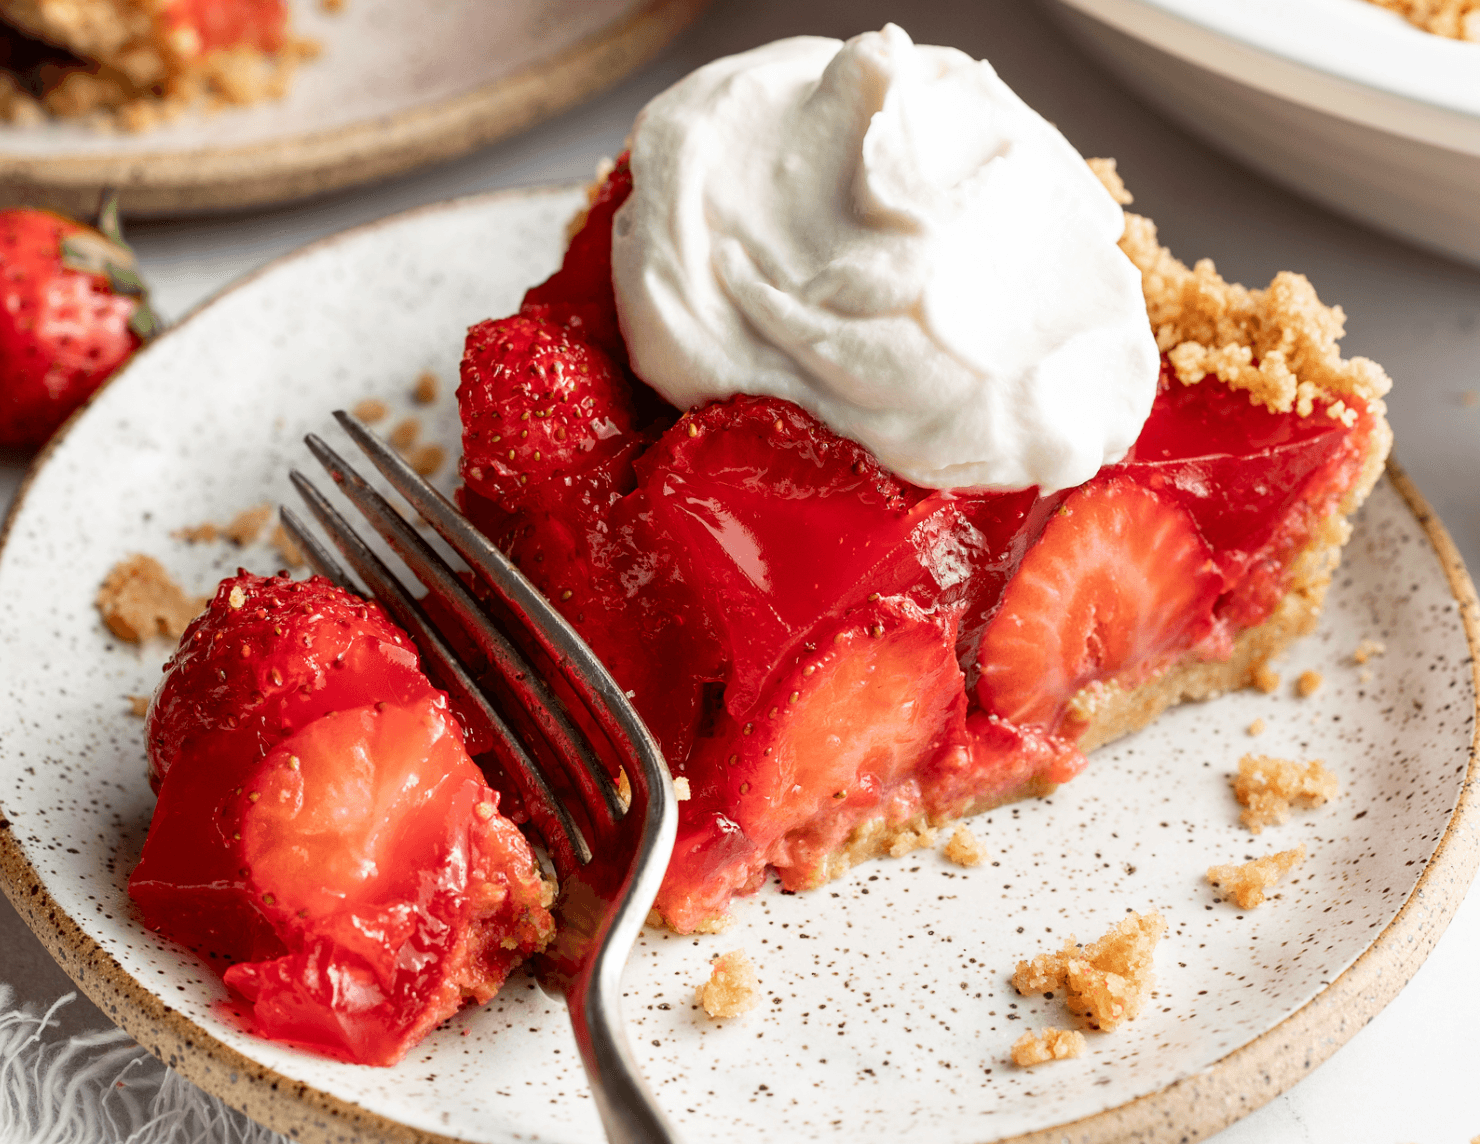
  • Easy Strawberry Pie

    Easy Strawberry Pie

    Our House Favorite Strawberry Pie!

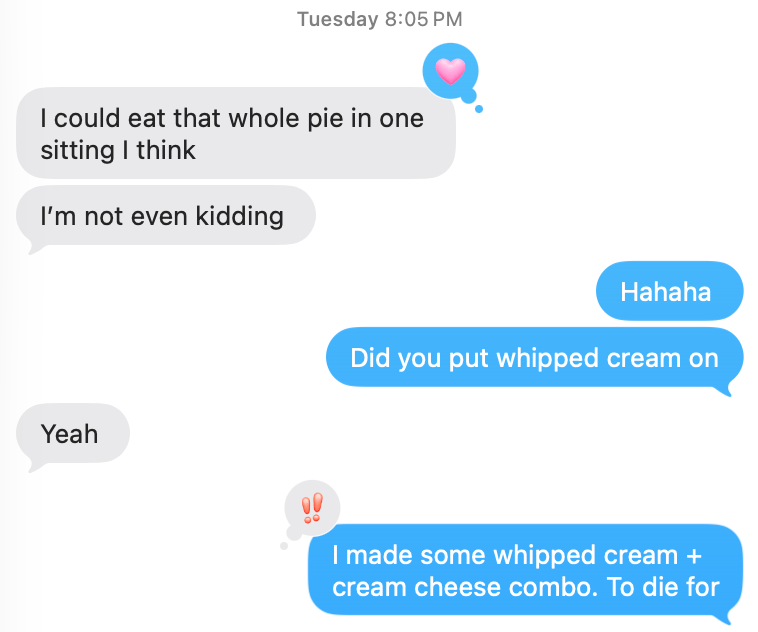
    A text I got from my neighbor last week:

    Text messages about strawberry pie.

    I asked my husband and kids to vote on several desserts that I’ve been making lately – “which one of these should be the July Family Dessert Night recipe?”

    This strawberry pie was the unanimous winner.

    Lindsay Ostrom headshot.

    Everyone in our house LOVES this pie.

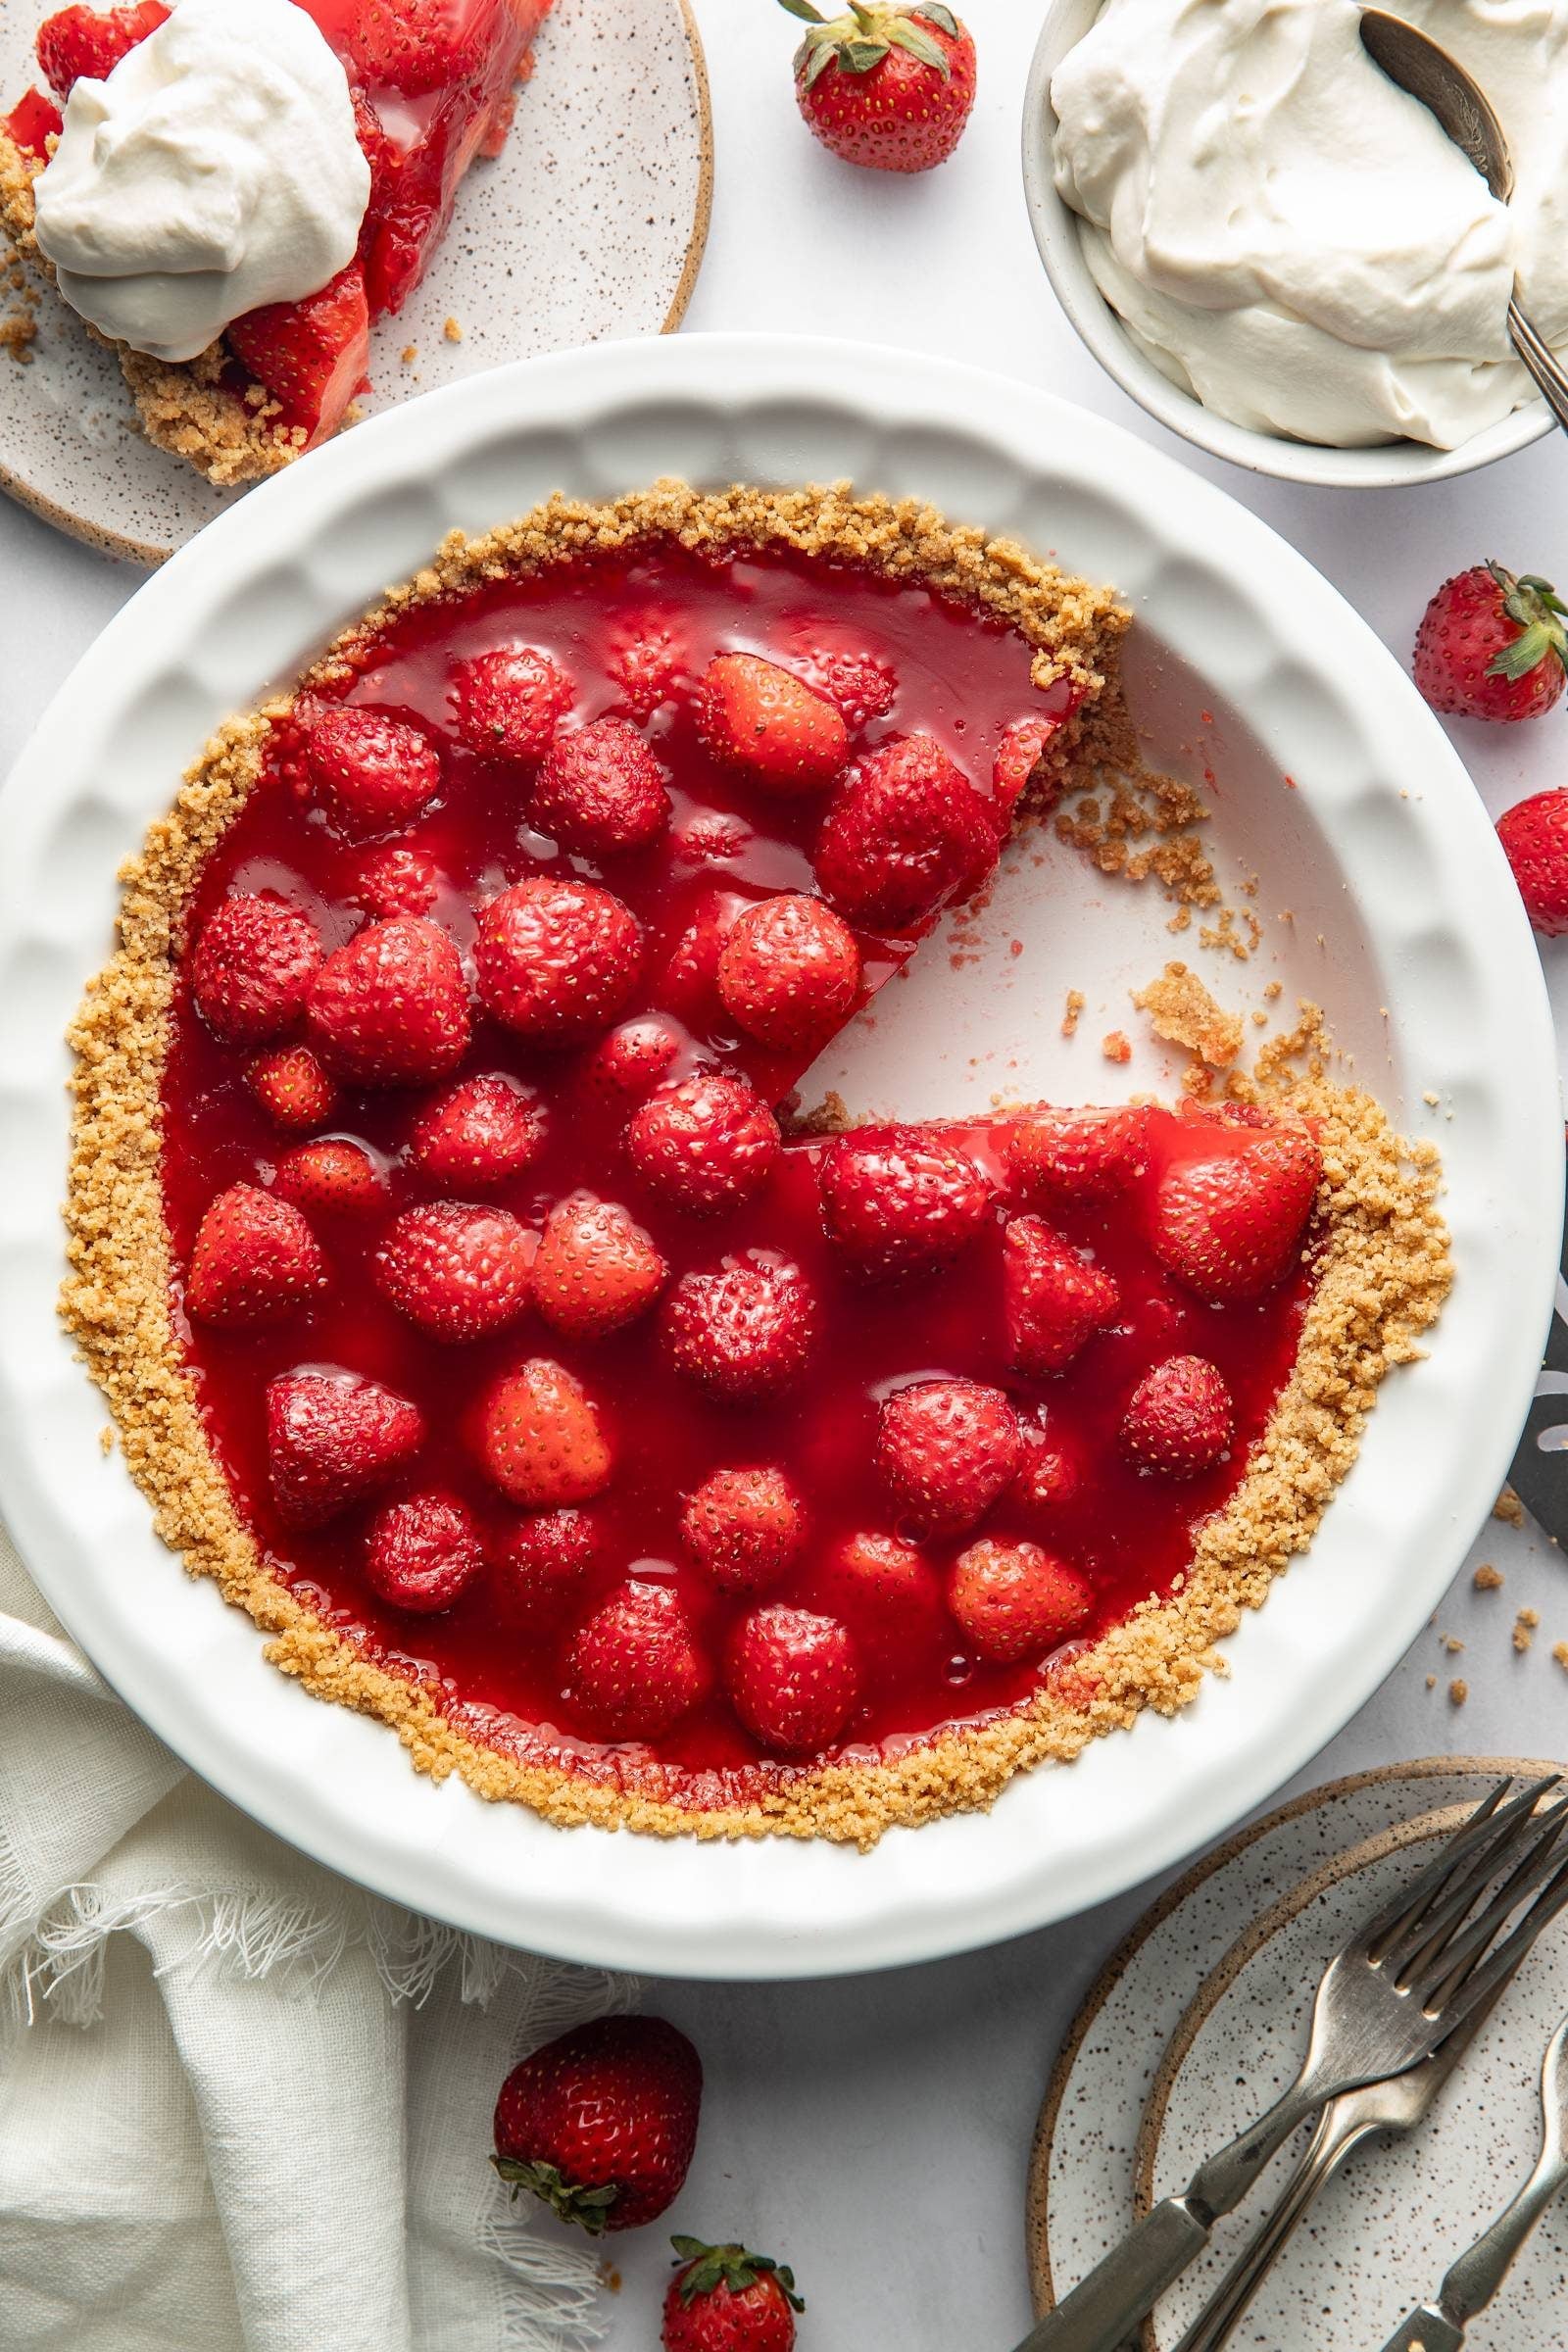
    It’s basically a bountiful platter of fresh strawberries, cold and juicy and sweet, held together inside a salty-sweet graham cracker pie crust, and dolloped with a cream cheese whipped cream. My mom and my grandma have been making this pie for years, so it’s my turn to get in on it!

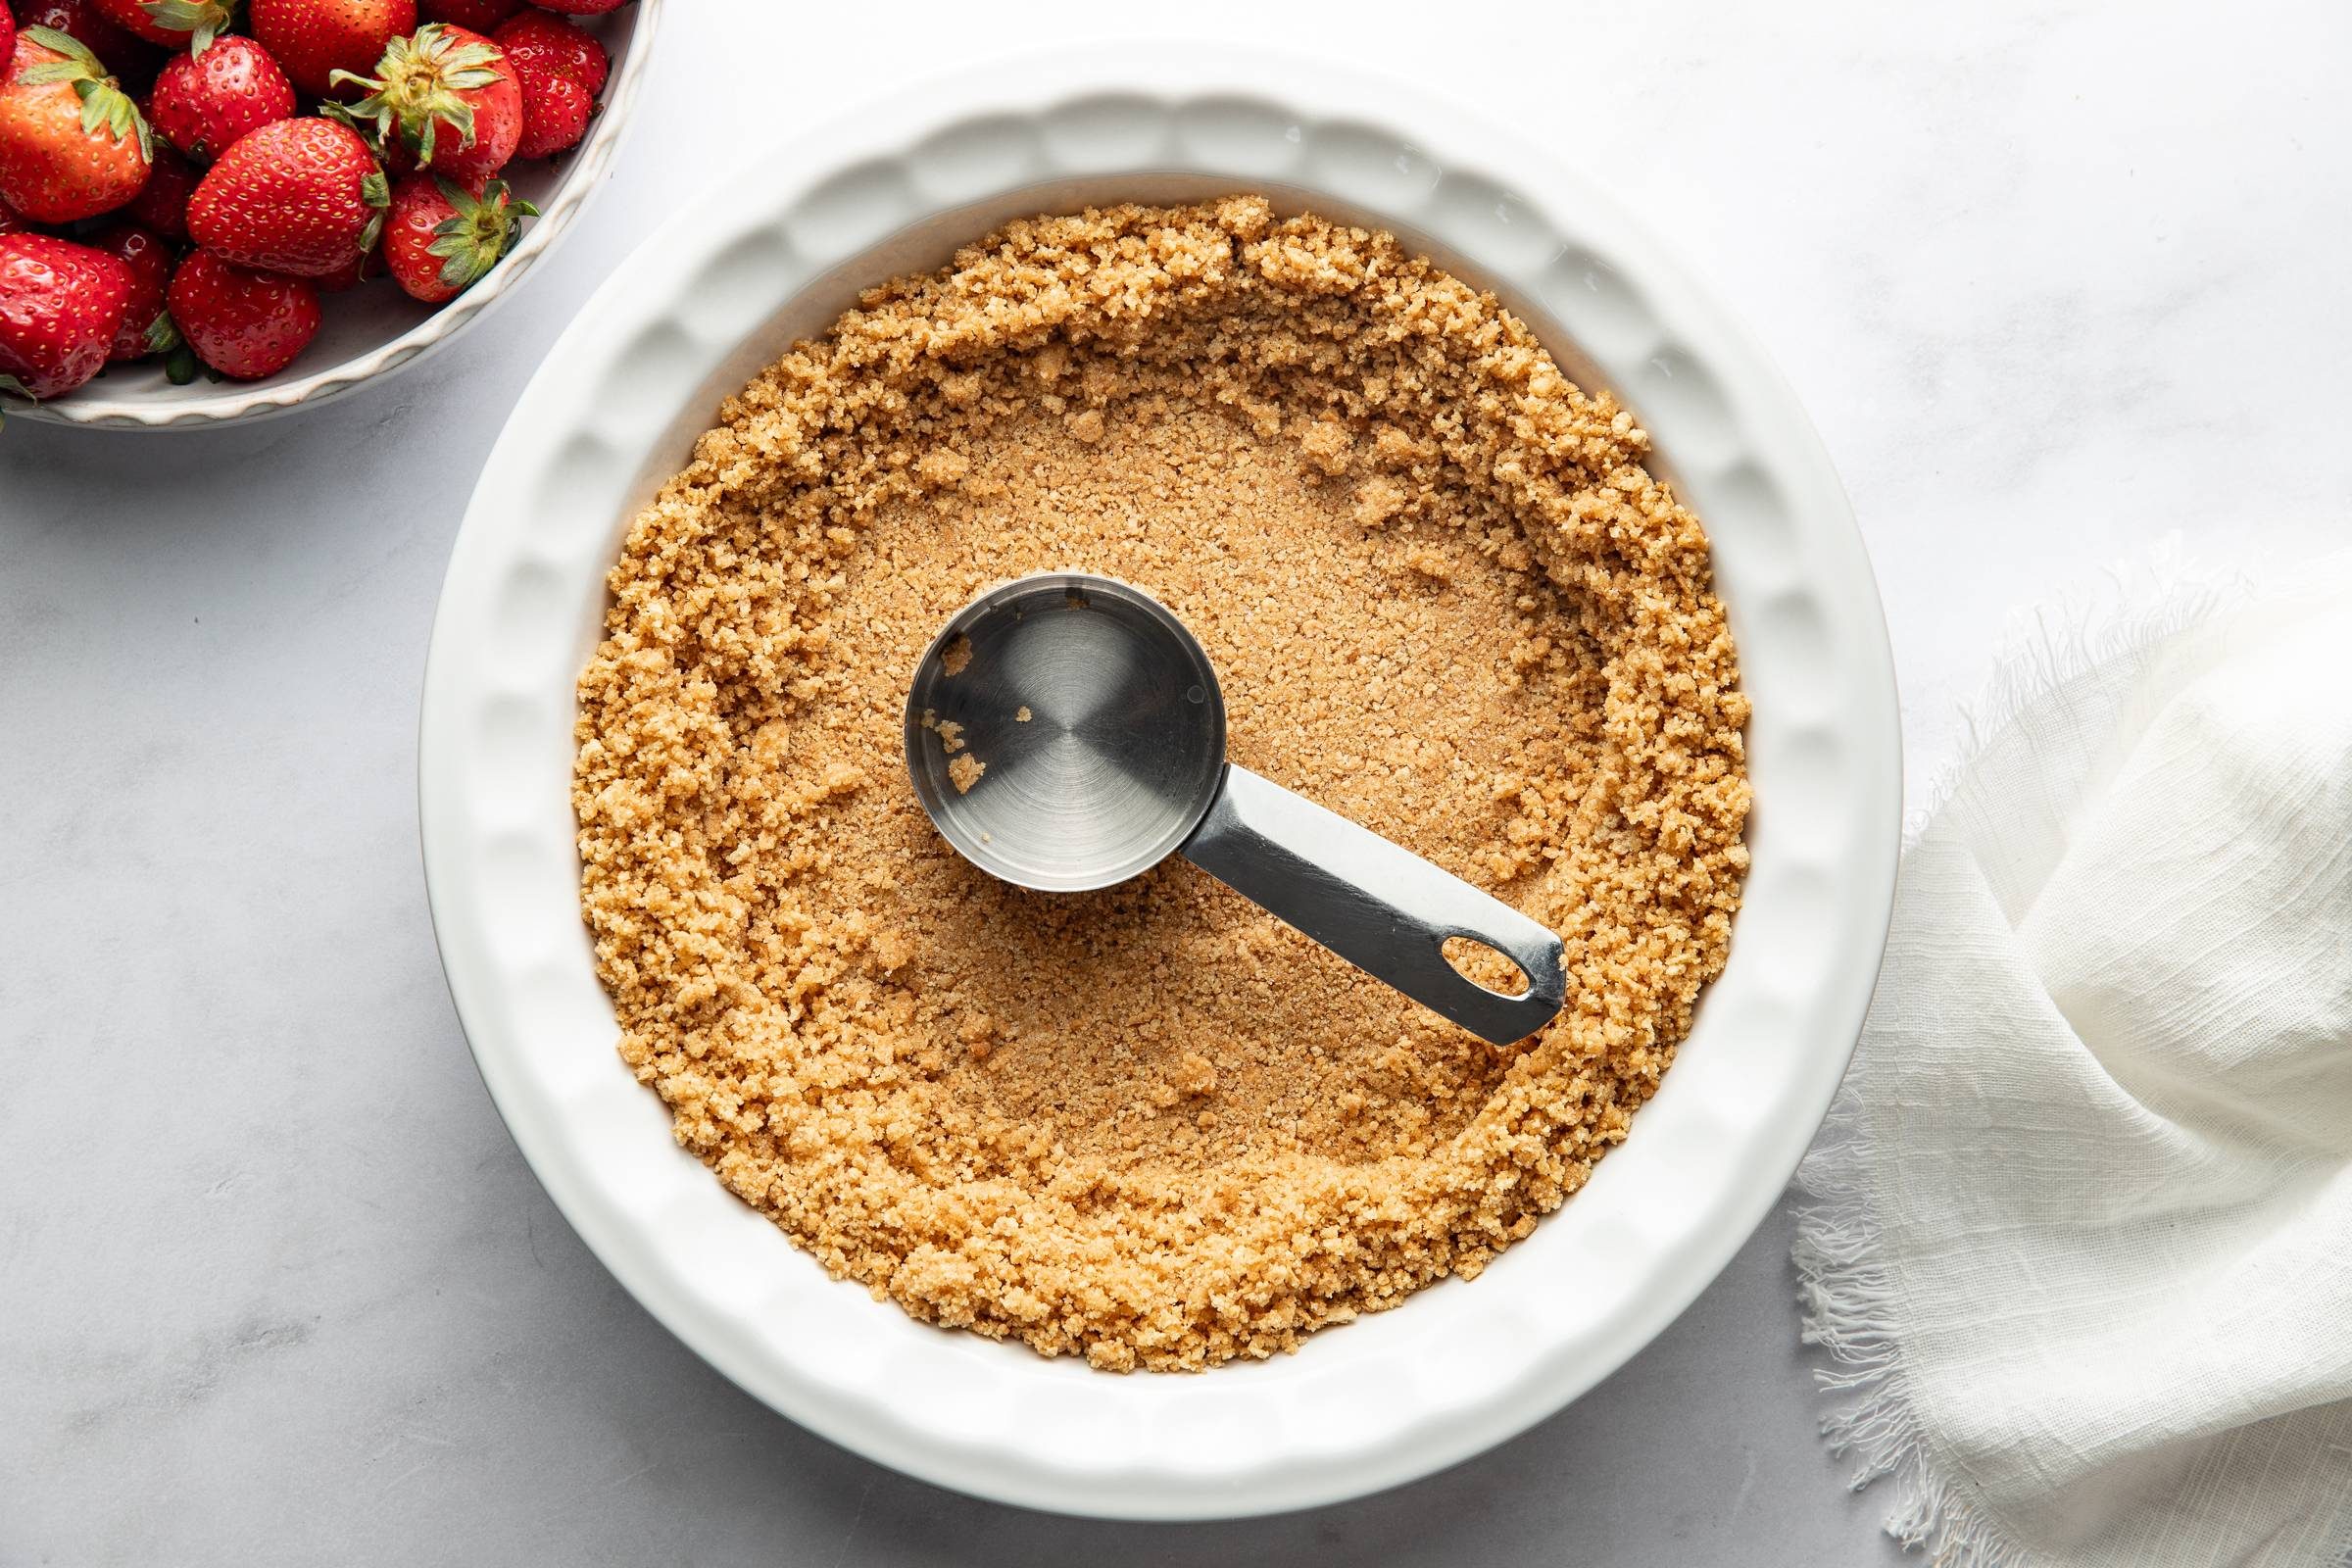
    I’m one of those people who thinks a homemade graham cracker crust is one of the best tasting things on the whole planet Earth (like, the BEST thing), so that’s what I use for mine! If you find yourself really wanting a regular pie crust – make it exactly the same, using a fully baked pie shell!

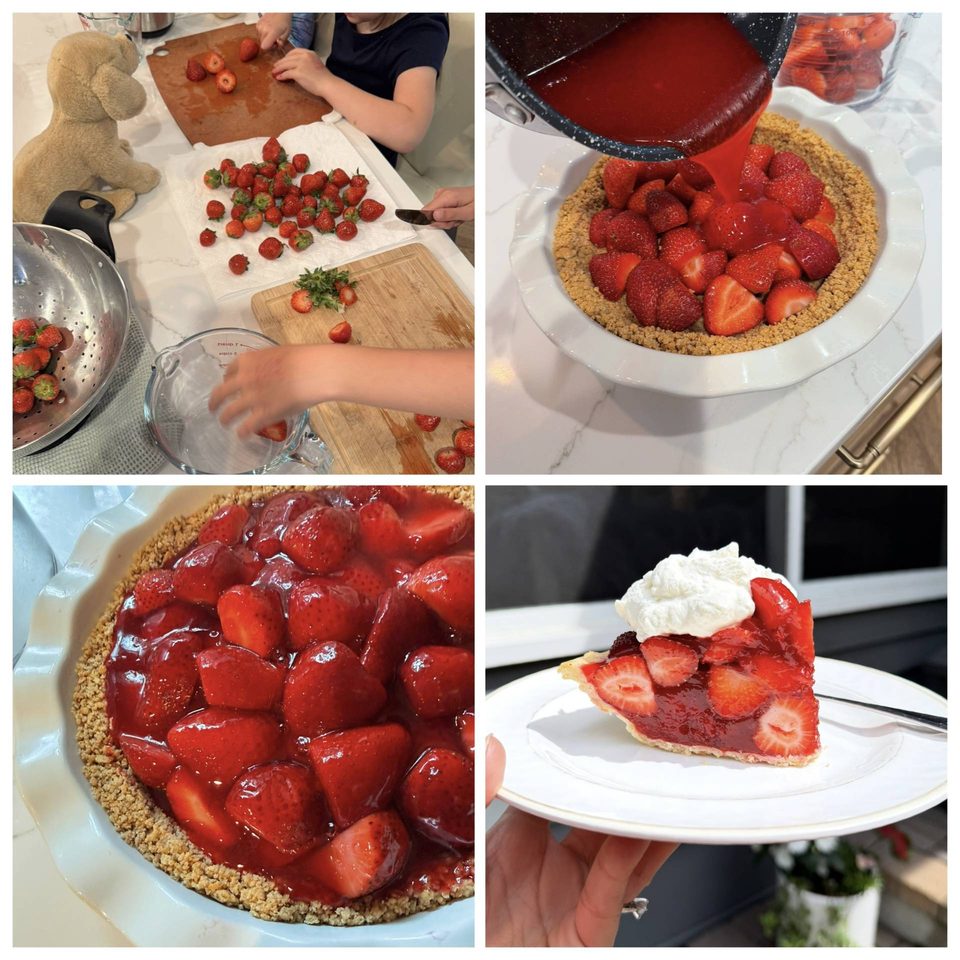
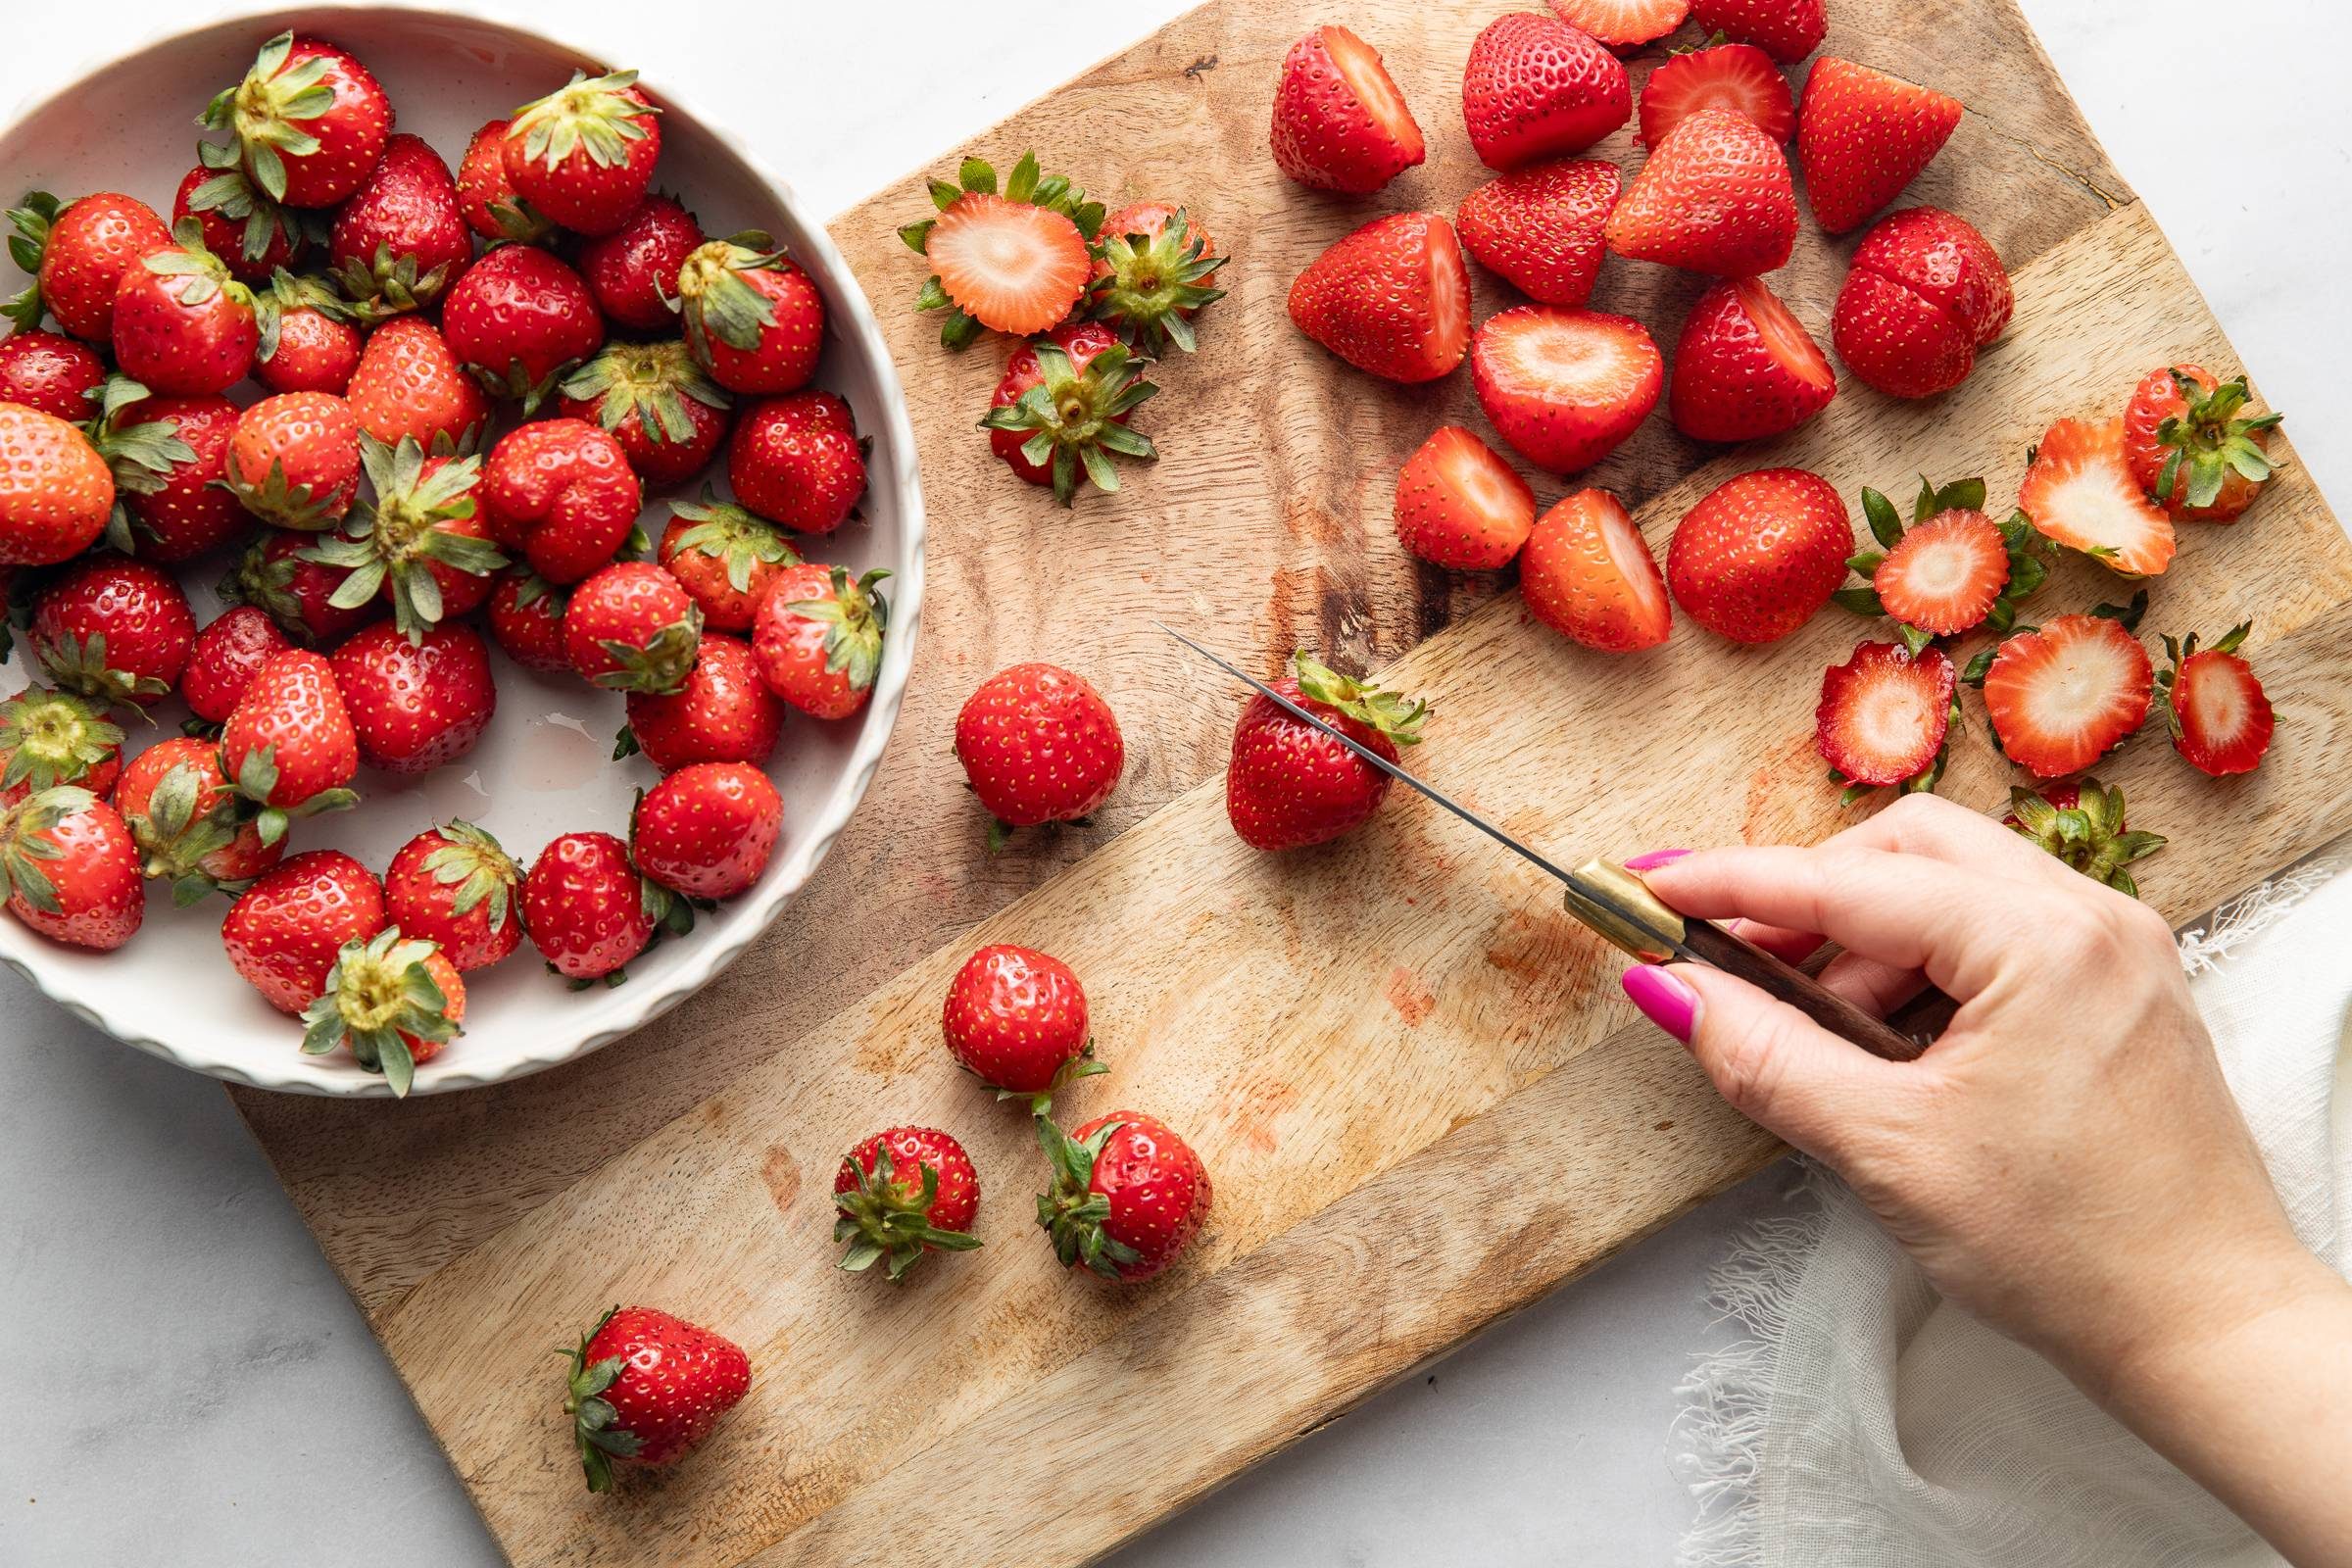
    A noteworthy thing I love about this pie: it’s the PERFECT hands-on recipe for kids to help with. I set up an assembly line for my girls and put them to work on the berries, and then had them help me whisk and pour in the filling. A+ for kid participation on this one!

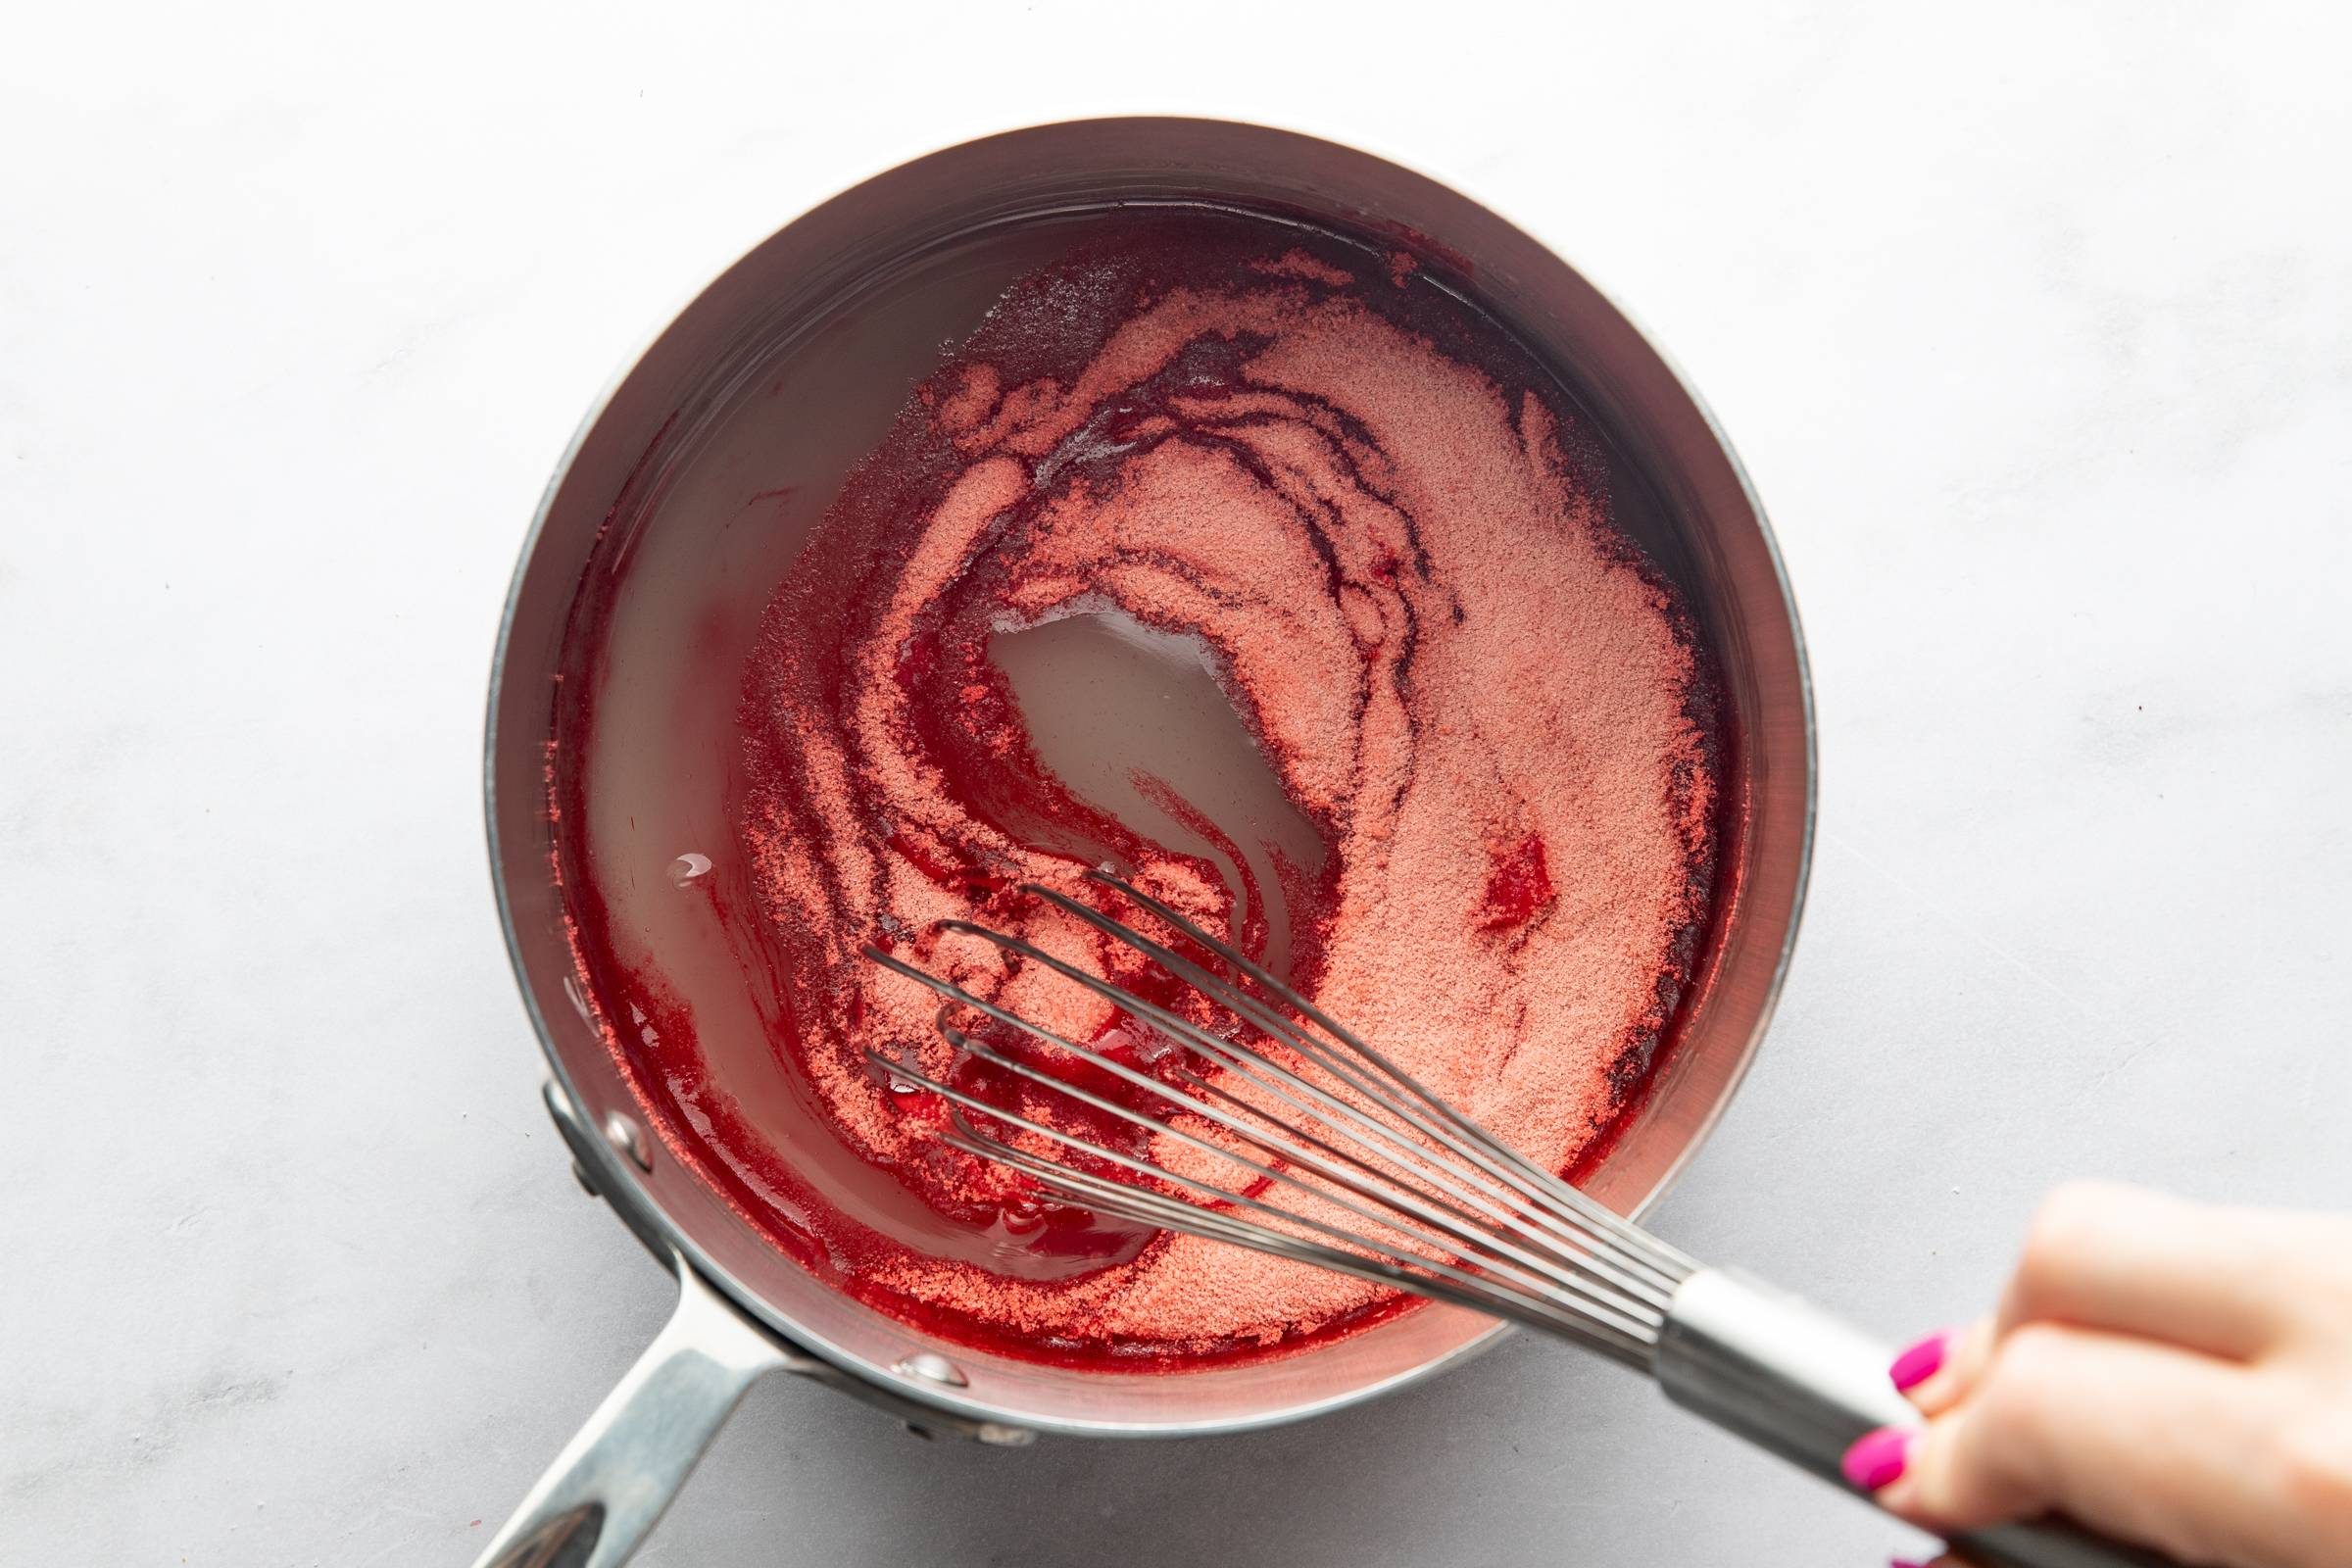
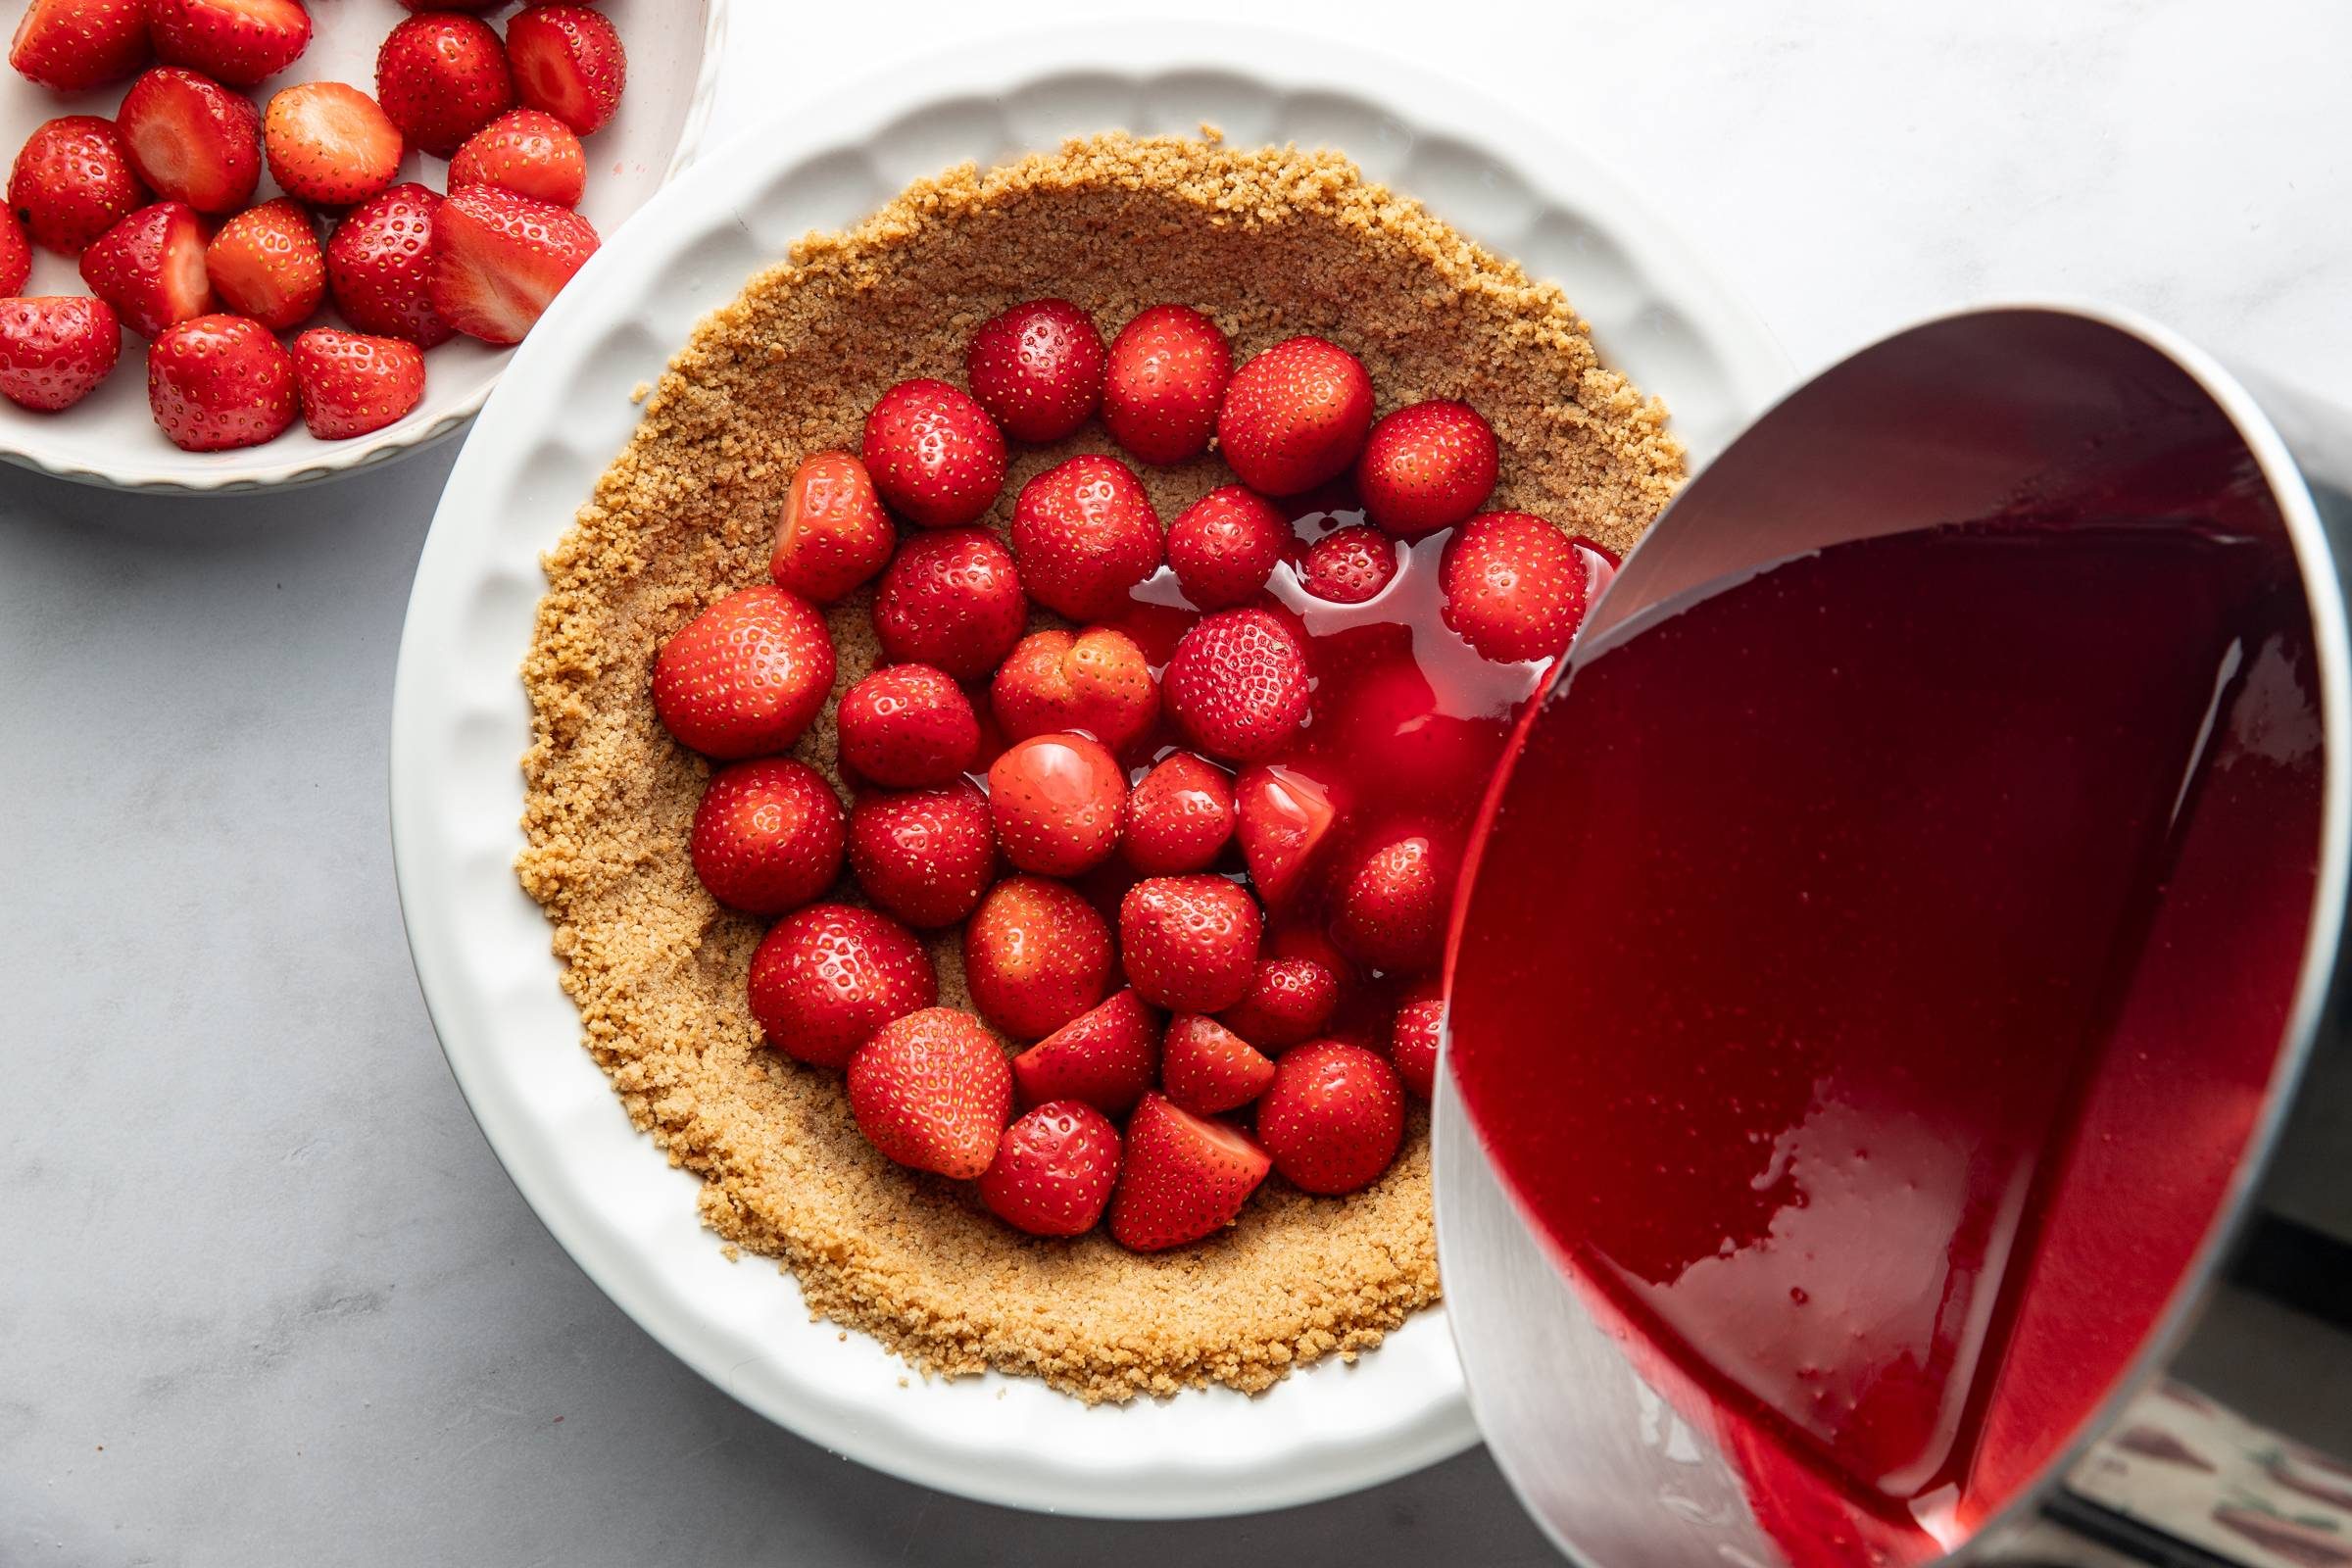
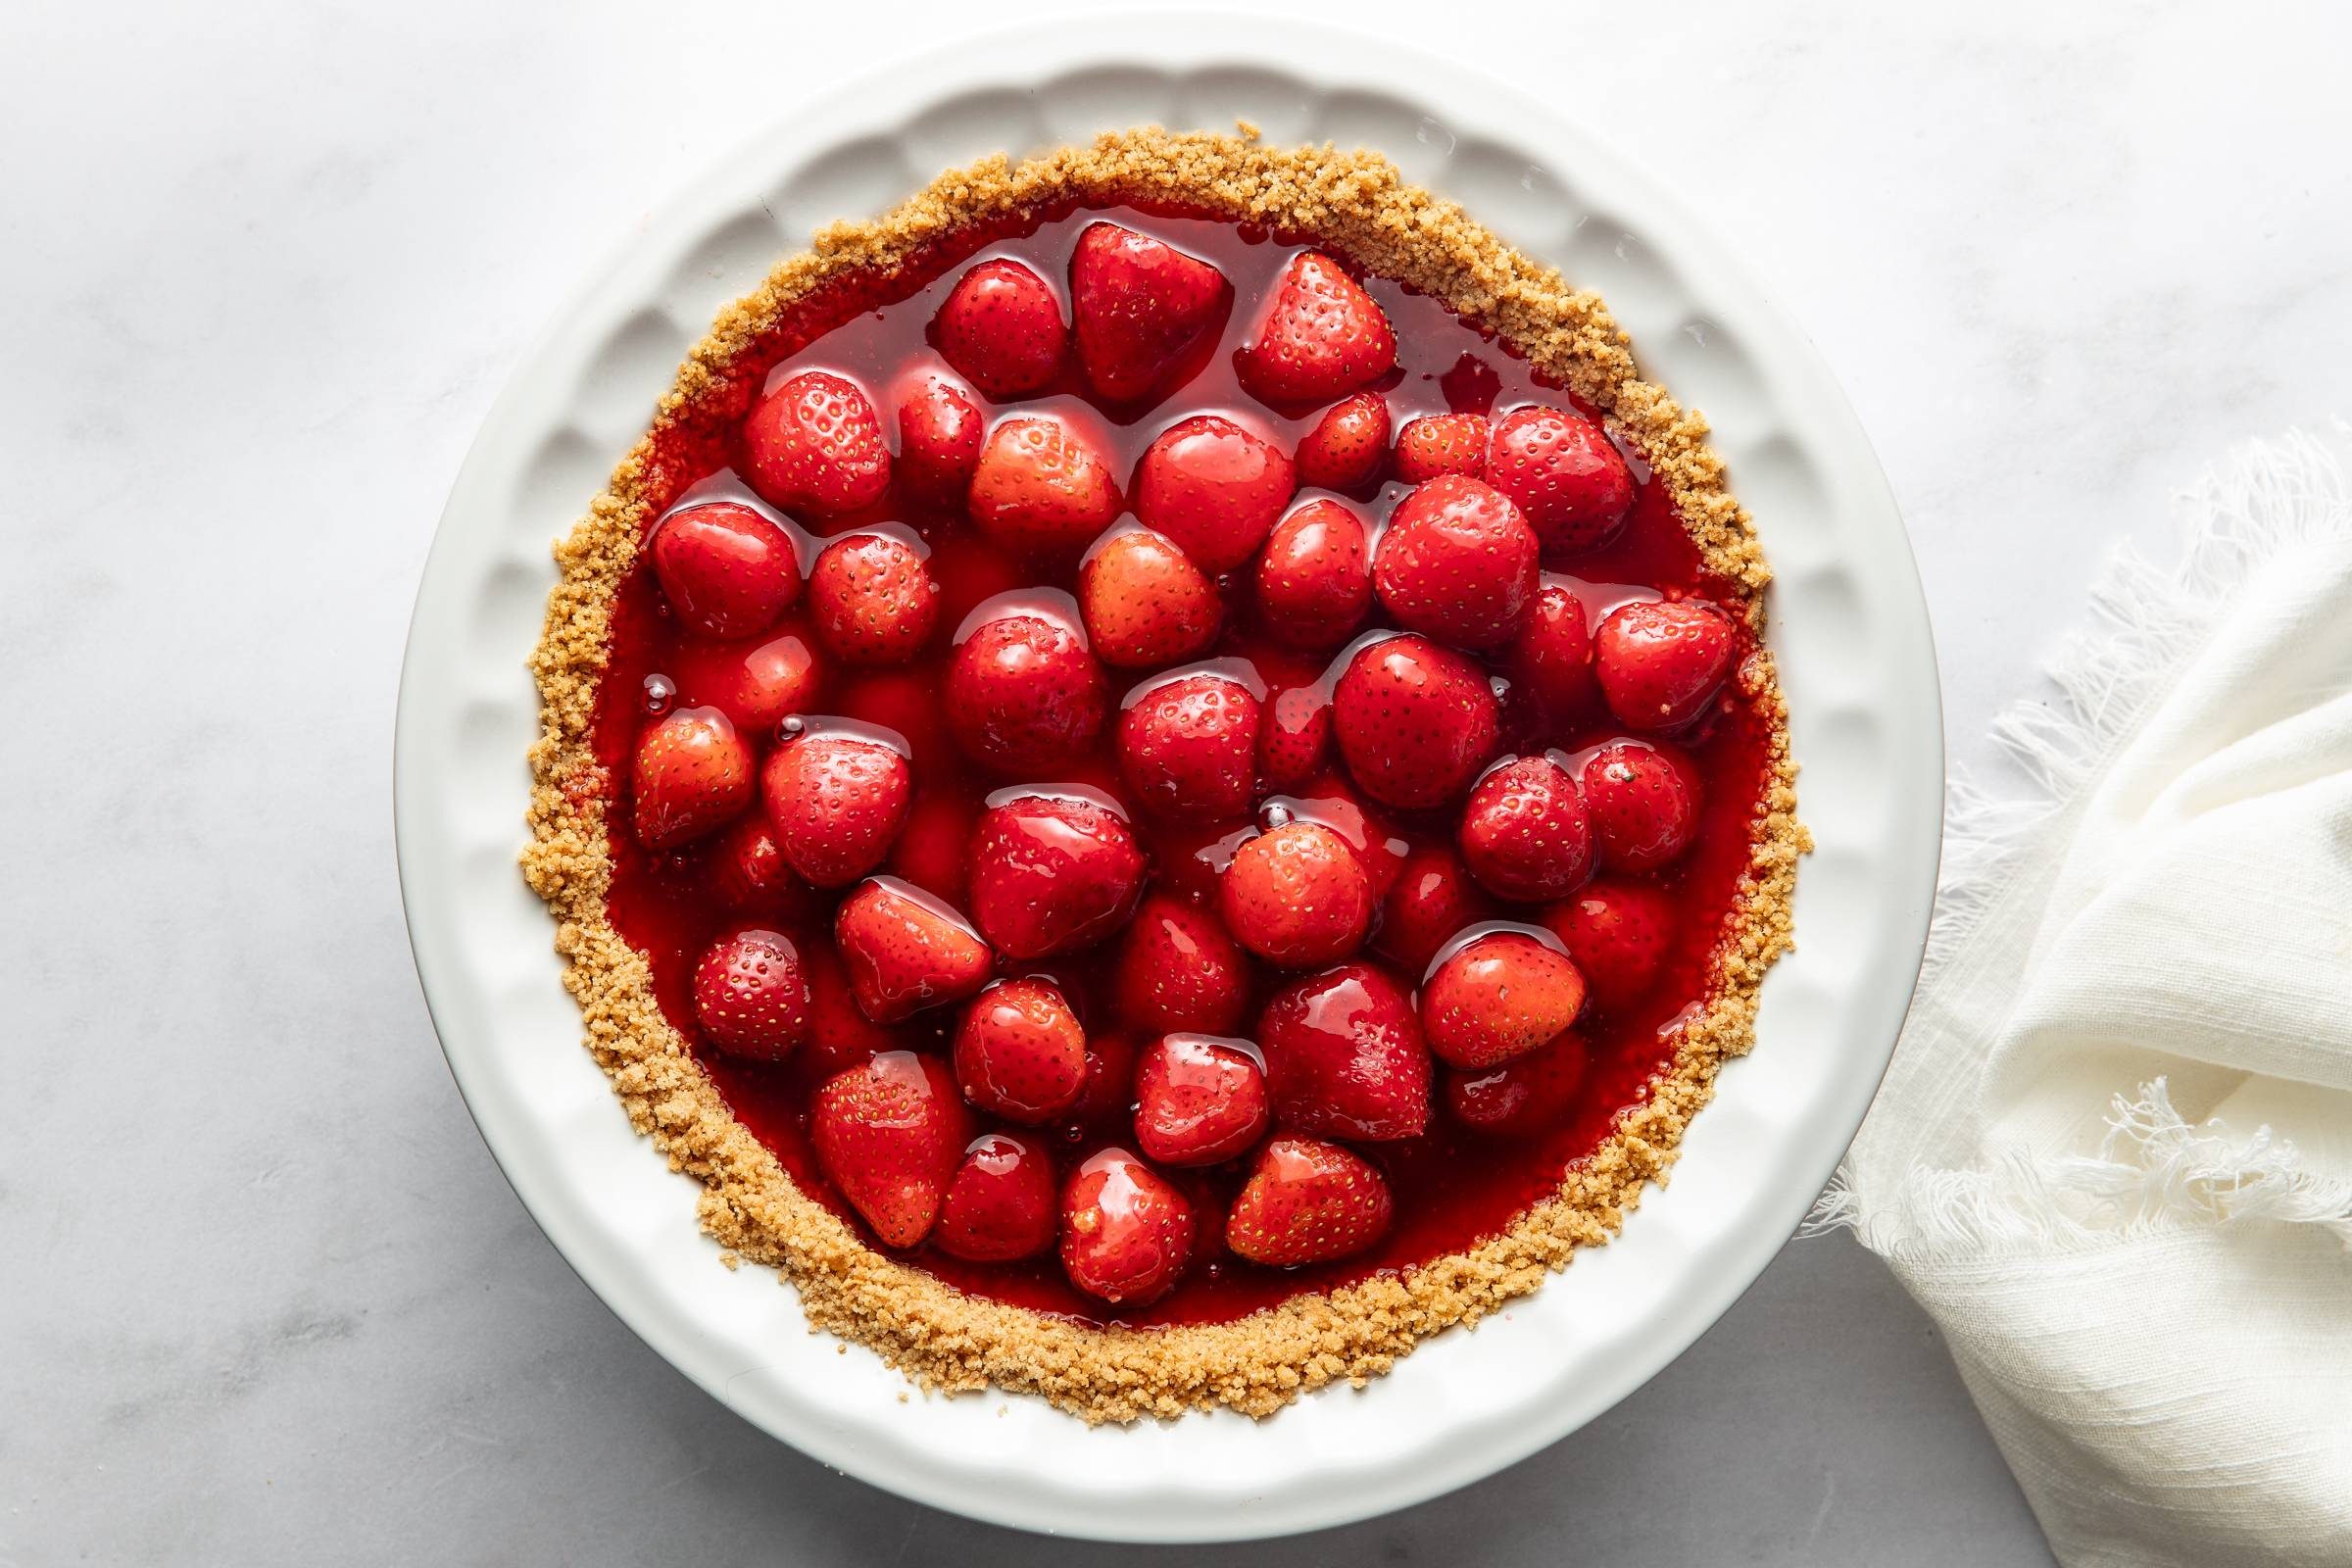
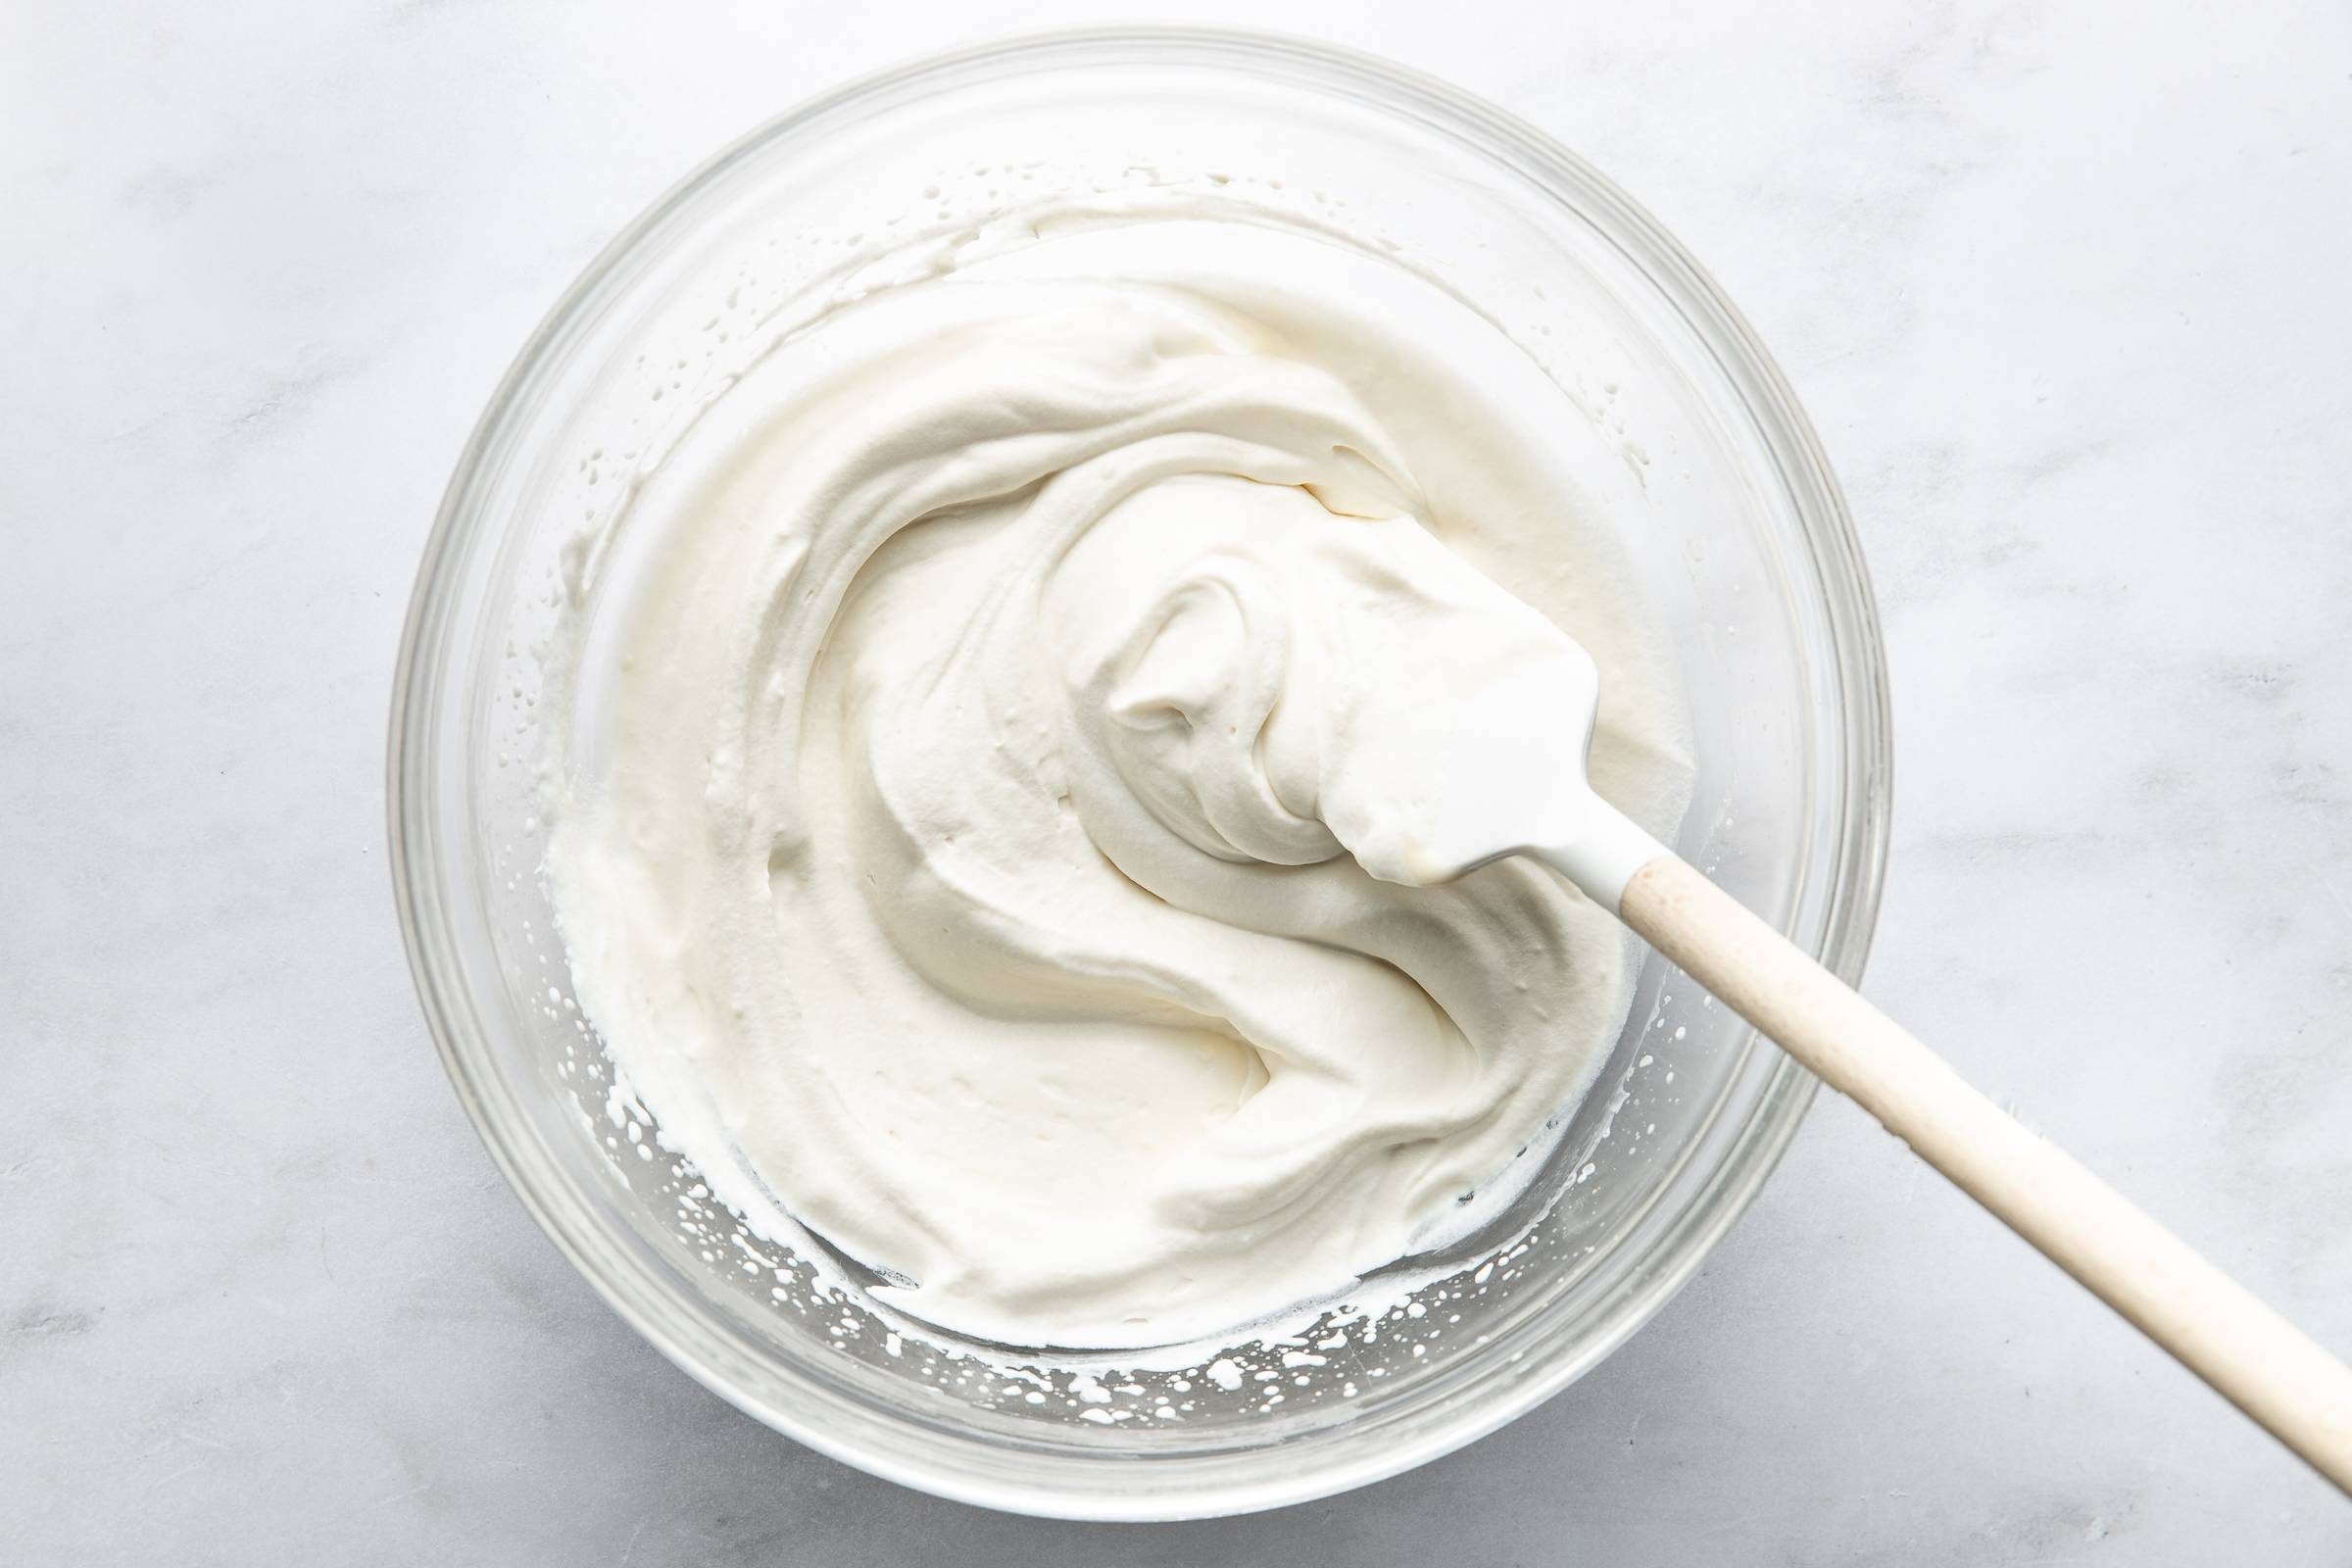
    Steps for making strawberry pie.

    Happy summer-ing! Wishing you a really joyful moment of walking this cold, juicy, towering pie out to the table for your people. Best feeling ever!

    P.S. More of my favorite summer desserts are here!

    Lindsay signature.

    Print

    Strawberry pie.

    Easy Strawberry Pie


    5 Stars 4 Stars 3 Stars 2 Stars 1 Star

    5 from 3 reviews


    • Author:
      Lindsay


    • Total Time:
      6 hours 5 minutes


    • Yield:
      8 large slices 1x

    Description

    The easiest homemade strawberry pie with a graham cracker crust and dolloped with a cream cheese whipped cream! Perfect summer dessert!


    Ingredients


    Units

    Crust:

    • 12 full sheets graham crackers, crushed (1 1/2 cups of crumbs)
    • 5 tablespoons sugar
    • 7 tablespoons salted butter, melted

    Filling:

    • 1/2 cup sugar (use 3/4 cup if your berries are less sweet)
    • 2 tablespoons cornstarch
    • 1 1/2 cups cold water
    • 3 ounces dry strawberry Jell-O powder (half a box, or 5-6 tablespoons)
    • 45 cups fresh strawberries

    Whipped Cream Cheese:

    • 3/4 cup heavy cream
    • 4 ounce cream cheese, softened
    • 1/4 cup maple syrup

    Instructions

    1. Graham Cracker Crust: Preheat the oven to 350 degrees. Mix crust ingredients and press into a 9-inch pie plate. Bake at 350 for 10 minutes.Pressing graham crackers into a crust.
    2. Prep Strawberries: Wash the strawberries well and blot them dry with a paper towel. Cut off the tops. If they are large, cut them all in half. If they are small, you can leave them as-is or just cut some of them in half.Slicing strawberries on a cutting board.
    3. Make Jell-O: In a small saucepan, whisk the sugar, cornstarch, and cold water. Cook over medium-low heat, stirring continuously, until it begins to thicken. Once it starts bubbling, cook it for another two minutes. Add Jell-O and stir till dissolved. Remove from heat and let it cool slightly.Whisking strawberry jello.
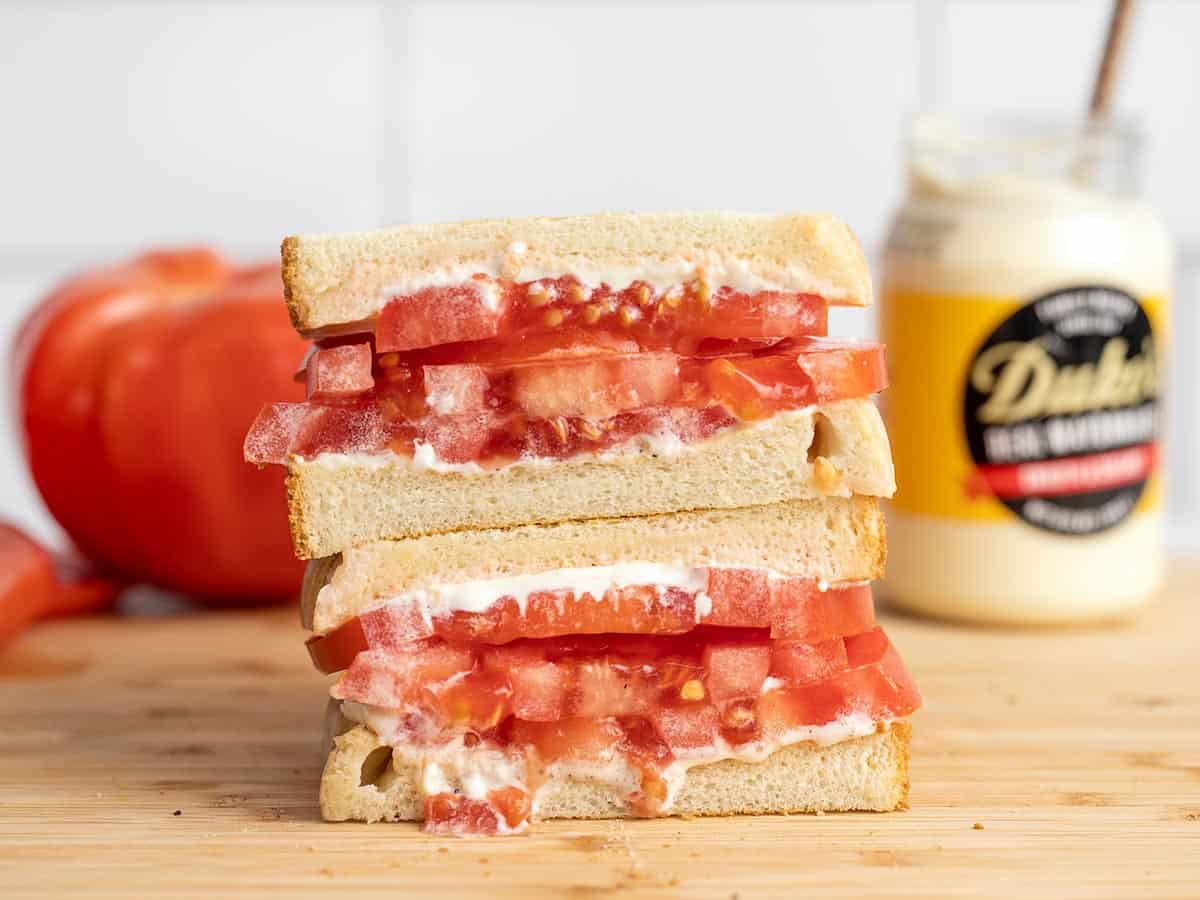
    4. Assemble Pie: Arrange half of the berries in your prepared pie crust. Pour some of the cornstarch mixture over the berries and jiggle it around a bit to make sure the mixture goes in and around all the berries. Repeat with the remaining berries on top, and cover with just enough of the cornstarch mixture to coat the berries and hold them in (you’ll have a bit of cornstarch mixture left over). Press the berries in so they are real cozy with each other, and brush the top with the cornstarch mixture to make the top glossy.Pouring jello onto strawberries and pie crust.
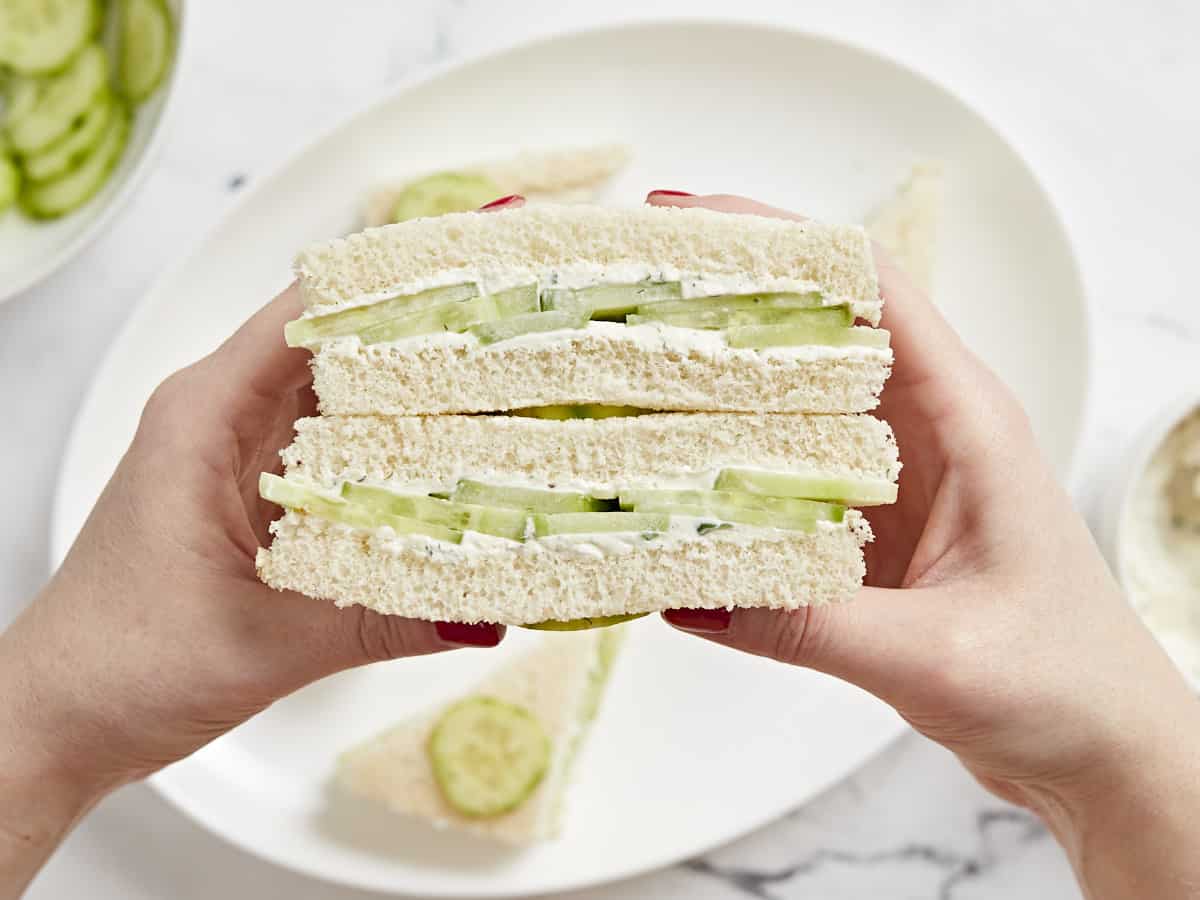
    5. Refrigerate Pie: Refrigerate for 4-6 hours. (I refrigerate uncovered until it’s mostly set, then cover with plastic. This is best served within 24 hours, because the strawberries will start to soften and release juices.)Strawberry pie before being set.

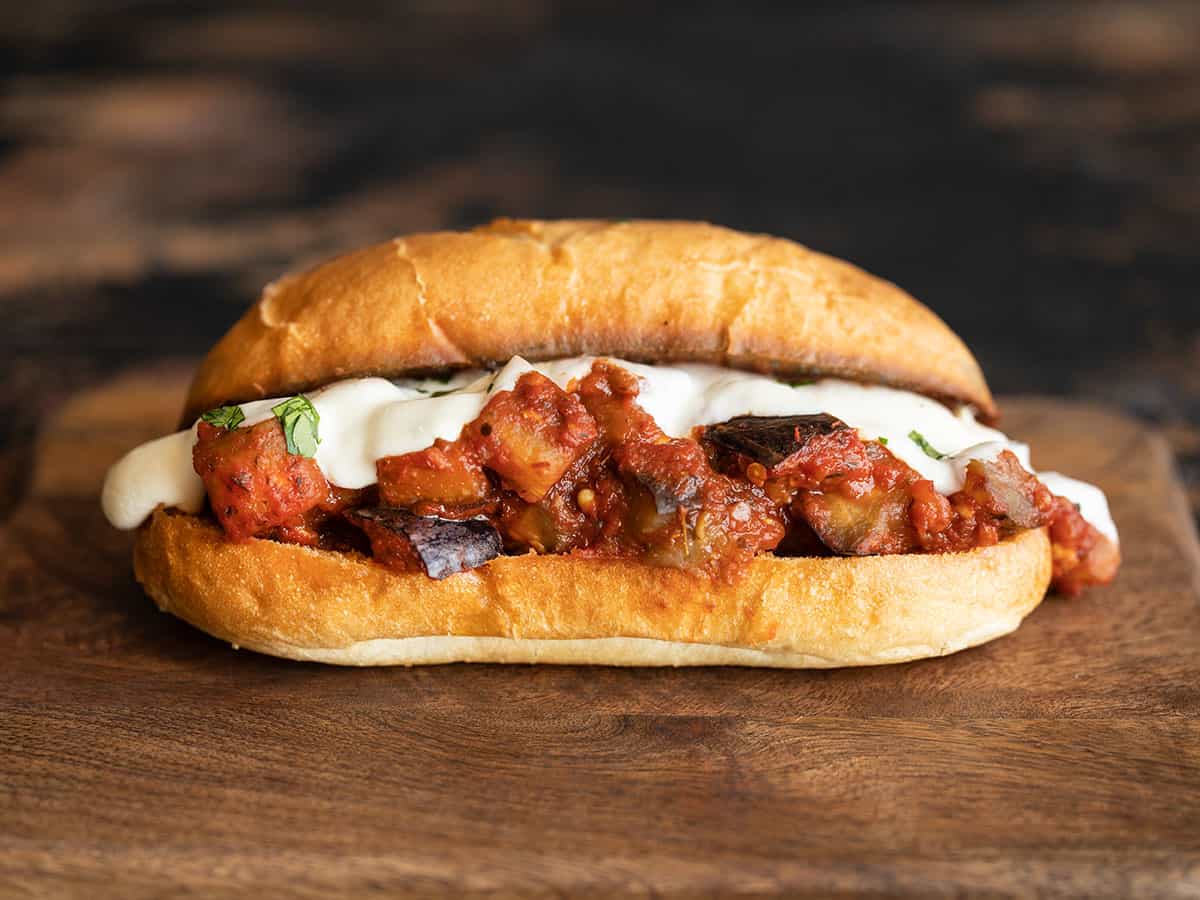
    6. Cream Cheese Whipped Cream: Using a hand mixer, beat the heavy cream until soft peaks form. In a separate bowl, beat the softened cream cheese until smooth. Slowly beat in the maple syrup with the cream cheese until it is loose and creamy. Fold the cream cheese mixture into the whipped cream.Making cream cheese whipped cream.
    7. Serve: Serve the pie slices cold, with a dollop of the whipped cream cheese on top!Finished pie slice.

    • Prep Time: 6 hours
    • Cook Time: 5 minutes
    • Category: Dessert
    • Method: No-Bake
    • Cuisine: American

    Keywords: strawberry pie, easy pie recipe, summer pie, summer dessert

    My Favorite Strawberry Recipes

    The post Easy Strawberry Pie appeared first on Pinch of Yum.

    This post was originally published on this site.