Tag: SNN Cooking

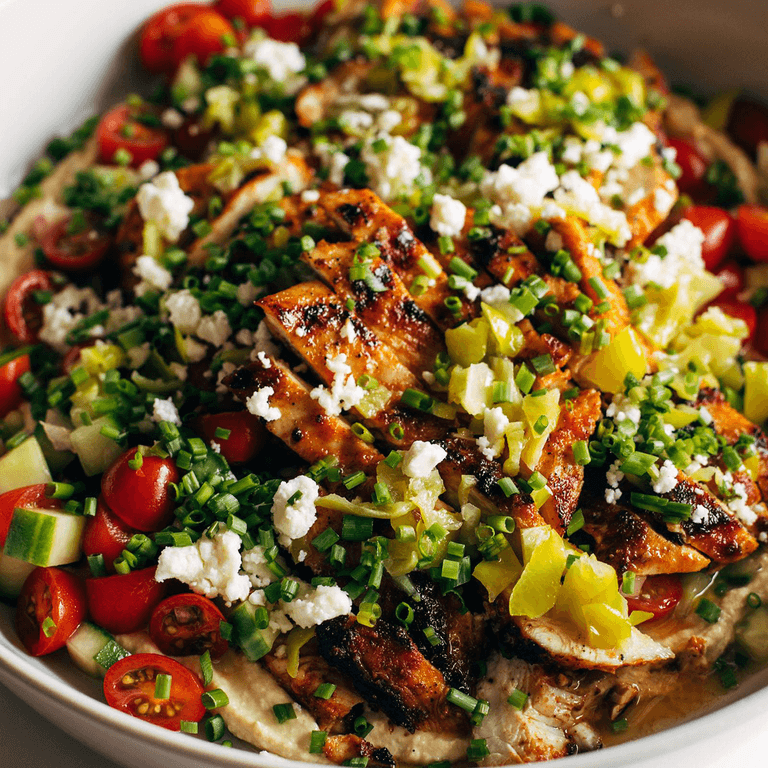
  • Chicken Shawarma

    Chicken Shawarma

    Even though it’s been 15 years since I first shared this recipe, I still believe the marinade for this Chicken Shawarma is one of the best marinades I’ve ever made. EVER. It’s so good that I find myself using it on everything. This easy chicken shawarma is made with chicken marinated in yogurt, lemon, garlic, and warm spices, then grilled or cooked in a skillet until tender and juicy. Serve it as a wrap, pile it over rice, tuck it into pita, or turn it into a meal prep bowl with plenty of fresh vegetables and tangy yogurt sauce. It’s pure magic, super versatile, and much easier to make at home than you think.

    “This recipe is in my regular rotation of BB recipes. I always chop up the chicken so it gets more marinade up the garlic in the sauce. This time I didn’t have cucumber so I subbed spinach for both that and the lettuce. So good!”

    Kelsey

    Easy Homemade Chicken Shawarma

    Shawarma is a Middle Eastern dish traditionally made from marinated meat that’s slow-roasted on a rotating spit. Lamb is a popular choice, but for my recipe, I use chicken because it’s a more accessible and budget-friendly option. I don’t have a rotating spit at home (and I’m assuming you don’t either!), so my take on this traditional recipe involves marinating the chicken and then cooking it on a grill or in a hot skillet. So while my recipe isn’t technically authentic, it’s an easy option for home cooks to try!

    I mix warming spices like cinnamon, nutmeg, and cloves with yogurt, lemon, and garlic, then let the chicken marinate for AT LEAST 4 hours so the flavor has time to really work its way in. That big flavor is what makes this chicken so good for meal prep because you can cook a batch once and use it all week to make sandwiches, rice bowls, salads, or whatever you like. I even use the marinade in my roasted potato wedges with shawarma sauce recipe. So good!

    Ways to Serve

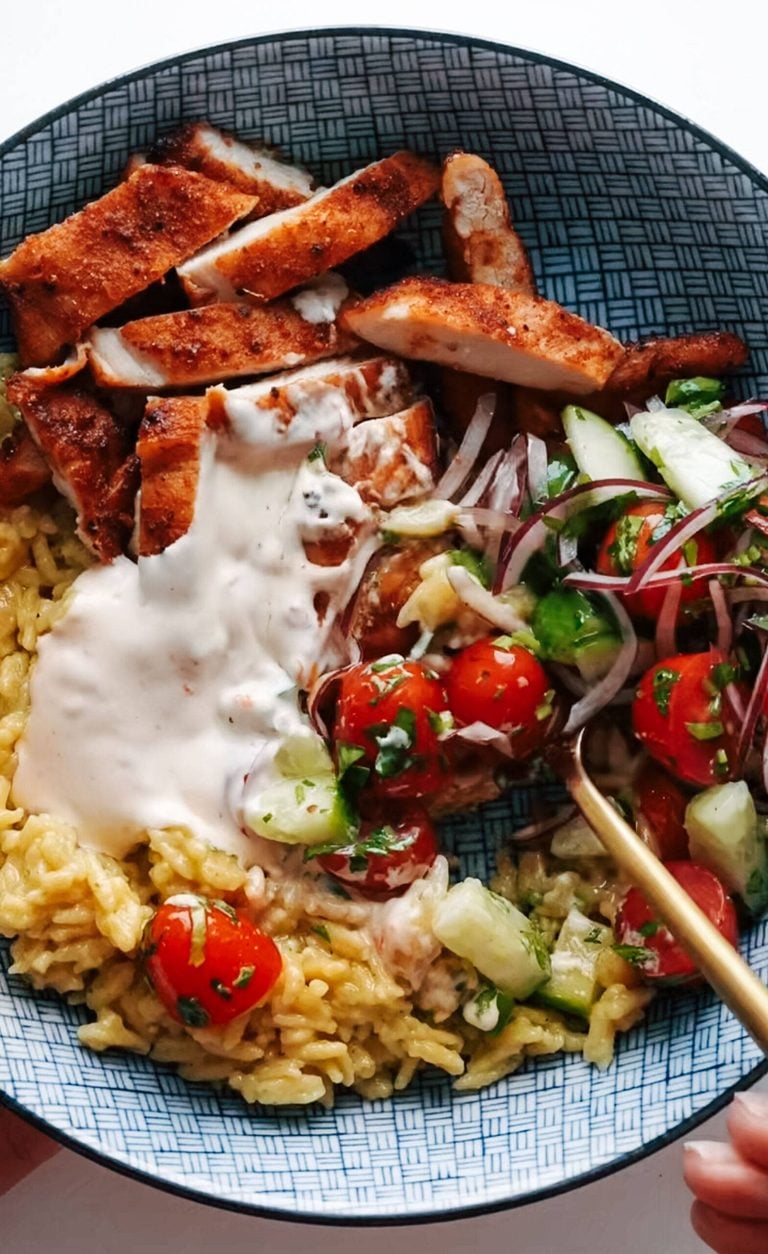
    • Chicken shawarma plate: Serve the sliced chicken on a plate with rice or flatbread, yogurt sauce, and a simple mix of cucumber, tomato, and red onion. Add a scoop of cauliflower tabbouleh, couscous, or a few grilled vegetables to make it feel like a full spread!
    • Salad: Pile the chicken over chopped romaine with cucumber, tomato, and red onion, then drizzle with the yogurt sauce.
    • Pita: Instead of rolling a full wrap, tuck the chicken into pita pockets with lettuce, cucumber, tomato, red onion, and sauce. It’s a little less fussy than wrapping everything up, and it makes an easy lunch or quick weeknight dinner.
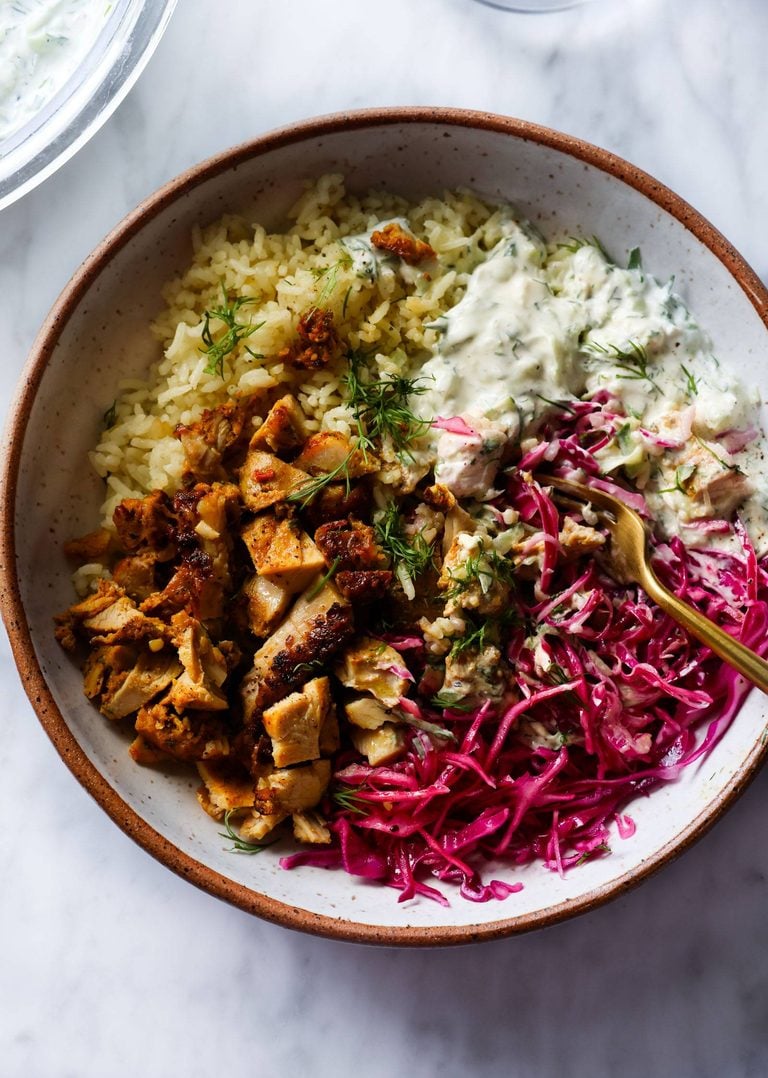
    • Bowl meal: Layer the chicken into a bowl with rice, couscous, or quinoa, plus fresh veggies and a spoonful of the yogurt sauce. I think this is one of the best ways to use it for meal prep because everything can be stored separately and assembled as needed.
    • Takeout-style: If I’m leaning even more into the takeout vibe, I’ll serve the chicken in a wrap with air fryer French fries and a big side of yogurt sauce or tzatziki. It’s simple, fun, and very hard to complain about.

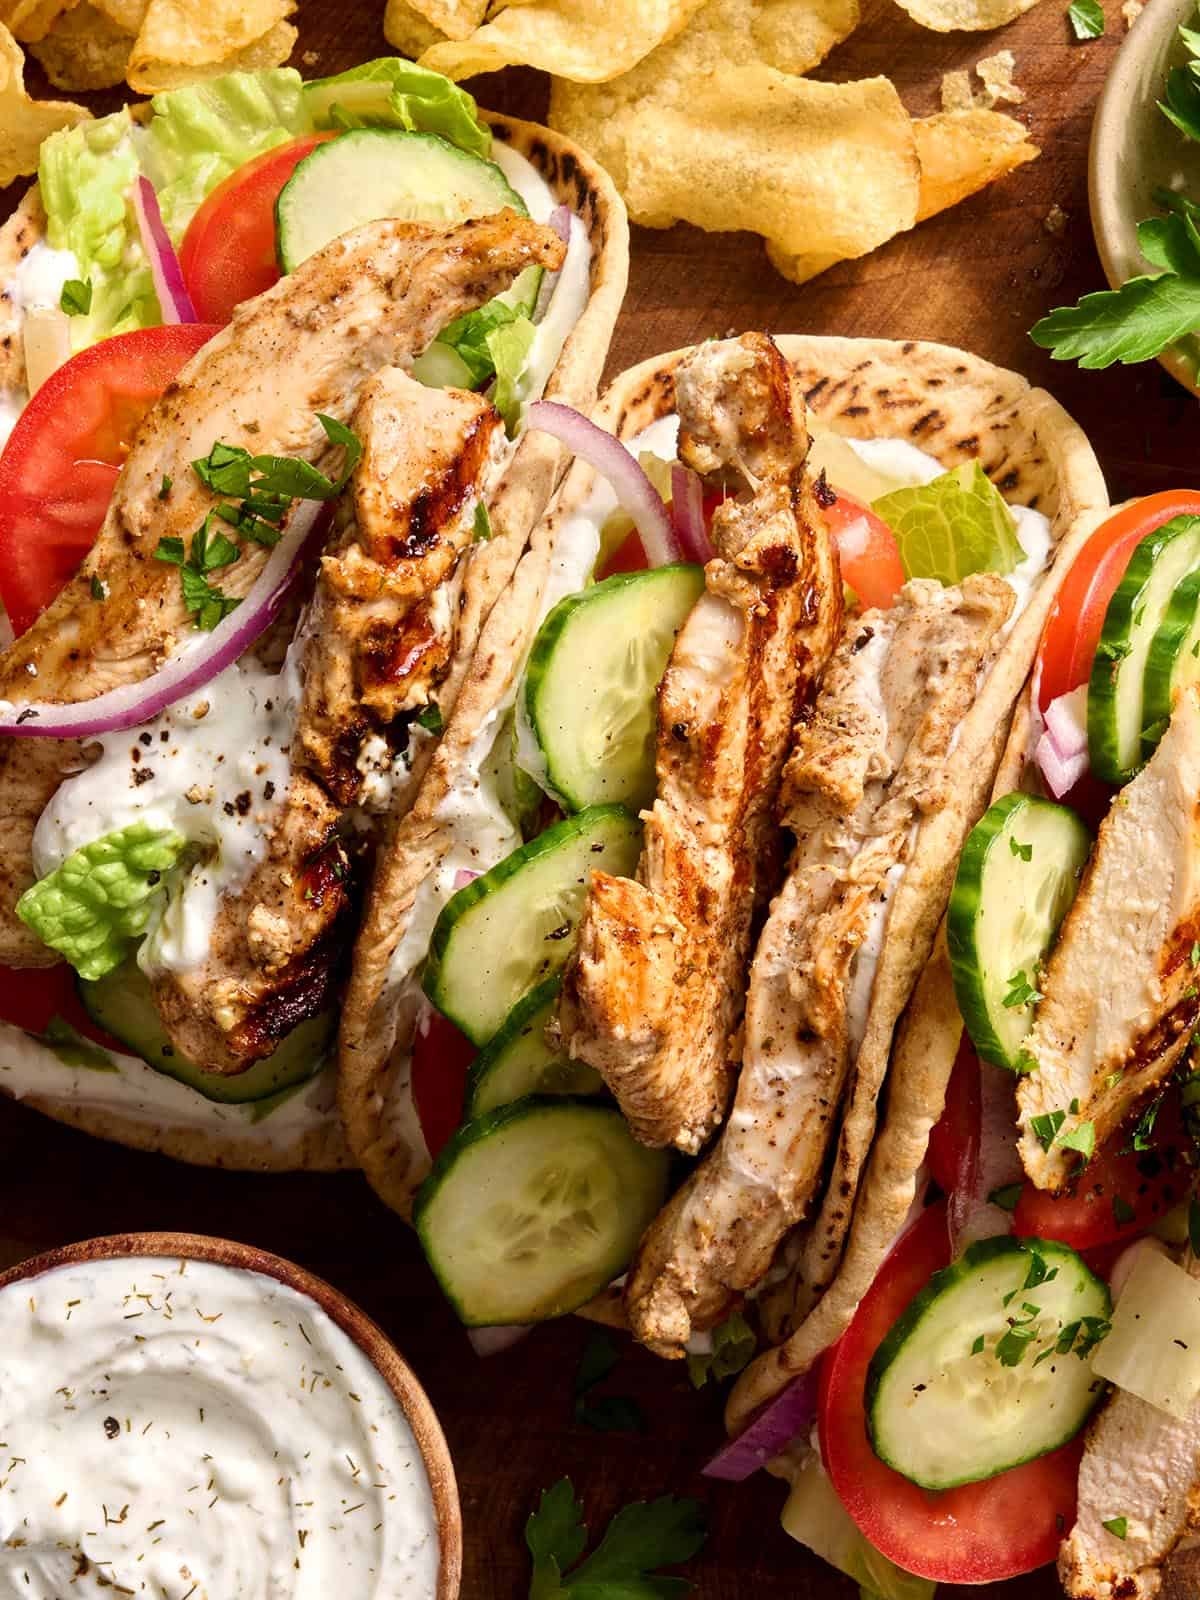
    Chicken shawarma serving suggestions collage.
    Homemade chicken shawarma shown here as a salad, wrap, platter, and an open-faced sandwich with the tangy yogurt sauce.

    Meal Prep it!

    This chicken shawarma keeps well for 3-4 days, making it perfect for easy meal-prep lunches. You can eat the chicken cold, especially in wraps and salads, or quickly reheat it in the microwave or in a skillet on the stovetop if you’re serving it with rice, pita, or veggies. As you can see in the photo below, the wraps can be fully assembled ahead of time, while salads, dips, and sides can be packed into separate compartments to keep everything fresh and easy to grab.

    Here are some of my favorite meal prep options for this chicken:

    • Meal prep box 1: Make a wrap with naan, pita, or flatbread, and pack it with a side of my creamy cucumber salad. Enjoy cold for an easy grab-and-go lunch over summer!
    • Meal prep box 2: Chop the chicken and serve it over the same veggies used in the wrap variation above, including romaine, cucumber, tomato, and red onion. Pack pita wedges and white bean hummus in separate compartments for a filling lunch with lots of texture.
    • Meal prep box 3: Keep the chopped chicken, salad, and hummus the same as the previous box, but swap the pita for cucumber sticks. This is my go-to when I want something lighter (it also happens to be gluten-free), and the whole box stays fresh and crunchy.
    • Meal prep box 4: Pair an assembled wrap with our summer lentil salad for a hearty lunch with plenty of protein and fresh vegetables. The lentil salad is a GREAT make-ahead side because it holds up really well in the fridge.
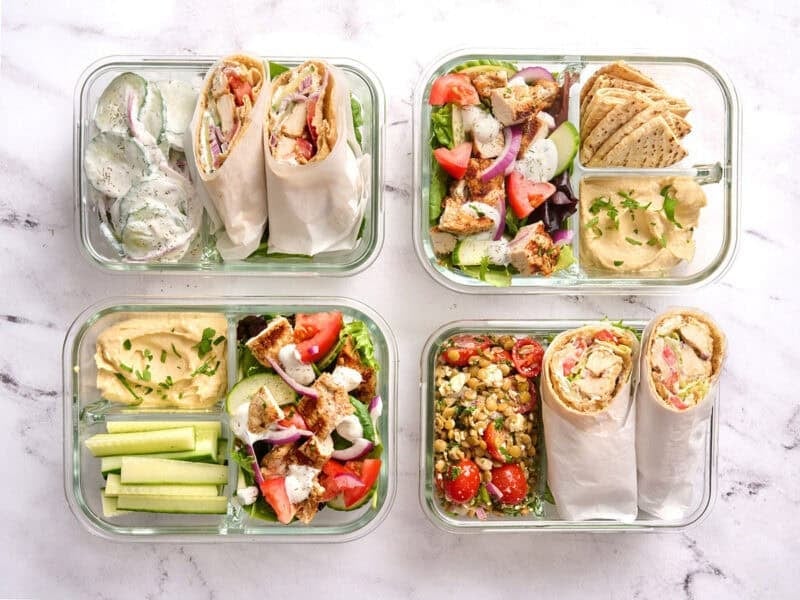
    Overhead of chicken shawarma meal prep boxes.

    Recipe Success Tips

    1. Chicken breasts and thighs both work. I used 2 large chicken breasts as that’s what I had to hand, but chicken thighs will also work (and are usually cheaper!). The fattiness of the thighs will make the chicken taste a little more like the traditional rotisserie version, too. The marinade will work for about 4-6 boneless, skinless chicken thighs.
    2. Give the chicken time in the marinade. Four hours is the minimum I’d recommend here, but overnight is even better if you’re planning ahead. The yogurt, lemon, garlic, and spices need time to season the chicken all the way through, but I wouldn’t push it past 24 hours since the lemon can start making the texture of the chicken too soft.
    3. Slice the chicken before marinating for extra flavor. You can marinate the chicken breasts whole, but slicing them into strips first gives the marinade more surface area to cover. It also helps the chicken cook faster and makes it easier to use in wraps, bowls, salads, and meal prep boxes after!
    4. Get the grill or skillet nice and hot. Shawarma is traditionally cooked on a rotating spit, so a hot grill or skillet helps recreate some of those browned, lightly charred edges at home. Let the chicken cook long enough to get color before flipping! If you’re using a skillet, cook the chicken in batches if needed so the pieces have room to brown nicely.
    5. Don’t skip the final rest. Let the chicken rest for a few minutes after cooking so the juices redistribute back into the meat. I also like to spoon any juices from the plate back over the sliced chicken because there’s so much flavor there!
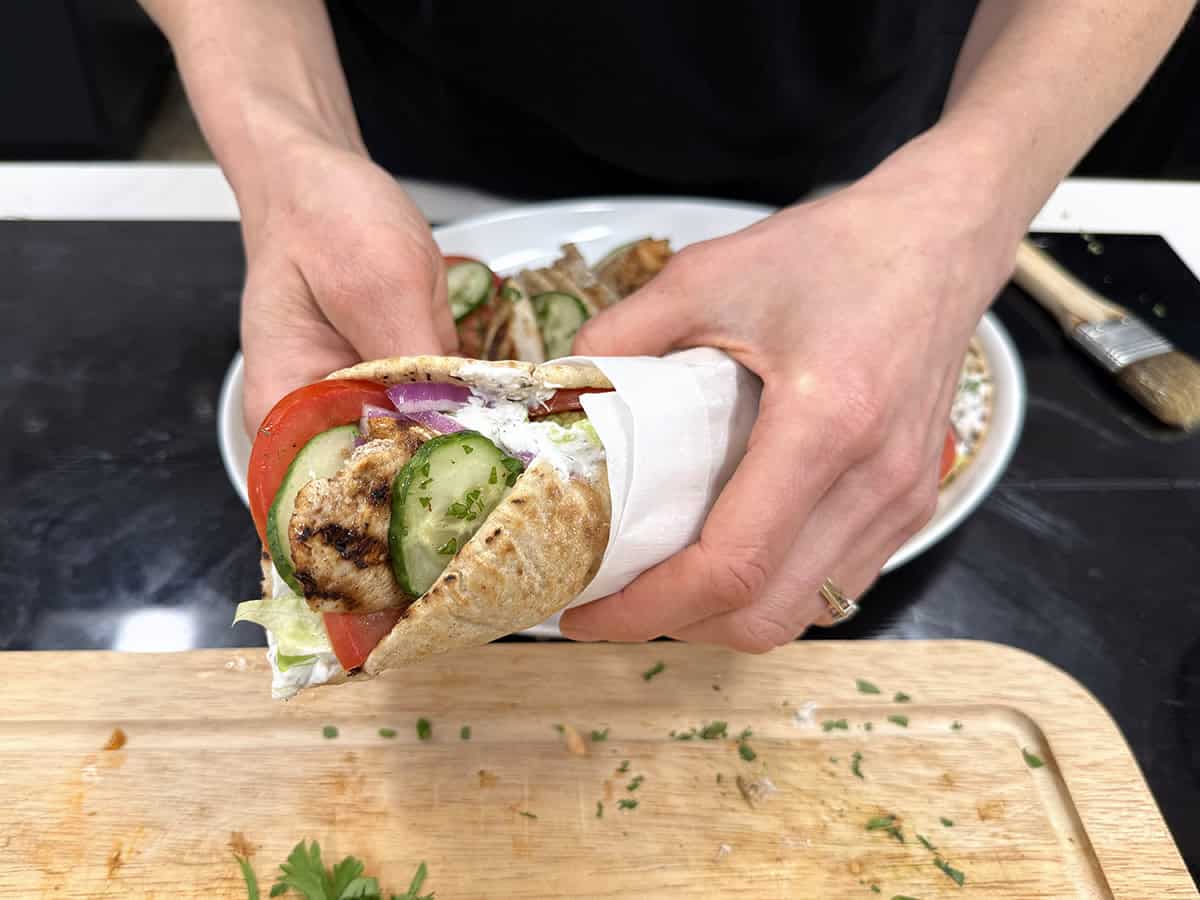
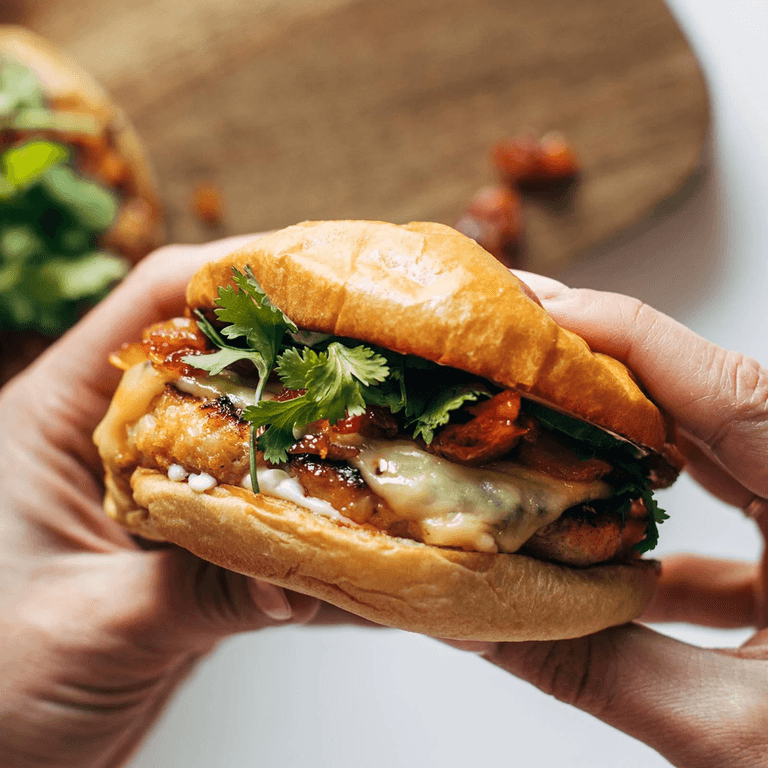
    Hands holding a chicken shawarma wrap.

    Overhead of chicken shawarma in a pita.

    Print
    Add to Collection Go to Collections

    Chicken Shawarma Recipe

    A magical blend of yogurt, lemon, garlic, and warm spices makes this homemade Chicken Shawarma tender, flavorful, and perfect for wraps, bowls, salads, or meal prep.
    Course Lunch
    Cuisine Middle-Eastern
    Total Cost $10.05 recipe / $2.51 serving
    Prep Time 10 minutes
    Cook Time 15 minutes
    Marinate Time 4 hours
    Total Time 25 minutes
    Servings 4
    Calories 156kcal

    Equipment

    • Mixing Bowls
    • Ziptop Bag
    • Grill or Skillet

    Ingredients

    CHICKEN & MARINADE

    • 2 large chicken breasts 1.25 lbs, $3.21*
    • ½ cup plain Greek yogurt $0.52
    • 1 Tbsp lemon juice $0.04
    • 1 Tbsp garlic minced, (3 cloves) $0.18
    • ½ tsp ground cinnamon $0.04
    • ½ tsp dried oregano $0.07
    • ½ tsp salt $0.01
    • ¼ tsp ground nutmeg $0.03
    • ¼ tsp ground cloves $0.03

    YOGURT SAUCE (optional)

    • ¾ cup plain Greek yogurt $0.78
    • ¼ tsp garlic minced, (1 clove) $0.06
    • ¼ tsp dried dill $0.03
    • ¼ tsp salt $0.01

    SANDWICH (optional)

    • ½ head romaine lettuce washed, dried & chopped, $1.07
    • ½ medium cucumber sliced, $0.38
    • 2 medium Roma tomatoes sliced, $0.64
    • ¼ red onion sliced, $0.31
    • 4 naan or pita or flatbread, $2.64**

    Instructions

    • Gather all of your ingredients.
    • In a small bowl, combine the ingredients for the marinade (½ cup plain Greek yogurt, lemon juice, garlic, cinnamon, oregano, salt, nutmeg, and ground cloves). Stir to combine.
    • Slice chicken breasts into 1-inch-thick strips before marinating to maximize the flavor.
    • Add chicken to a gallon ziptop bag or to a medium mixing bowl. Pour in the marinade and toss to cover the chicken. Make sure it’s coated well. Then, cover and refrigerate for 4-24 hours.
    • If you’re making the yogurt sauce (optional), you can prepare it while the chicken marinates. Combine the ¾ cup plain Greek yogurt with the garlic, dill, and salt. Cover and refrigerate until ready to use.
    • Preheat your grill. After marinating the chicken, grill until cooked through (I use an indoor tabletop grill; the total amount of time it’ll take to cook will vary from grill to grill). Flip after 7 minutes.***
    • Check the internal temperature of the chicken before removing it from the grill; it must read at least 160℉. It’ll reach a safe temperature of 165℉ after it’s removed from the grill and rested for a few minutes, covered with foil on a clean plate. Once rested, the chicken is ready to use!
    • If you want to make a wrap sandwich (optional), spread the yogurt sauce on your flat bread, top with the chicken and vegetables. Roll the sandwich closed. You can also wrap the sandwich in foil or parchment paper to help it stay closed as you eat.

    See how we calculate recipe costs here.

    Video

    Notes

    *I got my chicken breasts for $2.57 per lb at my local Walmart. It was a bulk package of 8 breasts. If you can, buy in bulk, split up the breasts, and freeze it for future meal prep. You can also use 4-6 boneless, skinless chicken thighs.

    **If I’m using this chicken to make a sandwich, I love serving it in a homemade naan. Homemade pita or flatbreads are also perfect. But you can, of course, use a store-bought option to save time! Our cottage cheese wraps will also work as a protein-packed alternative. 

    ***Don’t worry if you don’t have a grill; this chicken comes out just as delicious when cooked in a skillet. It won’t have the char marks, but it’ll still taste amazing. Cook the chicken until browned on both sides and cooked through!

    Marinating Time: Marinate the chicken for at least 4 hours, or up to 24 hours for the best flavor. You can also freeze the chicken in the marinade for up to 3 months, then thaw overnight in the fridge (it’ll marinate as it thaws!) and cook as directed.
     
    Nutrition information: The nutritional information below is for the marinated chicken only. Naan, pita, and flatbreads can all vary in shape, size, and nutritional value. This chicken is also delicious served in many ways, not just as a wrap!

    Nutrition

    Serving: 1serving (chicken only) | Calories: 156kcal | Carbohydrates: 2g | Protein: 28g | Fat: 3g | Sodium: 437mg | Fiber: 0.4g

    How to Make Chicken Shawarma Step-by-Step Photos
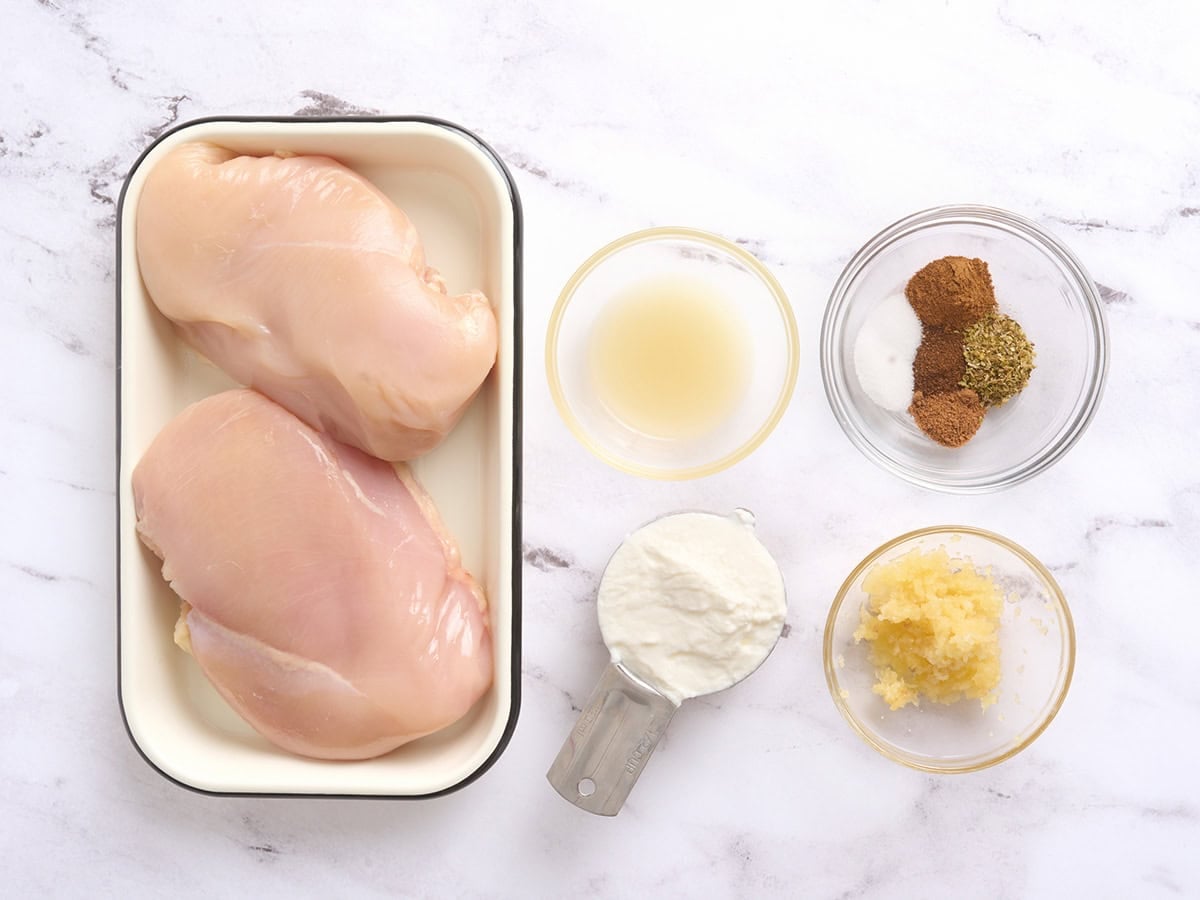
    The ingredients to make Chicken Shawarma.

    Gather the chicken shawarma ingredients: You’ll need ½ cup plain Greek yogurt, 1 Tbsp lemon juice, 1 Tbsp minced garlic, ½ tsp cinnamon, ½ tsp dried oregano, ½ tsp salt, ¼ tsp ground nutmeg, ¼ tsp ground cloves, and 2 large chicken breasts (1.25 lbs).
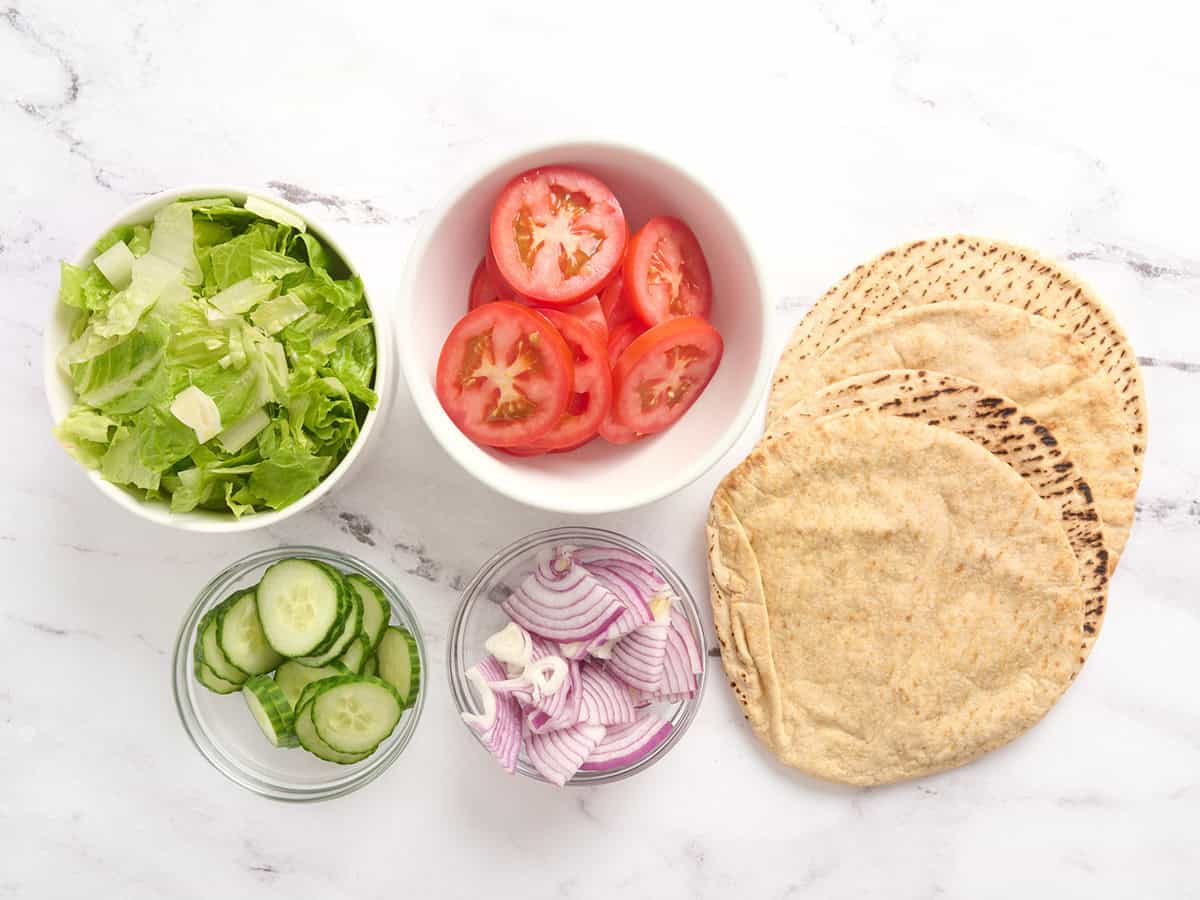
    Chicken Shawarma wrap ingredients.

    Gather the wrap ingredients (optional): If you’re turning this chicken into a wrap, you’ll also need ½ head romaine lettuce, ½ medium cucumber, 2 medium roma tomatoes, ¼ red onion, and 4 naan (or pita or flatbread).
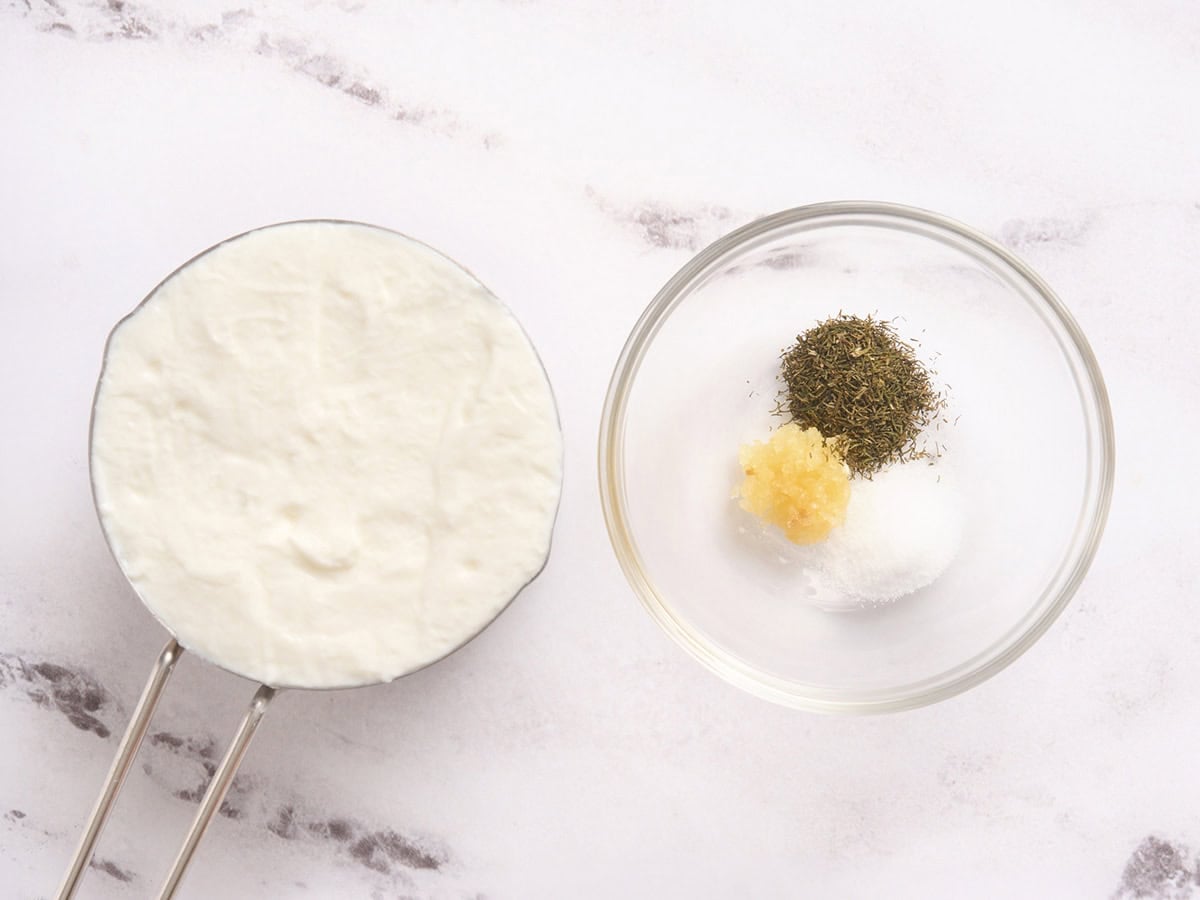
    The ingredients to make a yogurt sauce to serve with chicken shawarma.

    Gather the yogurt sauce ingredients (optional): The yogurt sauce I use in this recipe is for more than just wraps. It elevates this chicken shawarma however you choose to serve it! It’s optional, but if you want to make it, you’ll need ¾ cup plain Greek yogurt, ¼ tsp minced garlic, ¼ tsp dried dill, and ¼ tsp salt.
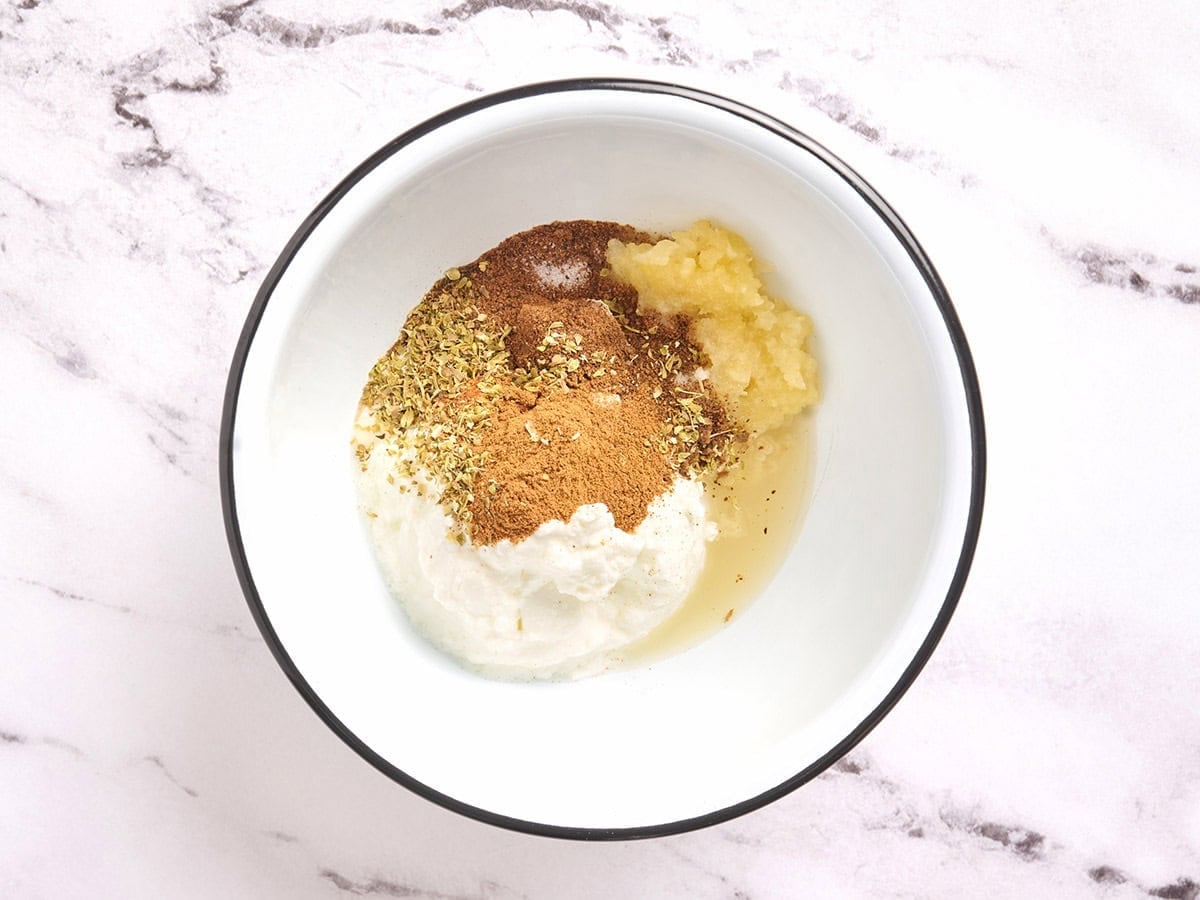
    Chicken Shawarma marinade ingredients in a bowl.

    Make the marinade: Add ½ cup plain Greek yogurt, 1 Tbsp lemon juice, 1 Tbsp minced garlic, ½ tsp cinnamon, ½ tsp dried oregano, ½ tsp salt, ¼ tsp nutmeg, and ¼ tsp ground cloves to a small bowl. Mix until smooth and well combined.
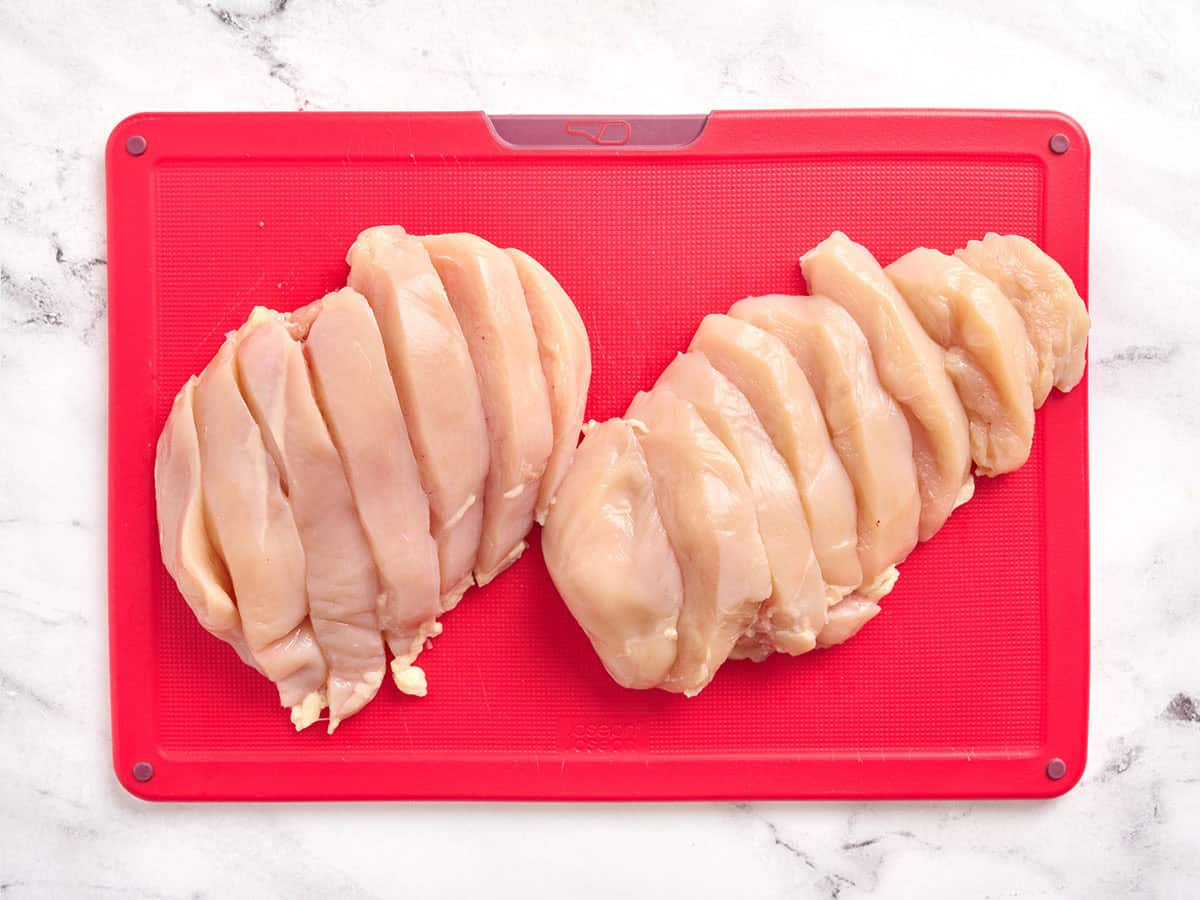
    Two chicken breasts cut into slices.

    Slice the chicken: I like to slice the chicken into 1-inch thick strips before marinating to allow more flavor to permeate the chicken. You can also leave the chicken whole if preferred and slice it after cooking, though it’ll take longer for the chicken to cook through if left whole.
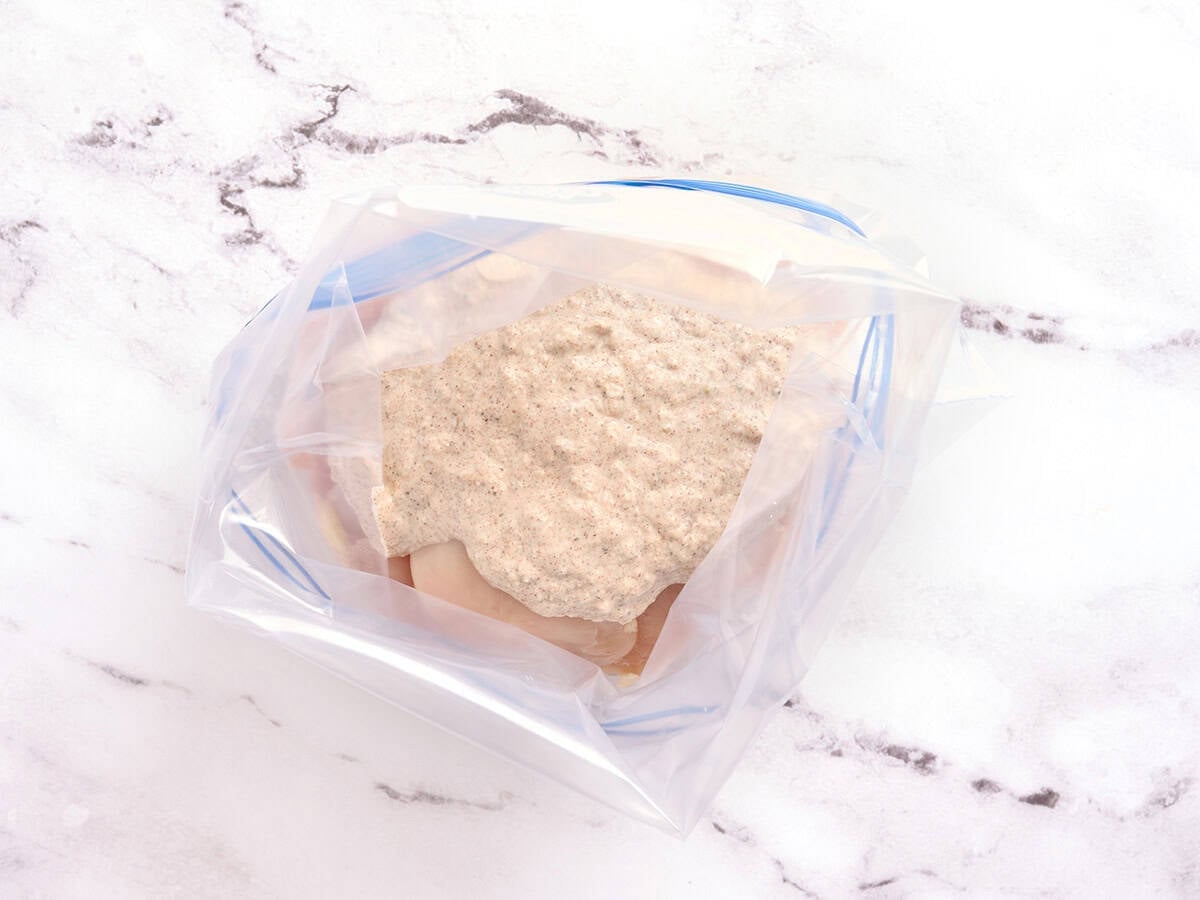
    Chicken breast marinating in a ziptop bag.

    Marinate the chicken: Place the sliced chicken in a gallon-sized ziptop bag or medium mixing bowl, and cover in the marinade. Make sure the chicken is coated well. Close the bag (or cover the bowl) and refrigerate for 4-24 hours.
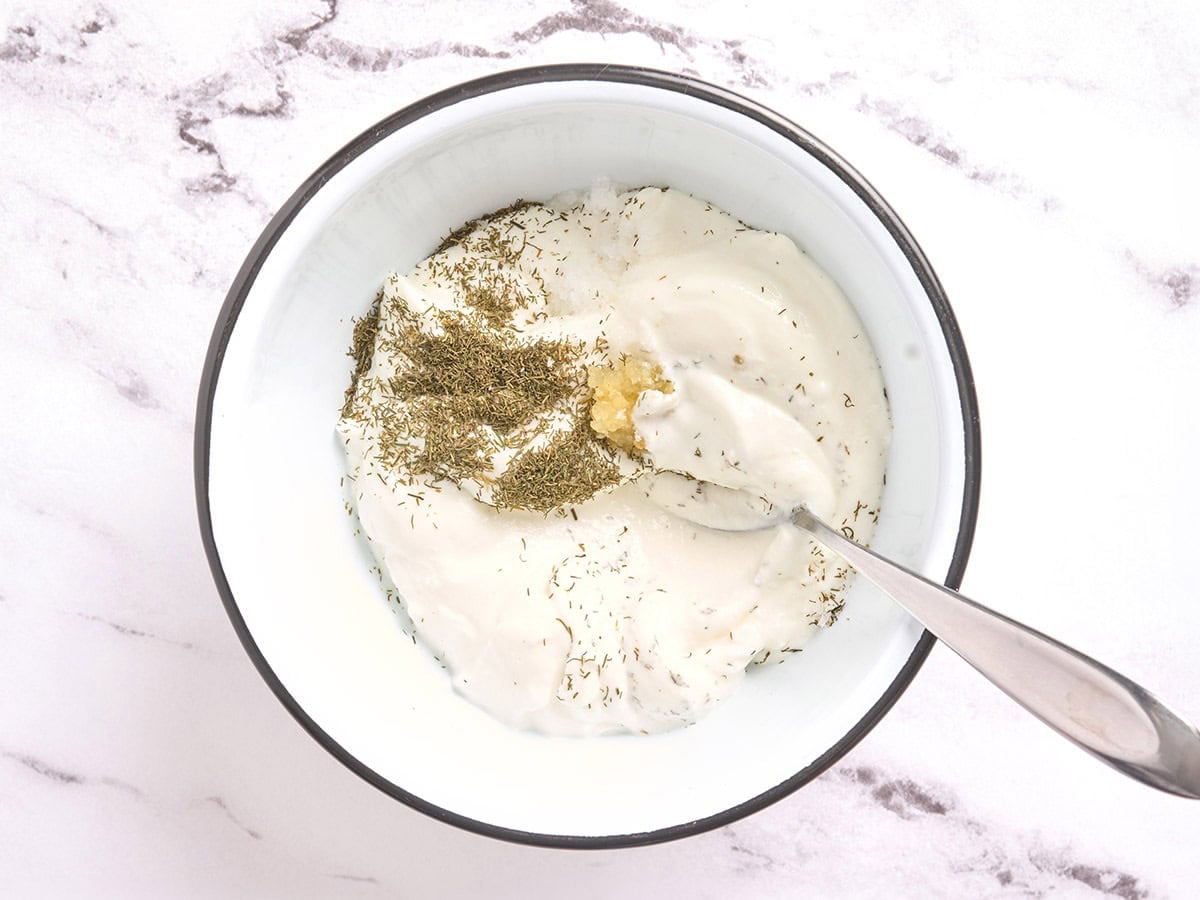
    Chicken Shawarma yogurt sauce ingredients in a bowl.

    Make the yogurt sauce (if using): While you wait for the chicken to marinate, you can make the herby yogurt sauce. Add ¾ cup plain Greek yogurt, ¼ tsp minced garlic, ¼ tsp dried dill, and ¼ tsp salt to a mixing bowl. Mix to combine and then store the sauce in the fridge until you’re ready to use it.
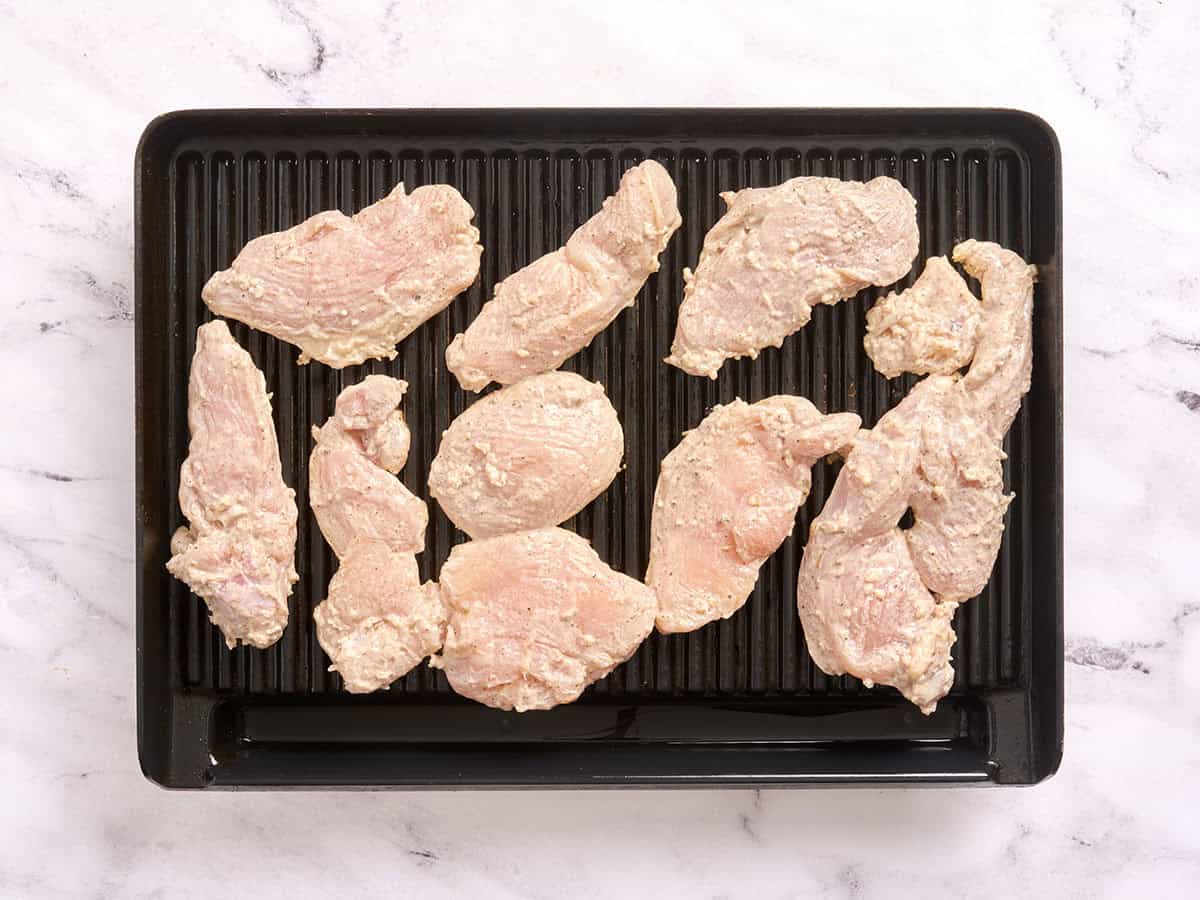
    Chicken Shawarma cooking on a grill.

    Cook the chicken: Once the chicken has marinated for at least 4 hours, grill until the chicken is cooked through. (I’m using the Ninja Sizzle Indoor Smokeless Grill. The total amount of time it’ll take to cook will vary from grill to grill). You can also cook it in a skillet on the stovetop.
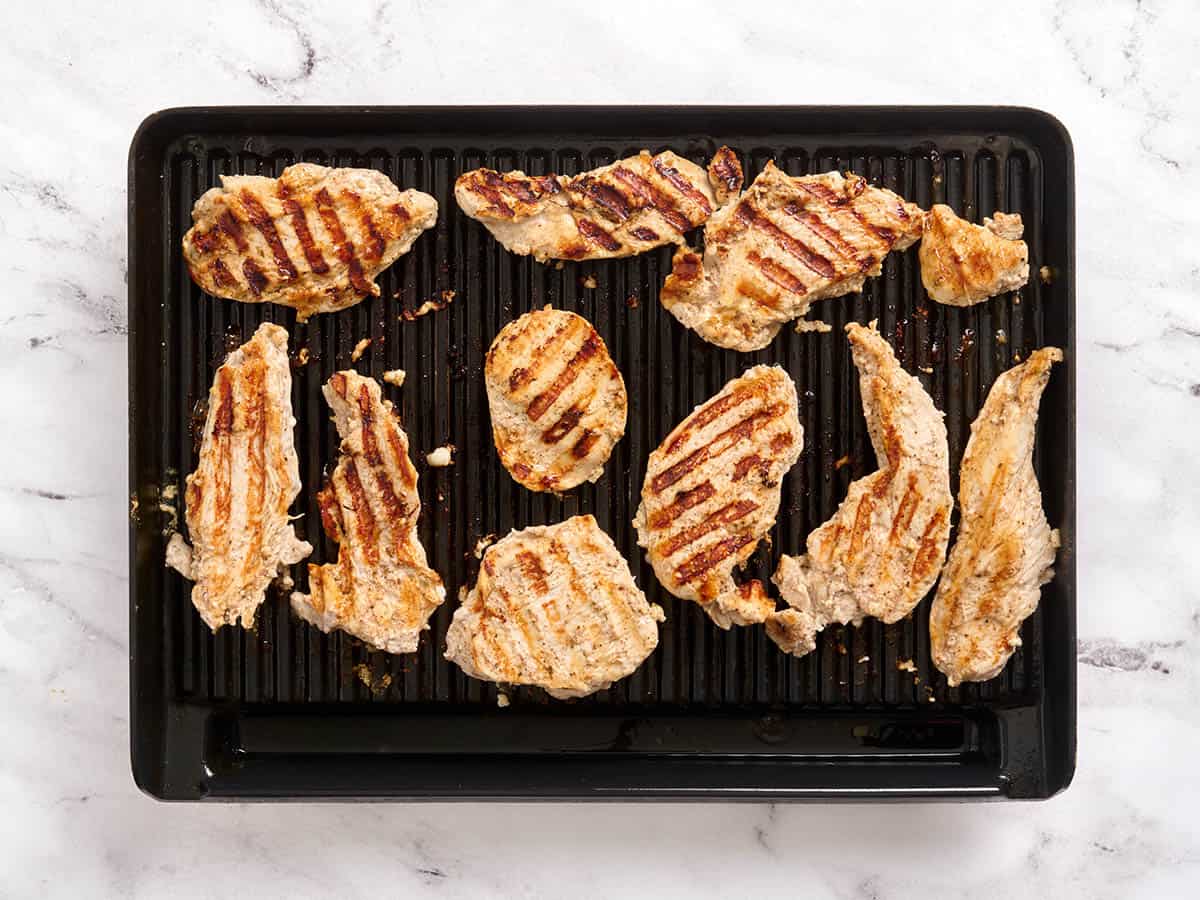
    Chicken Shawarma on a grill.

    Flip the chicken after 7 minutes, unless you’re using a grill with a lid that cooks it evenly from both sides, like a George Foreman grill. If using a skillet, let the chicken cook long enough to get some nice browning before flipping.
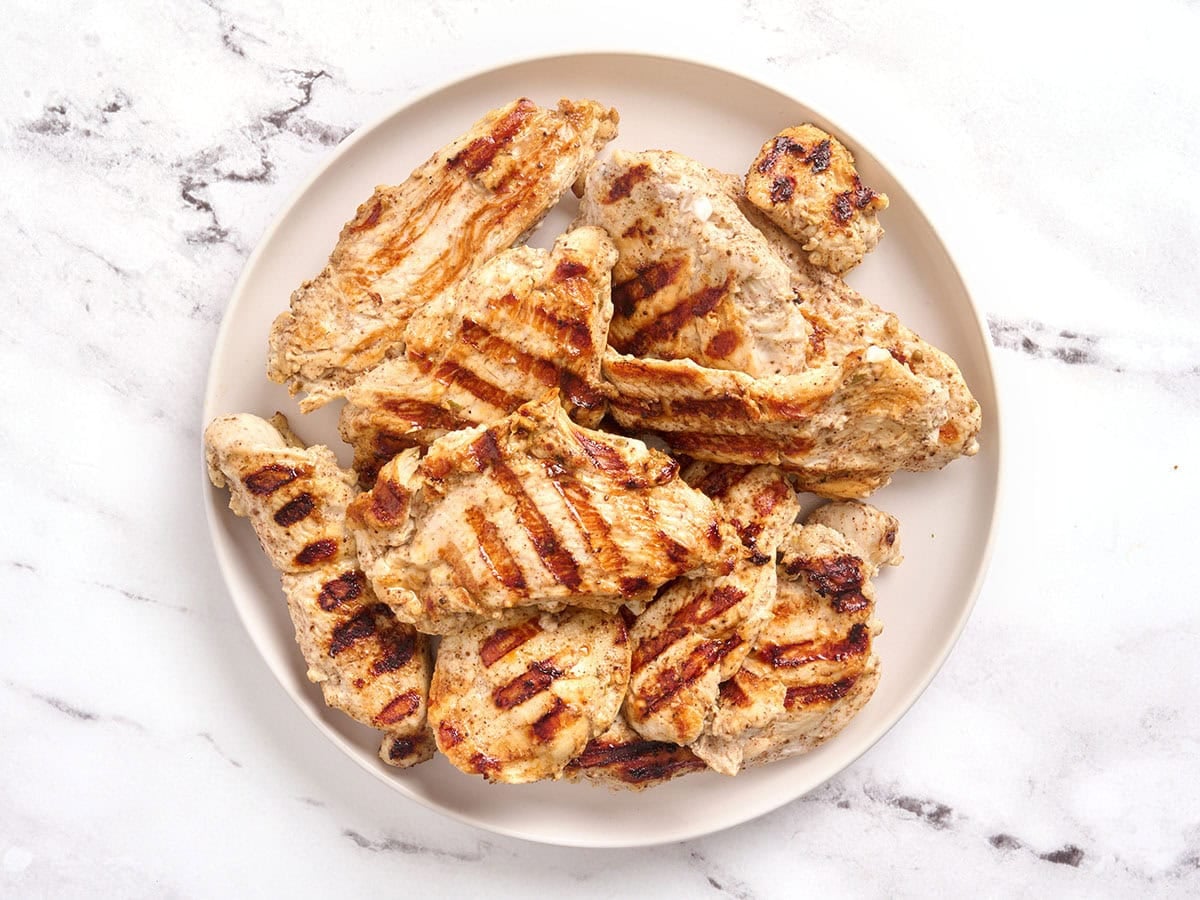
    Chicken Shawarma on a plate after grilling.

    Rest and slice the chicken: The chicken is done once it has noticeable grill marks or golden browning on the outside, the juices run clear, and it’s no longer pink on the inside. If you’ve got a meat thermometer handy, you’re aiming for 160°F right in the thickest part. After it’s cooked, cover with foil and let the chicken rest for a few minutes so the juices redistribute and the internal temperature can rise to 165°F. I like to spoon any juices from the plate back over the sliced chicken because there’s so much flavor there.

    Now your homemade chicken shawarma is ready to use in wraps, sandwiches, salads, or meal-prep lunches for the week!
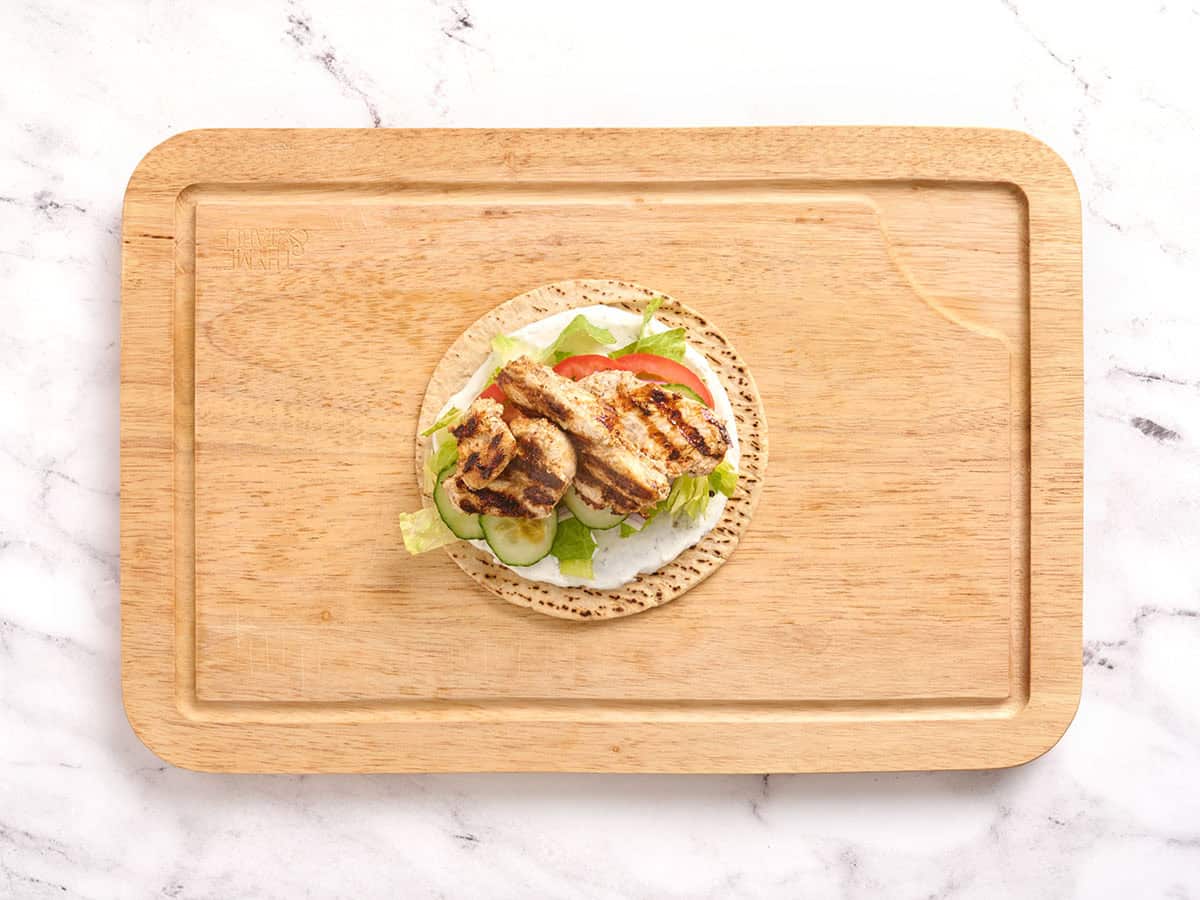
    An assembled Chicken Shawarma wrap.

    Make the wraps, optional: If you’re making the wrap sandwiches, spread the yogurt sauce on your chosen bread, such as naan, pita, or flatbread. Then top it with the chicken, lettuce, cucumber, tomato, and red onion. Roll the wrap closed.
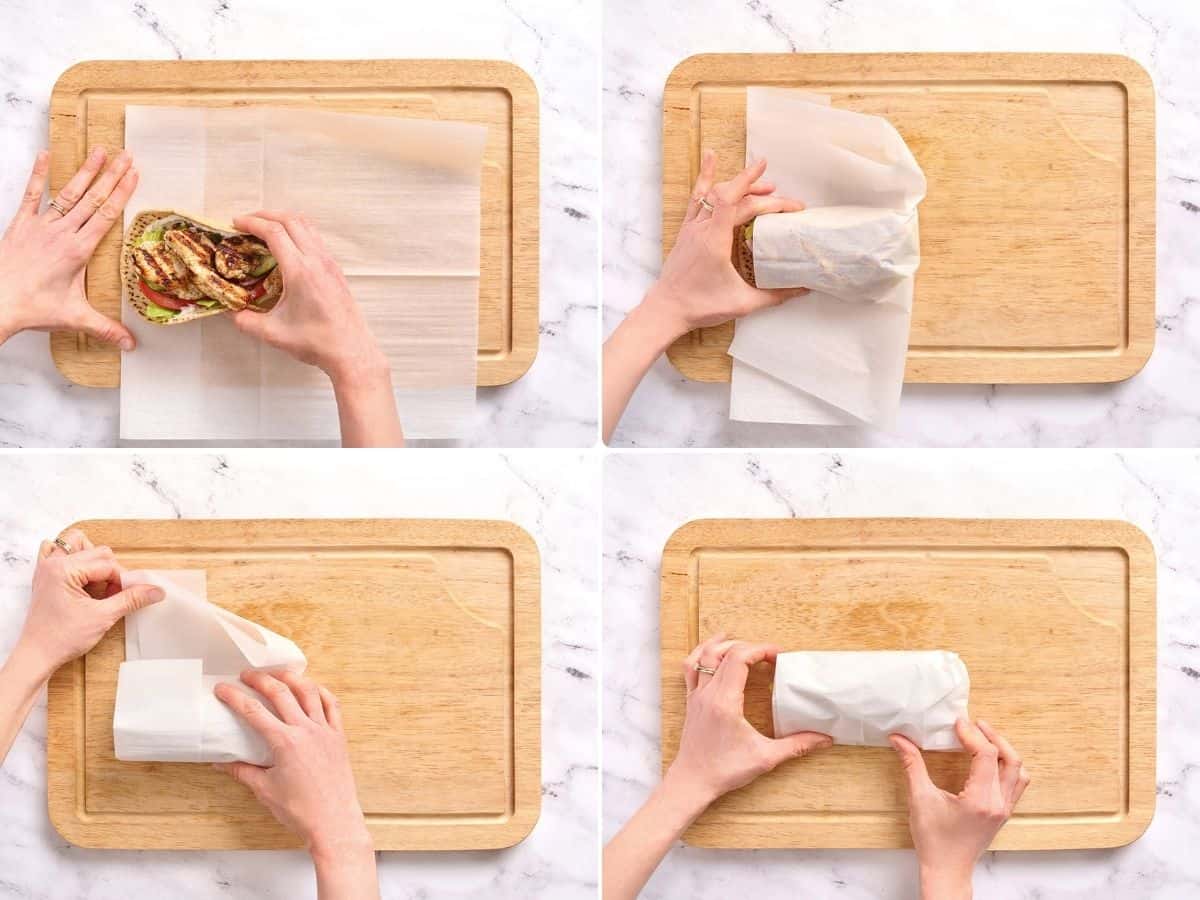
    The process of wrapping a Chicken Shawarma wrap in paper.

    You can also wrap it in foil or parchment paper to help it stay closed as you eat.

    Chicken Shawarma Wrap

    If you want to make the classic wrap version, spread some of the yogurt sauce over 1 naan, pita, or flatbread, then top it with a few slices of chicken, chopped romaine, sliced cucumber, tomato, and a little red onion. Roll it up tightly and, if you want, wrap it in foil or parchment paper to help hold everything together while you eat. It’s fresh, filling, and probably the closest thing to takeout-style shawarma you can make at home for way less.
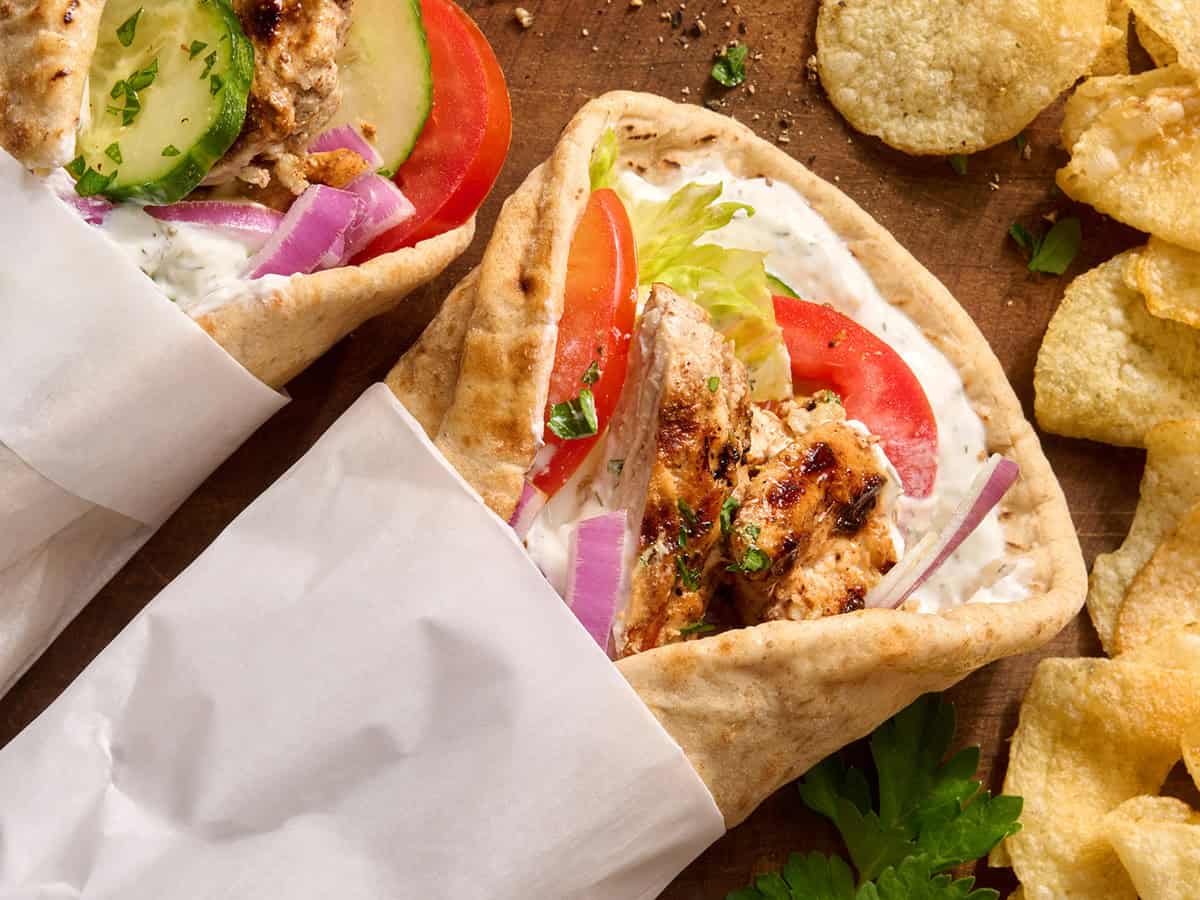
    Overhead of chicken shawarma wrap.

    Serving Suggestions

    I made this grilled chicken shawarma with the sole intention of making sandwich wraps, but then I started topping salads with it and eventually just snacked on the chicken plain. It’s just that good. I even divided the ingredient list in case you want to use the marinade for something else because even if you don’t want the wrap, you NEED to at least make the chicken.

    Storage Instructions

    Leftover cooked shawarma chicken can be stored in an airtight container in the refrigerator for 3-4 days. If you’ve made the yogurt sauce, keep it stored in the refrigerator for up to 4 days. For the freshest texture, keep the chicken, sauce, salad veggies, pita, naan, or flatbread separate when possible, then assemble when ready to eat.

    Reheating

    You can eat the chicken cold in wraps and salads, or reheat it quickly in the microwave, on the grill, or in a skillet on the stovetop until warmed through (165°F internally). If reheating in a skillet, add a tiny splash of water to keep it from drying out.

    Freezer

    You can freeze the cooked and cooled chicken in an airtight freezer-safe container for up to 3 months. Freeze the chicken on its own without the sauce, veggies, or bread. Thaw overnight in the refrigerator, then reheat in the microwave, on the grill, or on the stovetop until hot.

    You can also freeze the uncooked chicken in the marinade for up to 3 months. Thaw overnight in the refrigerator and cook as directed.

    Try These Other Middle-Eastern Inspired Recipes Next!

    • This easy Homemade Falafel skips deep frying and uses a skillet instead, so you still get golden, crispy edges with less fuss!
    • I love meal prepping these Beef Kofta Meatballs with Roasted Vegetables because the rice, veggies, and meatballs pack up so easily.
    • My Quinoa Tabbouleh swaps bulgur for easy-to-find quinoa while keeping the fresh lemon, parsley, cucumber, and tomato flavor!

    Our Chicken Shawarma recipe was originally published 6/22/11. It was retested, reworked, and republished to be better than ever 6/24/26.

    The post Chicken Shawarma appeared first on Budget Bytes.
    This post was originally published on this site.

  • Throw Your 4th of July Cookout for Around $40

    Throw Your 4th of July Cookout for Around $40

    I know it’s rough out there right now; between grocery prices staying sky-high and gas eating up half our paychecks, just getting by feels like a sport. But there’s no way I’m letting a tight budget stop me from hosting my annual 4th of July cookout! Holiday celebrations are about connecting with the people we love, and honestly, we all need a little time to unwind over a good meal. So instead of giving up, Jennie, Melissa, and I went to my local Walmart with a strict game plan and challenged ourselves to feed 8 people for $40(ish). I was skeptical, but with a few store-brand shortcuts and reliable Budget Bytes recipes, we pulled it off, made it festive, and nobody is leaving hungry!

    A Budget-Friendly 4th of July Cookout for 8

    The 4th of July has been my absolute favorite holiday since I was a kid, mostly because it strips away the stressful commercialism. There’s zero pressure around gifts, which is a major win for our wallets halfway through the year. Let’s face it: times are tough right now, and it’s easy to feel worn down by how divided the country feels. But that’s exactly why this holiday matters so much. When we gather under a sky lit up by community fireworks (a tradition with a $0 price tag), it’s a powerful reminder of what connects us.

    For me, Independence Day renews a deep sense of hope and a patriotic duty to participate in our democracy, look out for our neighbors, and take care of each other. Keeping our celebrations simple, delicious, and budget-friendly isn’t just practical; it leaves us with more energy to focus on the real work of building a stronger, more united community, no matter where you live in the USA!

    Why Walmart?

    We chose Walmart for this menu because the grocery giant captures roughly 21.2% of the entire U.S. grocery market share (by comparison, Kroger is second at 8.9%). Part of why so many Americans shop there is convenience: over 90% of the U.S. population lives within 10 miles of a Walmart store, so we didn’t want to ask you to drive all over town hunting for deals. The goal was a one-stop shop cookout plan you can actually pull off without stressing over your grocery bill or your gas tank. (More than usual, anyway).

    Of course, prices vary all over the country. We did our best to choose products that are widely available, so they should be some of the lowest-priced options at your local Walmart, too. And no, we’re not sponsored by Walmart! (Although I’m pretty sure Walmart owes me money after this post and our Easter Dinner for $40 post earlier this year!) 😉

    Grocery List

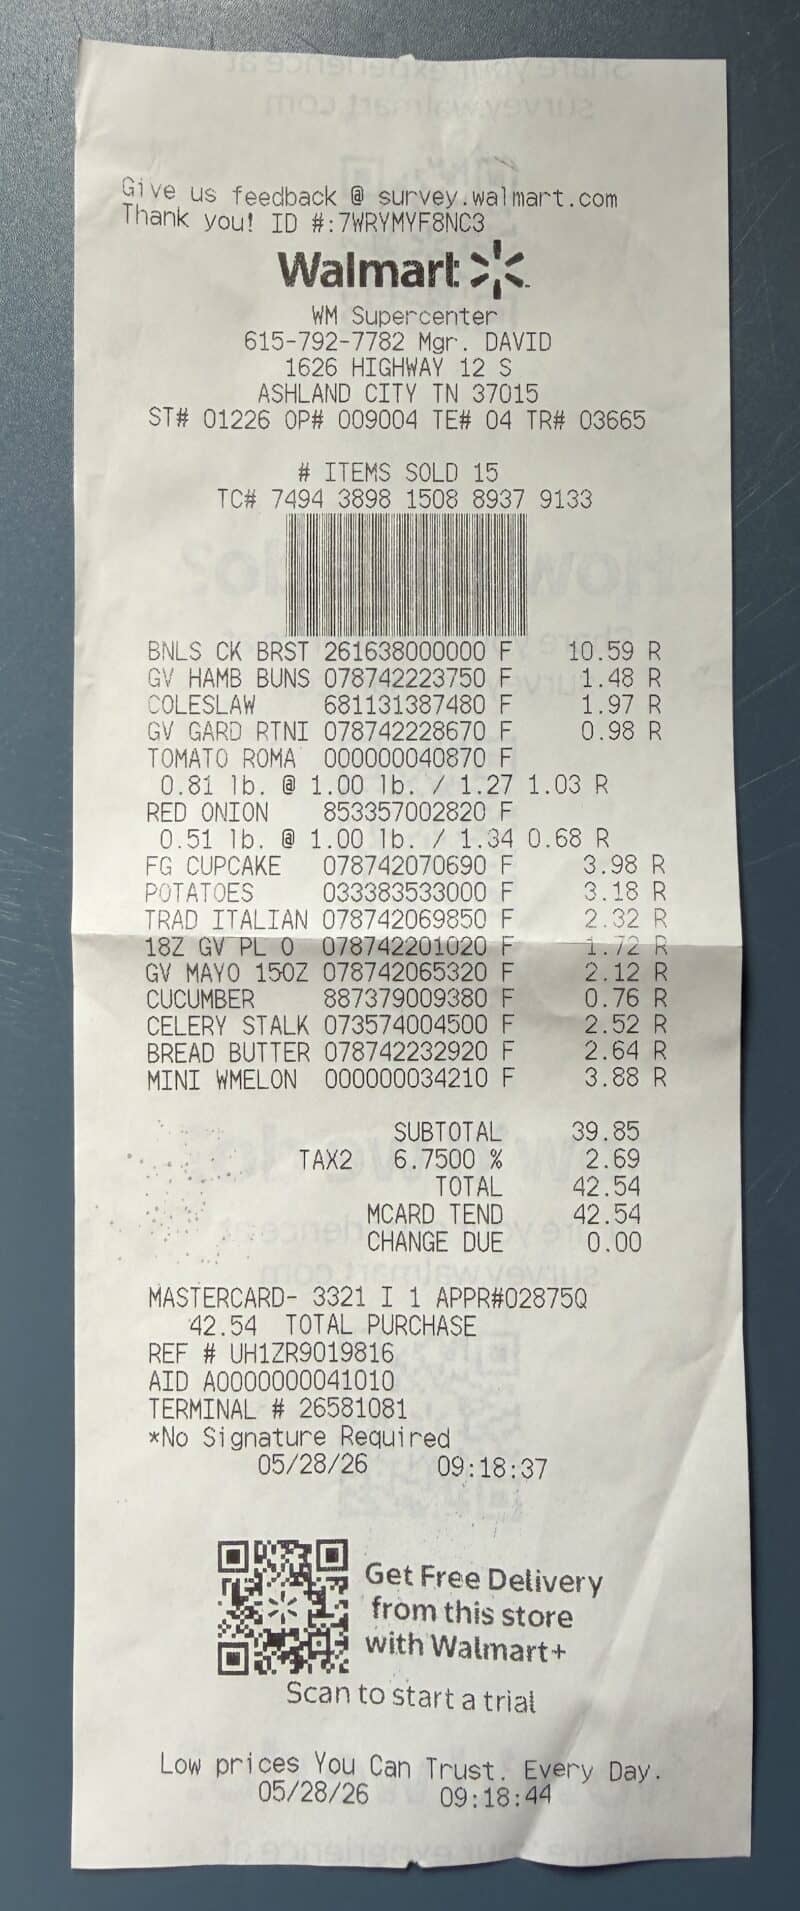
    • 4-5lbs. boneless chicken breasts ($10.59)
    • BBQ sauce ($1.72)
    • 8 Burger buns ($1.48)
    • Bread and butter pickle chips ($2.64)
    • 15oz. Mayonnaise ($0.56)
    • 16oz. bag of slaw mix (we used tri-color colelsaw) ($1.97)
    • 3lbs. Yellow potatoes ($3.18)
    • Cucumber ($0.76)
    • 3 Roma tomatoes ($0.81 per lb., $1.03)
    • Red onion ($1.00 per lb., 0.51lb. $0.34)
    • 16oz. Great Value brand Traditional Italian Dressing ($2.32)
    • Celery stalk ($0.50)
    • Great Value brand Garden Rotini* ($0.98)
    • Mini watermelon** ($3.88)
    • 12 Mini cupcakes*** ($3.98)

    If you’re trying to stay within budget (we aimed for UNDER $44 total while making this blog post), go for Great Value brand everything whenever possible.

    1. *The Great Value tri-color “garden rotini” was one cent cheaper than the regular rotini, but get whichever you prefer!
    2. **Mini watermelons were cheaper when we wrote this post, but full-size watermelons usually get cheaper as summer goes on. Grab the best deal you see! Mini melons are small but mighty; we got 27 slices out of ours, so everyone still gets a generous portion. Use any leftovers to make our refreshing watermelon gazpacho or watermelon and feta salad.
    3. ***Walmart’s bakery section always has something pre-made, inexpensive, and festive. While we could have made cupcakes from scratch, we picked up some nicely decorated premade ones to save time. Cheap and cheerful!
    Walmart receipt for July 4 cookout menu

    Download our 4th of July Cookout for around $40 Grocery List PDF HERE!

    Pantry Staples

    • Kosher salt
    • Granulated sugar
    • Salt
    • Black pepper
    • Cayenne pepper
    • Garlic powder
    • Onion powder
    • Brown sugar
    • Olive oil
    • Dijon mustard
    • Red wine vinegar
    • Cajun seasoning
    • Yellow mustard

    Budget-Friendly Shopping Tips

    1. Shop at home first. We already had pantry staples like salt, sugar, spices, oil, vinegar, and mustard, so we used what was already in our kitchens before adding anything extra to the cart.
    2. Choose store brand whenever possible. The Great Value brand products helped us keep this menu close to budget. For items like pasta, BBQ sauce, mayo, salad dressing, and cupcakes, the savings added up fast!
    3. We’re all about smart ingredient multitasking. You can easily clear out that entire jar of mayonnaise by dividing it between the creamy coleslaw and our classic potato salad, which also gets a tangy upgrade from a generous scoop of diced pickles (that are leftover from the sandwiches). We also split one red onion between the potato salad and the refreshing pasta salad!
    4. Don’t be shy about asking your friends and family to bring a side dish or contribute to the cooler of cold beverages! It’s a great way to keep your costs down and spirits high.

    What’s in this 4th of July Cookout Spread for ~$40

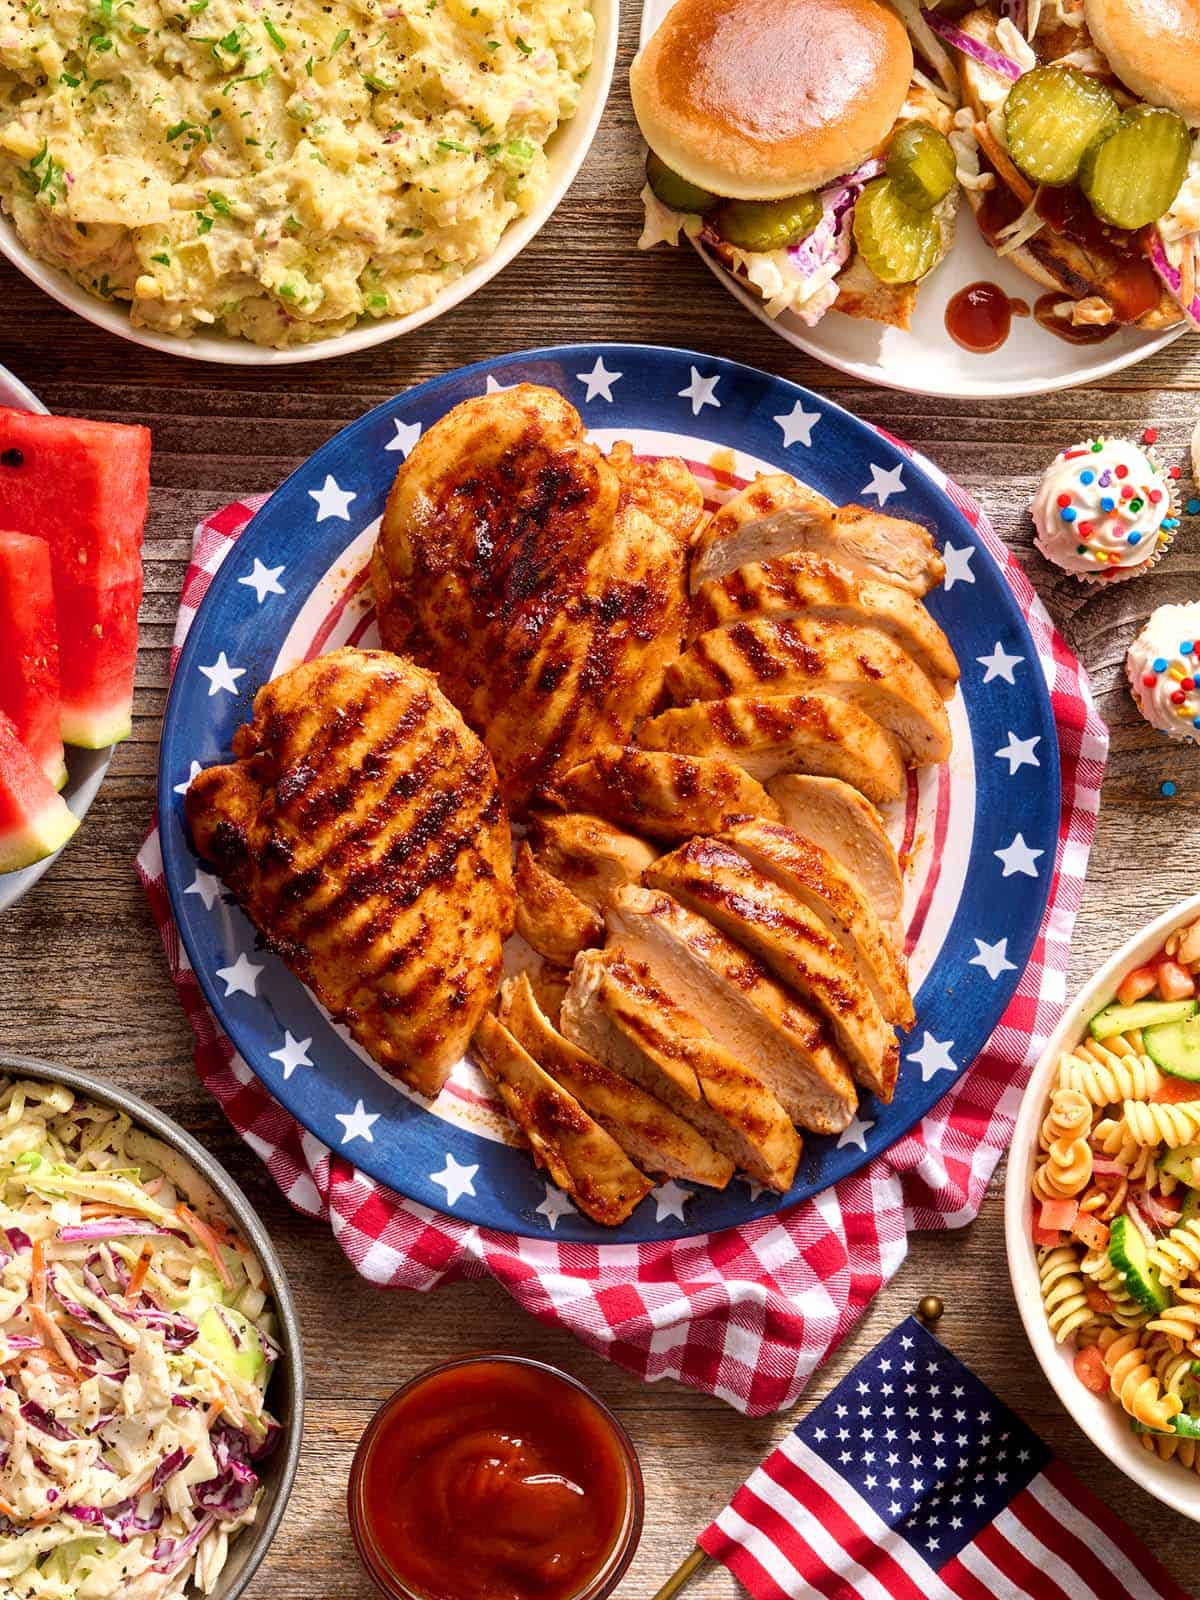
    This 4th of July cookout spread is all about budget shortcuts and ingredients that work hard. We stretched grilled BBQ chicken into sandwiches, used the mayo, pickles, and red onion in more than one place, and rounded things out with pasta salad, cupcakes, and cold watermelon slices for an easy summer meal that feeds 8!

    BBQ Chicken Breast Sandwiches

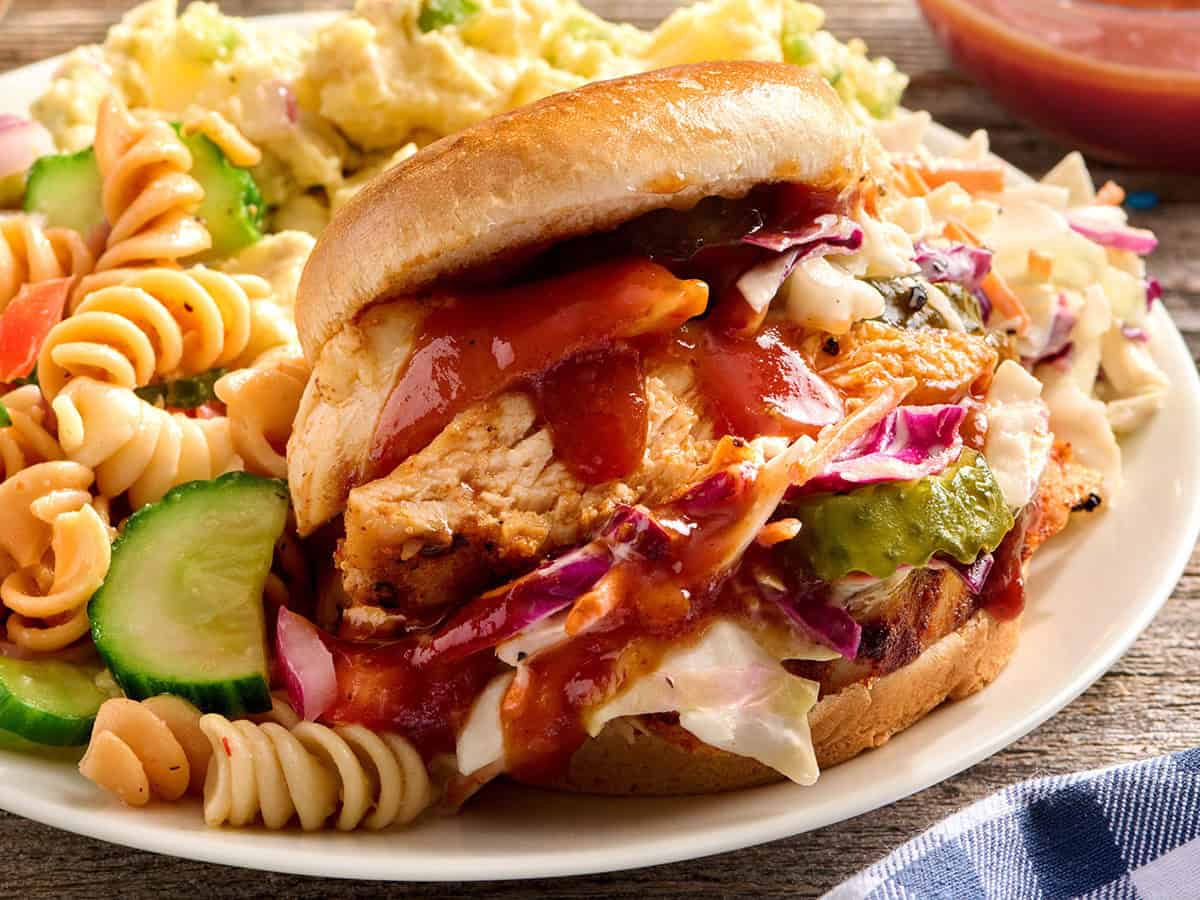
    Side view of grilled chicken sandwiches on a plate with pasta salad.

    Jess: I knew I had to include super juicy grilled chicken breasts on my 4th of July spread, but I knew I would blow our budget if I tried to serve one breast per person. Instead, I found a $10.59 value pack of 5 chicken breasts at Walmart and decided to slice the meat for sandwiches after I pulled it off the grill and let it rest. A drizzle of store-brand BBQ sauce, a mountain of crunchy slaw, and some pickles on top transformed the chicken into an absolute feast. We fed a crowd of 8 and had some leftovers for chicken salad with a BBQ twist the next day!

    Prep it ahead: Don’t forget to brine your chicken breasts! You only need water, sugar, and salt to make the super simple brine from my recipe above. That can be done 30 minutes before it hits the grill or even 24 hours before. There’s a LOT of prep you can do for this celebration in advance, so you’re stress-free on the fourth!

    Creamy Coleslaw

    Easy Creamy Coleslaw

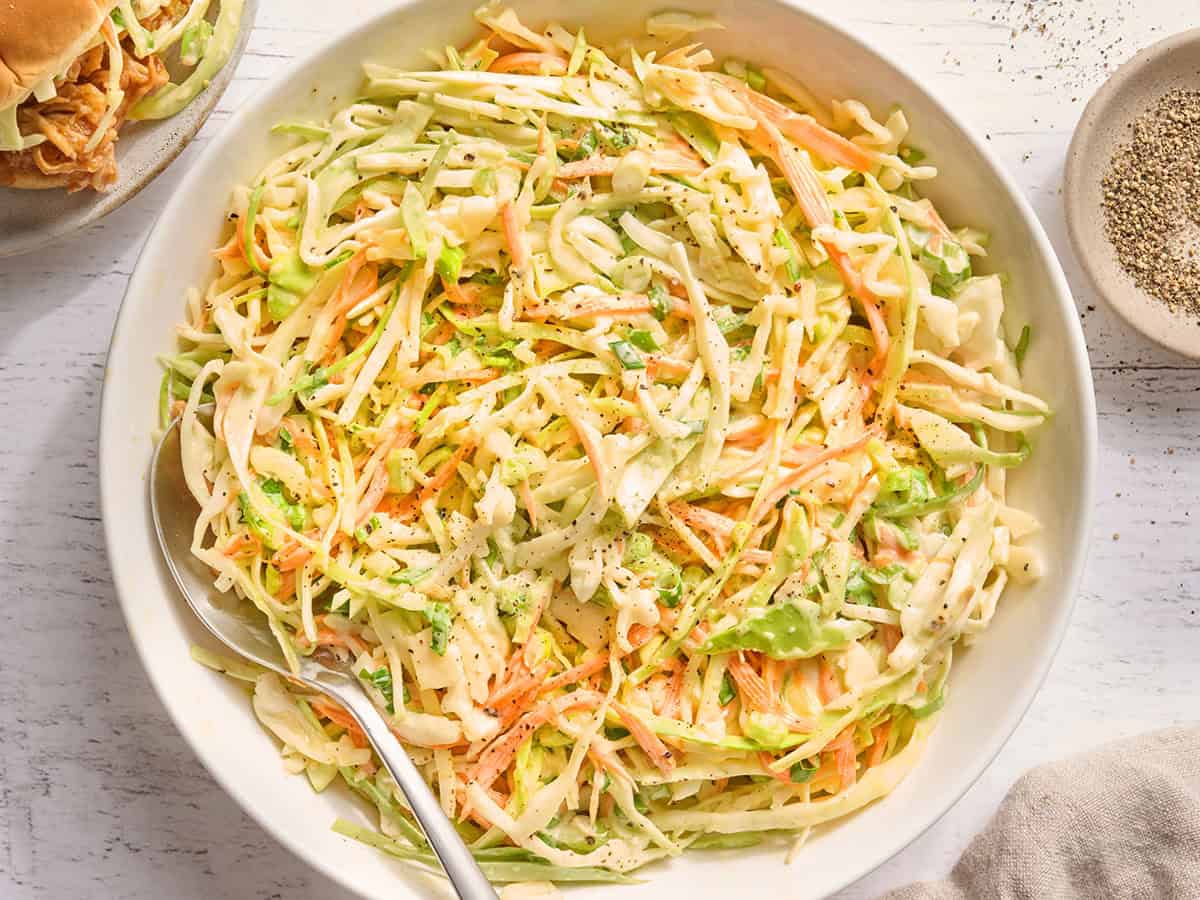
    coleslaw in a bowl

    This classic sweet and tangy homemade Creamy Coleslaw Recipe is perfect for piling onto pulled pork sandwiches or serving as a side with dinner.

    4.91 from 10 votes

    $3.10 recipe / $0.39 serving
    Get the Recipe

    Melissa: There’s nothing more classic than creamy coleslaw piled high on a BBQ sandwich! To make it even easier, I used bagged coleslaw mix, and I split the jar of mayo on our shopping list between the slaw and our potato salad for this budget-friendly 4th of July spread. If you already have cabbage and carrots on hand, you can skip the bagged mix and use about 3 cups finely shredded cabbage and 1 shredded medium carrot instead!

    Prep it ahead: You can make the dressing a day ahead and store it in the fridge. I’d wait to toss it with the slaw mix until a few hours before serving so the cabbage stays nice and crunchy.

    Potato Salad

    Classic Southern Style Potato Salad

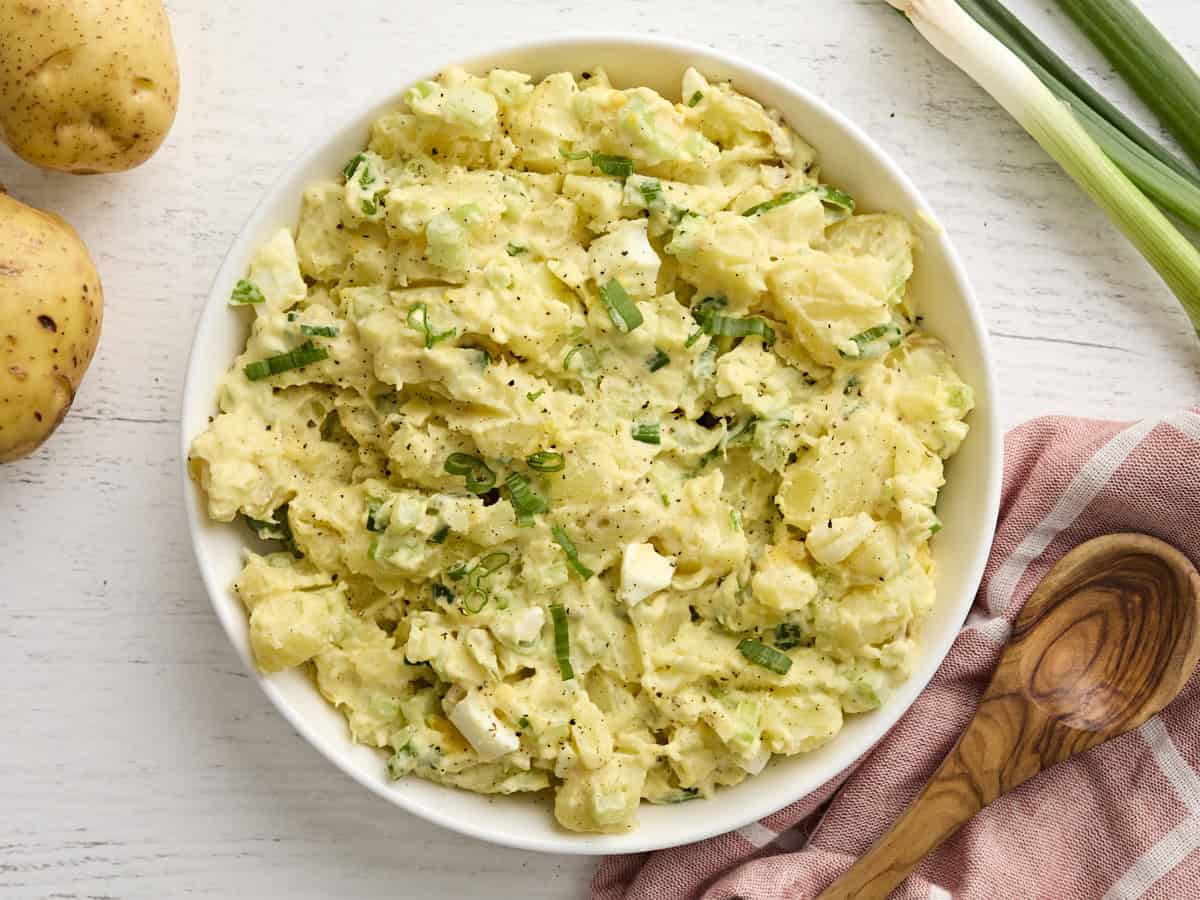
    Overhead view of a bowl of Southern style potato salad.

    This classic Southern Style Potato Salad uses both mustard and mayonnaise for a super flavorful dressing that is rich, tangy, and creamy.

    4.88 from 16 votes

    $5.43 recipe / $0.68 serving
    Get the Recipe

    Melissa: I’ve never met a potato I didn’t like, and this Southern style potato salad is no exception. The best part is customizing this recipe and utilizing ingredients you already have. I seasoned it with pantry staples and made some smart substitutions: I swapped the green onions I’d normally use for the red onion we were already using in the pasta salad. And instead of relish, I just chopped up some of the pickles that Jess used in her BBQ chicken sandwiches. This not only stretches the ingredient further but stretches your dollar, too! I also decided to leave out the eggs to keep costs down. If you’ve got an egg or two, though, add it in!

    Prep it ahead: You can make the potato salad a day or two in advance if you’re pressed for time. Store it in the fridge until serving.

    Pasta Salad

    Pasta Salad

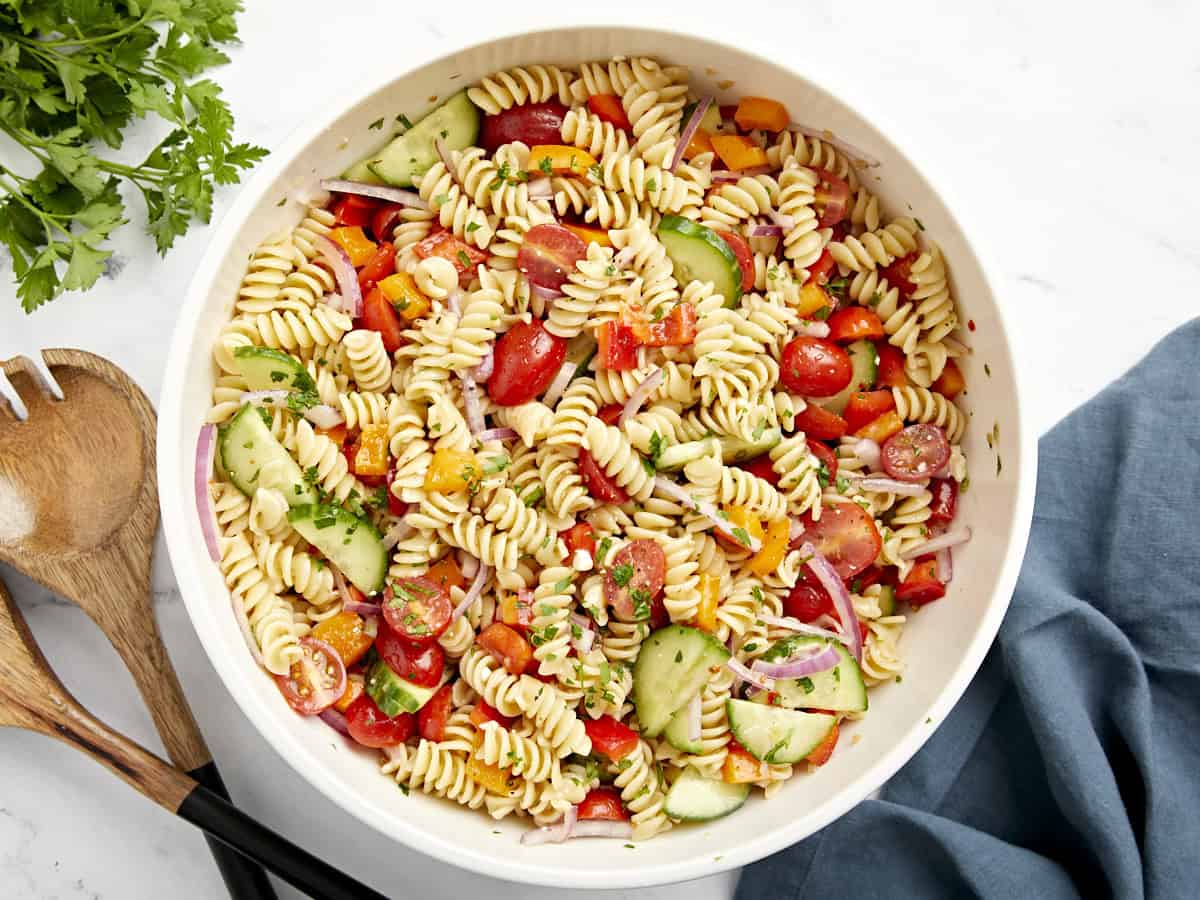
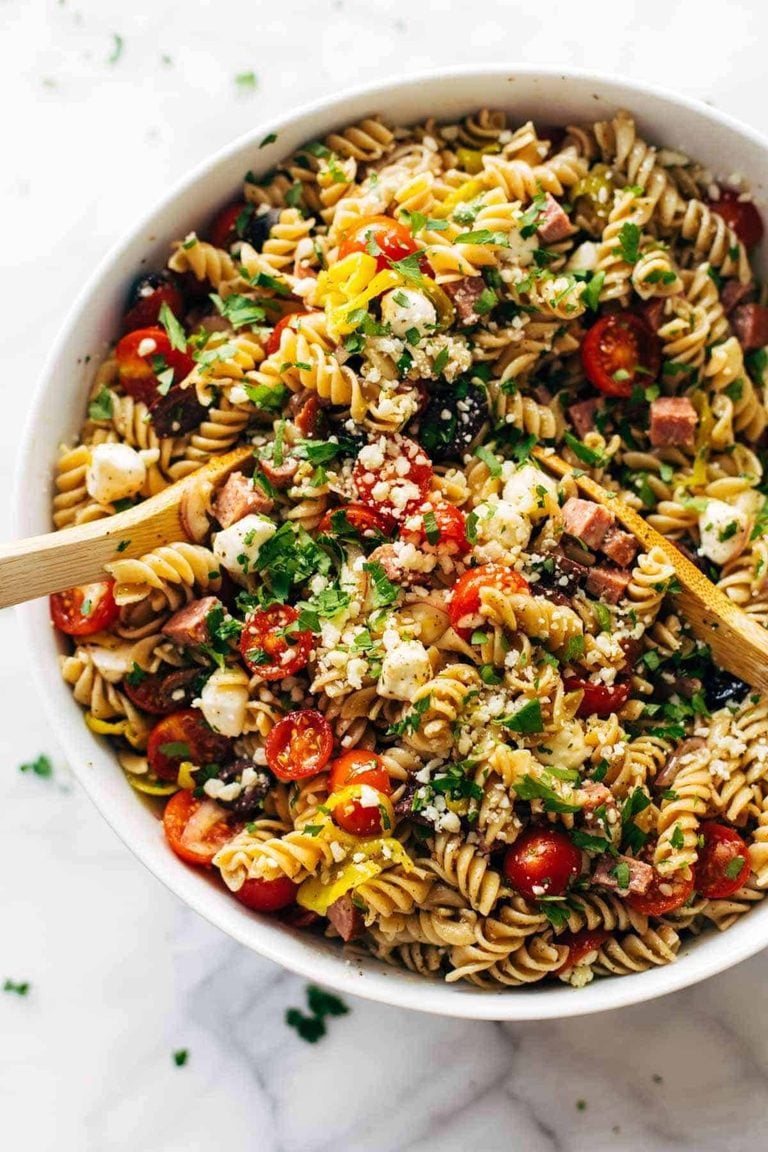
    Overhead view of pasta salad in a large white serving bowl with wood serving utensils on the side.

    This easy Pasta Salad is full of fresh flavors and tossed in a zesty Italian dressing. It will be the star at your next BBQ or summer cookout!

    4.70 from 10 votes

    $13.44 recipe / $1.34 serving
    Get the Recipe

    Jennie: It’s not a summer cookout without a pasta salad, in my opinion! There are so many variations, but you can’t go wrong with the classic. We took our beloved easy pasta salad recipe and made it even more budget-friendly for the 4th.

    I swapped grape tomatoes for diced Roma tomatoes, then added cucumber, red onion (which we split with the potato salad!), a few pantry staples, rainbow rotini, and a zesty bottled Italian dressing. I went for tri-color garden rotini for extra color since we used fewer fresh veggies to save money, and it was actually a cent cheaper than regular rotini at my Walmart, which was interesting!

    Prep it ahead: You can also prepare the pasta salad a day in advance. In fact, I think it’s better that way, as it gives the pasta time to soak up the juices from the vegetables and all of that dressing! Keep it in the fridge until serving.

    Mini Cupcakes

    Side view of cupcakes with sprinkles.

    Jess: I enjoy making desserts, but when I’m hosting a party at my place, sometimes I need to focus on the good vibes and keeping the tunes going, so I’ll grab a store-bought dessert instead. I’m more of a crisp, cold watermelon kinda gal on the 4th, but for the kiddos and adults with a sweet tooth, I grabbed a dozen mini cupcakes!

    Walmart usually has fun holiday-themed desserts around the big day, so it’s easy to pick something up that feels festive and frees up a bunch of my time and energy so I can focus on other things. Plus, who wants to turn on the oven to make cupcakes in Tennessee when July hits? (Spoiler alert: no one!)

    Watermelon Slices

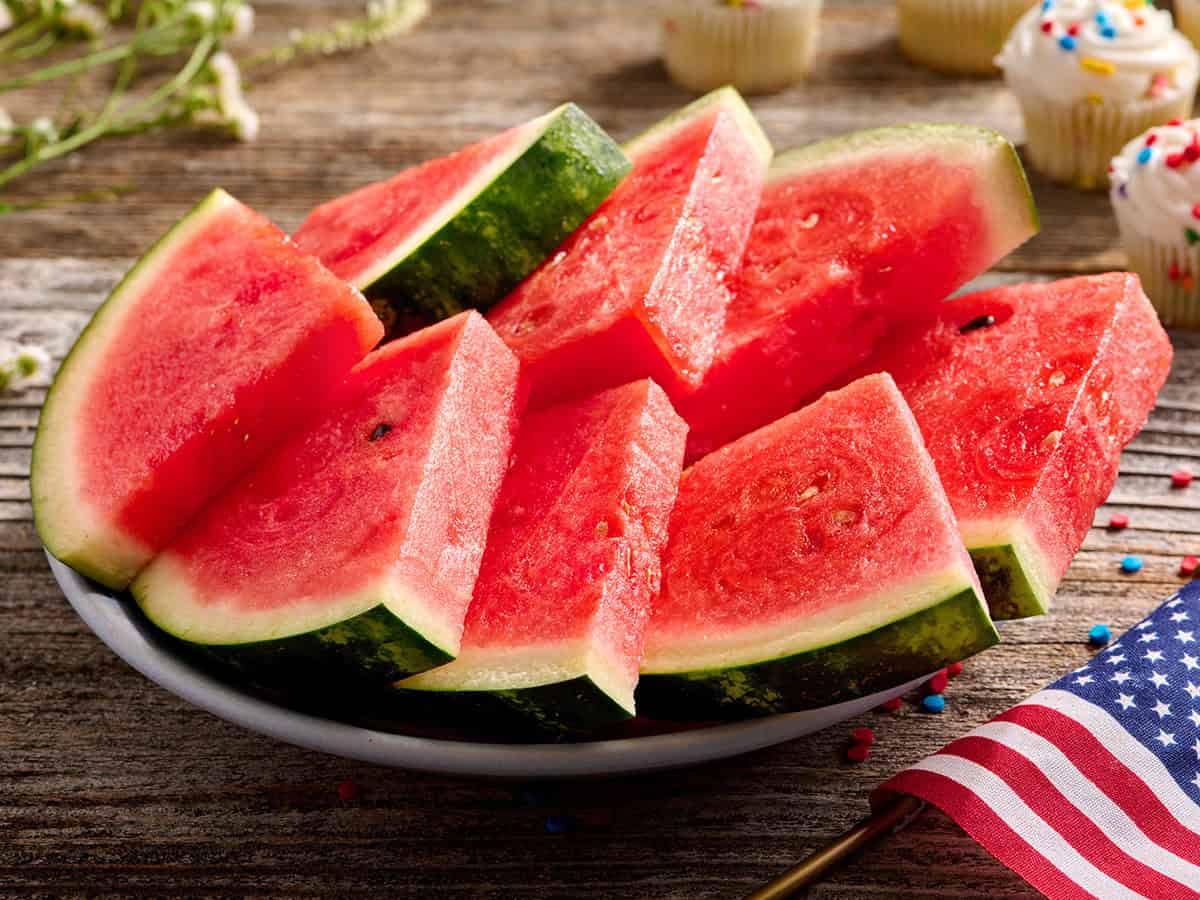
    Slice view of a plate of watermelon slices.

    Jess: I had to include watermelon because nothing tastes better next to BBQ and creamy cookout sides than those cold, juicy slices. Our mini watermelon yield was 25-30 slices (I couldn’t help eating some before I counted—my bad!), so even though they’re small, you can still slice them up into manageable pieces and feed a crowd.

    Click the image above to download our free grocery list for this 4th of July Cookout for around $40!

    The post Throw Your 4th of July Cookout for Around $40 appeared first on Budget Bytes.
    This post was originally published on this site.

  • Vegan Meatballs

    Vegan Meatballs

    These easy lentil Vegan Meatballs prove you don’t need ground beef to get big, cozy, classic meatball flavor. Lentils aren’t just incredibly budget-friendly—they’re also surprisingly high in protein, giving these vegan meatballs some serious staying power. Caramelized onions add deep savory sweetness, and a pinch of fennel seed brings that unmistakable Italian vibe. They’re hearty, comforting, and perfect for anyone craving a plant-based twist on a classic. (I always am!) Not to mention, you can make this whole recipe for just over $5!

    Homemade Vegan Lentil Meatballs

    Experimenting with seriously good homemade alternatives to classic meat recipes is my JAM (especially when they use simple, affordable ingredients instead of pricey vegan meat substitutes!) I’ve spent years playing with plant-based comfort food, and my goal is never to make something that feels like a sad substitute. I wanted these vegan meatballs to have the same savory, umami-rich flavor of classic homemade meatballs, so I borrowed the mushroom, walnut, and sun-dried tomato base from my lentil loaf and turned it into a tender, bite-sized pasta-night staple.

    Vegan meatballs can go mushy fast if the base has too much moisture, so this recipe starts by browning the mushrooms and onions until the extra liquid cooks away. From there, the flax ‘egg’, breadcrumbs, and slightly firm lentils help the mixture bind into scoopable meatballs with tender centers. I also give these lentil meatballs a quick breadcrumb coating, which helps the outside toast up in the oven so they actually hold together once they’re served with sauce! They soak up whatever sauce you toss them with, but stay in meatball form. My family loves these piled onto spaghetti with lots of pasta sauce.

    Recipe Success Tips

    1. Use slightly firm lentils. I recommend brown/green lentils for these vegan meatballs because they hold their shape better than softer red or yellow lentils. Cook them until they’re tender but still have a little structure. Overcooked lentils can make the mixture too soft and harder to roll. Full cooking instructions for lentils are in the recipe card notes below!
    2. Cook the mushrooms until the extra moisture is gone. Mushrooms release a lot of water as they cook, then that moisture evaporates, and the mushrooms start to brown. That browning is what builds the savory, meaty flavor. Cooking off the liquid also keeps the meatball mixture thick instead of mushy.
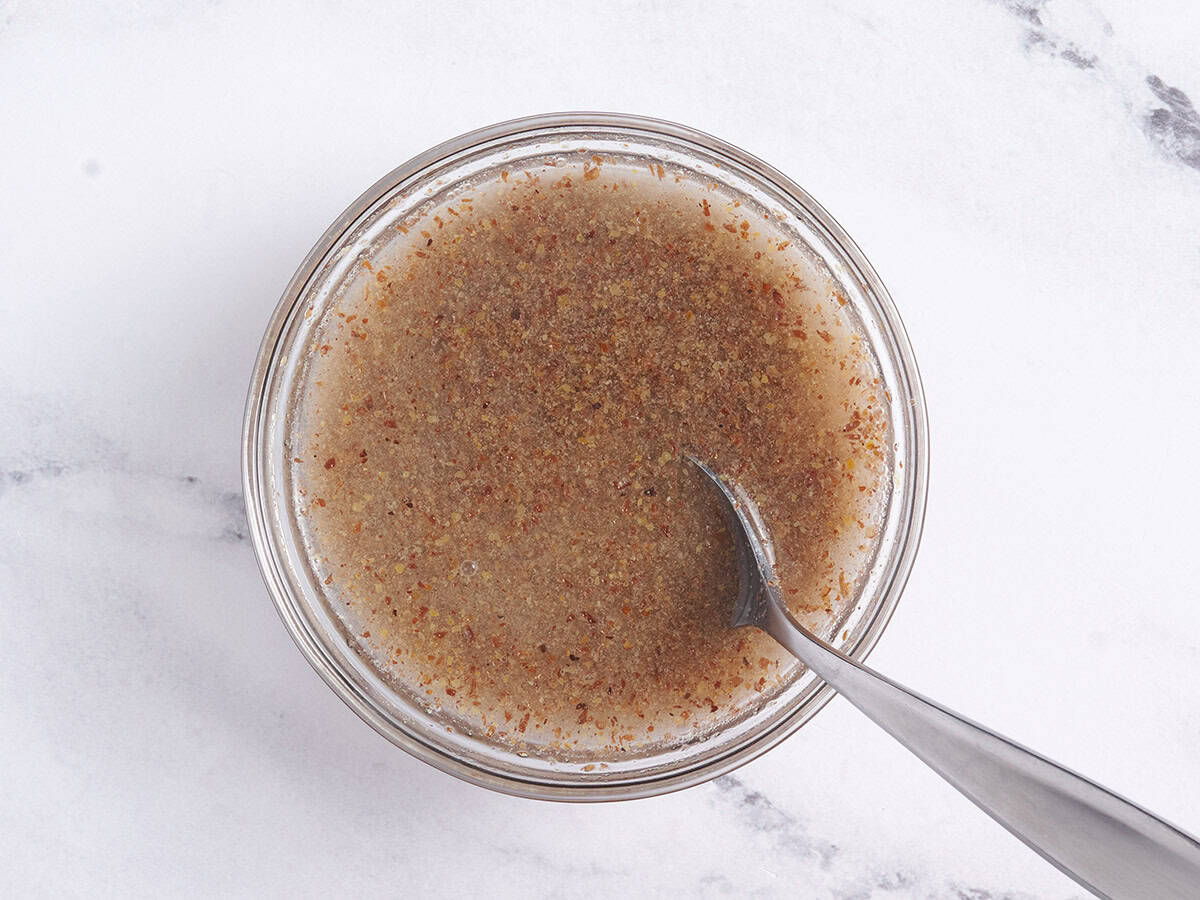
    3. Let the flax ‘egg’ thicken. I use a mixture of ground flax and water to replace the egg typically used in other meatball recipes. Let it sit for a few minutes until it looks slightly gelled; that thicker texture helps bind the lentils, breadcrumbs, and veggies together.
    4. Pulse, don’t puree. When you add all the ingredients to the food processor in step 8, pulse just until the mixture is sticky and thick. A few visible lentils are a good thing because they give these veggie meatballs a heartier texture instead of turning the mixture into a paste.
    5. Bake before adding a sauce. Baking helps the breadcrumb coating toast and gives the outside of these vegan meatballs time to set. I don’t recommend letting them simmer in a sauce for a long time, as too much liquid and movement can soften the outside and make them more delicate.

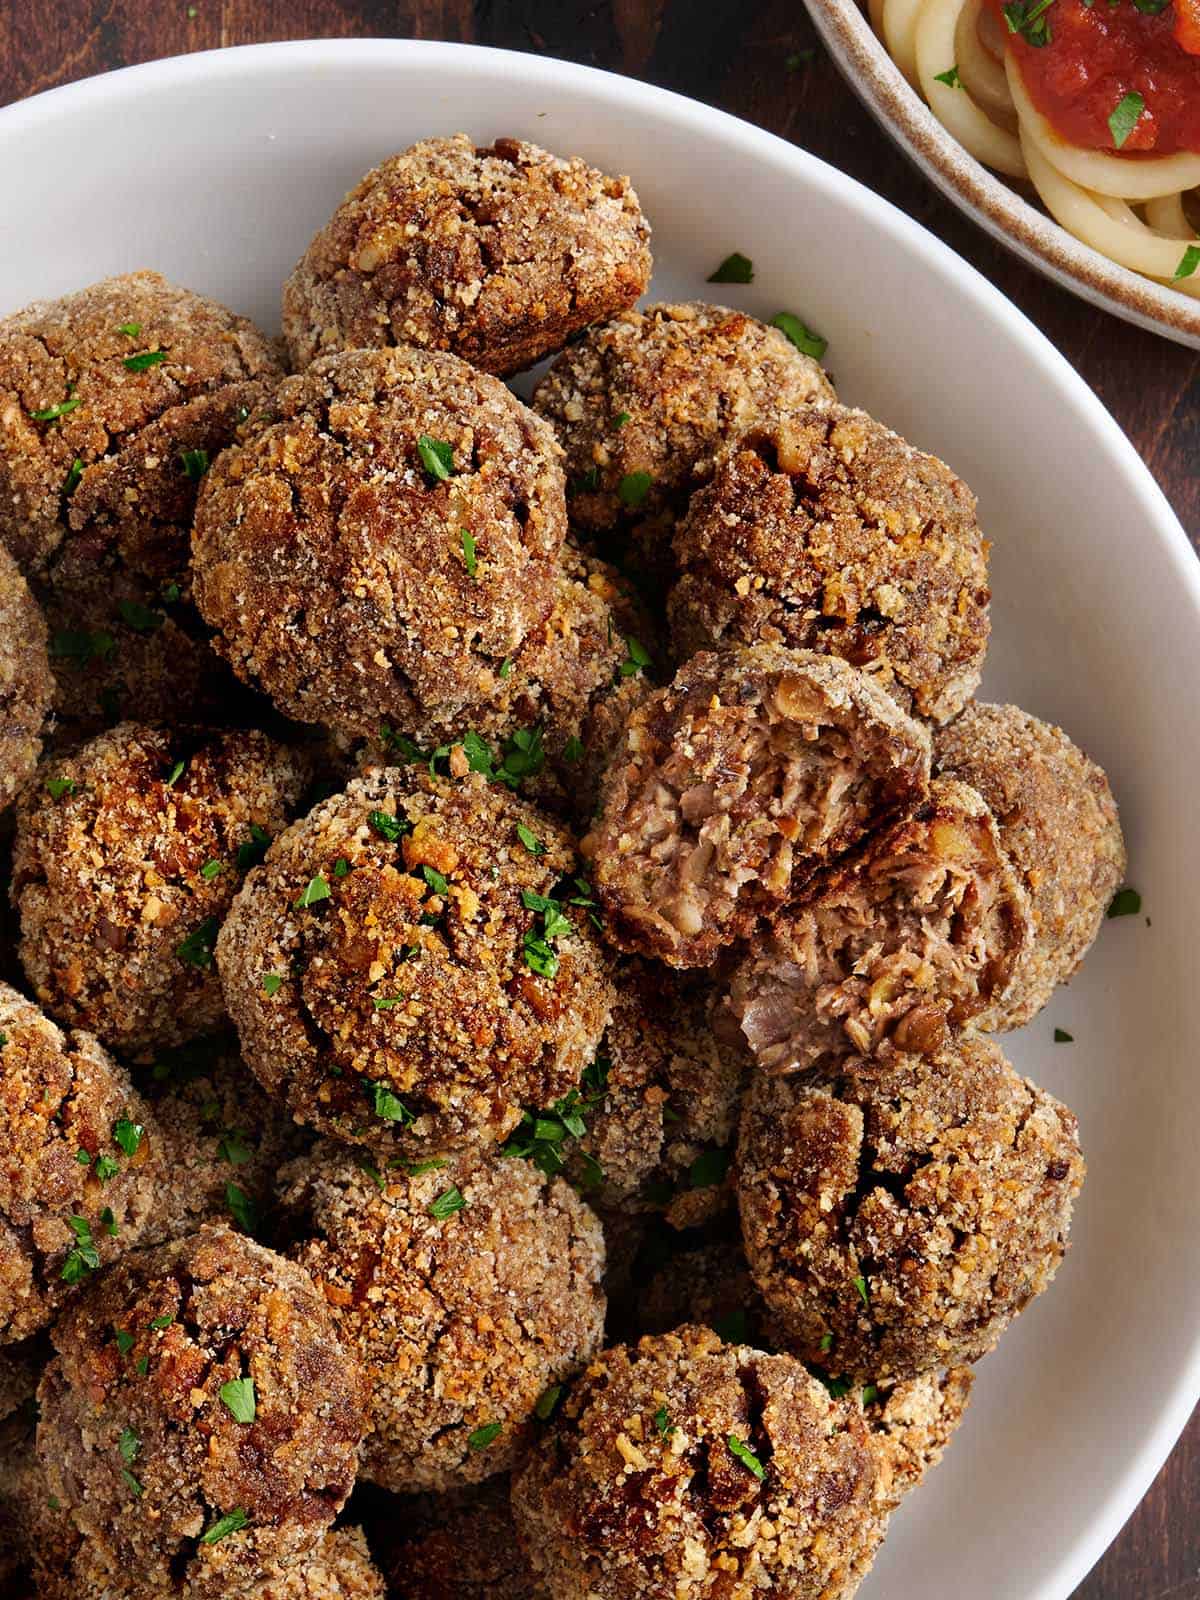
    Overhead view of a plate of vegan meatballs.

    Print
    Add to Collection Go to Collections

    Vegan Meatballs

    These Vegan Meatballs are made with lentils, mushrooms, walnuts, and sun-dried tomatoes for a cozy, totally plant-based, meatless dinner!
    Course Main Course
    Cuisine American
    Total Cost $5.22 recipe / $0.65 serving
    Prep Time 25 minutes
    Cook Time 35 minutes
    Total Time 1 hour
    Servings 8 servings (4 meatballs each)
    Calories 145kcal
    Author Jess Rice

    Equipment

    • Sauté Pan
    • Food Processor
    • Baking Sheet

    Ingredients

    • 1 tsp fennel seeds $0.30
    • ¼ cup walnut pieces $1.10*
    • ½ yellow onion $0.30
    • 1 Tbsp sun-dried tomato oil or olive oil, $0.10**
    • 2 Tbsp ground flax see note, $0.13
    • 6 Tbsp water $0.00
    • 8 oz. white button mushrooms $1.70***
    • 2 garlic cloves $0.20
    • ¼ cup sun-dried tomatoes $0.65**
    • 1 tsp salt $0.02
    • ½ tsp black pepper freshly cracked, $0.05
    • tsp chili flakes $0.02
    • 2 cups cooked lentils $0.40****
    • 1 Tbsp soy sauce $0.15
    • 1 Tbsp Italian seasoning $0.10
    • ½ cup plain breadcrumbs divided, $0.09
    • cooking spray $0.01
    • 1 Tbsp fresh parsley minced, $0.11

    Instructions

    • Gather ingredients and preheat oven to 375℉. If your lentils aren’t already cooked, see the recipe card notes below for instructions on how to cook lentils.
    • In a dry sauté pan, toast fennel seeds and walnut pieces until fragrant over medium-low heat, stirring often to avoid burning. Do this for around 4 minutes. You’ll be able to smell the fennel and a warm smell from the walnuts lightly toasting. Remove from the pan and set aside.
    • Meanwhile, thinly slice half an onion (or dice it if that’s easier for you) and add to the same pan with 1 Tbsp sun-dried oil (or olive oil). Turn the heat up to medium. Stir the onions occasionally; we want them to caramelize, not burn!
    • Make the “flax egg” by combining the ground flax and water. Stir well and let it sit while you continue with the recipe.
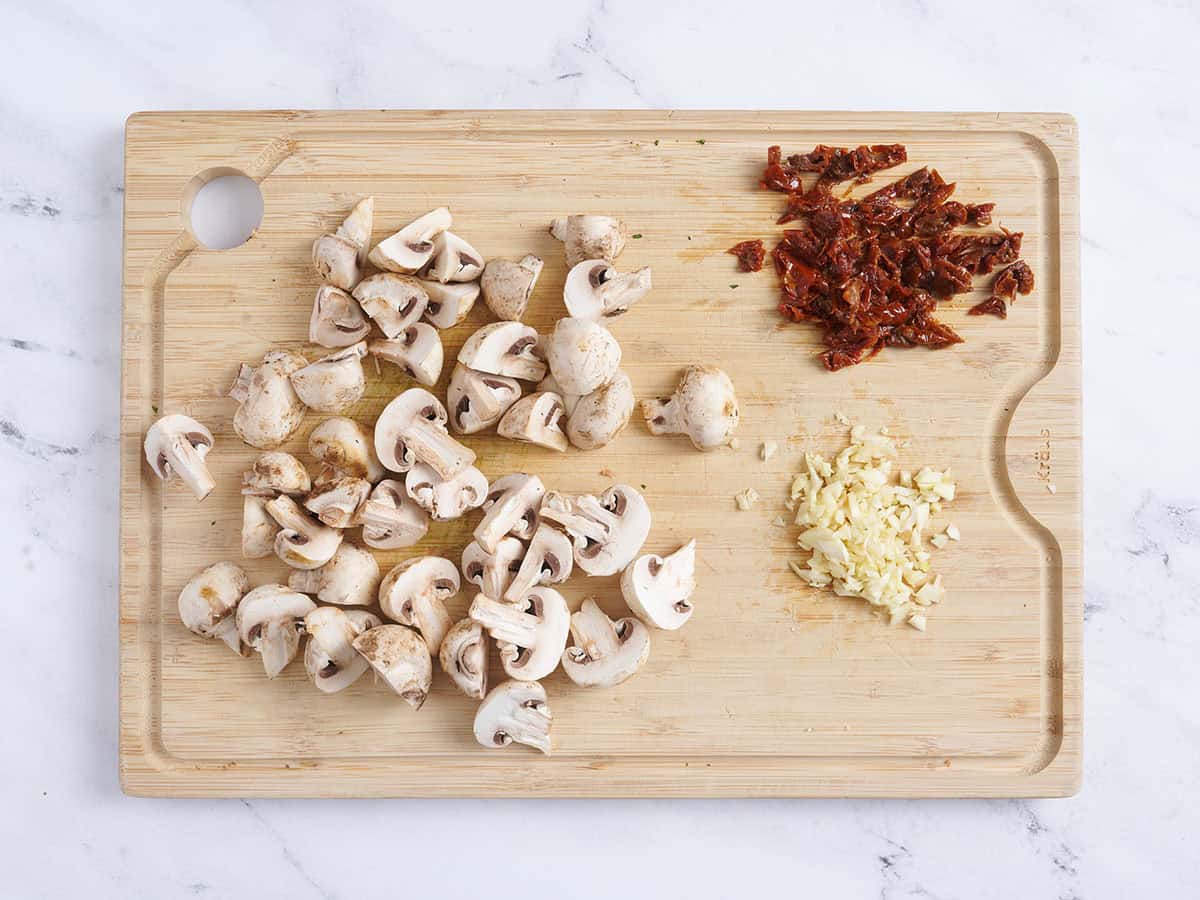
    • Clean and quarter mushrooms, chop garlic, and sun-dried tomatoes.
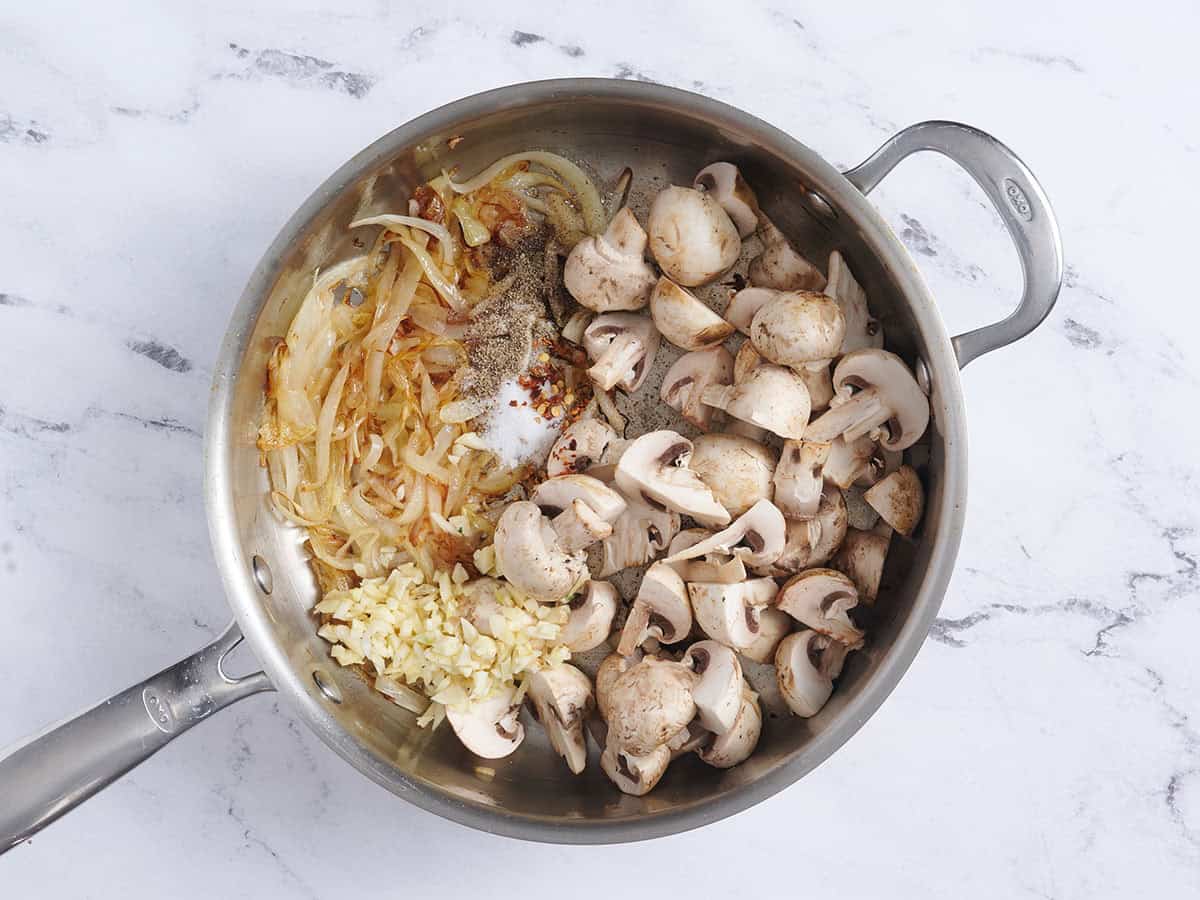
    • Add mushrooms, garlic, salt, pepper, and chili flakes to the sauté pan.
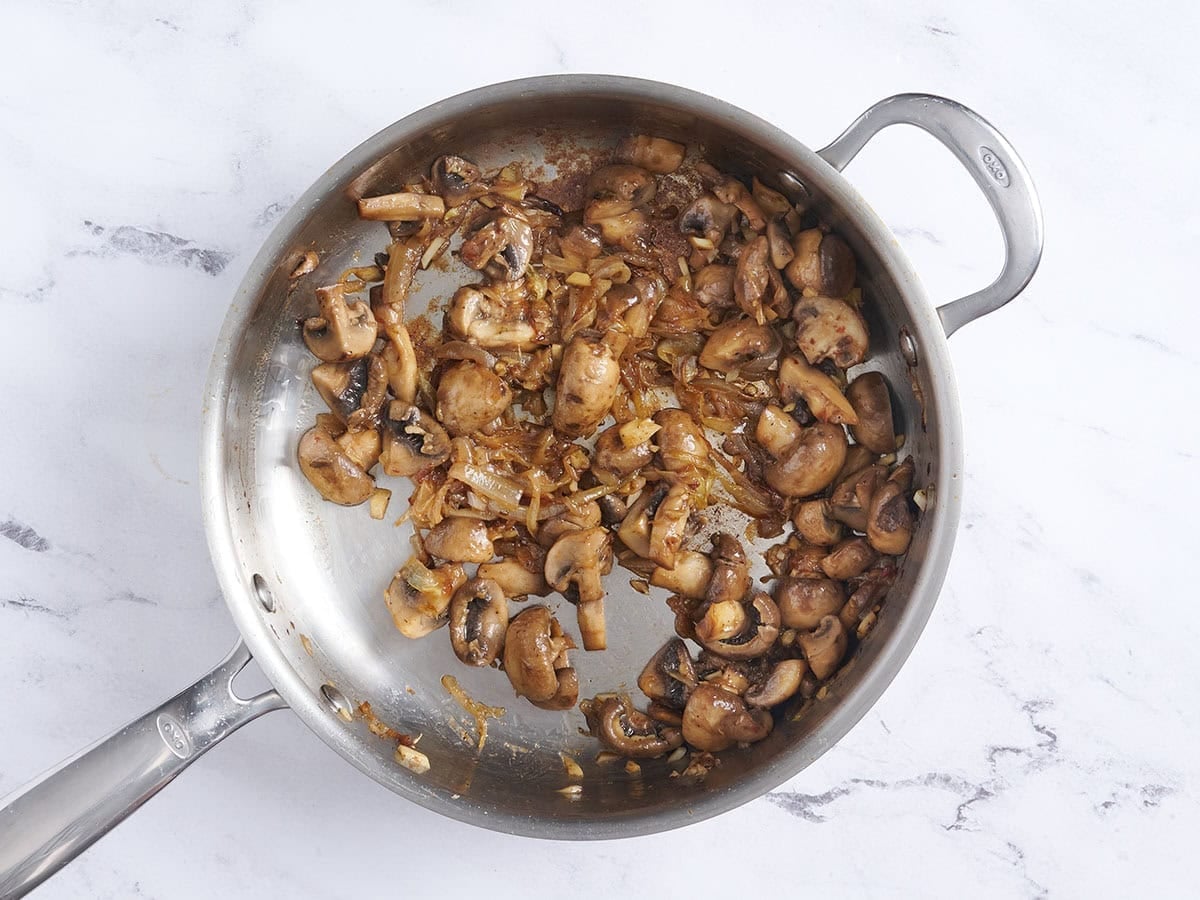
    • Stir and cook until the mushroom onion mixture is browned and all of the mushrooms have softened, about 5 minutes. Once cooked, remove from the heat and allow them to cool.
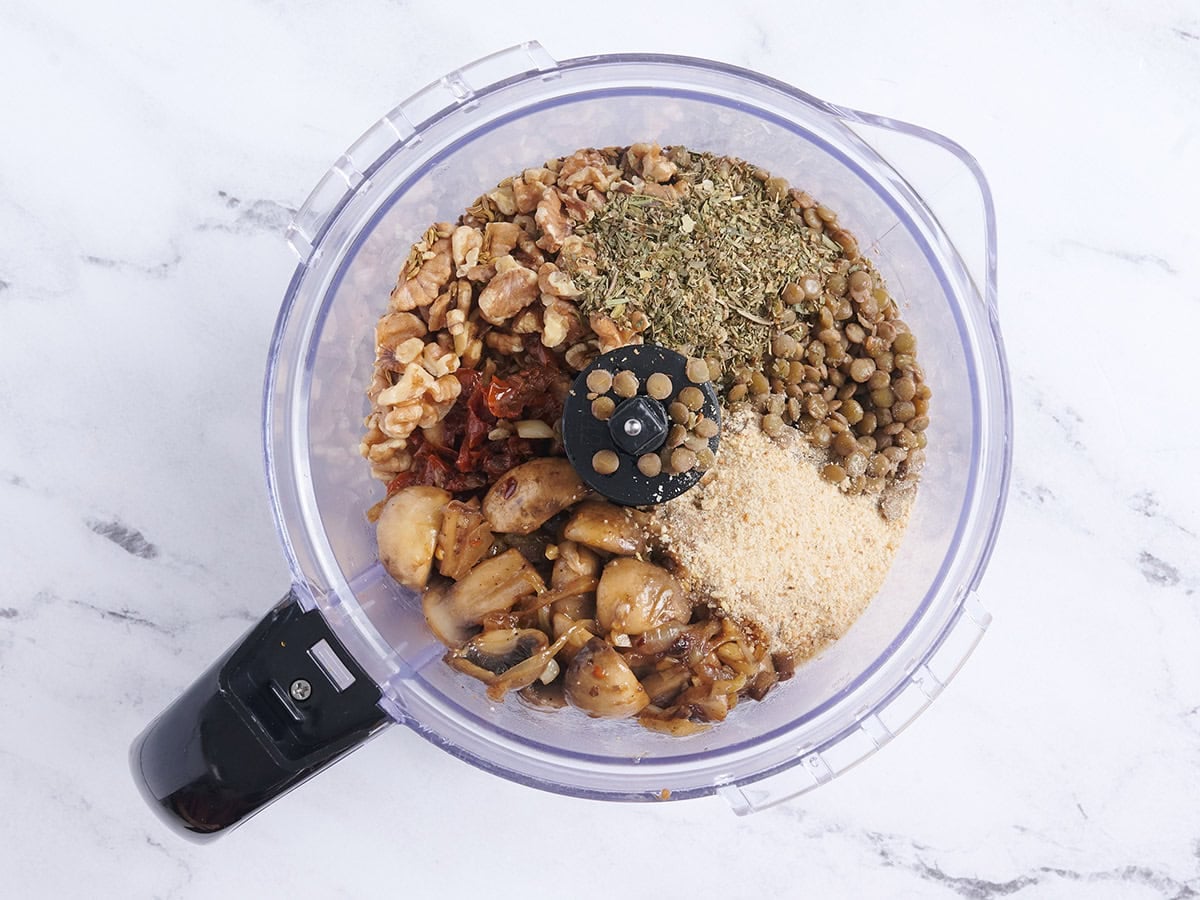
    • To a food processor, add the cooked lentils, toasted walnuts and fennel seeds, flax egg, soy sauce, Italian seasoning, sun-dried tomatoes, mushroom and onion mixture, and half the breadcrumbs.
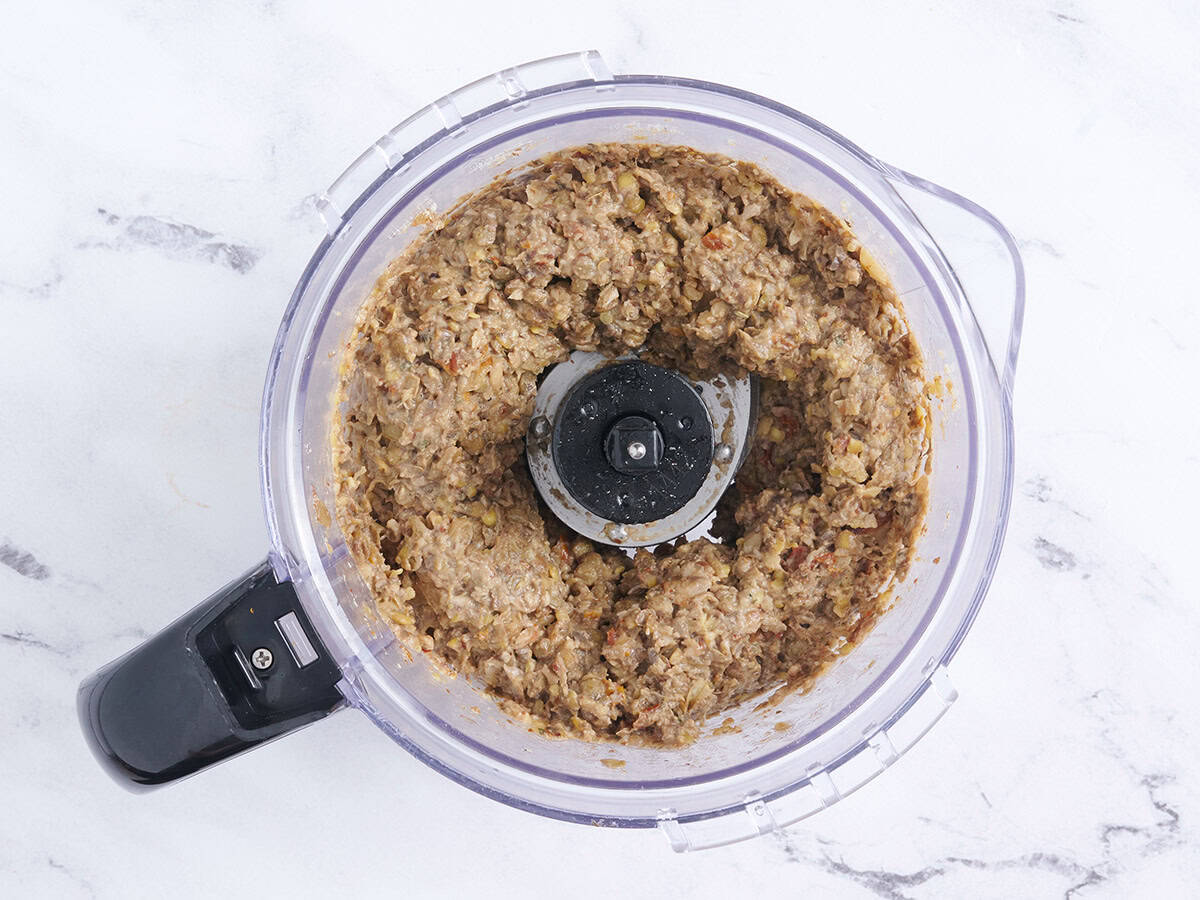
    • Pulse until a sticky, thick mixture forms. It’s ok if you still see some whole lentils.
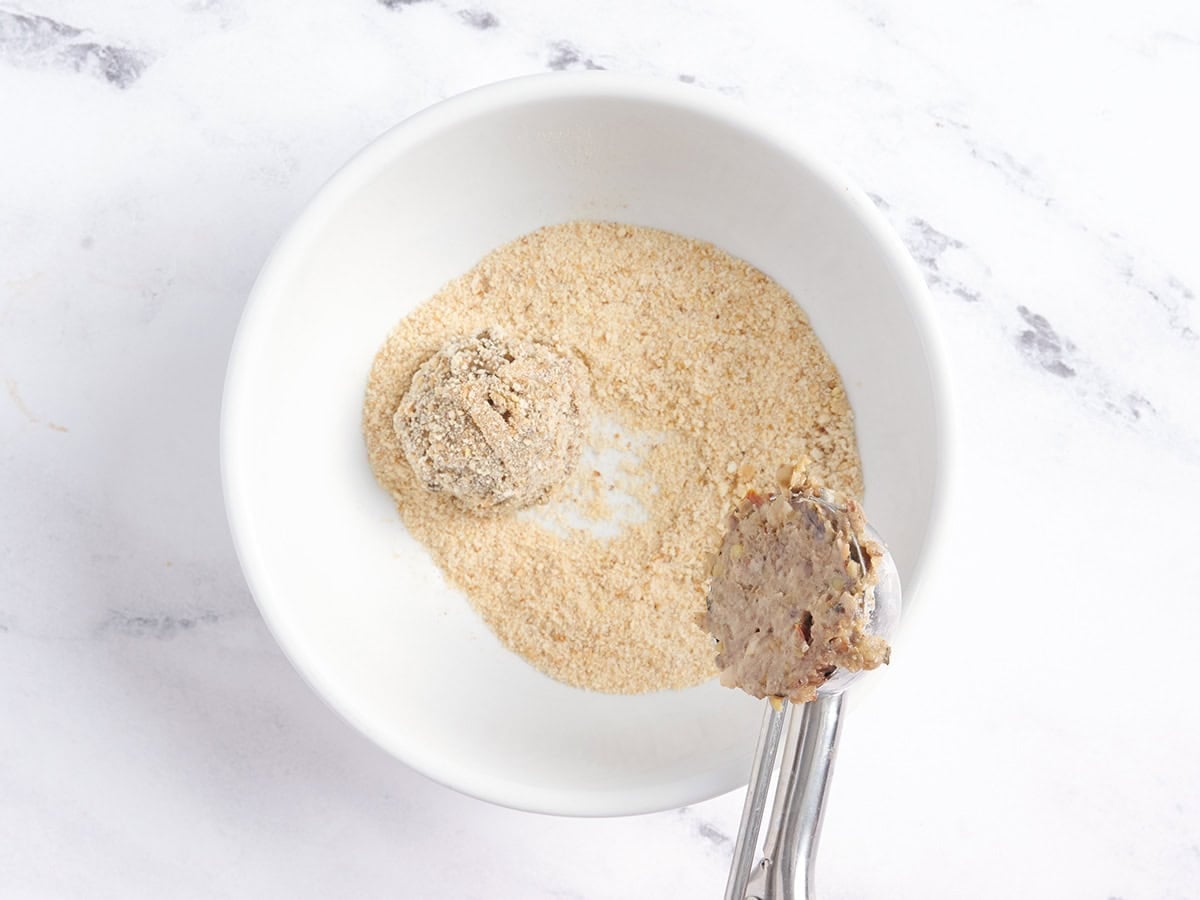
    • Scoop 1 Tbsp of the lentil meatball mixture out at a time and lightly roll it in the remaining breadcrumbs.
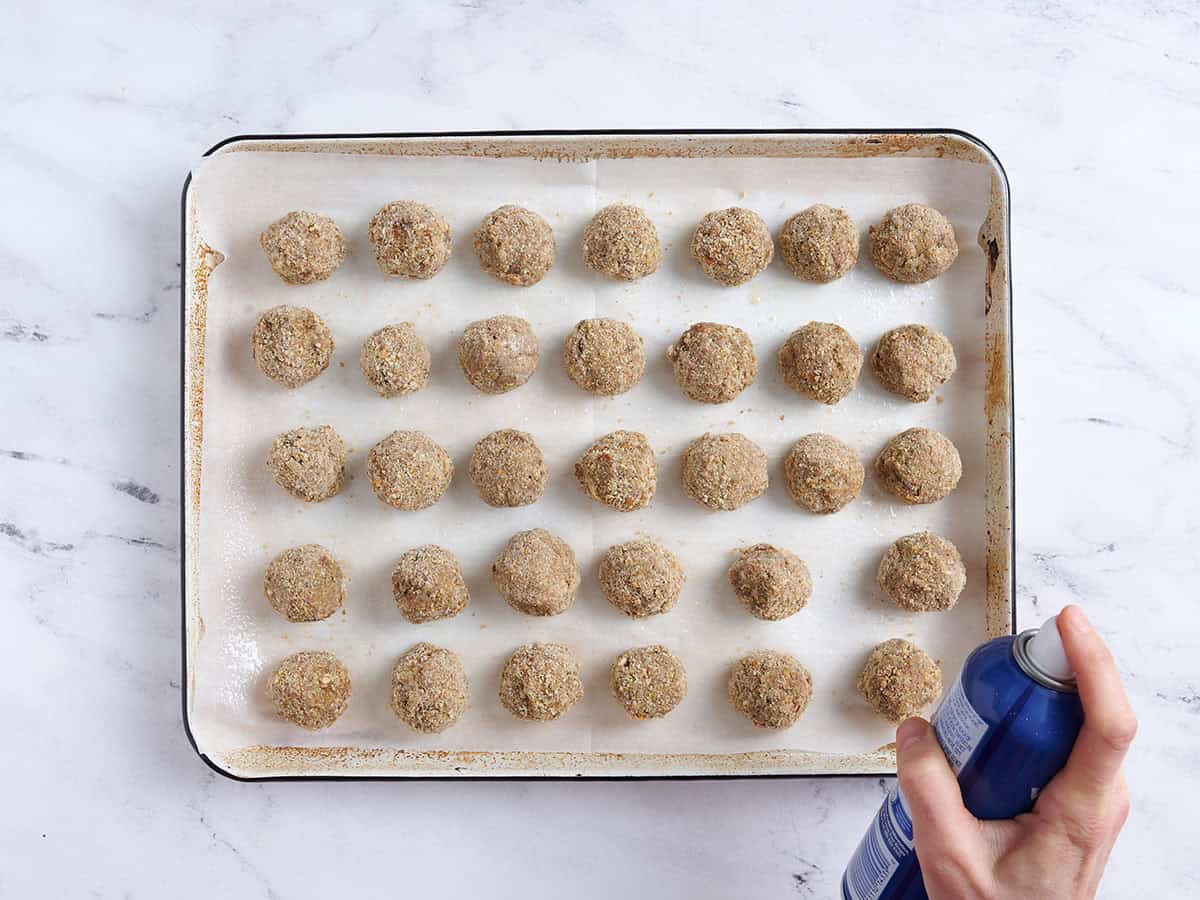
    • Arrange the veggie meatballs on lined cookie sheets and give them a spray with cooking oil to help toast up the breadcrumbs nicely! Bake for 20-25 minutes, gently shaking the baking sheet about halfway through. Garnish with fresh parsley and serve!

    See how we calculate recipe costs here.

    Notes

    *Walnuts add a nice texture difference and earthy flavor. You can also swap them with any other nut or seed, like pecans, almonds, or shelled sunflower seeds. Or for a nut-free version, replace them completely with ¼ cup more cooked lentils!

    **Oil packed sun-dried tomatoes are the easiest option as they’re ready to use. If you’re using dehydrated sun-dried tomatoes, rehydrate them in oil or hot water first. For this recipe, I recommend rehydrating them in olive oil (this will take a while, so start the process in the morning or the day before you plan to make your meatballs). You can use the sun-dried tomato-infused olive oil in this recipe, giving them extra flavor!

    ***Mushrooms make up a big part of the ‘meaty’ flavor and texture. I use white button mushrooms for the price, but you can use other mushrooms like cremini or portobello. There isn’t an equal substitute for the mushrooms in this particular recipe. 

    ****For lentil meatballs, slightly firmer brown/green lentils are ideal—they hold together better when mixed with breadcrumbs and other ingredients. Canned lentils can work in a pinch, but drain them very well first.

    Flax Seed Egg: The flax ‘egg’ is made by mixing ground flaxseed with water until it thickens slightly, which helps bind the vegan meatballs together. If you’re not keeping this recipe vegan, you can replace the flax egg with 2 large eggs.

    How to Cook Lentils (makes 5-6 cups once cooked): Rinse 2 cups dry brown lentils and pick out any debris. Add them to a pot with 6-8 cups of hot water and optional seasonings like a pinch of salt, bay leaf, or aromatics. Bring to a boil, then reduce the heat and simmer gently, partially covered, for 15-20 minutes or until tender but not mushy. Drain any excess liquid. This makes about 5-6 cups of cooked lentils, and you can use them in any lentil recipe you like! If you’re avoiding leftovers, use ~¾ cup dry lentils and 2 cups of hot water to make about 2 cups of cooked lentils.

    Nutrition

    Serving: 1serving (4 meatballs) | Calories: 145kcal | Carbohydrates: 21g | Protein: 8g | Fat: 4g | Sodium: 480mg | Fiber: 6g

    how to make Vegan Meatballs step-by-step photos

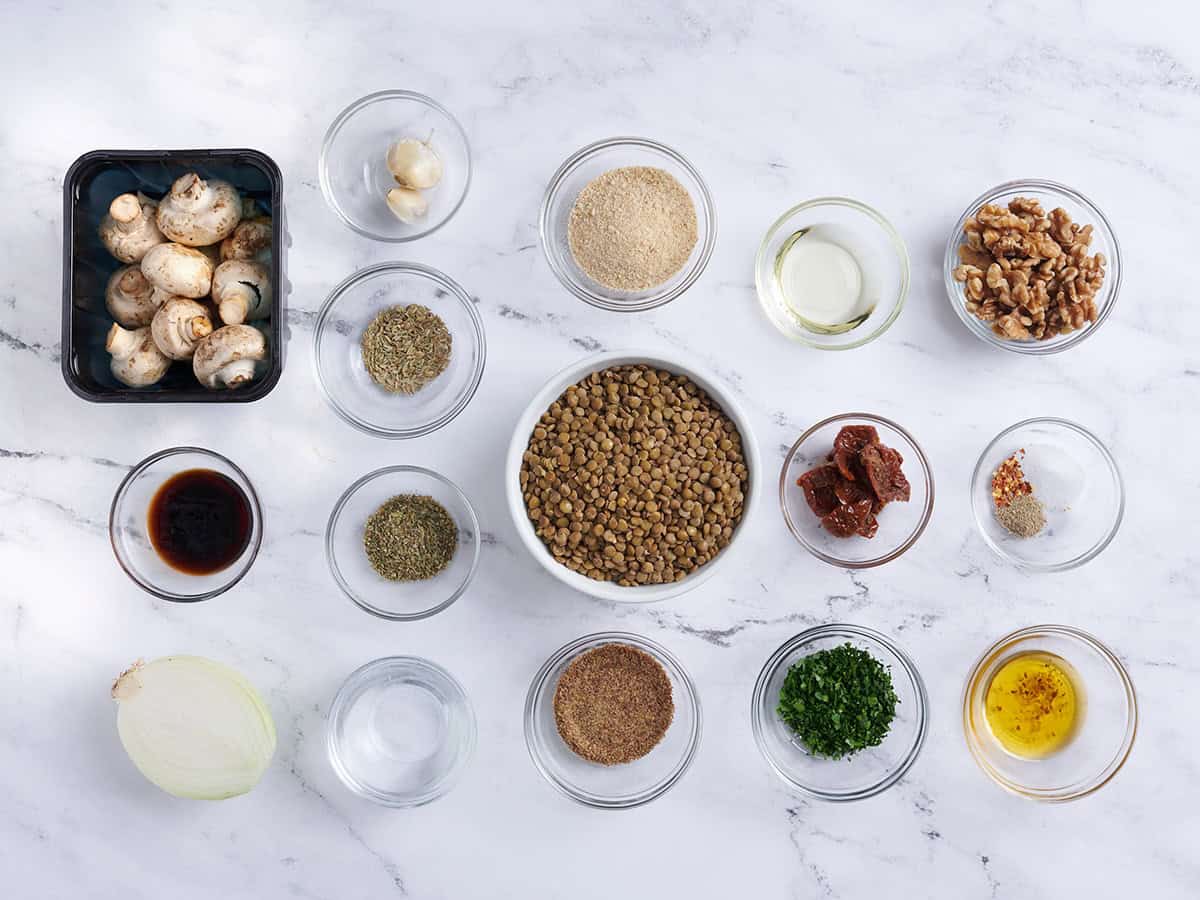
    The ingredients to make vegan meatballs.

    Gather all your ingredients and preheat the oven to 375°F. Line a baking sheet with parchment paper or a silicone baking mat.

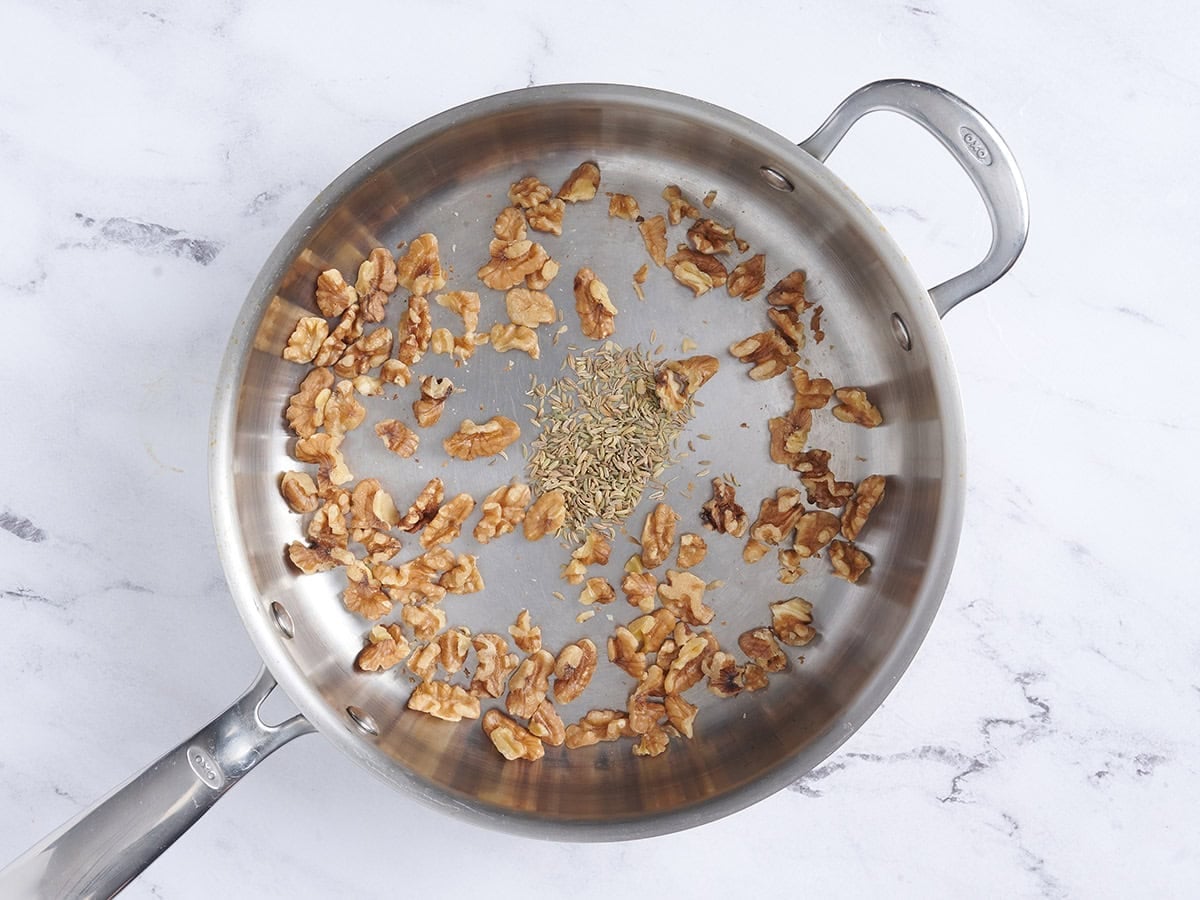
    Fennel seeds and walnuts toasting in a skillet.

    Toast the fennel seeds and walnuts: Add 1 tsp fennel seeds and ¼ cup walnut pieces to a dry sauté pan. Toast over medium-low heat for about 4 minutes, stirring often, until the walnuts smell warm and nutty and the fennel is fragrant. Keep a close eye on them so they don’t burn. Remove from the pan and set aside.

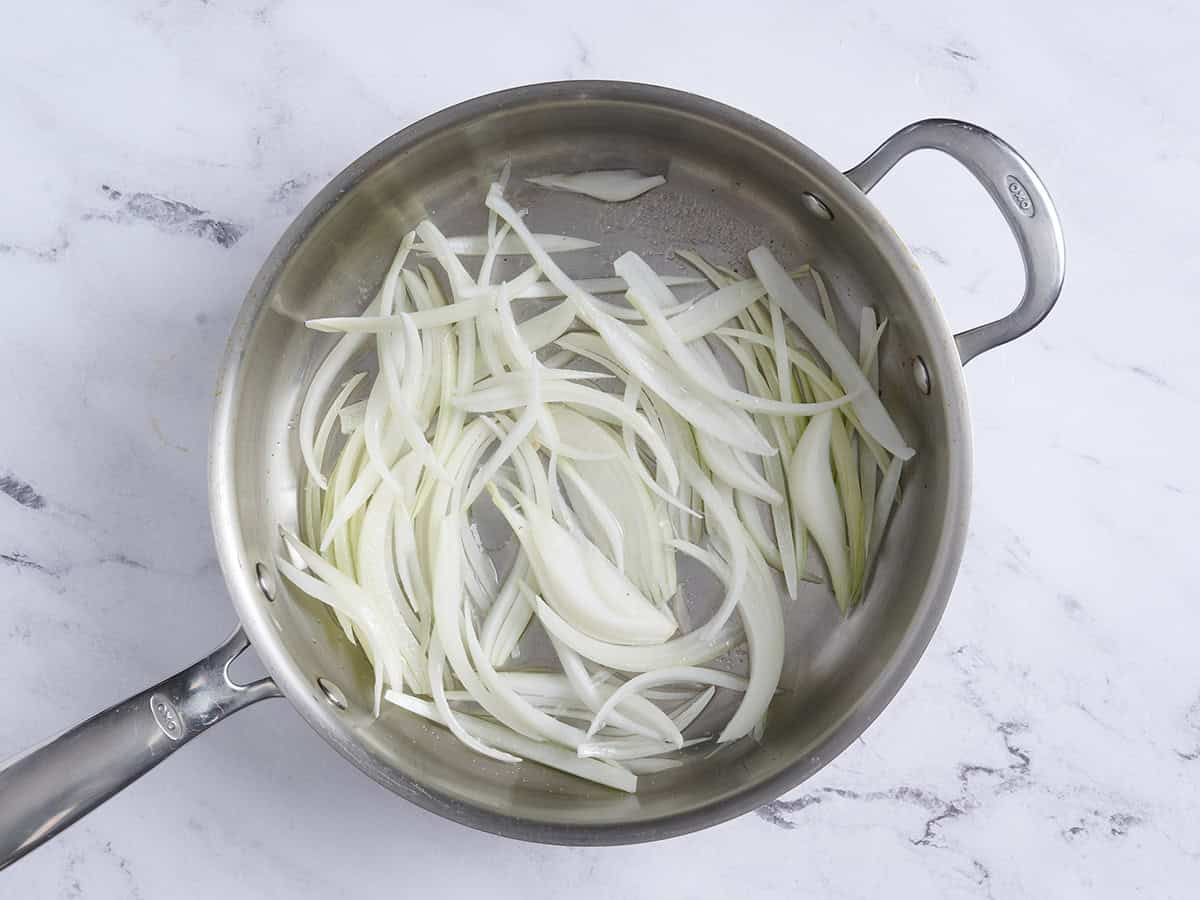
    Sliced onions in a skillet.

    Caramelize the onions: While the walnuts and fennel seeds toast, julienne (thinly slice) ½ yellow onion. You can also dice it if that’s easier.

    Once the walnuts and fennel seeds are toasted and removed from the pan, add 1 Tbsp sun-dried tomato oil (or olive oil) to the same pan, then turn the heat to medium. Add the onion and cook, stirring occasionally, until softened and lightly caramelized. You want the edges golden and sweet-smelling, not dark or burnt.

    Flax seed and water in a bowl.

    Make a flax egg: Make the flax egg by stirring together 2 Tbsp ground flax and 6 Tbsp water in a small bowl. Let it sit while you continue with the recipe. It should thicken into a gel-like mixture after a few minutes, which helps bind the meatballs together.

    Sliced mushrooms, sundried tomatoes, and garlic on a wooden cutting board.

    Prep the fresh ingredients: Clean and quarter 8 oz. white button mushrooms. Chop 2 garlic cloves and ¼ cup sun-dried tomatoes.

    Garlic, mushrooms, caramelized onions and seasonings in a skillet.

    Sauté the mushrooms and garlic: Add the quartered mushrooms, chopped garlic, 1 tsp salt, ½ tsp black pepper, and ⅛ tsp chili flakes to the pan with the onions. Cook for about 5 minutes, stirring occasionally, until the mushrooms have softened, released their moisture, and browned.

    Onions, garlic and mushrooms in a skillet.

    The mixture should look darker, glossy, and fairly dry, not watery. Remove the pan from the heat and let the mixture cool slightly.

    The ingredients for vegan meatballs in a food processor.

    Combine the ingredients: Add 2 cups cooked lentils, the toasted walnuts and fennel seeds, the thickened flax egg, 1 Tbsp soy sauce, 1 Tbsp Italian herb seasoning, ¼ cup sun-dried tomatoes, the cooked mushroom-onion mixture, and ¼ cup plain breadcrumbs to a food processor.

    Vegetarian meatball mixture in a food processor.

    Pulse until a thick, sticky mixture forms. Don’t over-process it into a completely smooth paste; it’s okay if you still see a few whole lentils and small bits of mushroom or walnut. The mixture should hold together when pressed. If the mixture feels too soft to roll, let it rest for 10-15 minutes to allow the breadcrumbs to soak up any moisture. If it feels dry and crumbly, pulse a few more times or add a tiny splash of water or sun-dried tomato oil.

    Veggie meatballs being tossed in breadcrumbs.

    Roll in breadcrumbs: Add the remaining ¼ cup plain breadcrumbs to a shallow bowl. Scoop the lentil mixture 1 Tbsp at a time, gently shape it into small meatballs, then lightly roll each one in the breadcrumbs. If the mixture feels too sticky, lightly dampen your hands as you roll.

    Vegan meatballs on a baking sheet being sprayed with cooking spray.

    Bake: Arrange the veggie meatballs on the prepared baking sheet, leaving a little space between each one. Lightly coat the tops with cooking spray to help the breadcrumbs toast and turn golden.

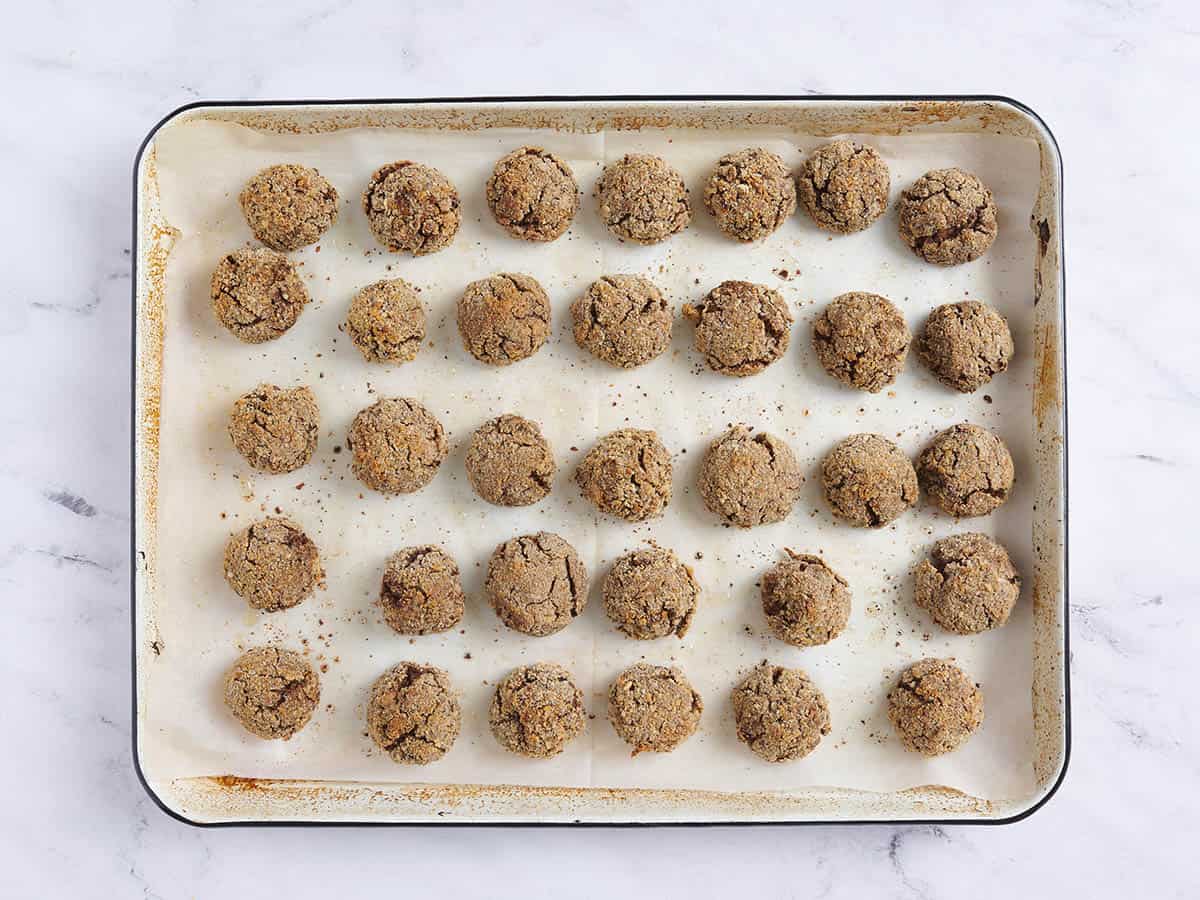
    Vegan meatballs on a baking sheet.

    Bake for 20-25 minutes, gently shaking the baking sheet halfway through, until the meatballs are firm, lightly browned, and crisp on the outside. Garnish with fresh parsley, and serve warm. Enjoy!

    Overhead view of veggie meatballs in a bowl with spaghetti and tomato sauce.

    Serving Suggestions

    My favorite way to serve these vegan meatballs is the classic way: piled over spaghetti with warm marinara sauce and a little fresh parsley. They’re also SO good with my angel hair pasta pomodoro because the light, garlicky tomato sauce keeps the whole meal bright and fresh while still giving you a cozy pasta-night feel.

    This recipe makes 8 servings, with 4 meatballs per serving, so it’s great for family dinners, meal prep, or freezing a few for later. You can also tuck the meatballs into toasted rolls for vegan meatball subs, serve them as a party appetizer with a balsamic glaze or your favorite dipping sauce, or spoon them over olive oil mashed potatoes with a mushroom herb gravy for the coziest comfort food dinner.

    Meal Prep It!

    This recipe makes a big batch of vegan meatballs, which means future-you gets an easy dinner win. To freeze before baking, scoop and roll the mixture, coat in breadcrumbs, then freeze on a parchment-lined baking sheet until solid. Transfer the meatballs to a freezer bag or container, then bake straight from frozen (add a few extra minutes to the total baking time). I skip thawing because the breadcrumb coating can soak up moisture and not get as toasty.

    Storage & Reheating

    Store leftover vegan meatballs in an airtight container in the refrigerator for 3-4 days. The breadcrumb coating will soften a little as they sit. They’ll still taste great, but reheating them in the oven or air fryer brings back the best texture!

    Reheating

    Reheat leftovers in the oven or air fryer at 350ºF until hot throughout and lightly crisp on the outside. The microwave works in a pinch, but they’ll turn out softer (which is good for sandwiches and wraps, I’d say!)

    Freezer

    To freeze baked vegan meatballs, let them cool completely, then freeze them in a single layer on a parchment-lined baking sheet until solid. Transfer to a freezer bag or container and freeze for up to 3 months. Reheat from frozen in the oven or air fryer until hot throughout.

    Got Leftover Lentils? Try These Recipes Next:

    • My Lentil Loaf brings all the nostalgic meatloaf-style comfort, but keeps things totally vegan with lentils, veggies, and pantry staples.
    • This Vegan Lasagna makes 12 servings, which is the kind of big-batch dinner I want when comfort food meets meal prep!
    • Lentil Bolognese uses a classic onion, carrot, and celery base, then adds garlic, basil, oregano, and crushed red pepper for a cozy flavor.

    The post Vegan Meatballs appeared first on Budget Bytes.

    This post was originally published on this site.

  • Zucchini Recipes

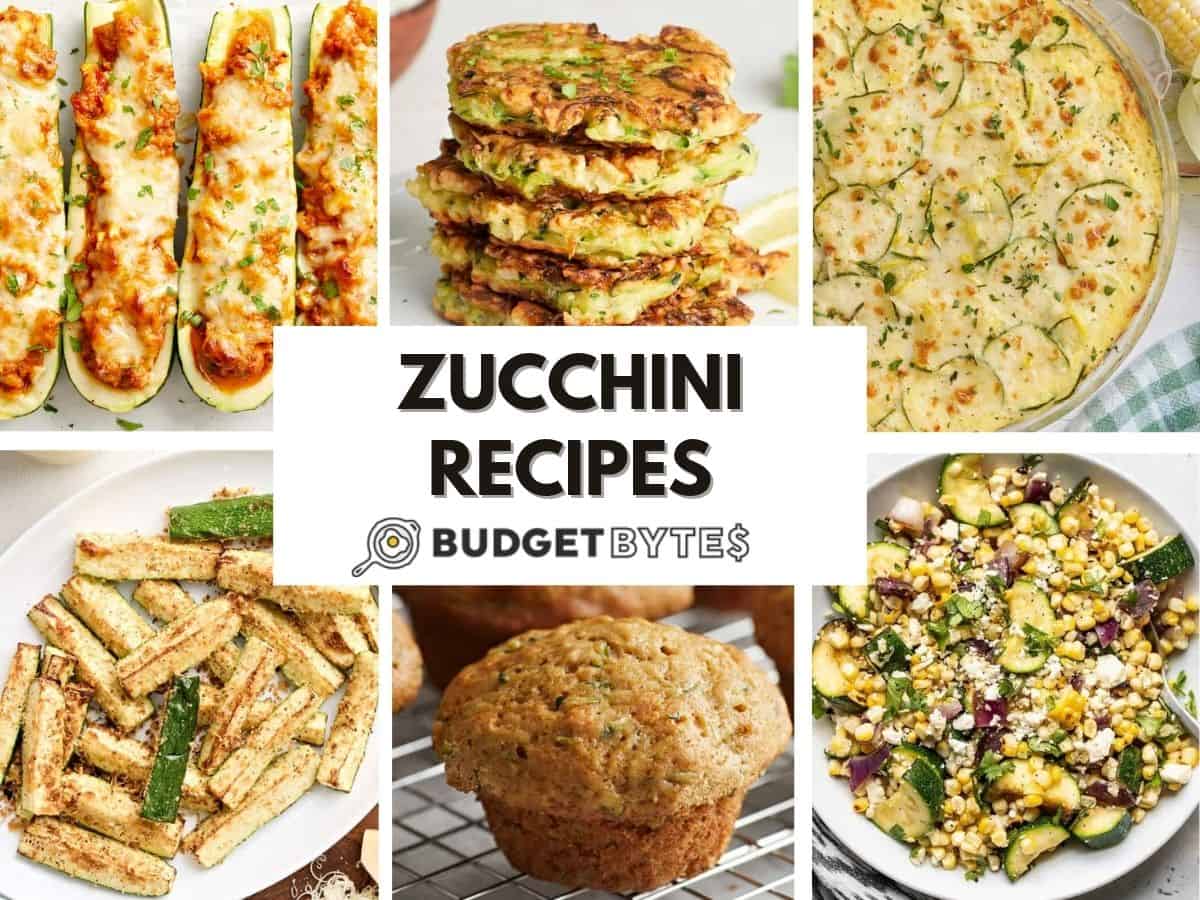
    Zucchini Recipes

    Ok, am I the only one who loves zucchini season? This super affordable green vegetable can be cooked in so many fun and tasty ways. My neighbor usually has an abundance of zucchini growing in her garden each year and begs me to take some off her hands. I’m always excited because it’s just an easy vegetable to slice and add to stir-frys, chop and roast in the oven, or grate and add to muffins! So, for all my fellow zucchini lovers and anyone growing zucchini this year, I’ve rounded up a list of simple Zucchini Recipes for you to try!

    Easy Zucchini Dinners

    Make zucchini the star of your next meal with these satisfying dinner ideas. From cheesy stuffed boats to skillet meals and baked pasta, these easy zucchini recipes are hearty, budget-friendly, and a great way to stretch fresh summer produce into dinner.

    1. Zucchini Lasagna

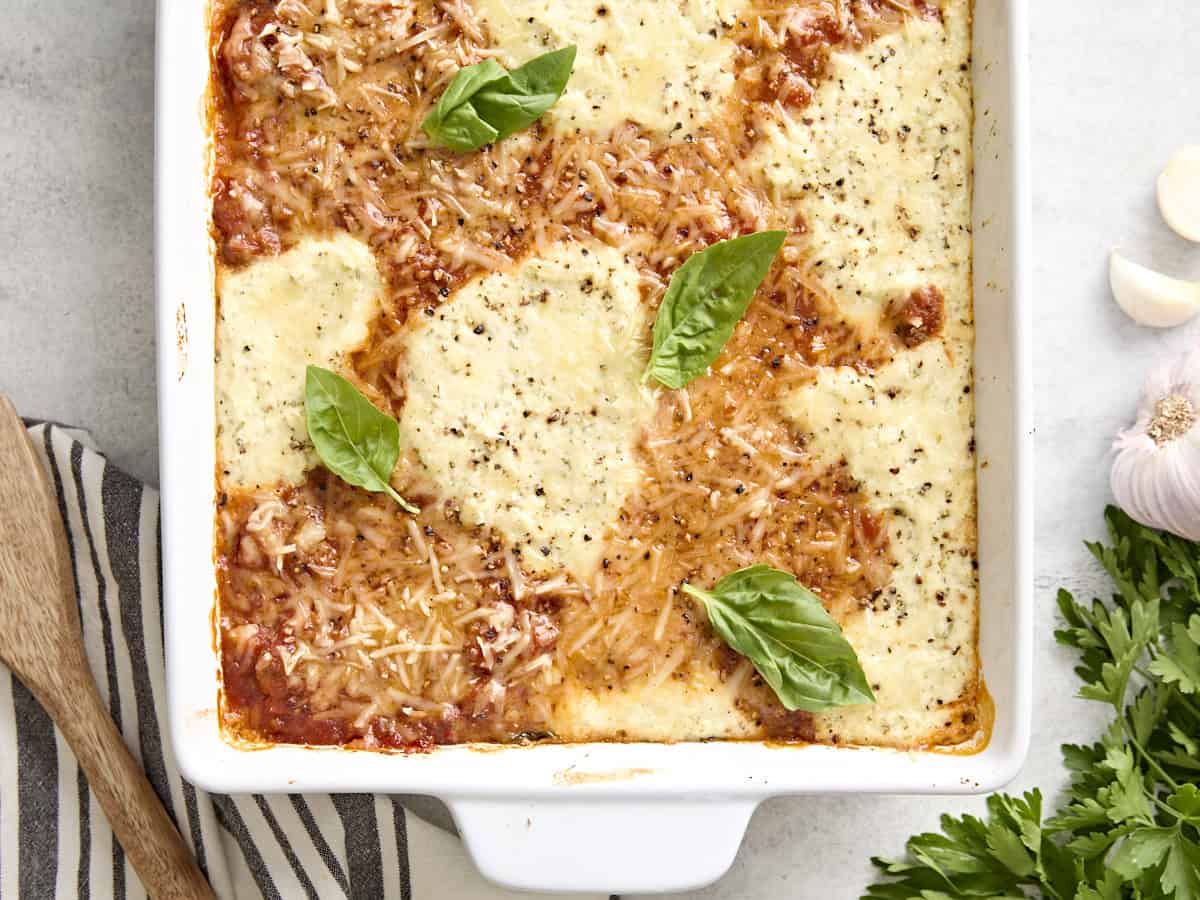
    Zucchini Lasagna

    Overhead view of zucchini lasagna in a baking dish

    This zucchini lasagna recipe uses zucchini slices instead of traditional noodles to create a low-carb, gluten-free, and delicious lasagna!

    5 from 3 votes

    $18.43 recipe / $1.84 serving
    Get the Recipe

    Our zucchini lasagna layers fresh zucchini slices between a tangy meat and a creamy cheese sauce for a lower-carb, gluten-free dinner that still feels cozy, saucy, and totally satisfying! I love that the zucchini really is the star here, and the quick salting and baking step helps keep the lasagna from turning watery.

    2. Zucchini Boats

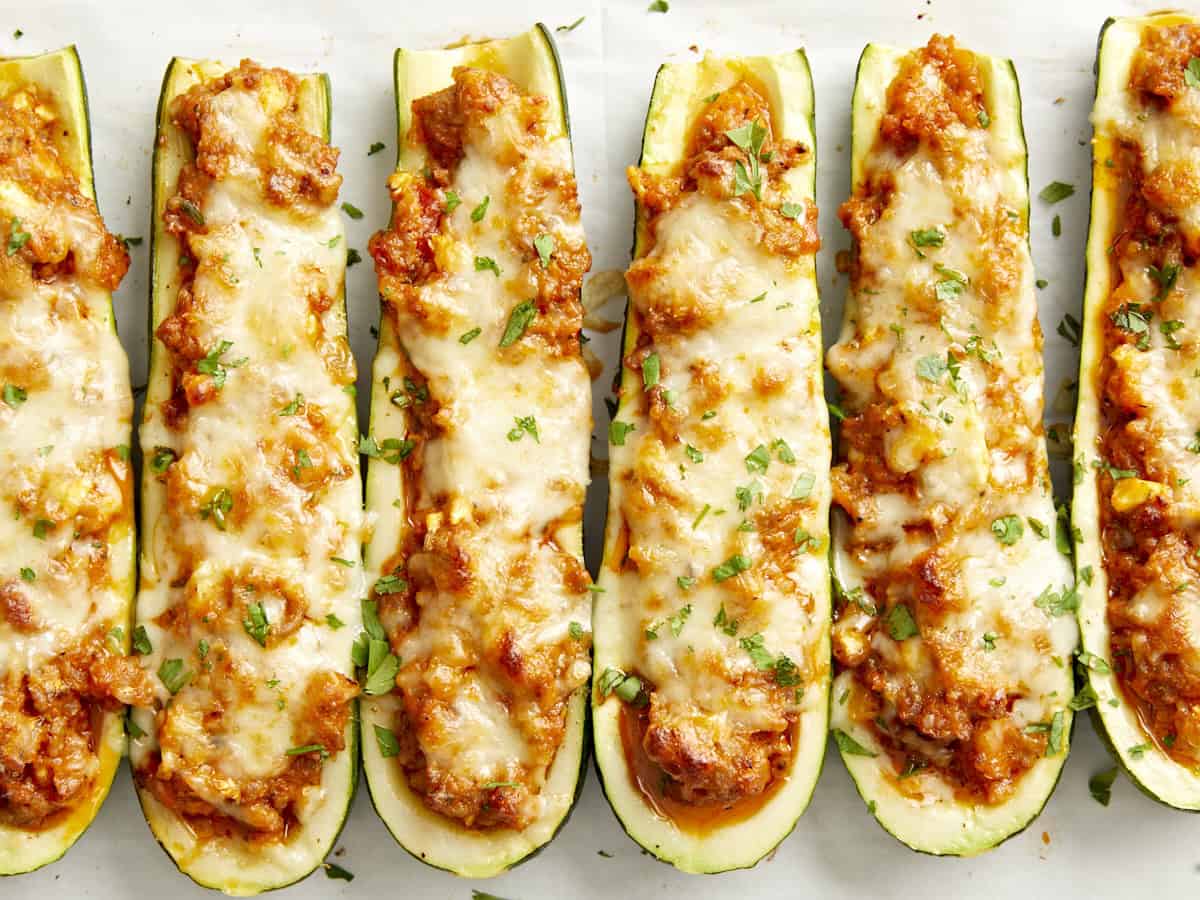
    Zucchini Boats

    Overhead close up view of Zucchini boats on parchment paper.

    Zucchini Boats are the perfect mashup for meat and veggie lovers. An easy and fun way to switch up your weeknight dinner routine!

    4.91 from 22 votes

    $10.08 recipe / $2.52 serving
    Get the Recipe

    Zucchini boats are the perfect mashup for meat and veggie lovers, and they’re such an easy, fun way to switch up your weeknight dinner routine. I stuff them with seasoned Italian sausage, marinara, breadcrumbs, and a layer of gooey mozzarella for a hearty veggie-packed dinner.

    3. Zucchini Enchiladas

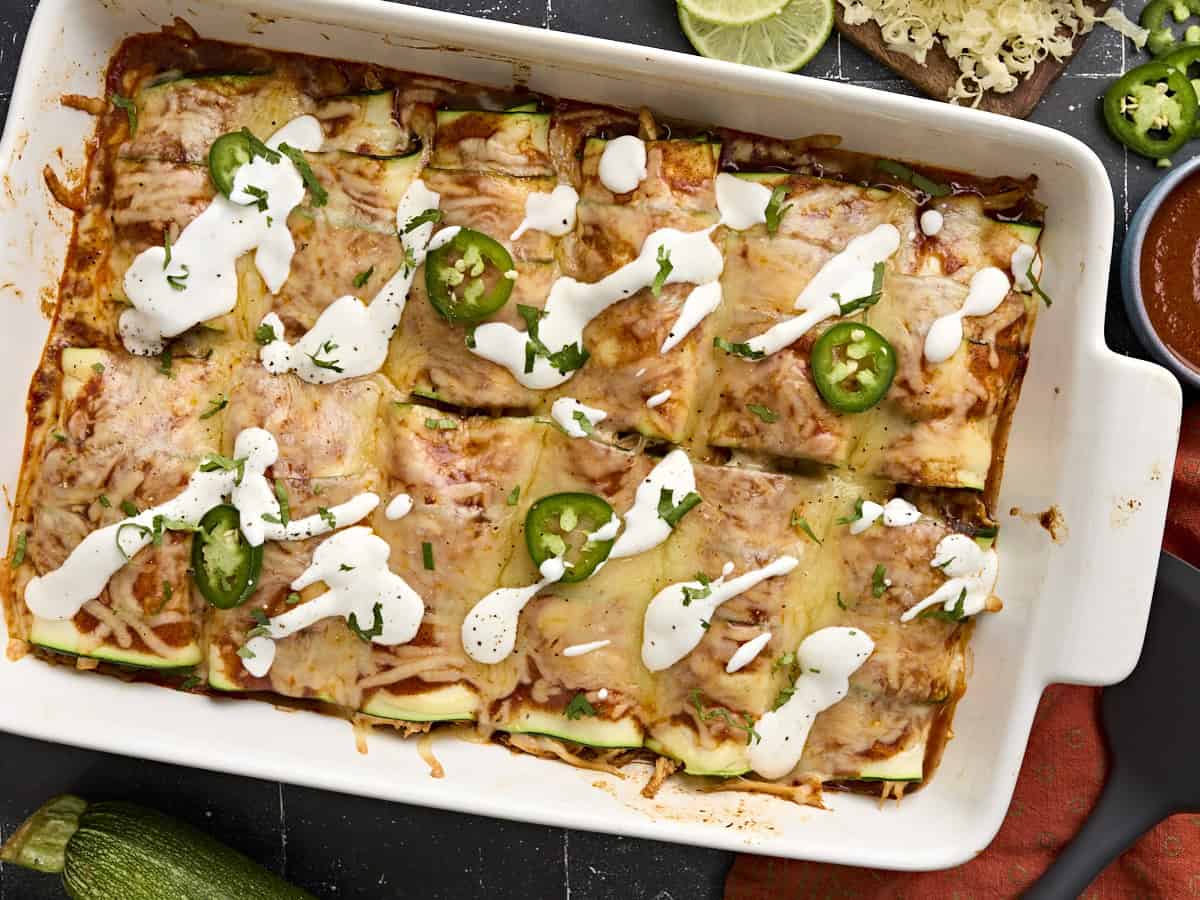
    Zucchini Enchiladas

    Overhead view of zucchini enchiladas topped with sour cream and sliced jalapenos.

    These Zucchini Enchiladas are made with strips of zucchini, not tortillas, for a lower-carb, naturally gluten-free twist on the classic enchilada recipe!

    4 from 1 vote

    $7.65 recipe / $1.28 serving
    Get the Recipe

    These zucchini enchiladas swap tortillas for thin slices of zucchini, then roll everything up with shredded chicken, enchilada sauce, green onions, and Monterey Jack cheese. I like this one for a lighter, veggie-forward dinner that still has all the saucy, cheesy enchilada comfort, and it only needs 5 ingredients.

    4. Blackened Salmon With Zucchini

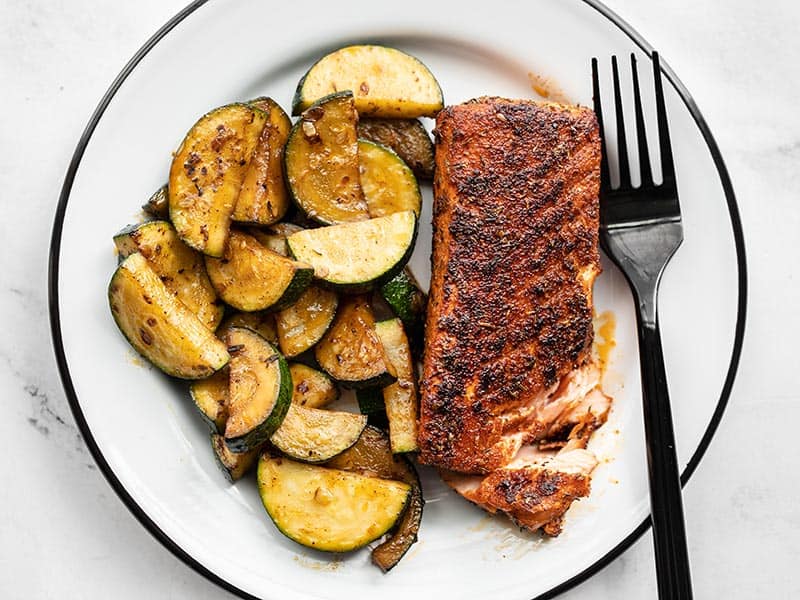
    Blackened Salmon with Zucchini

    Blackened salmon with zucchini on a plate with a black fork on the side

    Blackened salmon coated in Cajun spices, cooked to perfection in butter, and paired with simple sautéed zucchini makes a simple but delicious dinner!

    4.77 from 21 votes

    $13.30 recipe / $3.33 serving
    Get the Recipe

    This blackened salmon with zucchini is a great example of how food doesn’t have to be complicated to be good. The salmon is coated in Cajun spices, cooked in butter until it forms a dark, flavorful crust, and is paired with simple sautéed zucchini for a dinner that comes together in just 30 minutes.

    5. Roasted Vegetable Baked Penne

    Roasted Vegetable Baked Penne

    Overhead view of roasted vegetable baked penne being scooped out of the casserole dish

    Layers of pasta, flavorful roasted vegetables, a simple homemade red sauce, and melty cheese make this roasted vegetable baked penne to die for!

    4.67 from 15 votes

    $11.34 recipe / $1.42 serving
    Get the Recipe

    Speaking of baked pasta, this roasted vegetable baked penne is a great recipe for using zucchini and other roasted vegetables in a cozy casserole. It’s full of colorful veggies, homemade red sauce, and lots of gooey cheese, and the leftovers are awesome for quick lunches or stashing in the freezer.

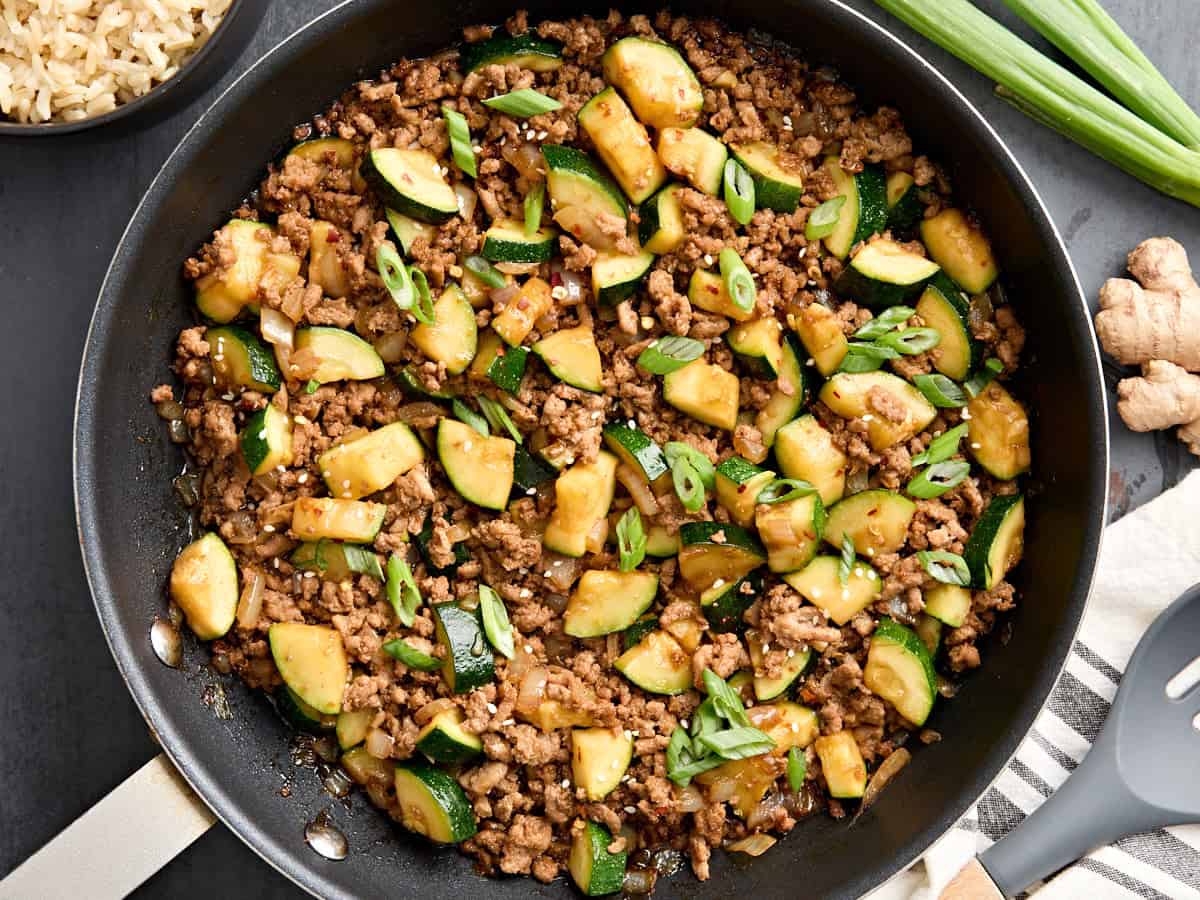
    6. Ground Turkey Zucchini Skillet

    Ground Turkey Zucchini Skillet

    Overhead view of an easy ground turkey zucchini skillet.

    This easy Ground Turkey Zucchini Skillet is a quick, budget-friendly skillet meal packed with flavor. Perfect for meal prep or busy weeknights!

    5 from 18 votes

    $6.69 recipe / $1.67 serving
    Get the Recipe

    This ground turkey zucchini skillet is not only budget-friendly, but also made in less than 30 minutes, which is exactly what I need when I’m really short on time. The sweet and savory soy, garlic, ginger, brown sugar, and chili garlic sauce make it taste way more time-consuming than it actually is. I like serving it over rice with green onions, sesame seeds, and red pepper flakes. YUM.

    7. Sweet Corn and Zucchini Pie

    Sweet Corn and Zucchini Pie

    Overhead view of sweet corn and zucchini pie.

    This Sweet Corn and Zucchini Pie is a crustless, cheesy bake with fresh corn, tender squash, and eggs. Perfect for brunch, dinner, or meal prep.

    4.17 from 12 votes

    $7.24 recipe / $1.21 serving
    Get the Recipe

    Our sweet corn and zucchini pie is a crustless, cheesy bake with sweet corn, tender zucchini, yellow squash, eggs, cottage cheese, and mozzarella. I’ll happily make this when I want zucchini to feel filling enough for brunch, meal prep, or a light dinner without messing with pie crust!

    Baking Recipes

    Zucchini brings moisture and subtle sweetness to baked goods, like these muffins and bread! These are the recipes I reach for when I have extra zucchini hanging out in the fridge and want something snacky and easy to grab throughout the week.

    8. Zucchini Muffins

    Zucchini Muffins

    Side view of Zucchini muffins on a wire rack.

    These irresistible Zucchini Muffins are fluffy, super moist and the perfect way to use up your generous supply of summer zucchini!

    4.77 from 17 votes

    $3.53 recipe / $0.44 each
    Get the Recipe

    If you’ve never tried zucchini muffins, then you’re totally missing out. These muffins are soft, super moist, and another great way to use up extra zucchini. I purposefully chose NOT to squeeze the excess liquid from the grated zucchini because that extra moisture helps keep the muffins tender!

    9. Zucchini Bread

    Zucchini Bread

    Overhead view of zucchini bread sliced on a cooling rack.

    This Zucchini Bread recipe is super moist, flavorful, and the best way to use up extra zucchini during the summer or all year round!

    5 from 4 votes

    $4.96 recipe / $0.41 slice
    Get the Recipe

    My zucchini bread is made with the simplest ingredients, is perfectly moist, and makes an easy breakfast on the go. I was first introduced to zucchini bread by my mom years ago, and this version with cinnamon, vanilla, applesauce, and optional walnuts is still one of my favorite ways to use up extra zucchini.

    Fried or Crispy Bites

    Crispy on the outside, tender on the inside, these fried and baked zucchini snacks are impossible to resist. They’re great for dipping, sharing, or turning a few fresh zucchini into something a little more fun.

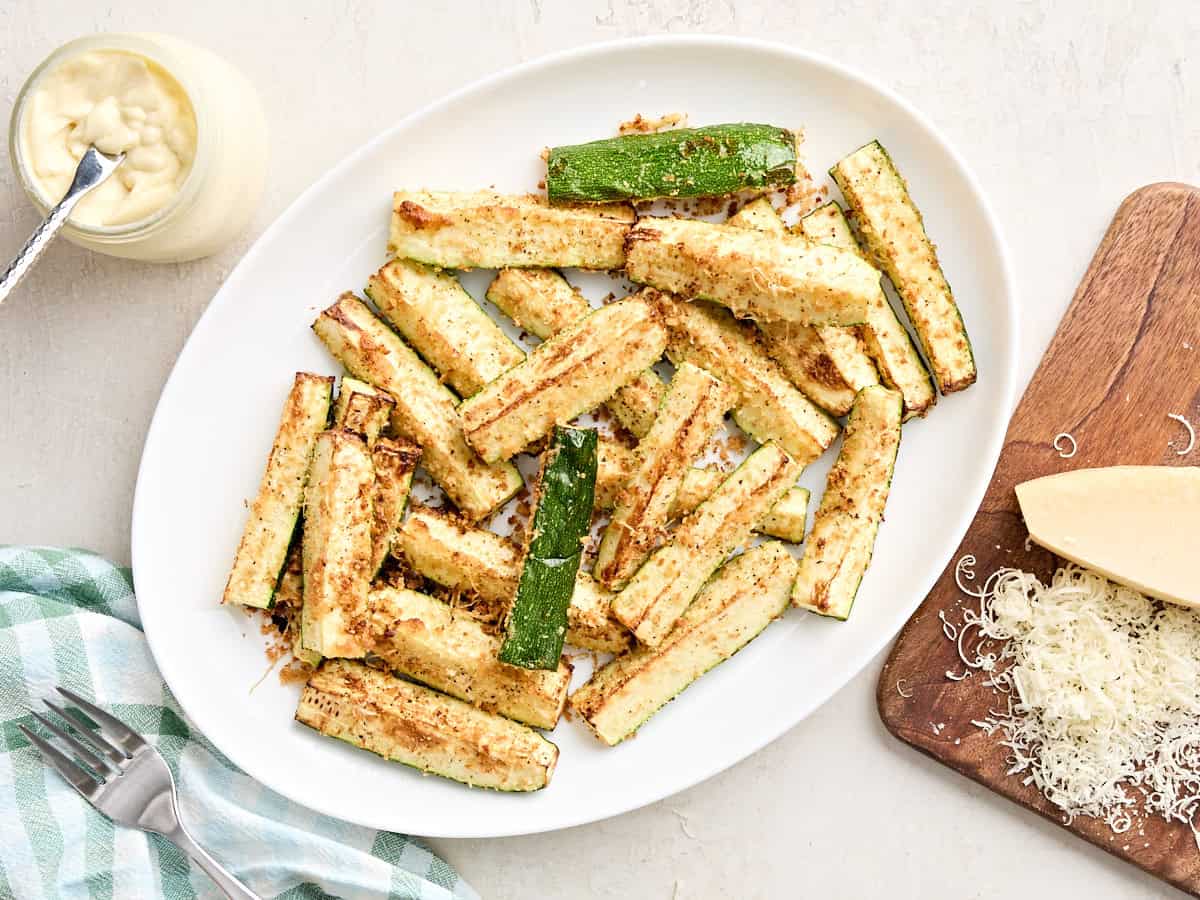
    10. Baked Zucchini Fries

    Baked Zucchini Fries

    One Zucchini Fry dipped into a dish of pizza sauce.

    Baked Zucchini Fries make a delicious snack or side dish and are the perfect way to use up that extra bumper crop of summer zucchini.

    4.80 from 24 votes

    $3.81 recipe / $0.76 serving
    Get the Recipe

    Let’s start things off with these popular baked zucchini fries! They’re crispy on the outside, creamy and delicious on the inside, and the panko-Parmesan coating helps give high-moisture zucchini that crunchy edge we all want. I love eating them plain, or you can dip them in your favorite pizza or marinara sauce.

    11. Zucchini Fritters

    Zucchini Fritters

    Front side view of a stack of zucchini fritters.

    These easy zucchini fritters include crispy brown edges, a tender inside, and they’re a super fun way to get your veggies in!

    4.85 from 13 votes

    $3.26 recipe / $0.81 serving
    Get the Recipe

    Zucchini fritters are another easy way to enjoy summer zucchini, and they’ve been a favorite of mine for years. These lightly pan-fried fritters have crispy brown edges, tender centers, Parmesan and garlic in the mix. Enjoy them by themselves or with some Tzatziki sauce!

    12. Air Fryer Zucchini

    Air Fryer Zucchini

    Overhead view of air fried zucchini on a plate.

    This easy Air Fryer Zucchini recipe makes crispy and golden zucchini spears with simple ingredients. A quick, healthy side dish or snack!

    5 from 1 vote

    $4.07 recipe / $1.02 serving
    Get the Recipe

    Crispy, tender, and ready in minutes, this air fryer zucchini is a versatile side dish that works just as well on a hot summer evening as it does alongside hearty winter meals. I aim for golden on the outside and juicy in the middle, and the quick garlic-mayo-Dijon coating helps the panko and Parmesan stick without much effort.

    Fresh Salads

    These zucchini salad recipes are perfect for cookouts, light lunches, and easy sides when you want to make the most of seasonal produce!

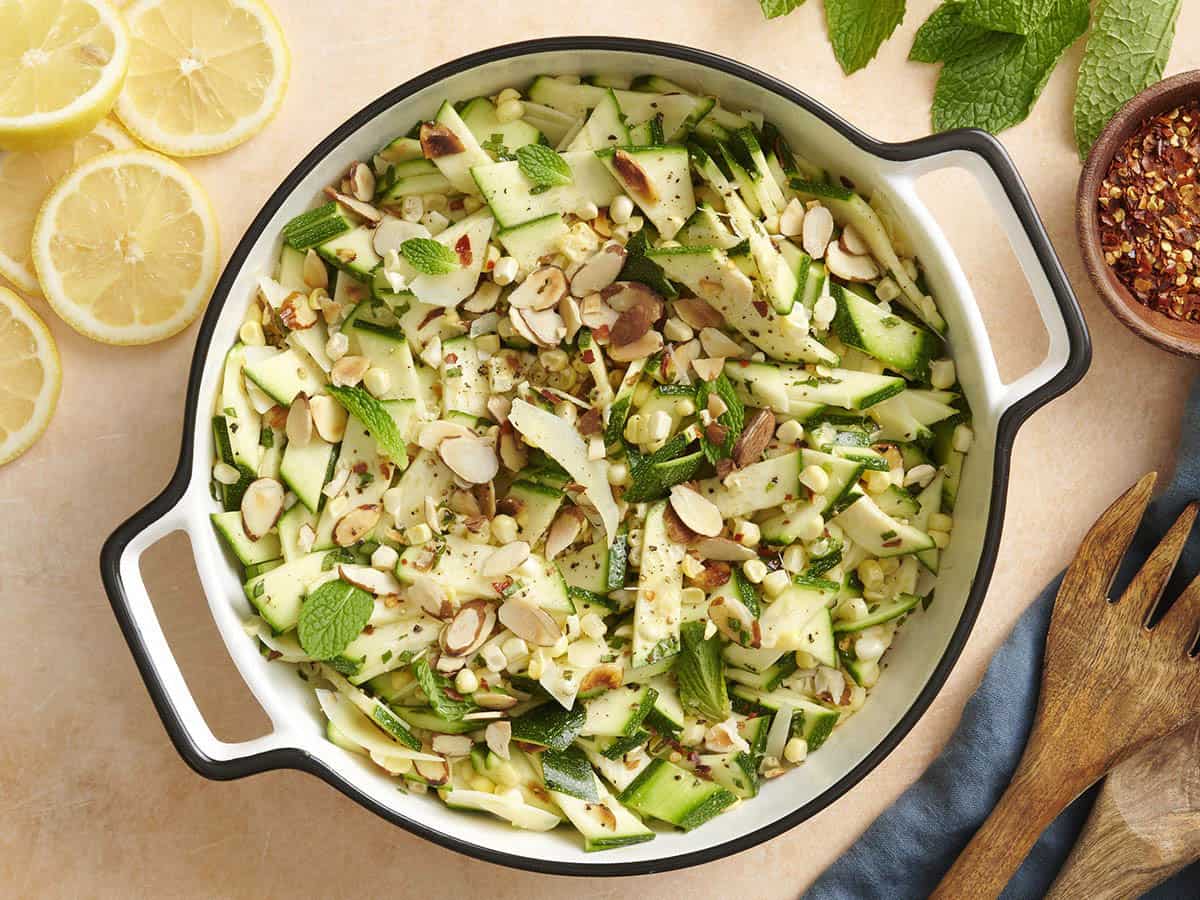
    13. Zucchini, Corn and Toasted Almond Salad

    Zucchini, Corn, and Toasted Almond Salad

    Overhead view of a bowl of zucchini, corn and toasted almond salad.

    This Zucchini, Corn, and Toasted Almond Salad with a homemade lemon-mint dressing is a quick, refreshing side dish that celebrates summer’s best produce!

    5 from 3 votes

    $5.95 recipe / $0.99 serving
    Get the Recipe

    If I’ve got extra garden zucchini piling up, this zucchini, corn, and toasted almond salad is exactly the kind of fresh side I want. The raw shaved zucchini stays crisp and light, the corn adds sweetness, and the toasted almonds, Parmesan, and lemon-mint dressing make every bite taste bright, crunchy, and summery.

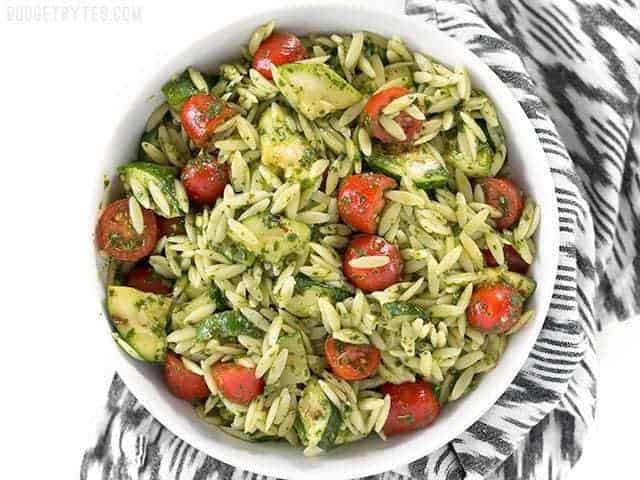
    14. Zucchini And Orzo Salad With Chimichurri

    Zucchini and Orzo Salad with Chimichurri

    Zucchini and orzo salad with chimichurri in a bowl.

    Zucchini and Orzo Salad with Chimichurri is a fresh summer salad that makes the perfect fresh and zesty side dish for summer grilling.

    4.69 from 22 votes

    $6.52 recipe / $1.63 serving
    Get the Recipe

    This zucchini and orzo salad gives you all the best flavors and colors of summer and can be jazzed up and modified several different ways. I like that the chimichurri works like a bold, herby dressing, and you can use the zucchini raw, grilled, or roasted depending on what you’re already cooking.

    15. Pasta Primavera

    Pasta Primavera

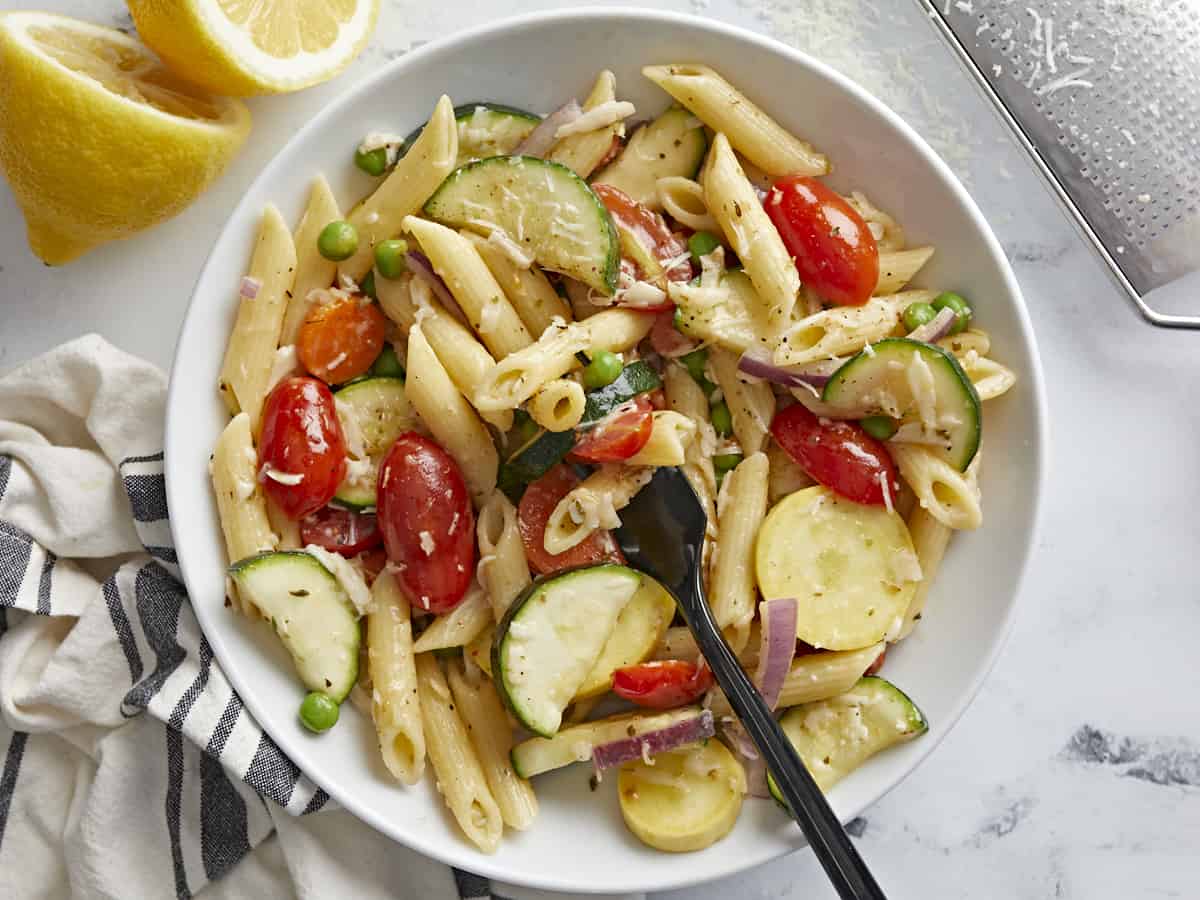
    A bowl of pasta primavera with a fork in the center.

    Pasta Primavera is the perfect Spring dish packed with fresh seasonal vegetables tossed with pasta in a light lemon and butter sauce.

    4.92 from 12 votes

    $7.10 recipe / $1.77 serving
    Get the Recipe

    If you’re craving a delicious pasta recipe to enjoy with your zucchini this year, then you’ve got to try this pasta primavera. It’s full of fresh vegetables tossed with pasta in a light lemon butter sauce, and I make it when I want something fresh or have a few vegetables in the fridge that need using up.

    16. Charred Corn And Zucchini Salad

    Charred Corn and Zucchini Salad

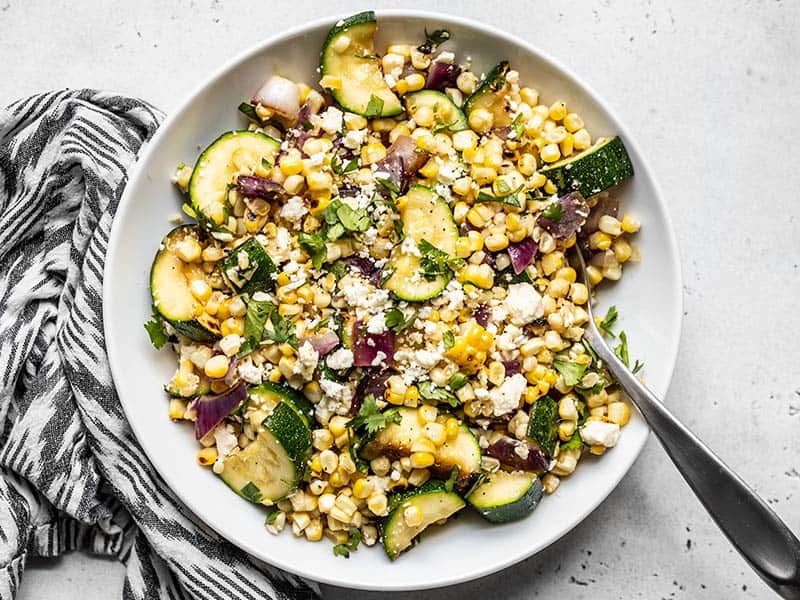
    Overhead view of a bowl of Charred Corn and Zucchini Salad with a black and white napkin on the side.

    This Charred Corn and Zucchini Salad perfectly captures the flavor of summer with fresh sweet corn, salty feta, and a smoky grill-like flavor. 

    4.94 from 16 votes

    $3.92 recipe / $0.98 serving
    Get the Recipe

    Fresh sweet corn pairs perfectly with summer zucchini in this charred corn and zucchini salad. The corn and zucchini get charred over high heat for smoky grill-like flavor, then finished with red onion, cilantro, and salty feta for a simple side dish that tastes like summer.

    More Tasty Side Dishes

    These simple, flavorful sides make the most of in-season zucchini. Roasted, sautéed, grilled, or baked into something cheesy and cozy, they make it easy to add more vegetables to the table without overthinking dinner.

    17. Grilled Zucchini

    Grilled Zucchini

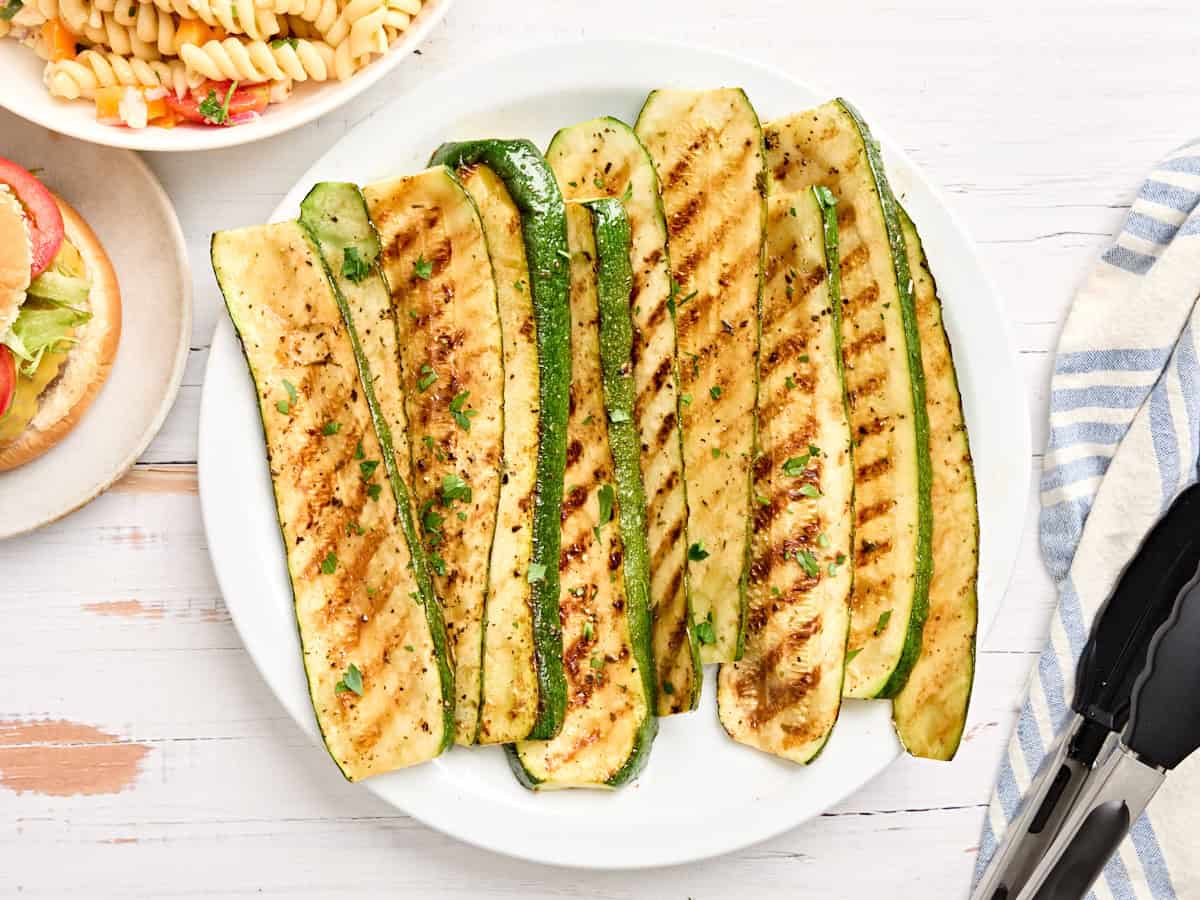
    Overhead view of grilled zucchini slices on a plate.

    Make the most of summer squash with this easy Grilled Zucchini recipe! Ready in minutes with a delicious honey and balsamic vinegar marinade.

    No ratings yet

    $2.80 recipe / $0.70 serving
    Get the Recipe

    Grilled zucchini is one of those simple recipes that totally over-delivers. I’d make extra because the honey-balsamic marinade and smoky grill marks make it delicious hot off the grill, but the leftovers are also great tucked into wraps, grain bowls, omelets, or salads!

    18. Zucchini Slice

    Zucchini Slice

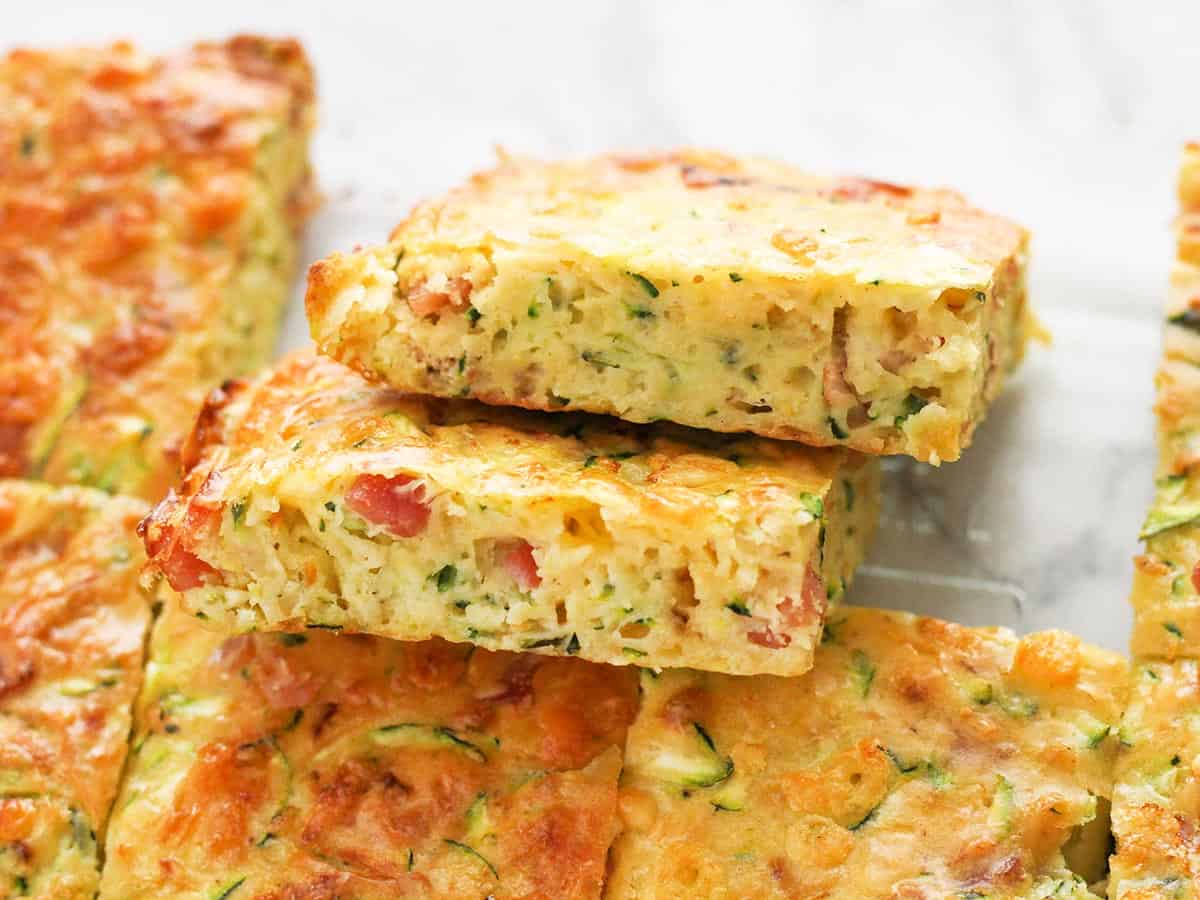
    Two slices of zucchini slice laying against the whole casserole.

    Zucchini Slice is an easy and budget-friendly Australian dish featuring fresh zucchini baked into a cheesy egg-based batter.

    4.84 from 30 votes

    $5.60 recipe / $0.70 serving
    Get the Recipe

    A zucchini slice is similar to a crustless quiche but with a denser, cheesy texture. It’s budget-friendly, great for meal prep, and I like that it can be served hot or cold for breakfast, lunch, dinner, or an on-the-go snack.

    19. Lemon Pepper Zucchini

    Lemon Pepper Zucchini

    Overhead view of a bowl full of lemon pepper zucchini

    Bright and peppery, this Lemon Pepper Zucchini is a simple and flavorful side dish for any dinner! Great for that summer zucchini bumper crop!

    5 from 5 votes

    $1.98 recipe / $0.50 serving
    Get the Recipe

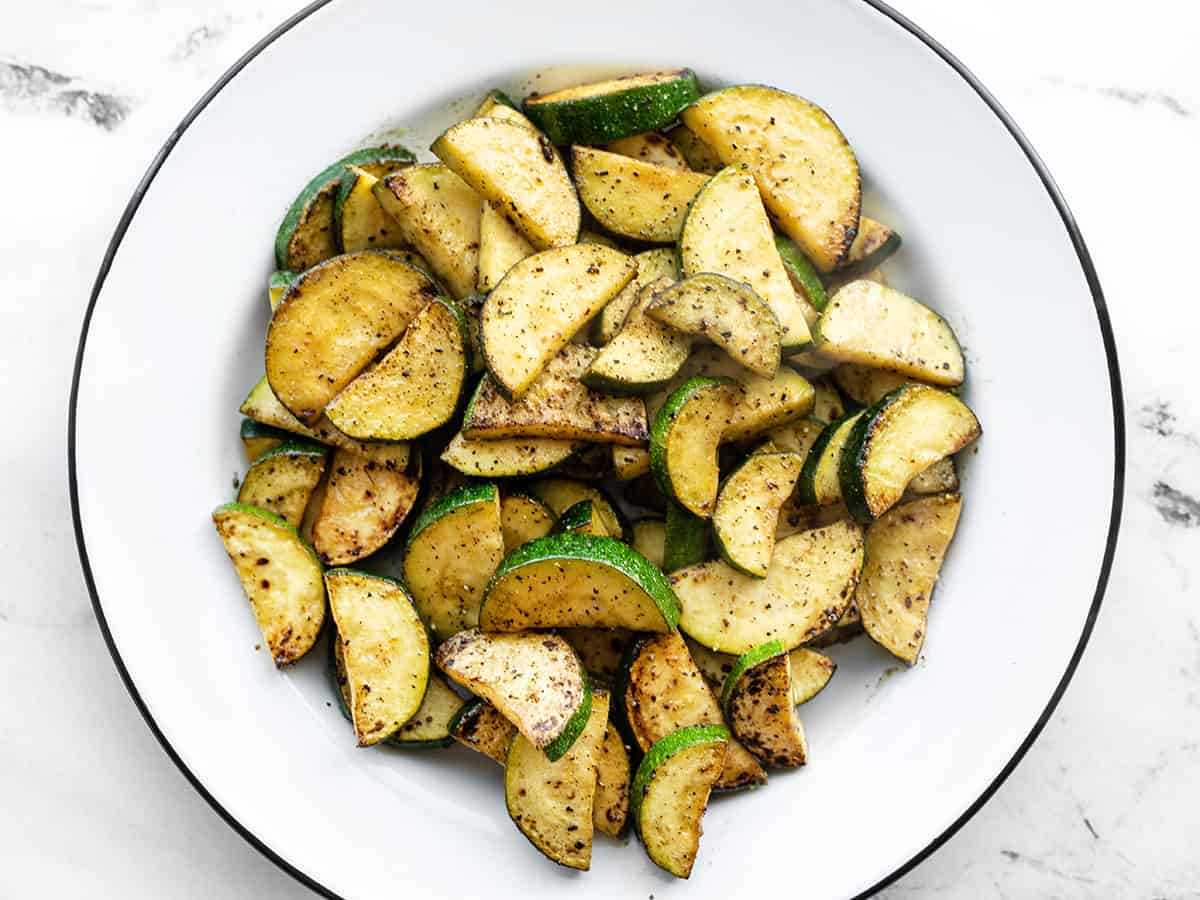
    Ahh, this has to be one of my favorite ways to prepare zucchini. Lemon pepper zucchini is bright, peppery, and ready in about 20 minutes. The key is using a really hot skillet so the zucchini browns quickly instead of getting soft and watery!

    20. Oven Roasted Ratatouille

    Oven Roasted Ratatouille

    Overhead view of a baking dish filled with layers of oven roasted ratatouille.

    This Oven Roasted Ratatouille is packed with layers of fresh veggies, marinara sauce, and melty cheese. A simple, cozy side dish that tastes like comfort!

    4.78 from 68 votes

    $6.48 recipe / $0.81 serving
    Get the Recipe

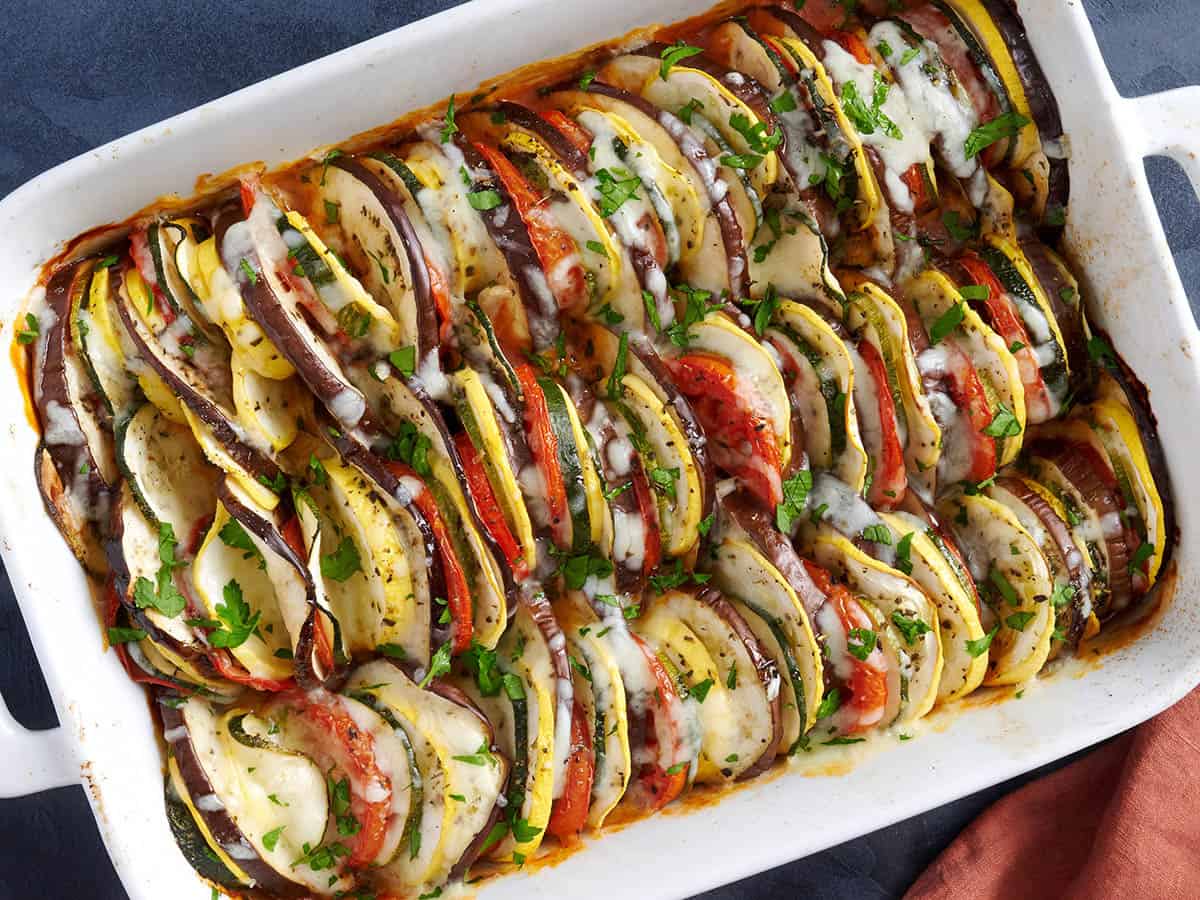
    Can we get a round of applause for this gorgeous and insanely delicious oven roasted ratatouille?! We make it with zucchini and other fresh summer vegetables, a rich red sauce, plenty of herbs, and cheese on top. Seriously, add this one to your dinner list this week!

    21. Roasted Summer Vegetables

    Roasted Summer Vegetables

    Roasted Summer Vegetables are the easiest side dish of the season and can be served as a simple side, or added to several other dishes to add color, flavor, texture, and nutrients. BudgetBytes.com

    Roasted Summer Vegetables are a super easy side dish and can be served as a simple side, or added to enhance several other dishes. 

    4.50 from 14 votes

    $4.85 recipe / $1.21 serving
    Get the Recipe

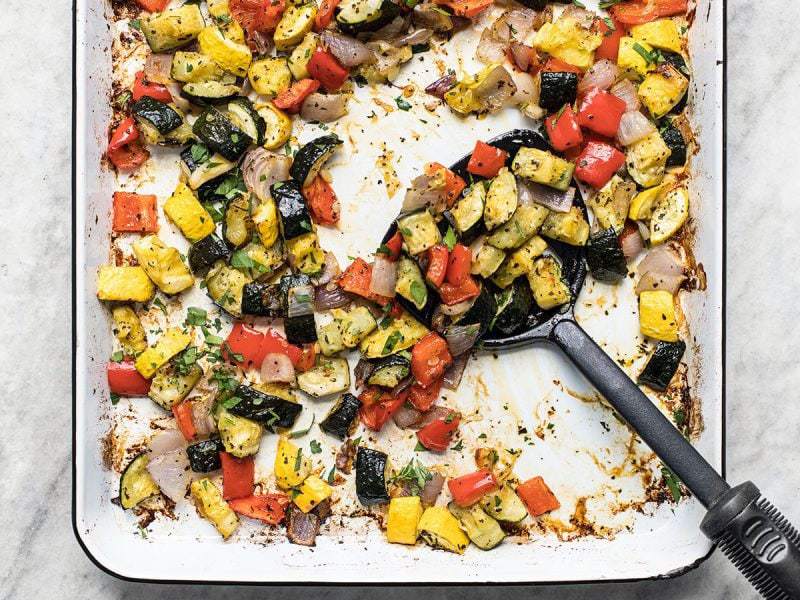
    Roasted summer vegetables are awesome as a simple side dish, but they’re also delicious with pasta salad, tucked inside a sandwich wrap, or used to make baked pasta. I’m all for this basic technique because the oven does most of the work, and the dry heat caramelizes the vegetables so they get sweet, smoky edges.

    22. Simple Sauteed Vegetables

    Simple Sautéed Vegetables

    Side view of sautéed vegetables in the skillet

    These simple sautéed vegetables are an easy, delicious, and colorful side dish that can go with just about anything you make for dinner!

    5 from 7 votes

    $3.33 recipe / $0.83 serving
    Get the Recipe

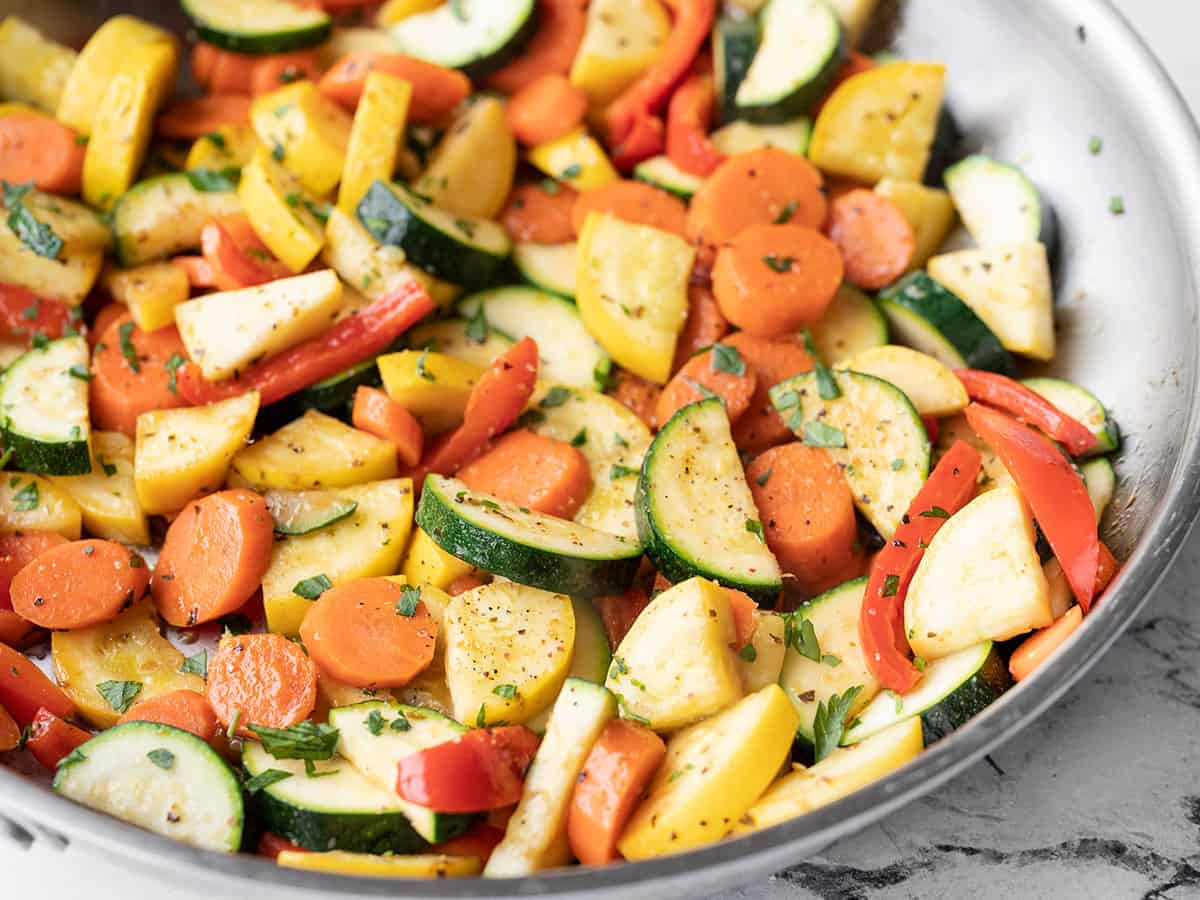
    It’s always good to have an easy go-to side dish recipe like these simple sautéed vegetables in your back pocket. The vegetables cook quickly in a hot skillet, so they stay tender with just enough bite.

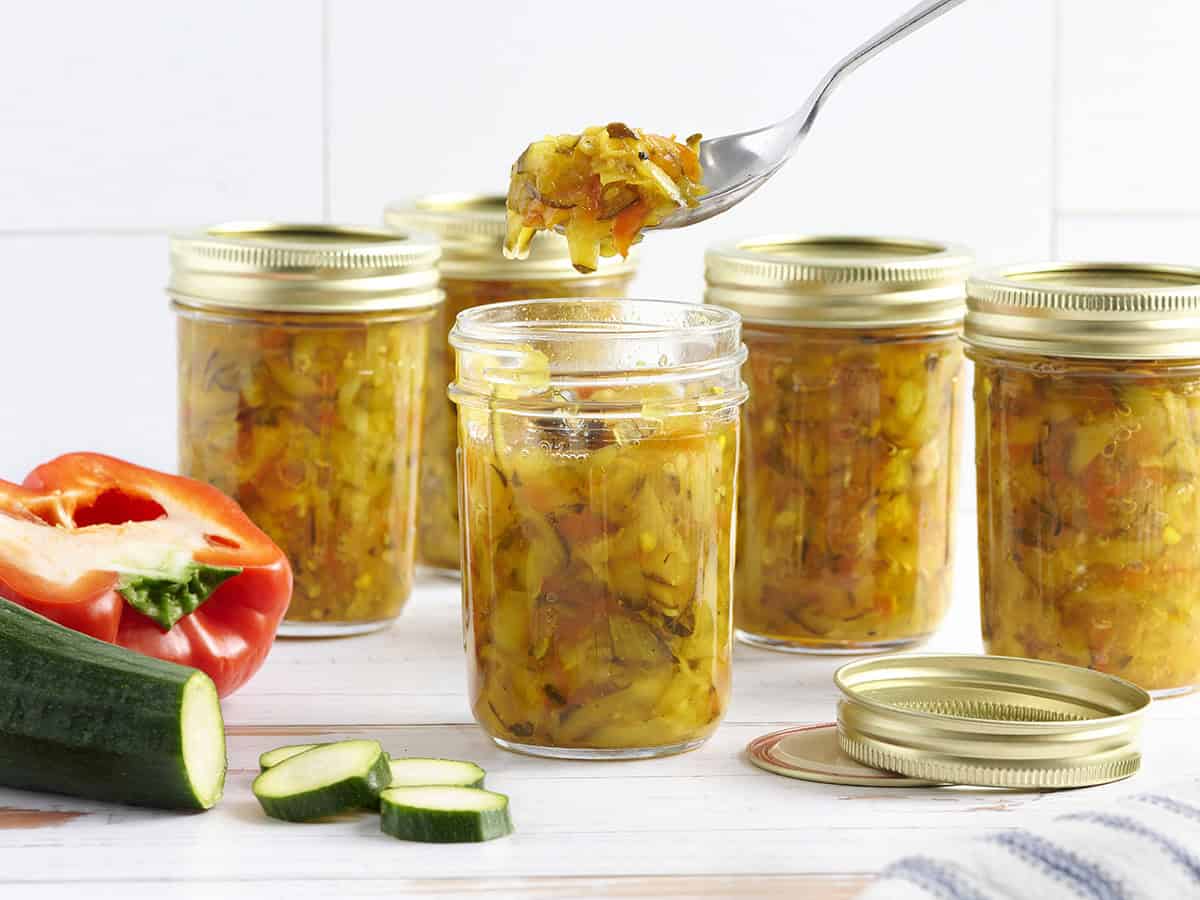
    23. Zucchini Relish

    Zucchini Relish

    Side view of jars of zucchini relish, is a spoon taking some from one jar.

    This homemade Zucchini Relish is a great way to preserve fresh zucchini with onion, bell pepper, jalapeño, and a sweet-tangy brine.

    5 from 1 vote

    $6.14 recipe / $0.08 serving
    Get the Recipe

    Zucchini relish is a smart way to turn extra zucchini into something you can spoon over burgers, hot dogs, sandwiches, or grilled dinners later. It’s packed with zucchini, onion, jalapeño, and bell pepper for a spicy-sweet condiment. We’ve also included canning, fridge, and freezer storage options depending on how ambitious you’re feeling!

    Our Zucchini recipes was originally published 8/4/23. We have updated it to be the best it can be and republished 6/20/26.

    The post Zucchini Recipes appeared first on Budget Bytes.
    This post was originally published on this site.

  • Icebox Cake

    Icebox Cake

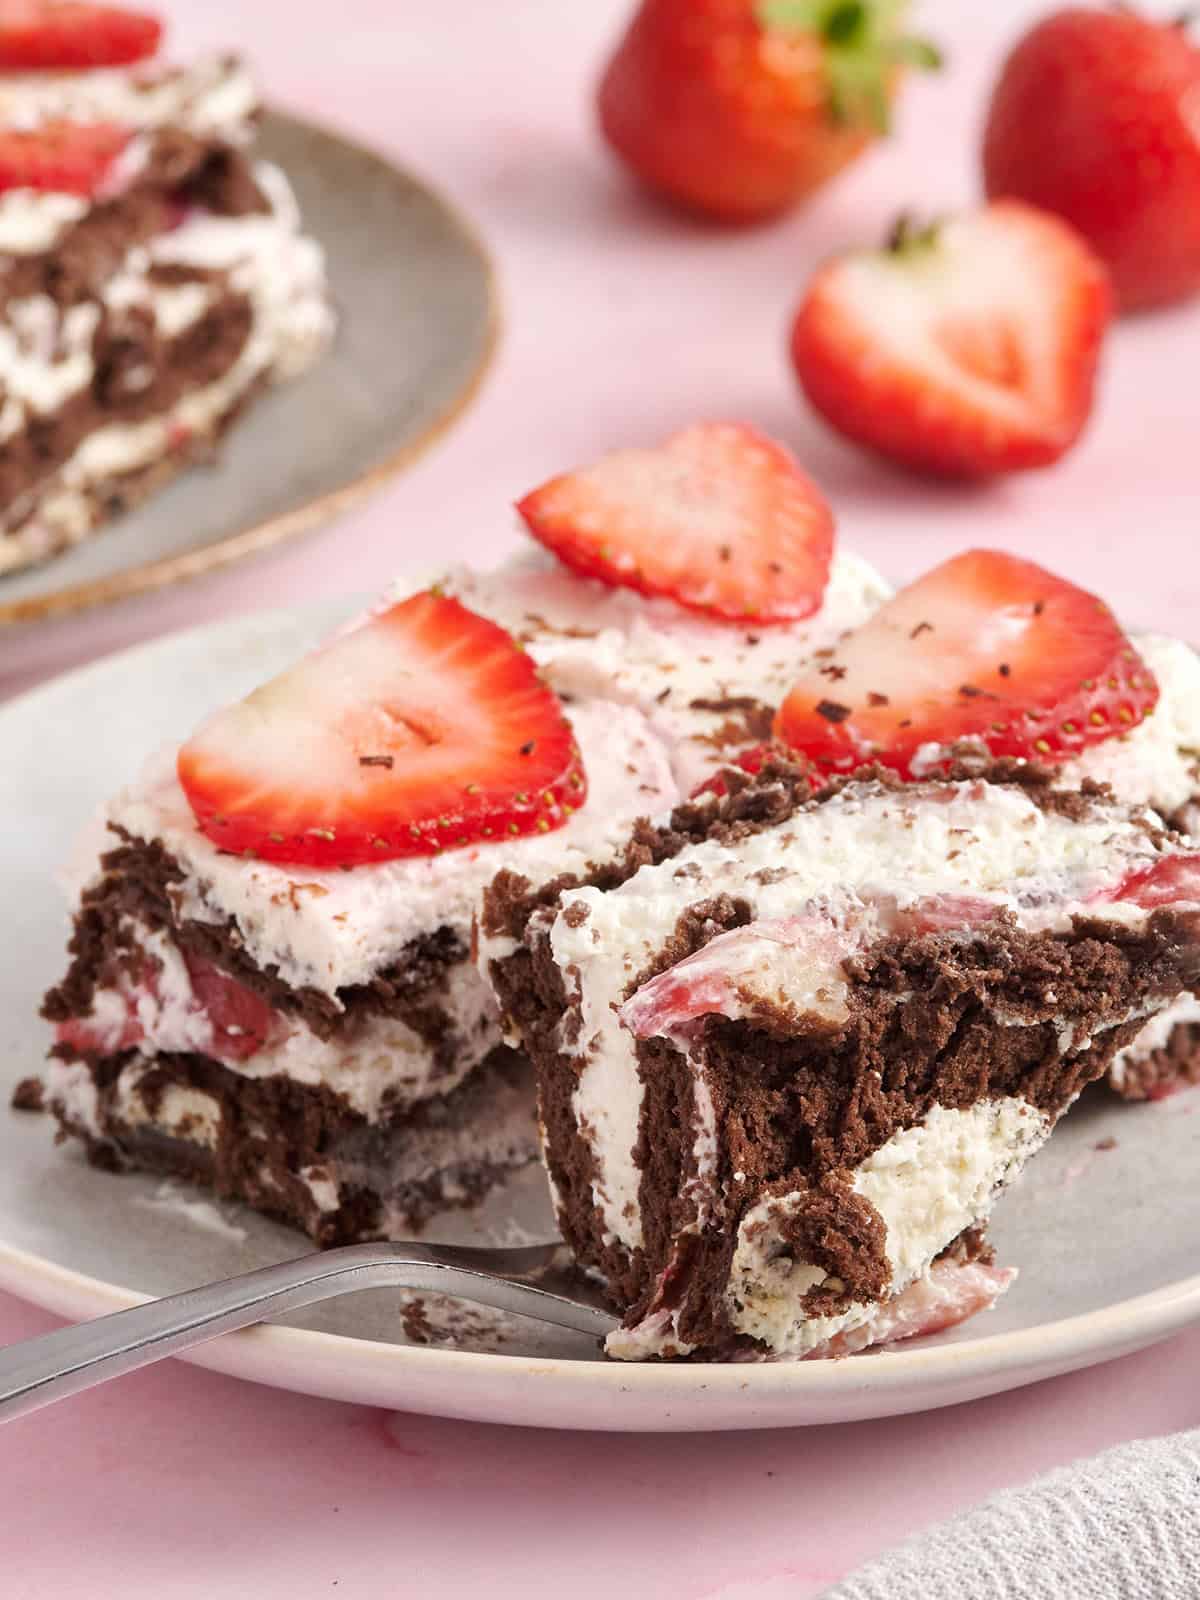
    On days when it’s too hot to think about turning on the oven, this chocolate strawberry Icebox Cake gives me a cool, creamy dessert without heating up the kitchen. This 7-ingredient no-bake dessert layers chocolate graham crackers, fresh strawberries, vanilla cream cheese whipped cream, and grated chocolate in a 9×13 pan, then the fridge does the rest. After a few hours of chilling, the layers soften into a sliceable, cake-like dessert that’s easy to make ahead for summer cookouts and potlucks!

    A Creamy No-Bake Dessert

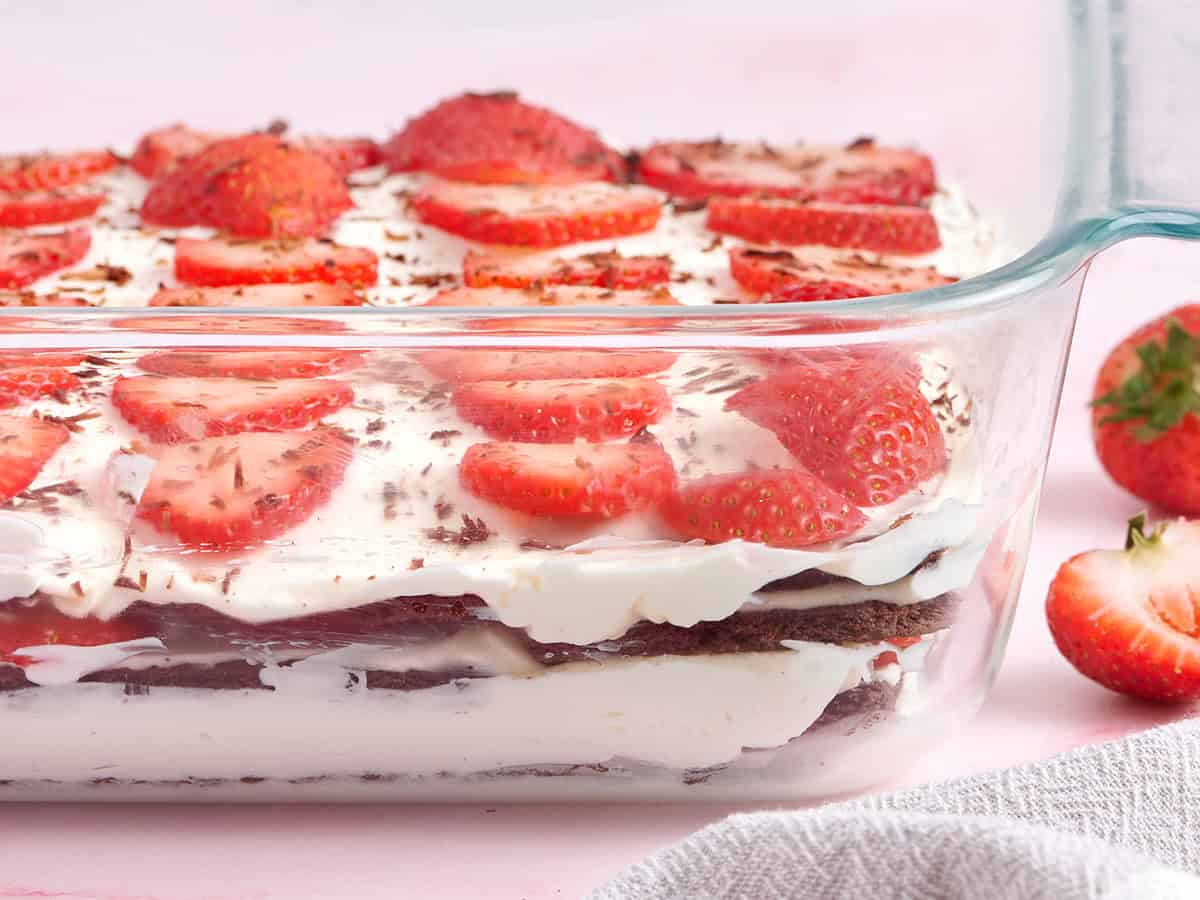
    This icebox cake recipe is an old-fashioned classic that first became popular back in the 1920s when home refrigeration started becoming a thing. Instead of baking, people layered cookies or crackers with cream and let the fridge do the work. And honestly, it’s still a bit of a magic trick. As this cake rests, the chocolate graham crackers soak up moisture from the cream cheese whipped cream and soften into thin, cake-like layers. I like using cream cheese here because it adds a little tang and helps the whipped cream hold up, so the cake slices cleanly instead of turning into a creamy puddle. Every bite is a dreamy combo of rich chocolate, fluffy vanilla cream, and juicy strawberries. It’s nostalgic and fresh all at once.

    What I love most is how low-stress this recipe is, no oven or complicated steps needed. Just simple layering and a little chill time. It’s budget-friendly, easy to throw together, and always manages to impress a crowd! That’s my kind of dessert.

    Recipe Success Tips

    1. Start with softened cream cheese and cold heavy cream. I let the cream cheese soften first so it beats smoothly and doesn’t leave little lumps in the filling, but I keep the heavy cream cold so it whips up light and fluffy. For the smoothest filling, beat the cream cheese completely first, then slowly stream in the heavy whipping cream while mixing.
    2. Spread cream on the bottom of the dish first. That thin first layer helps the chocolate graham crackers stay in place while you build the cake. It also ensures the bottom layer of crackers softens from both sides.
    3. Give it enough time to chill. I always give this icebox cake at least 4 hours in the fridge, but overnight is even better! The longer chill gives the graham crackers time to soak up moisture from the cream cheese whipped cream, so the slices hold together, and the texture resembles cake.
    4. Budget-saving tip: If strawberries are pricey or I just want to keep the cost lower, I’ll leave them out and skip the grated chocolate on top. You can also swap in other fruit you already have, like blueberries, raspberries, or well-drained canned peaches. Or keep it fruit-free for more of a cookies-and-cream style icebox cake. Either way, it’s still creamy and delicious.

    Side view of a slice of chocolate strawberry icebox cake.

    Print
    Add to Collection Go to Collections

    Chocolate Strawberry Icebox Cake

    Make this chocolate strawberry Icebox Cake with 7 simple ingredients, no oven, and layers of chocolate graham crackers, strawberries, and whipped cream cheese filling!
    Course Dessert
    Cuisine American
    Total Cost $14.14 recipe / $1.18 serving
    Prep Time 20 minutes
    Chill Time 4 hours
    Total Time 4 hours 20 minutes
    Servings 12 servings
    Calories 395kcal

    Equipment

    • 9×13” Pan
    • Large Mixing Bowl
    • Hand Mixer

    Ingredients

    • 27 chocolate graham crackers one 14.4 oz. box, $2.79*
    • 2 cups heavy whipping cream cold, (16 oz.) $3.37**
    • 8 oz. cream cheese softened, $1.96
    • ½ cup powdered sugar 60g, $0.15
    • 1 tsp vanilla extract $0.60
    • 4 cups strawberries sliced, (540g) $4.50
    • 2 squares unsweetened baking chocolate optional, (0.05 oz/28g) $0.77***

    Instructions

    • In a large mixing bowl, beat the softened cream cheese with a hand mixer until smooth. Add powdered sugar and vanilla and mix until combined.
    • Slowly pour in the heavy cream and continue to beat until the mixture is light, fluffy, and soft peaks form.
    • Spread a thin layer of the cream mixture on the bottom of a 9×13 dish.
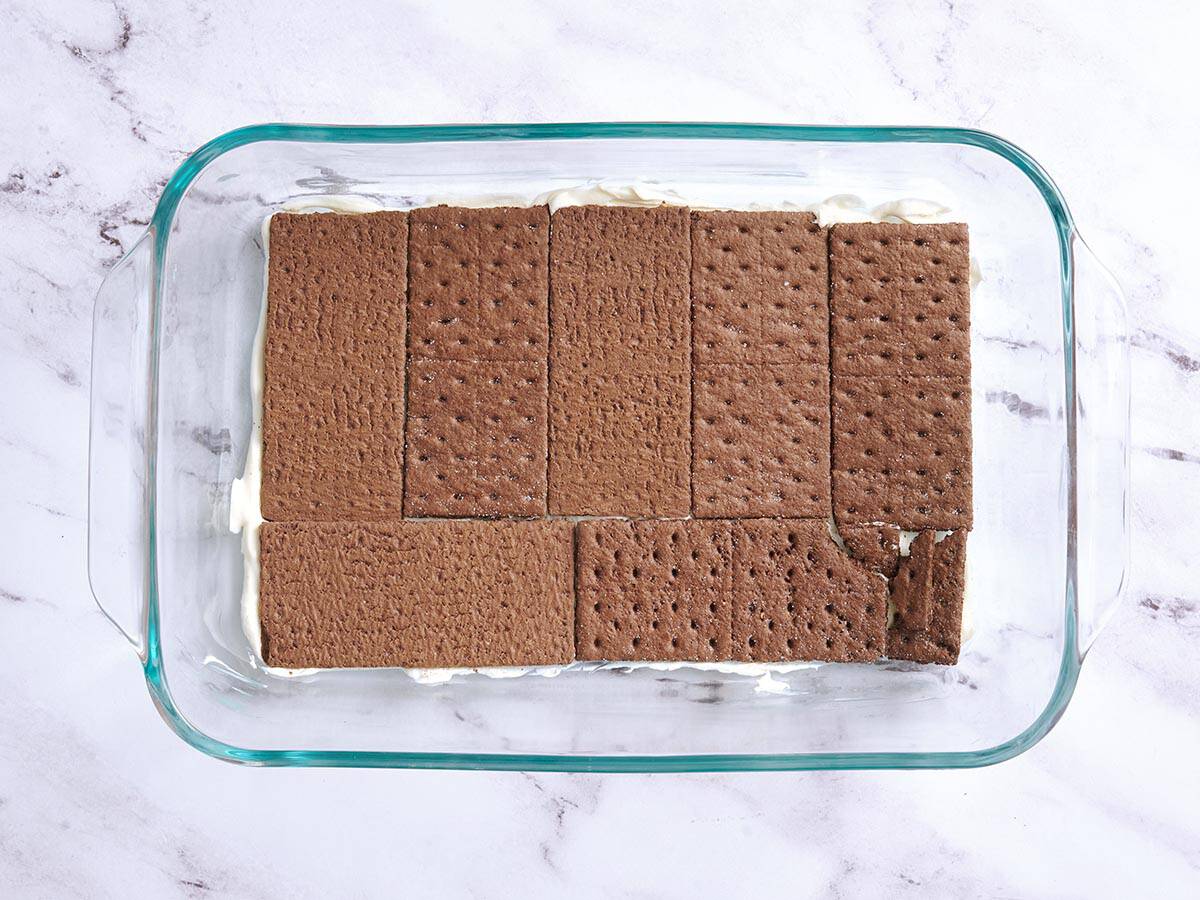
    • Add a single layer of graham crackers, breaking pieces as needed to fit.
    • Top with about ⅓ of the cream mixture, then scatter 1 cup of sliced strawberries on top.
    • Repeat two more times (grahams, cream, berries), ending with cream and sliced berries on top.
    • Cover and refrigerate for at least 4 hours, or overnight, until the graham crackers soften into a cake-like texture.
    • Slice into squares and serve cold. Garnish with grated chocolate if desired.**

    See how we calculate recipe costs here.

    Notes

    *I use chocolate graham crackers for a chocolatey strawberry flavor, but original, honey, or cinnamon graham crackers all work too! You can also use chocolate wafer cookies, chocolate sandwich cookies, vanilla wafers, or digestive biscuits. Thicker cookies (like sandwich cookies or digestive biscuits) will need a longer chill time to fully soften into a cakey texture, so I recommend chilling overnight if you use them.

    **You can use whipped topping (like Cool Whip) instead of homemade whipped cream. Just fold it gently into the beaten cream cheese until combined in Step 2.

    ***I love finishing the top with a sprinkle of grated chocolate from the baking bar—it adds a little texture and richness. Totally optional, though!

    Nutrition

    Serving: 1slice | Calories: 395kcal | Carbohydrates: 36g | Protein: 5g | Fat: 27g | Sodium: 279mg | Fiber: 3g

    how to make Icebox Cake step-by-step photos

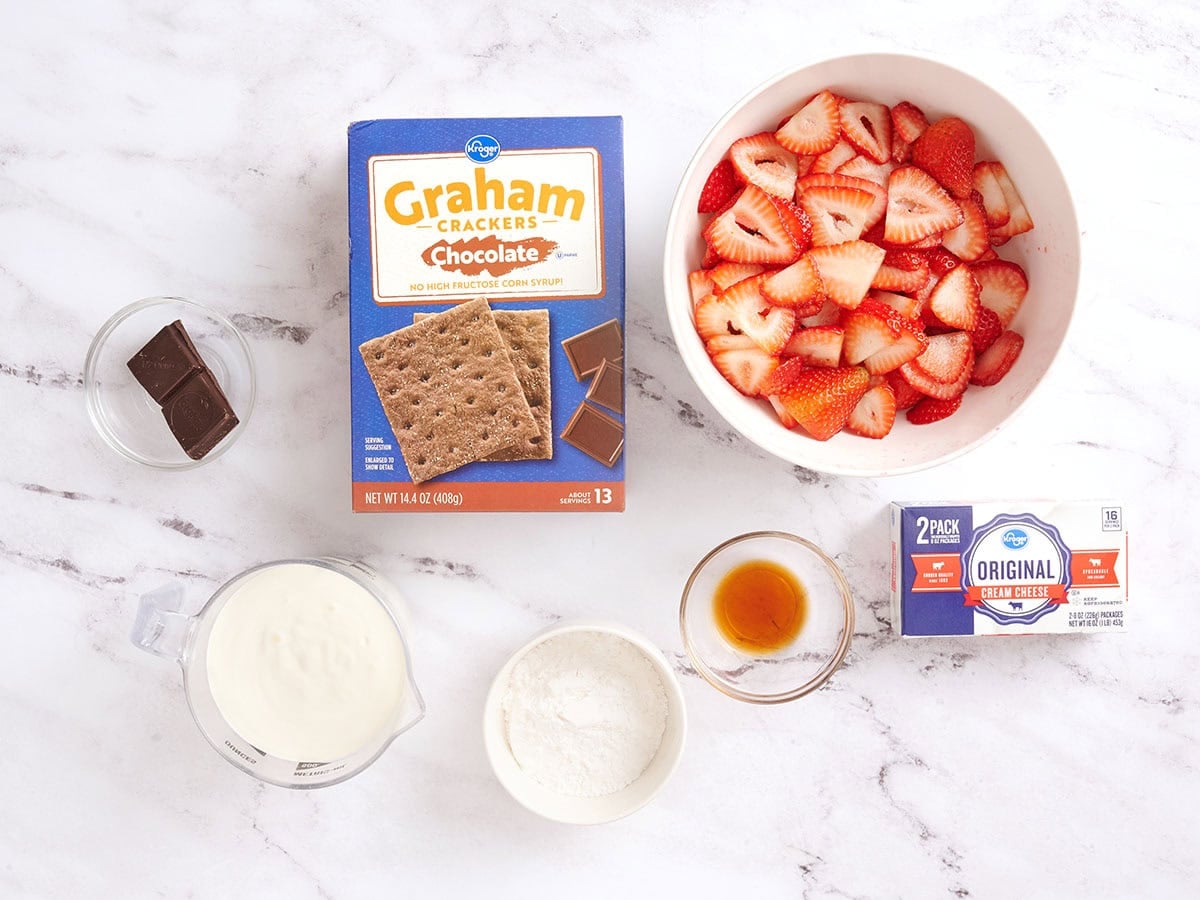
    The ingredients to make an icebox cake.

    Gather all of your ingredients.

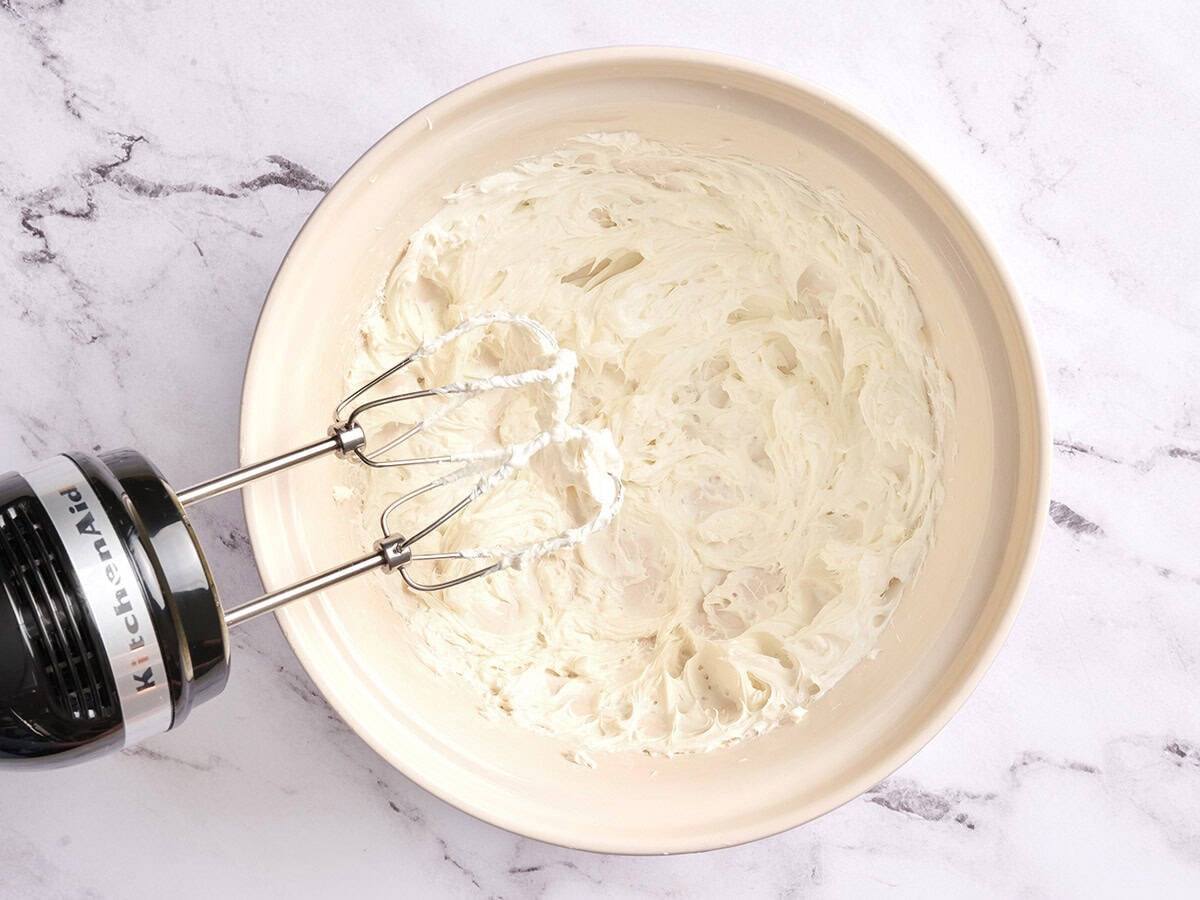
    Whipped cream cheese in a bowl.

    Beat the cream cheese: Add the softened 8 oz. cream cheese to a large mixing bowl and beat with a hand mixer until completely smooth and creamy with no visible lumps.

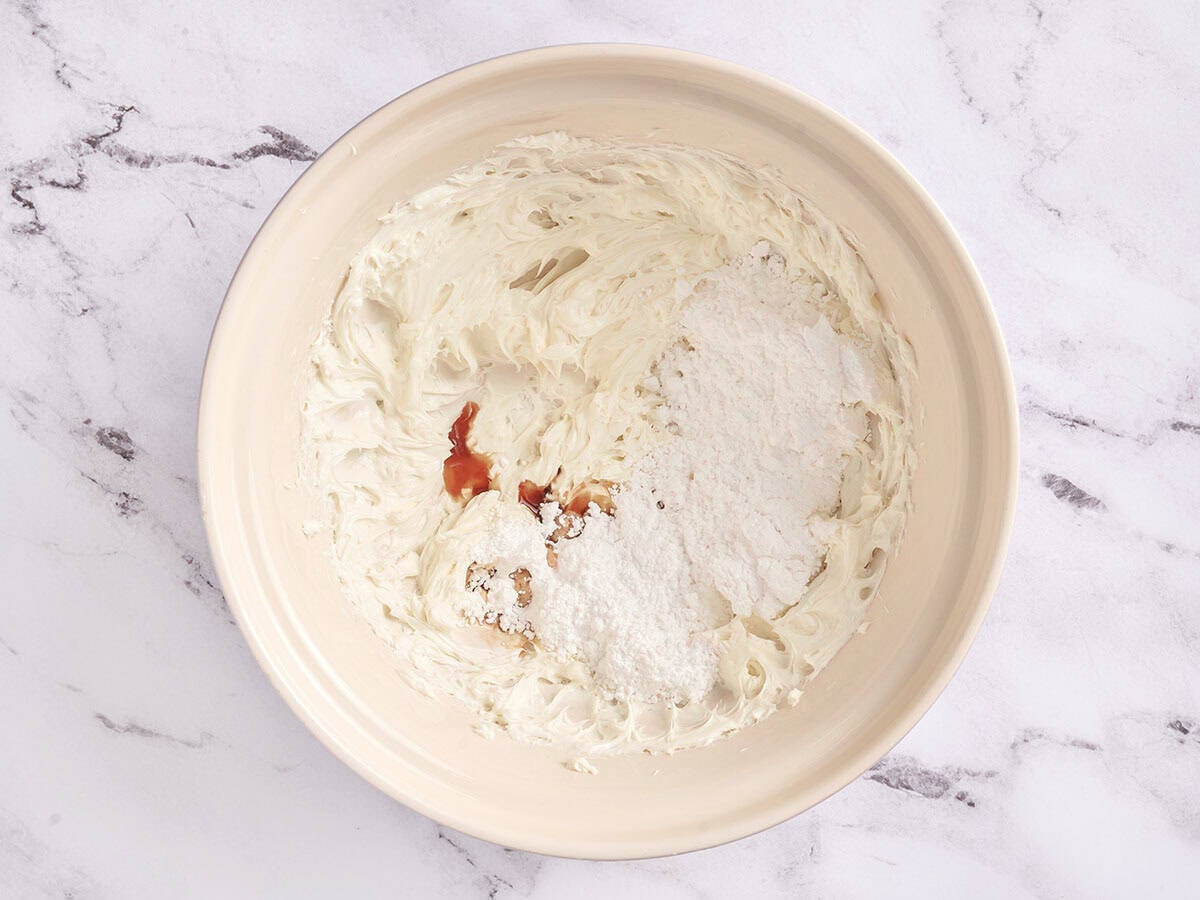
    Cream cheese, vanilla and powdered sugar in a bowl.

    Add ½ cup powdered sugar and 1 tsp vanilla extract, then beat again until combined.

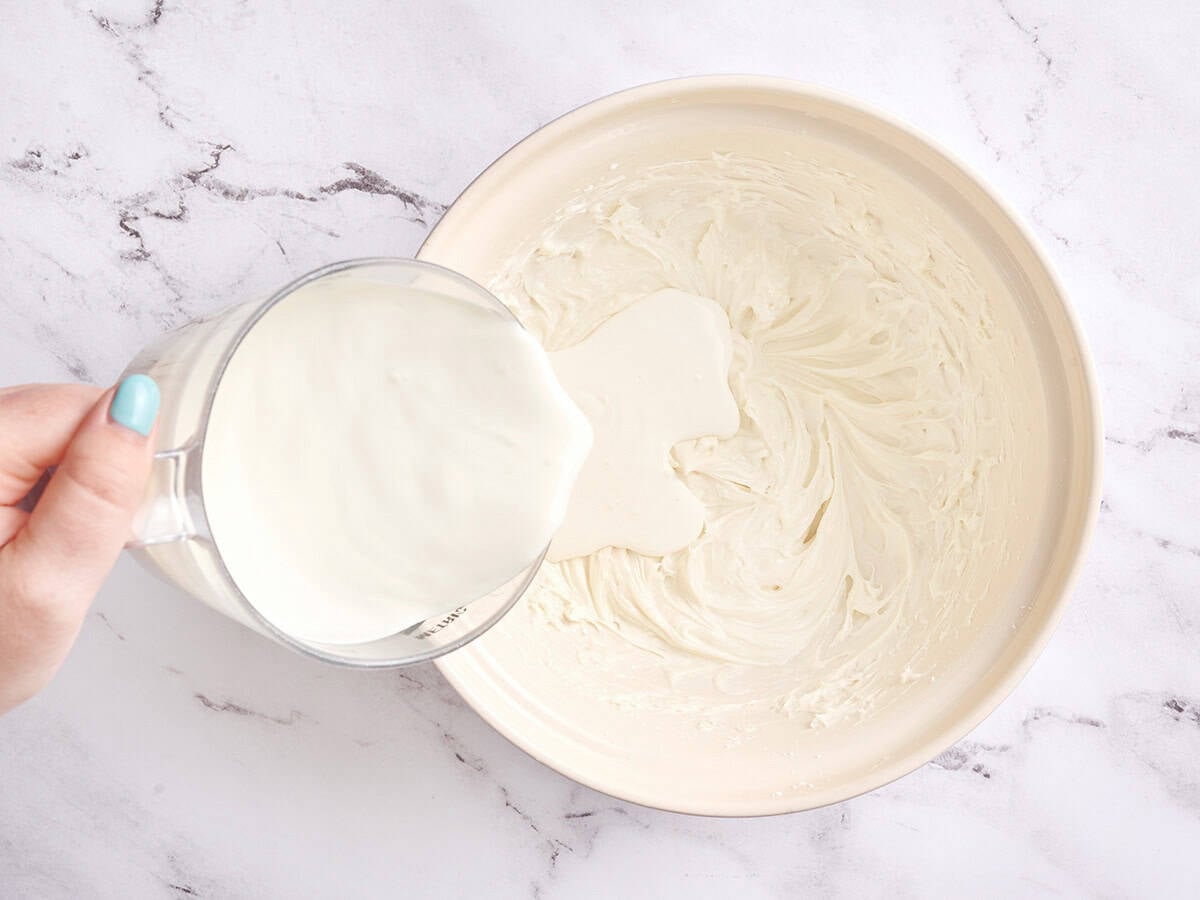
    Cream being poured into whipped cream cheese.

    Add the heavy cream: Slowly pour in 2 cups heavy whipping cream while mixing on low.

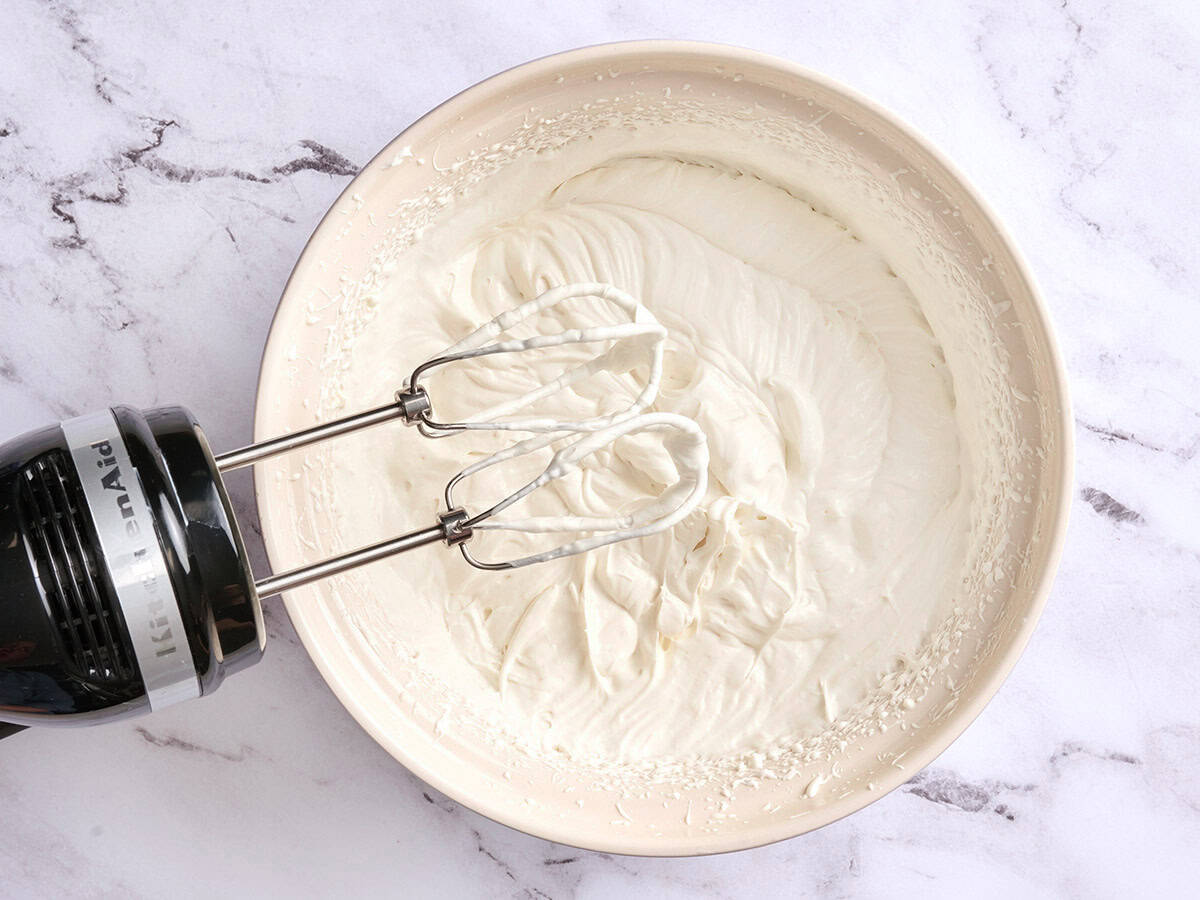
    Whipped cream in a bowl.

    Then increase the speed and beat until the mixture becomes light, fluffy, and thick enough to hold soft peaks. It should look airy and spreadable, not loose or runny.

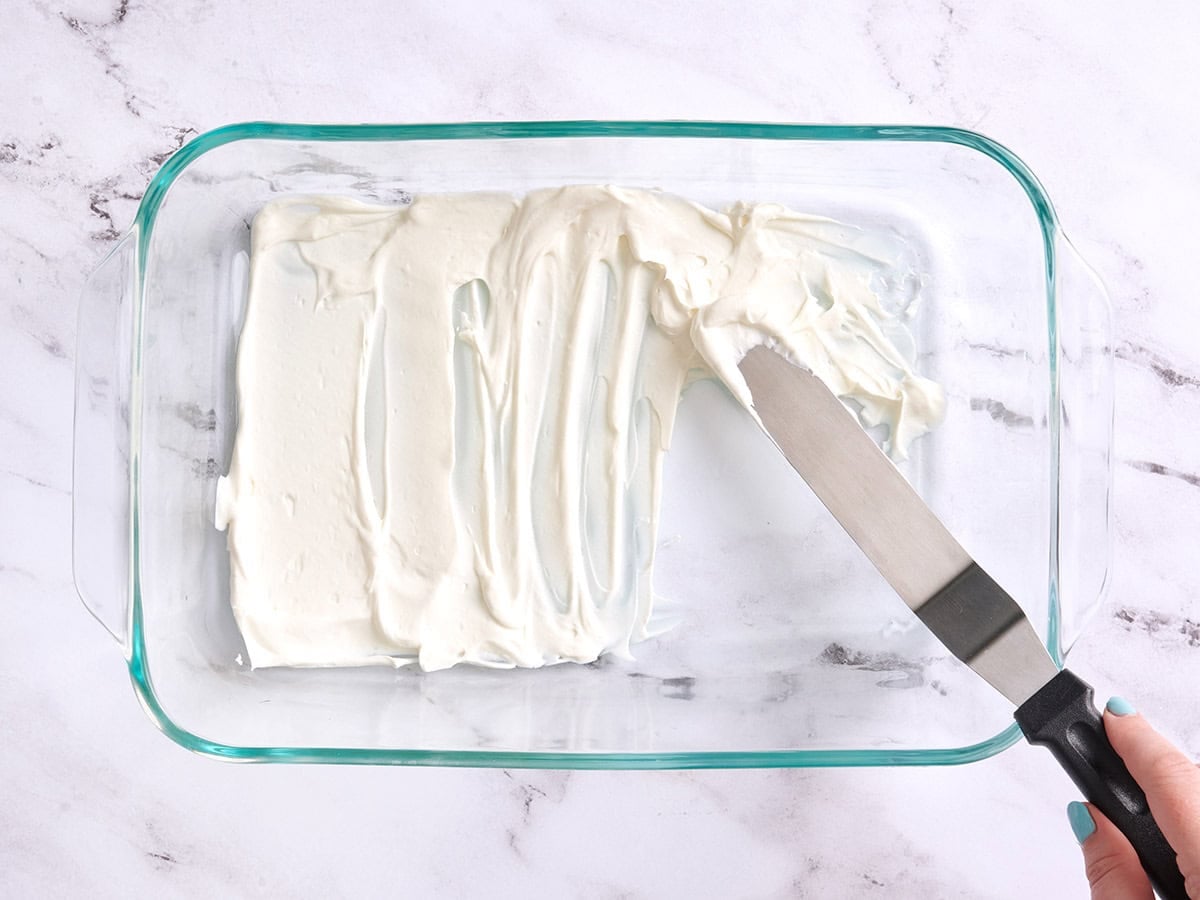
    Whipped cream layered into a baking dish.

    Assemble the icebox cake: Spread a thin layer of the cream mixture across the bottom of a 9×13 dish. This helps the first layer of graham crackers stay in place and soften evenly.

    A layer of chocolate graham crackers added to a baking dish.

    Arrange a single layer of the chocolate graham crackers over the cream, breaking pieces as needed to fit snugly into the dish. Don’t worry if the pieces aren’t perfect; they’ll soften as the cake chills, and no one will know the difference anyway!

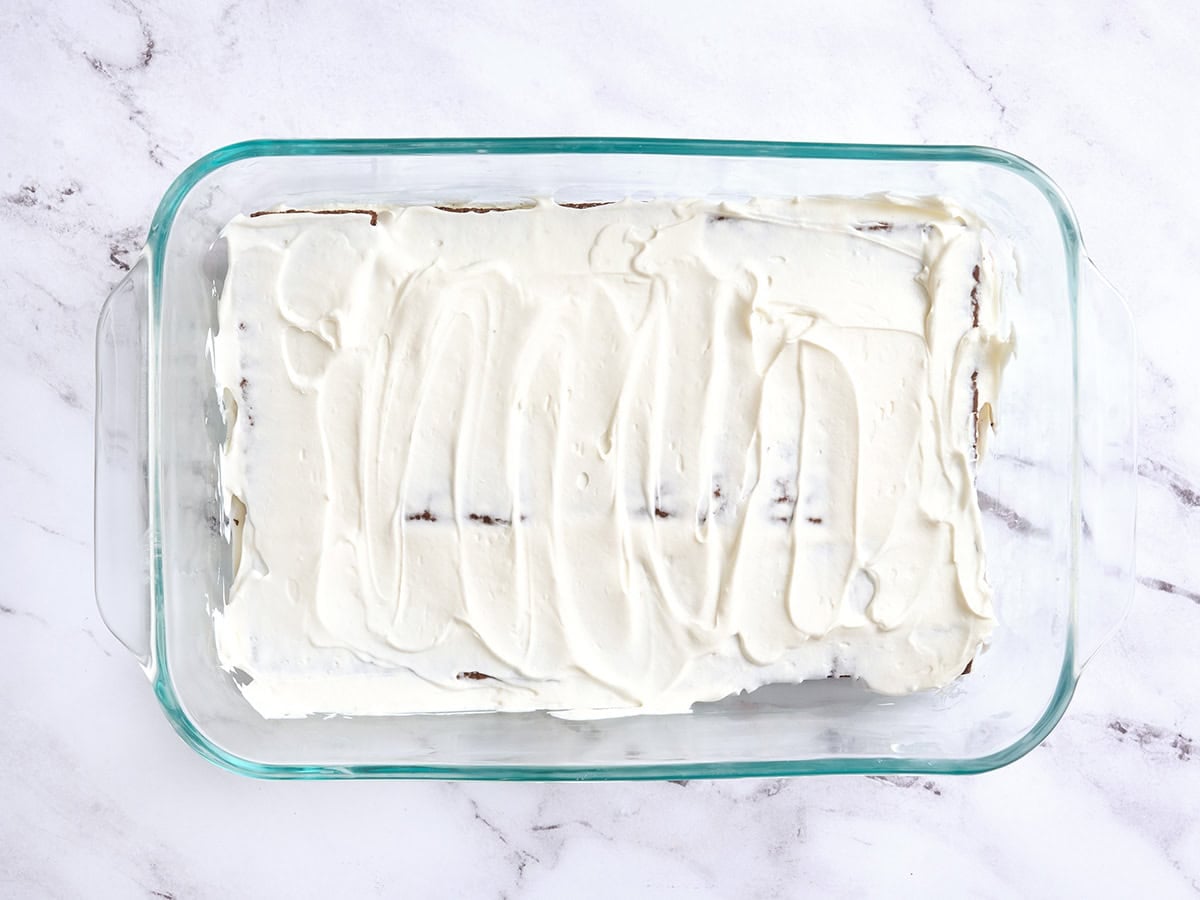
    Whipped cream topping added to a baking dish over graham crackers.

    Next, spread about one-third of the cream mixture over the graham crackers, taking it all the way to the edges.

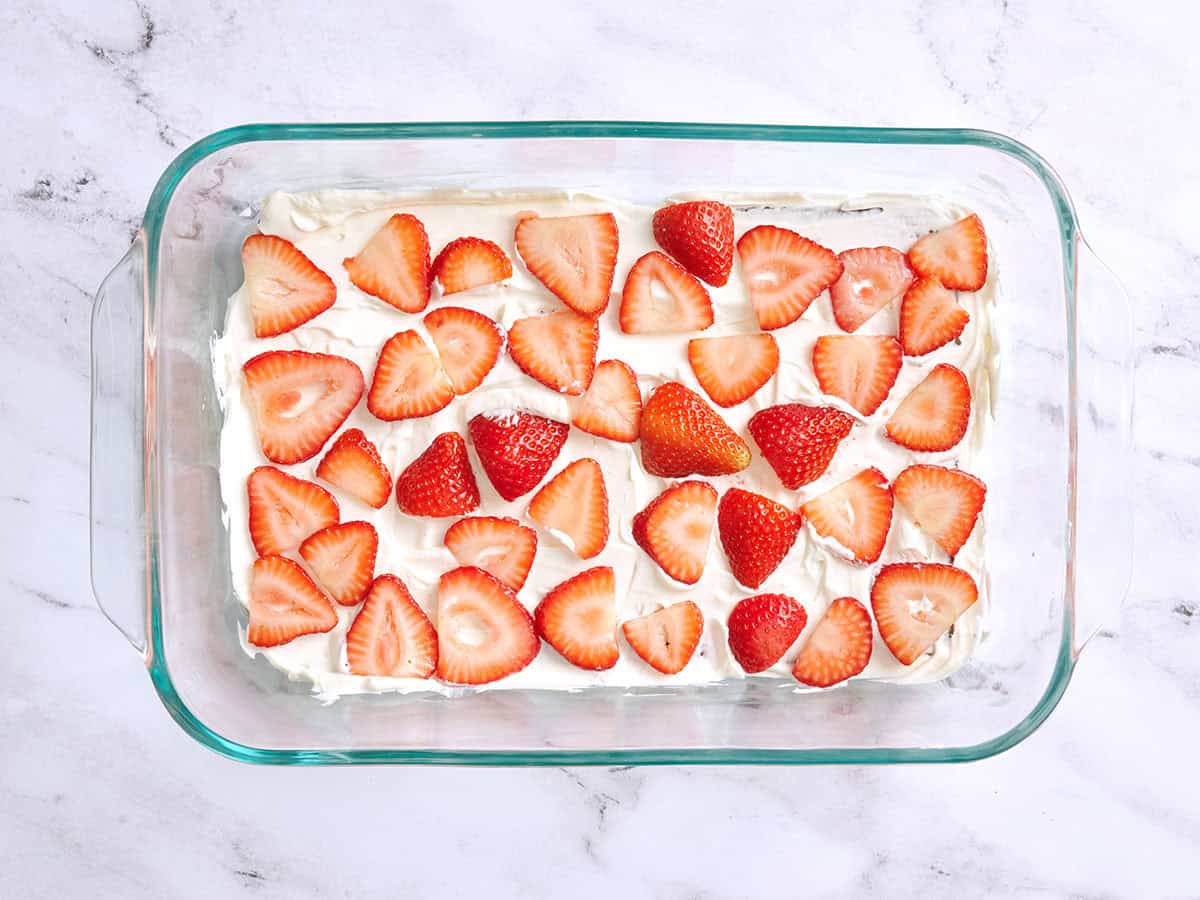
    Layered strawberries in a baking dish.

    Top with 1 cup of the sliced strawberries, scattering them evenly so every slice gets plenty of fruit.

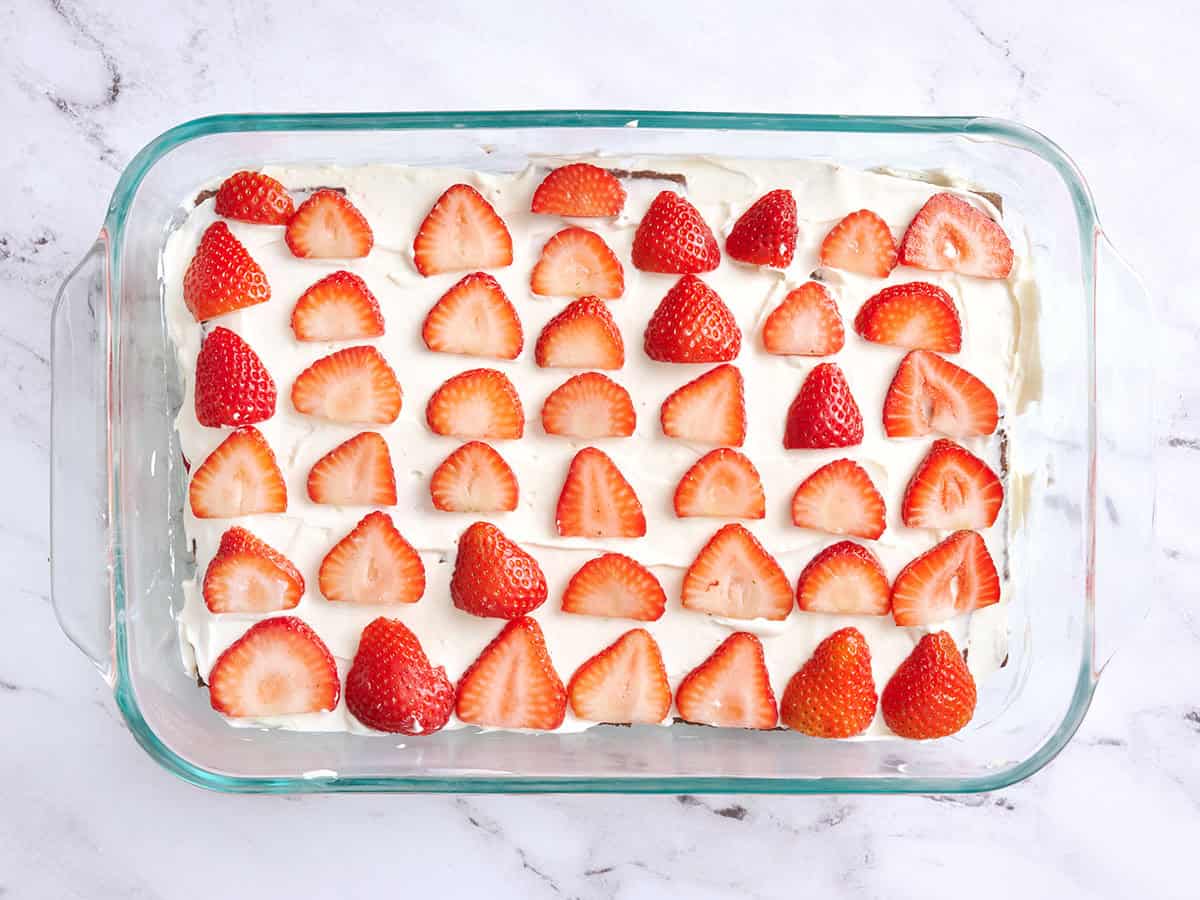
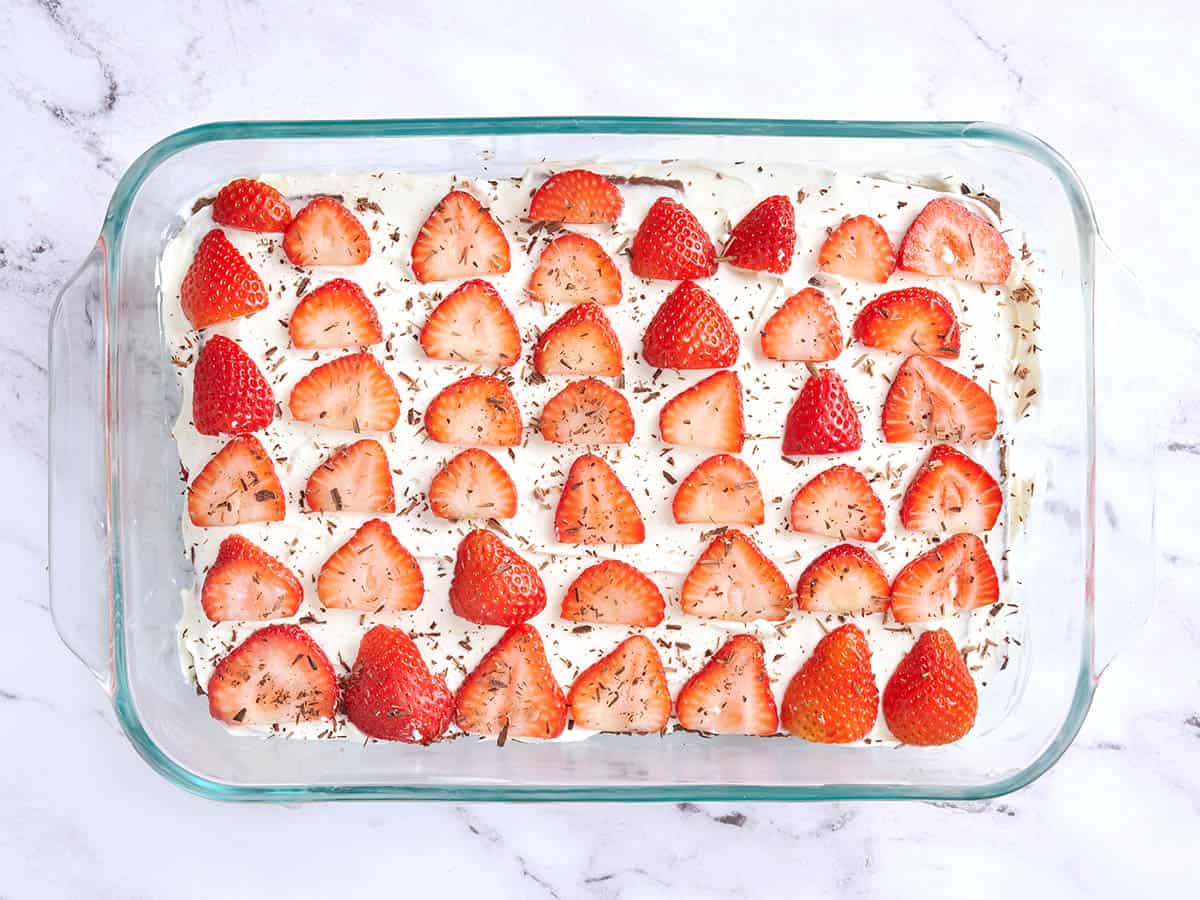
    Strawberries layered over a chocolate icebox cake.

    Finish and chill: Repeat the layers two more times with graham crackers, cream, and 1 cup sliced strawberries each time. Finish with the remaining cream mixture and the last 1 cup of sliced strawberries on top.

    Cover the dish and refrigerate for at least 4 hours, or overnight for the best texture. As it chills, the graham crackers will soften and turn cake-like, while the cream sets into a cool, sliceable filling!

    A chocolate strawberry icebox cake.

    Garnish: Grate the 2 squares of unsweetened baking chocolate over the top just before serving, if using, for a pretty finish and a little extra chocolate flavor. Slice the icebox cake into squares and serve cold. Enjoy!

    Side view of chocolate strawberry icebox cake in glass baking dish.

    Serving Suggestions

    Make sure this chocolate graham cracker icebox cake is fully chilled before slicing. It’ll cut cleaner and hold its shape better. I like to use a sharp knife and wipe it clean between slices for the neatest squares, especially if I’m serving it for a cookout, potluck, or birthday dessert. If you want to dress it up even more, don’t skip the freshly grated chocolate, and add a dollop of whipped cream or a drizzle of strawberry syrup right before serving! This icebox cake is rich and creamy but still light enough for summer, so I usually cut it into 12 generous slices, but you can definitely stretch it to 15 smaller pieces if you’re feeding a bigger crowd.

    Make it Ahead!

    This is the kind of dessert I LOVE making ahead because the fridge does all the work while I go do literally anything else. For the best texture, assemble this icebox cake the day before and let it chill overnight. By the next day, the chocolate graham crackers will have softened into those dreamy, cake-like layers, and the whole thing will slice much more neatly.

    Storage Instructions

    Store your chocolate strawberry icebox cake tightly covered in the fridge for up to 3 days. It actually gets better after the first day as the layers continue to meld and soften!

    Freezer

    You can freeze this cake, though the texture of the strawberries will soften quite a bit after thawing, so you may want to leave them out if you plan to freeze. If freezing, wrap the cake tightly in plastic wrap and then foil, or store in a freezer-safe container. Freeze for up to 1 month. Thaw overnight in the fridge before serving.

    Love No-Bake Desserts? Try These Next!

    The post Icebox Cake appeared first on Budget Bytes.

    This post was originally published on this site.

  • Chicken Caesar Smash Tacos

    Chicken Caesar Smash Tacos

    Food, Food Presentation, Meat

    Chicken Caesar Salad, But Fold It Up And Dunk It!

    Lindsay Ostrom headshot.

    In other words, my dream come true.

    I’ve seen a few videos for this method, and I felt like I needed to give it a try, and I WAS CORRECT. What a genius little dinner invention for people who love chicken caesar salad and want to eat it in every available form (it’s me)!

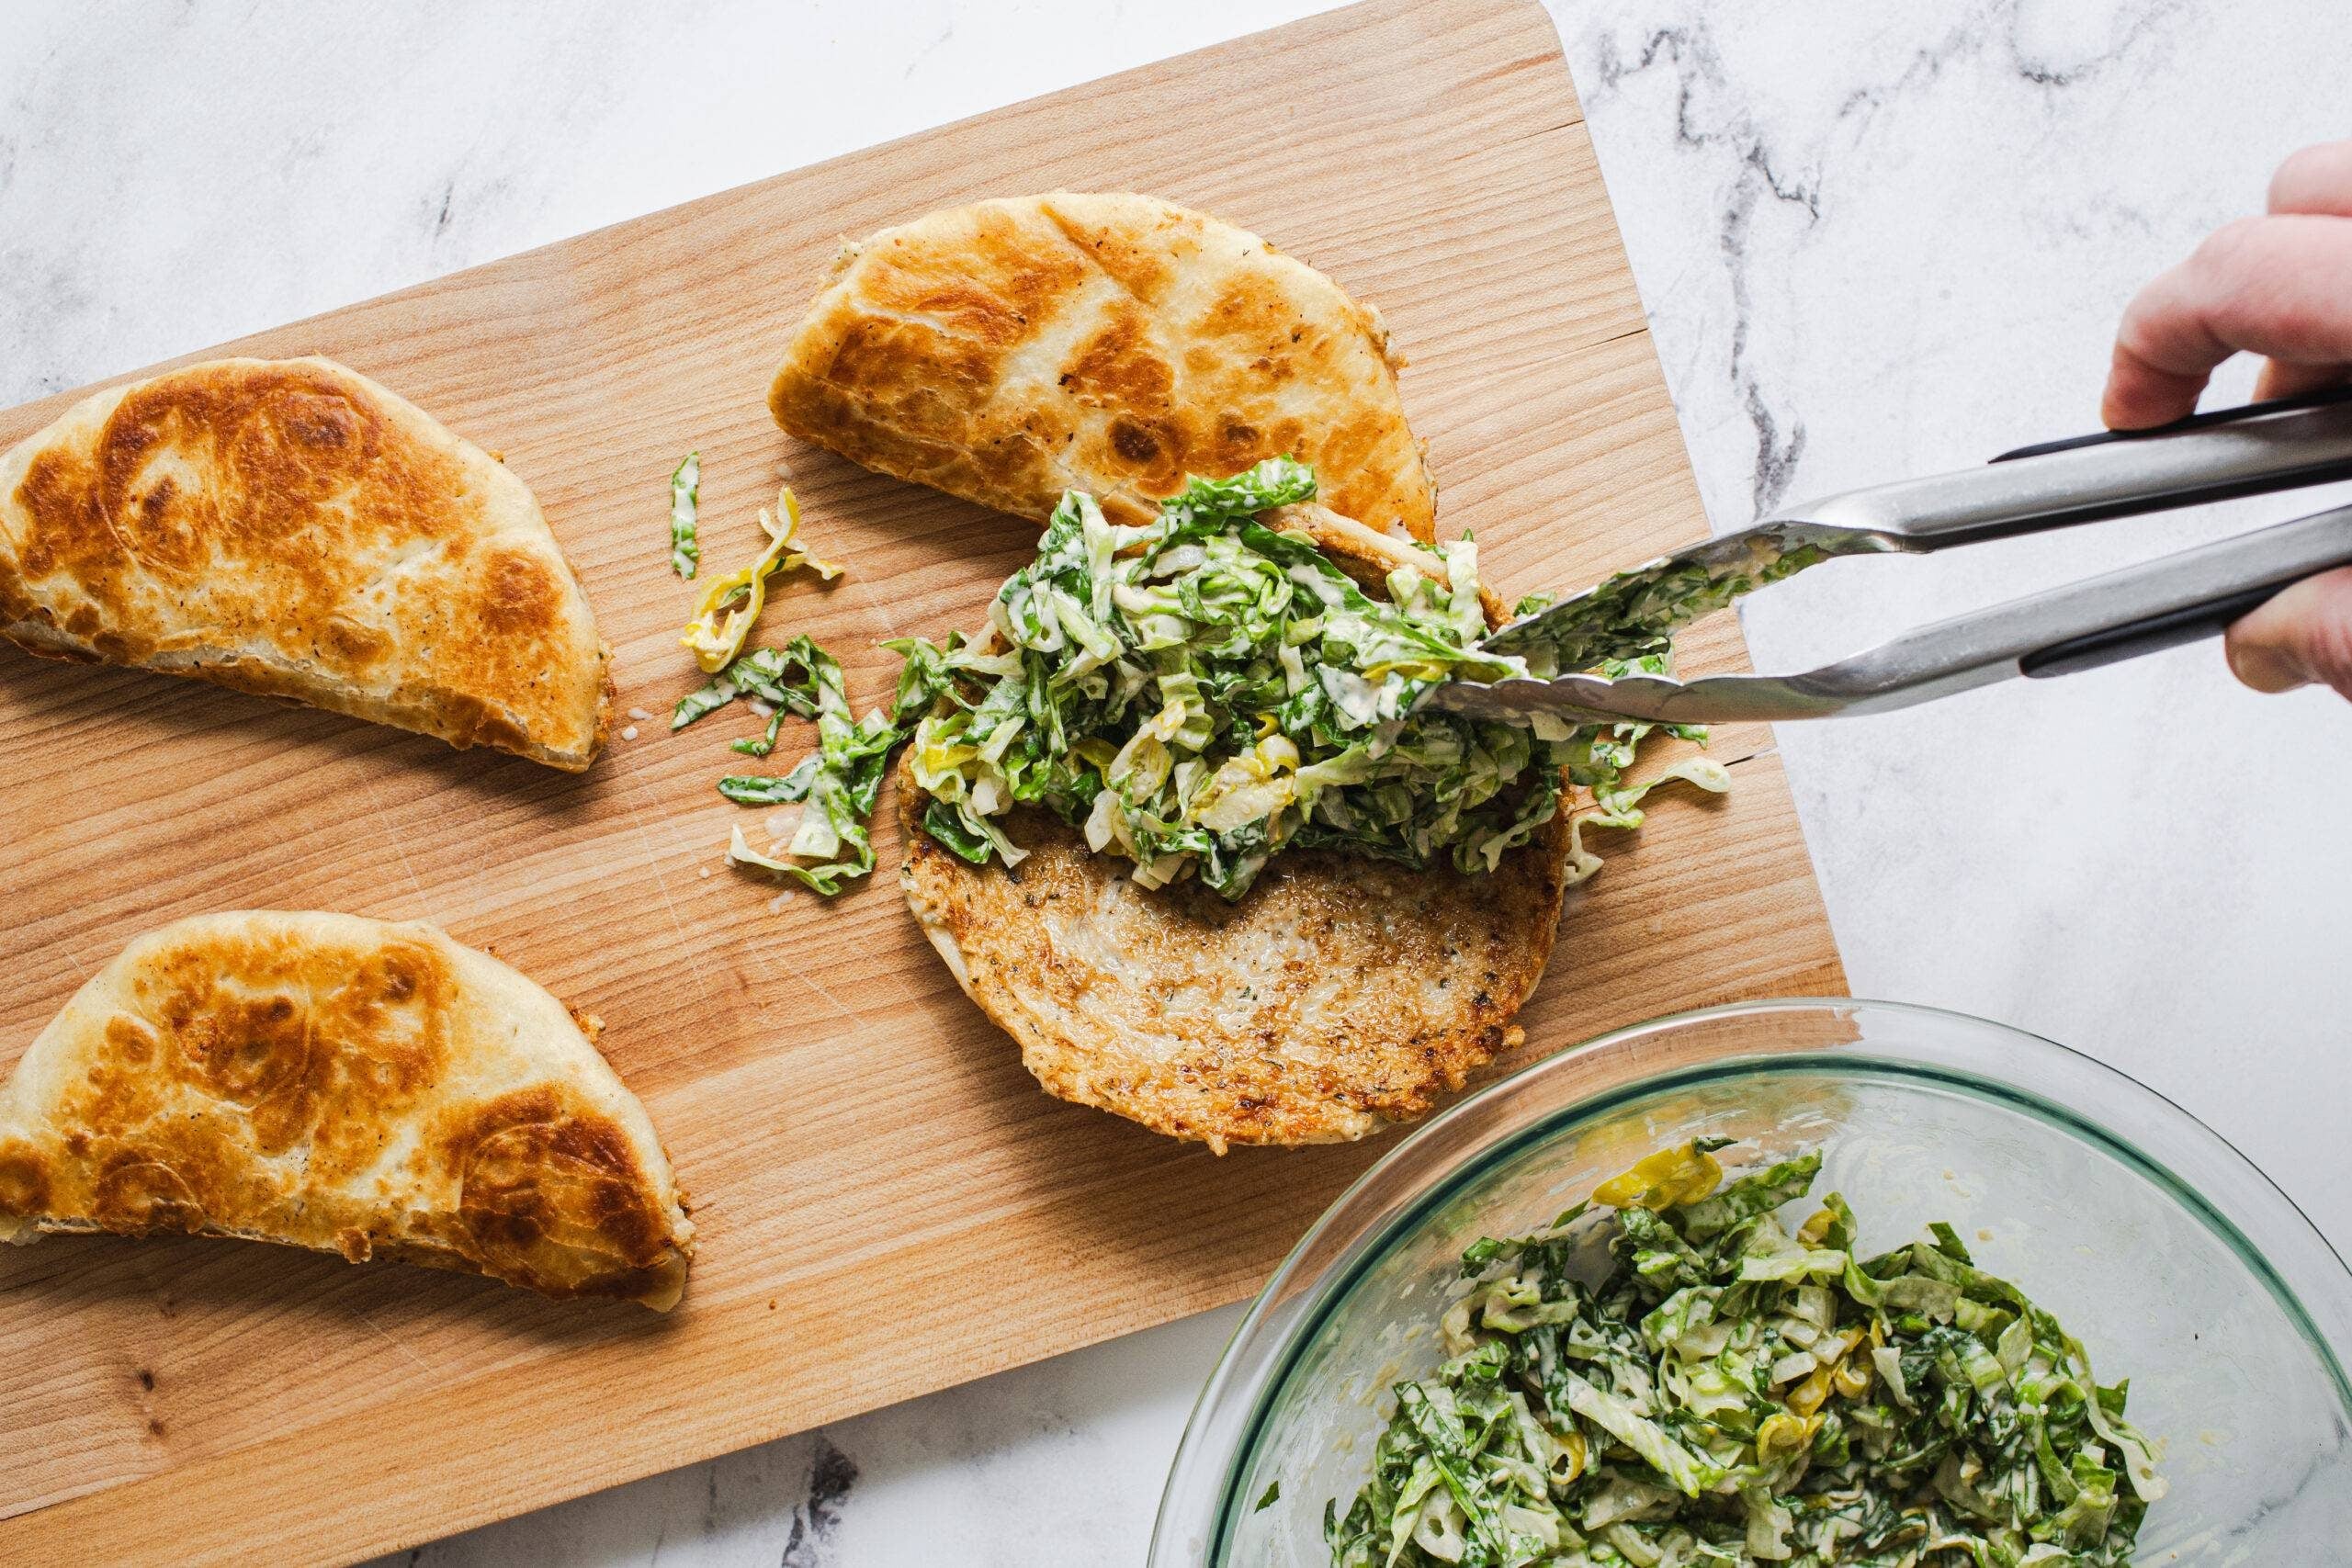
    These are crispy taco-like handhelds, golden and crispy outsides that kind of shatter when you bite into them, with seasoned ground chicken and shreddy Caesar salad + pepperoncini smashed inside?!

    Dunked in a Caesar sauce?!?!

    Holy smokes! They are so yummy. And so easy.

    These fall in the same family as the black bean crispies or the pizza burgers – quick little hitters that require very little from you but actually end up being some of the meals you look forward to most.

    Hope you love them!

    Lindsay signature.

    How To Make These Smash Tacos (Video)

    Print

    Caesar smash tacos on a plate.

    Chicken Caesar Smash Tacos


    5 Stars 4 Stars 3 Stars 2 Stars 1 Star

    5 from 8 reviews


    • Author:
      Lindsay


    • Total Time:
      25 minutes


    • Yield:
      4 servings 1x

    Description

    Super fun easy dinner – chicken caesar smash tacos! A crispy golden handheld with seasoned ground chicken and shredded caesar salad. It’s so good!


    Ingredients


    Units

    Caesar Sauce:

    • 1/2 cup mayo
    • 1/4 cup plain yogurt
    • 1 tablespoon Dijon
    • 1 tablespoon Worcestershire sauce
    • 1 tablespoon lemon juice
    • 1 clove garlic, grated
    • salt to taste

    Caesar Salad: 

    • 1/2 head romaine, finely shredded (23 cups)
    • 1/2 cup pepperoncini, sliced
    • 1/4 cup freshly grated Parmesan cheese

    Chicken Caesar Smash Tacos:

    • 1 lb. ground chicken
    • 1 tablespoon Trader Joe’s aglio olio seasoning, or any chicken seasoning
    • salt and pepper to taste
    • 68 small flour tortillas (I use La Banderita “Street Taco” tortillas for this)
    • avocado oil for frying

    Instructions

    1. Make Your Caesar Sauce: Whisk sauce ingredients until smooth. Whisking caesar dressing in a bowl.
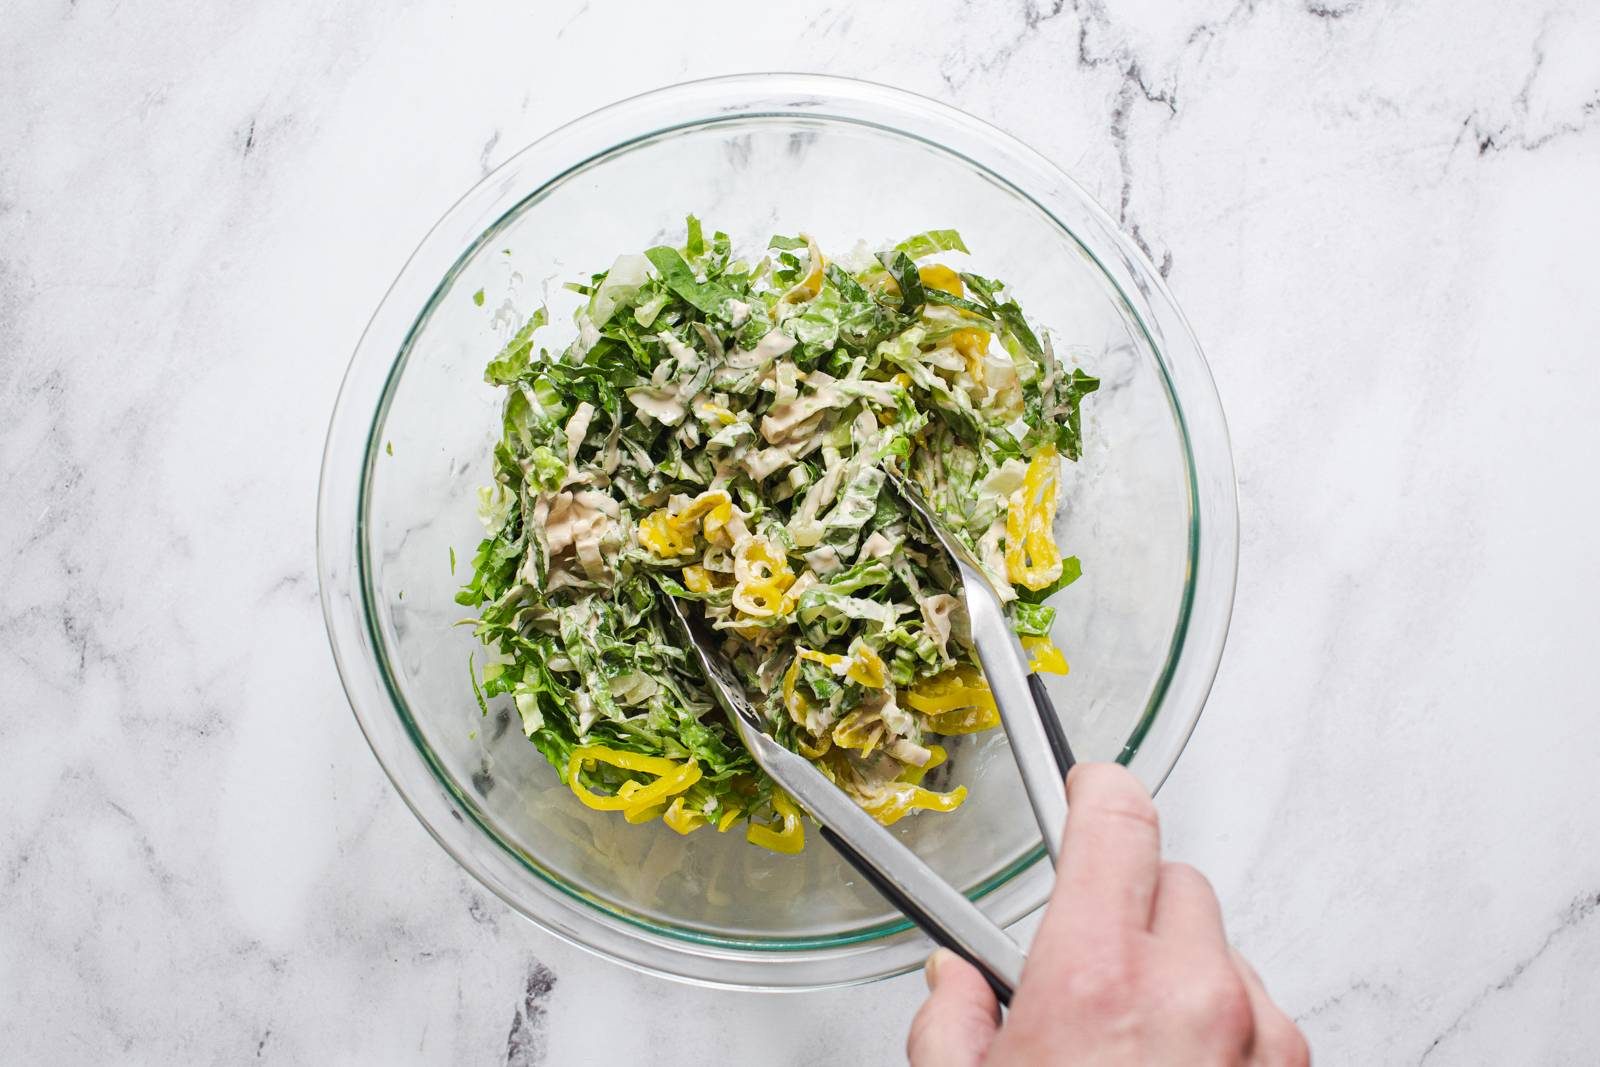
    2. Mix Your Salad: Toss romaine, pepperoncini, parmesan, and about half of the Caesar sauce until well-combined. (For the remaining sauce – whisk it with 1-2 tablespoons of water to make it smoother for dunking.) Tossing caesar salad in a bowl.
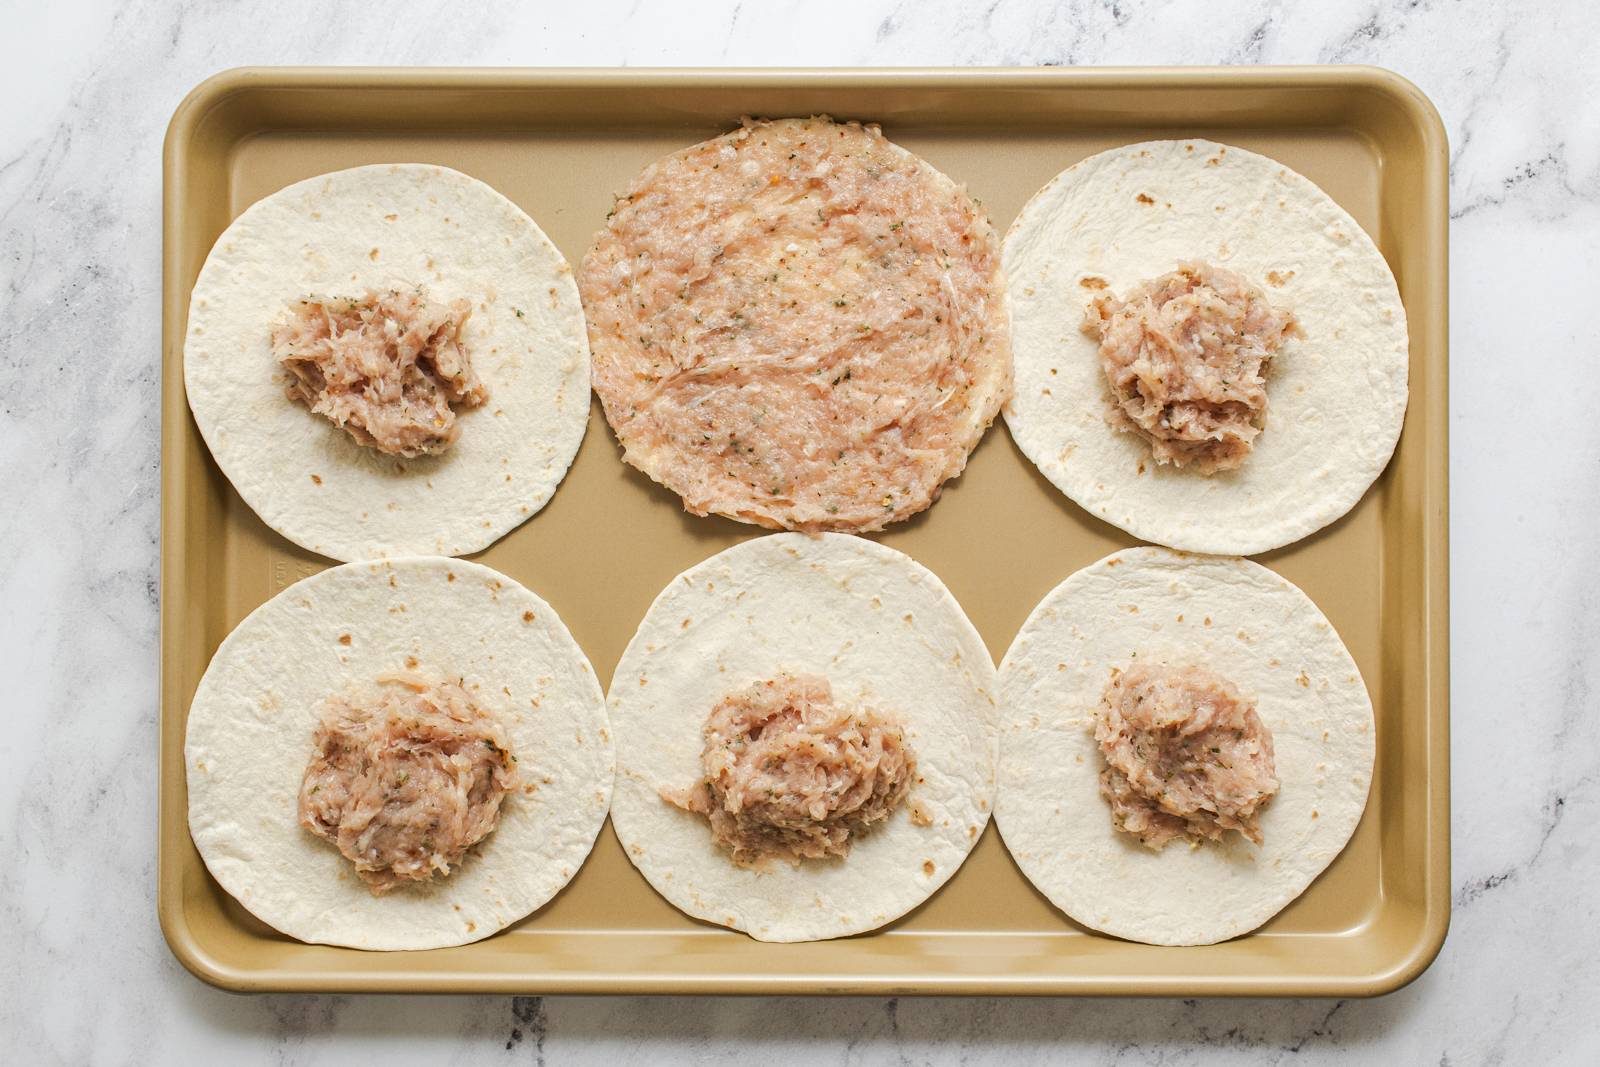
    3. Prep the Tacos: Mix the seasoning into the ground chicken. Place your tortillas on a large cutting board or tray; spread each tortilla with some of the ground chicken mixture, pushing it all the way to the edges or even slightly past. Spreading ground chicken mixture on tortillas.
    4. Smash and Fry the Tacos: Heat a thin layer of oil over medium heat (2 tablespoons or more will give you the best crispy crust). Working in batches, place the tortilla chicken-side down and press down with a spatula for 15-30 seconds. Cook for another 2-3 minutes until the chicken is browned and fully cooked. Flip to the other side for another minute to get a bit of crisping on the back side of the tortilla. Frying smash tacos in a skillet.
    5. Almost Done: Remove tacos from skillet and fold in half (the tortilla may crackle a bit when you fold them – that’s fine!). If needed, place on a baking sheet and pop in a warm oven until you’re ready to serve. When you’re ready to eat, stuff the Caesar salad inside the tacos!
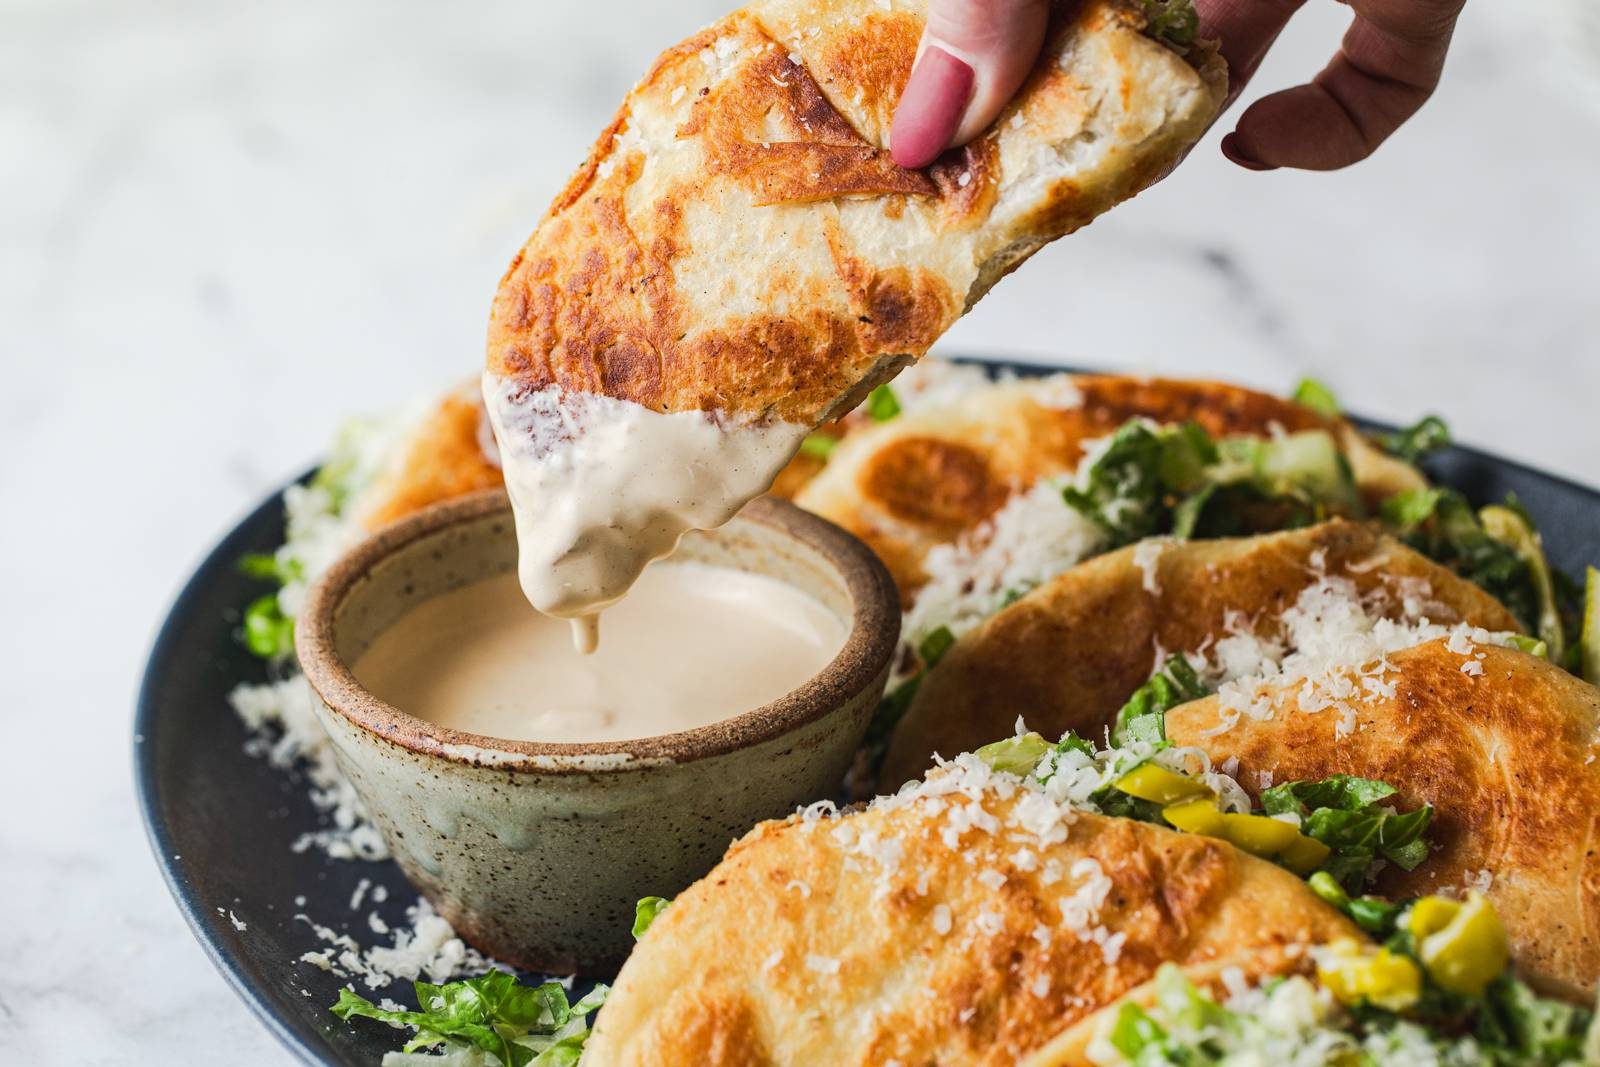
    6. Serving: Serve alongside a dish of the remaining Caesar sauce for dipping. YUM! Dipping smash tacos into caesar dressing.

    • Prep Time: 10 minutes
    • Cook Time: 15 minutes
    • Category: Dinner
    • Method: Stovetop
    • Cuisine: American

    Keywords: caesar tacos, smash tacos, caesar salad, easy dinner

    Three More Fun Tacos To Try

    The post Chicken Caesar Smash Tacos appeared first on Pinch of Yum.

    This post was originally published on this site.

  • Vegan Nutella Ice Cream

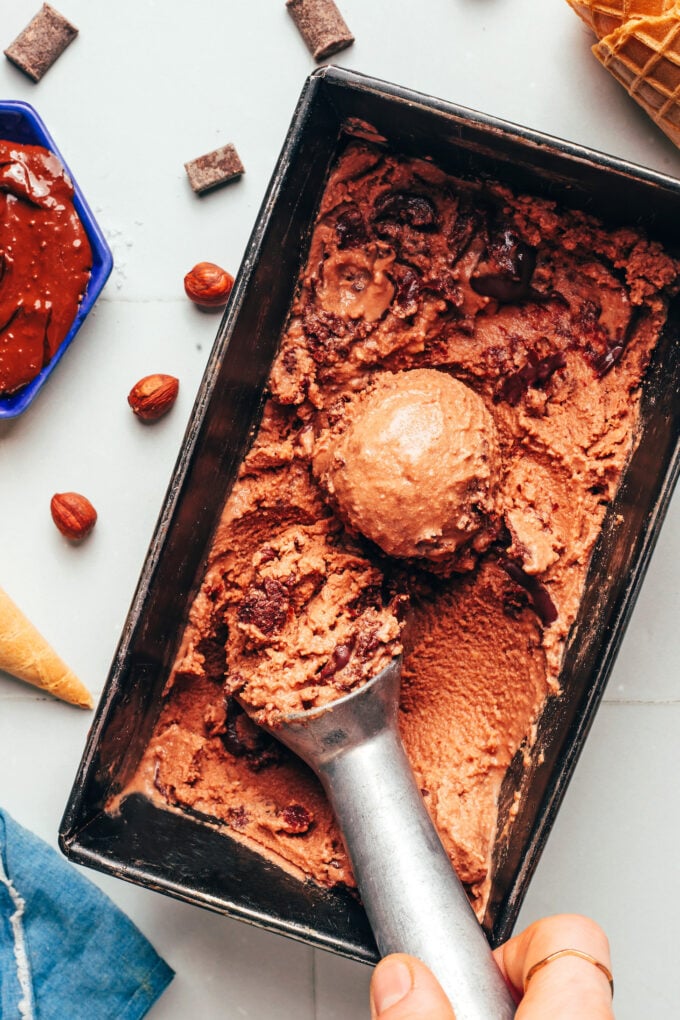
    Vegan Nutella Ice Cream

    Friends! The fluffiest, most satisfying, Nutella lover’s dream dessert is here: vegan ice cream made with chocolate and hazelnuts. It’s creamy, dreamy, oh-so delicious, and kind of perfect! Especially when craving a sweet treat on a warm summer day.

    Just 6 ingredients required for this (dare we say) MASTERPIECE. It’s going to be on repeat in our ice cream maker all season long. Grab your cones. Let’s make Nutella ice cream!

    Vegan Nutella Ice Cream from Minimalist Baker →

    This post was originally published on this site.

  • 22 Must-Make Summer Dessert Recipes

    22 Must-Make Summer Dessert Recipes

    If your summer calendar looks anything like mine, it’s filled with BBQs, lake days, family get-togethers, and those last-minute texts asking, “Can you bring dessert?”

    Good news: this list of summer dessert recipes has you covered! These are the sweet treats that I make every summer – easy, crowd-friendly, and loved by everyone. Bars, pies, cookies, brownies, and more!

    My MOST favorite ones on the list: the Best Peach Cobbler and those S’Mores Bars. I make them multiple times every single summer. ❤️

    Here’s to long summer days and lots of treats! Hope you find your next fav!


    Favorite Summer Dessert Recipes

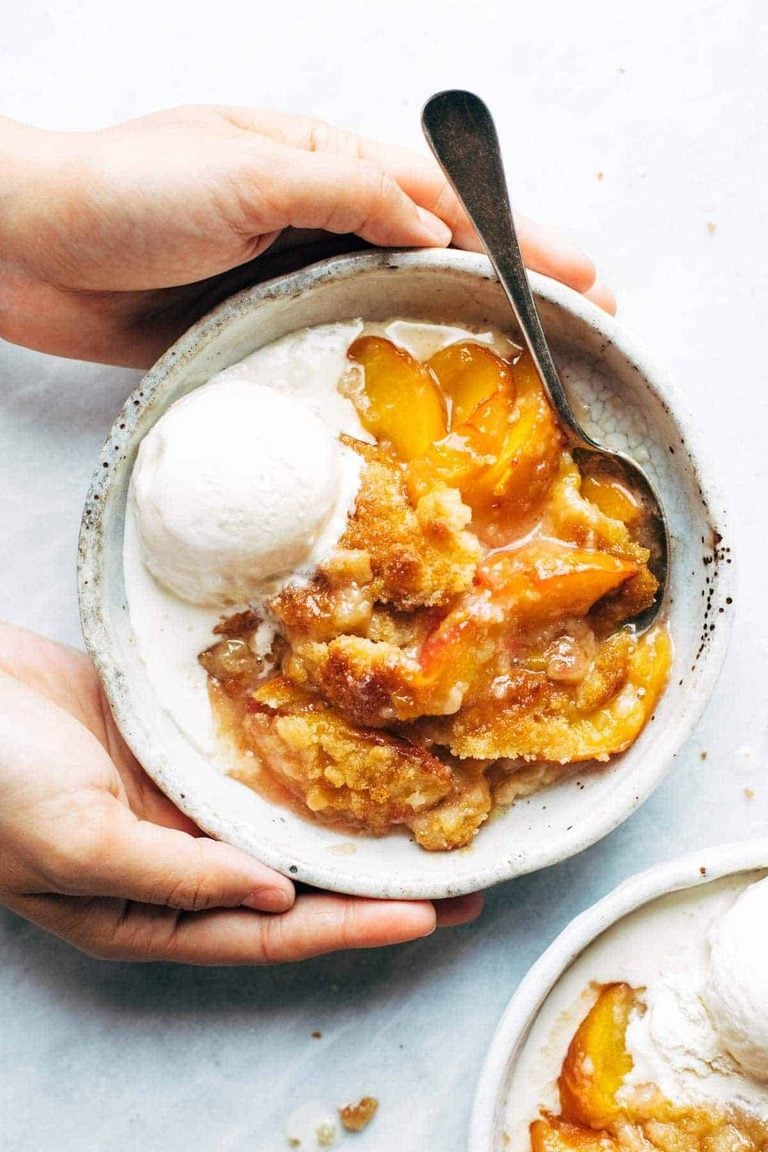
    Peach cobbler on a plate with ice cream.

    The Best Peach Cobbler

    Best summer dessert ever! Made with fresh peaches, sugar, and a topping that bakes like slightly underbaked cookie dough, with crunchy sugar broiled on top.

    246 reviews / 4.7 average

    S'mores bars stacked.

    Best S’mores Bars

    These really are the BEST S’mores Bars! Chocolate, peanut butter, and marshmallow sandwiched between two layers of a graham cookie crust. Everyone’s favorite summer snack (S’MORES, please!) in dessert bar form!

    133 reviews / 4.9 average

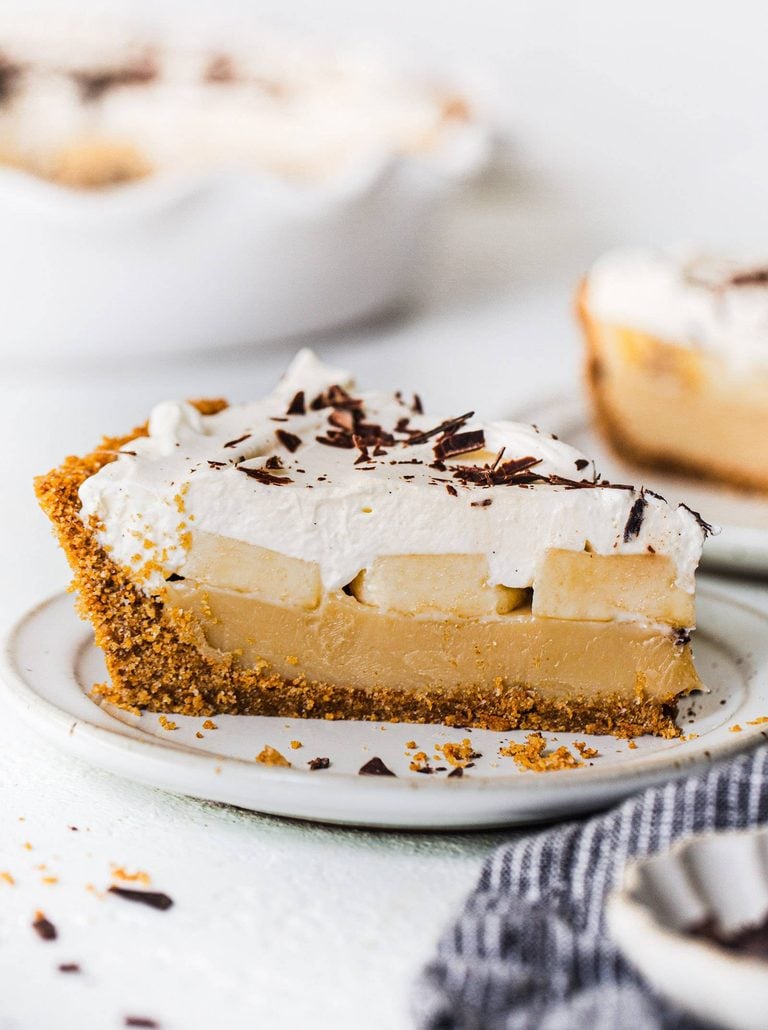
    Slice of banoffee pie.

    Banoffee Pie

    Absolutely my new favorite dessert. Salty-sweet graham cracker crust, silky caramel toffee filling, sliced bananas, and whipped cream on top. My family loves this easy dessert recipe!

    55 reviews / 4.8 average

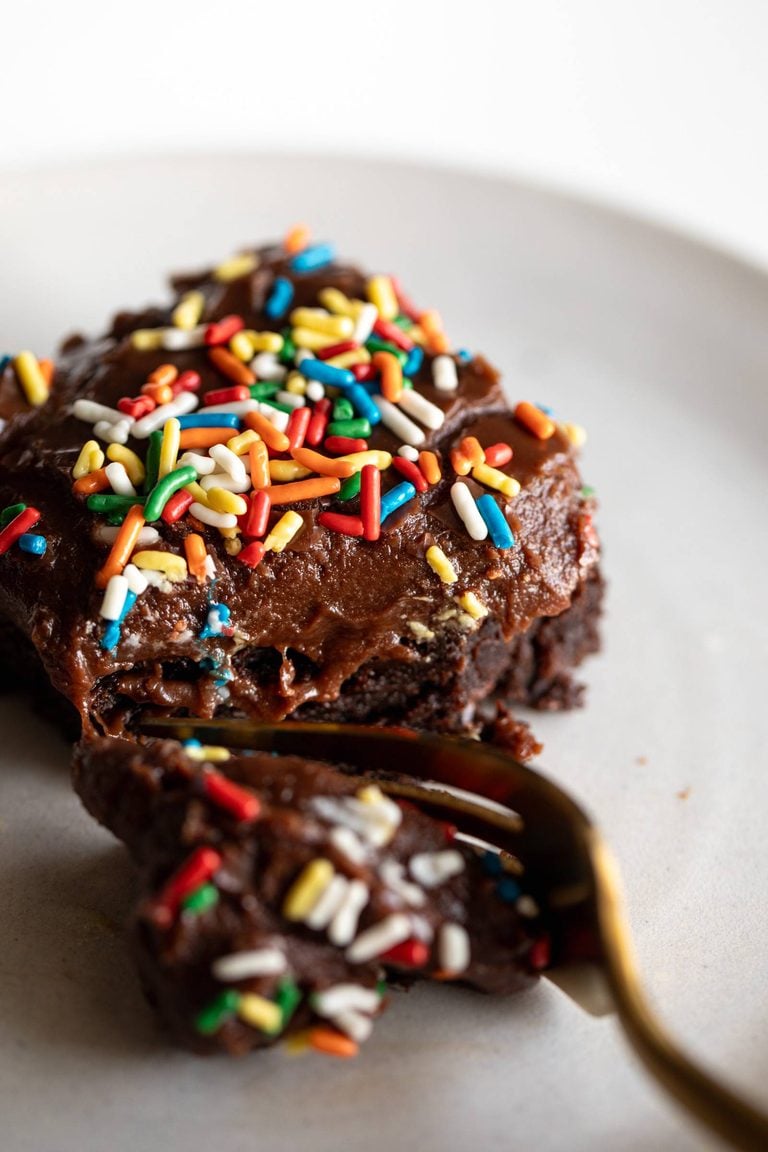
    Party brownie with sprinkles on top.

    Party Brownies

    Brownies covered with a thick layer of fudge frosting and rainbow sprinkles. The best way to jazz up a box of brownie mix!

    19 reviews / 4.9 average

    Strawberry white chocolate cookie.

    Strawberry White Chocolate Cookies

    These are HUGE Strawberry White Chocolate Cookies speckled with creamy and rich white chocolate chips and beautifully balanced with tart freeze-dried strawberries. Grab your baking essentials and let’s go!

    452 reviews / 4.8 average

    Salted caramel rice krispie bars.

    Salted Caramel Rice Krispie Bars

    Salted Caramel Rice Krispie Bars! Perfectly chewy, crispy, caramelly, buttery, soft, and exactly as over-the-top as you need them to be.

    21 reviews / 4.8 average

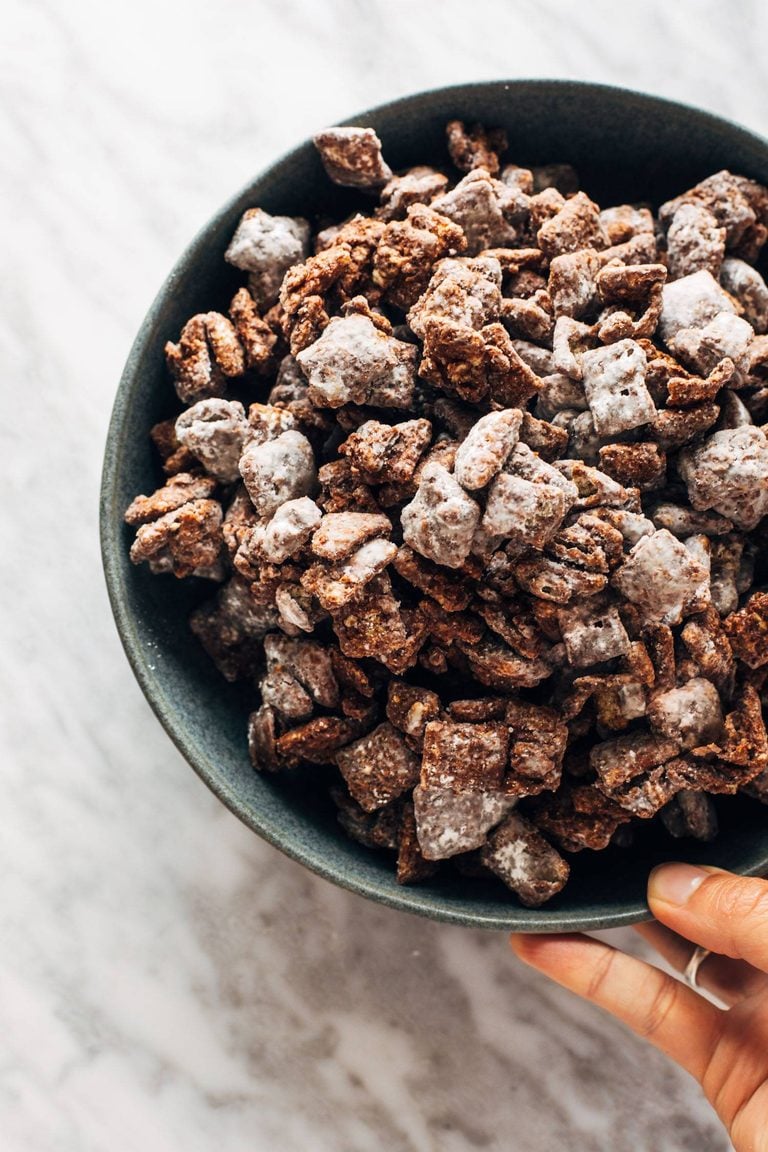
    Puppy chow in a bowl.

    Extra Good Puppy Chow

    Beautiful, chunky clusters of puppy chow with extra chocolate and peanut butter, and a coating of powdered sugar! Midwest summer bliss.

    26 reviews / 5 average

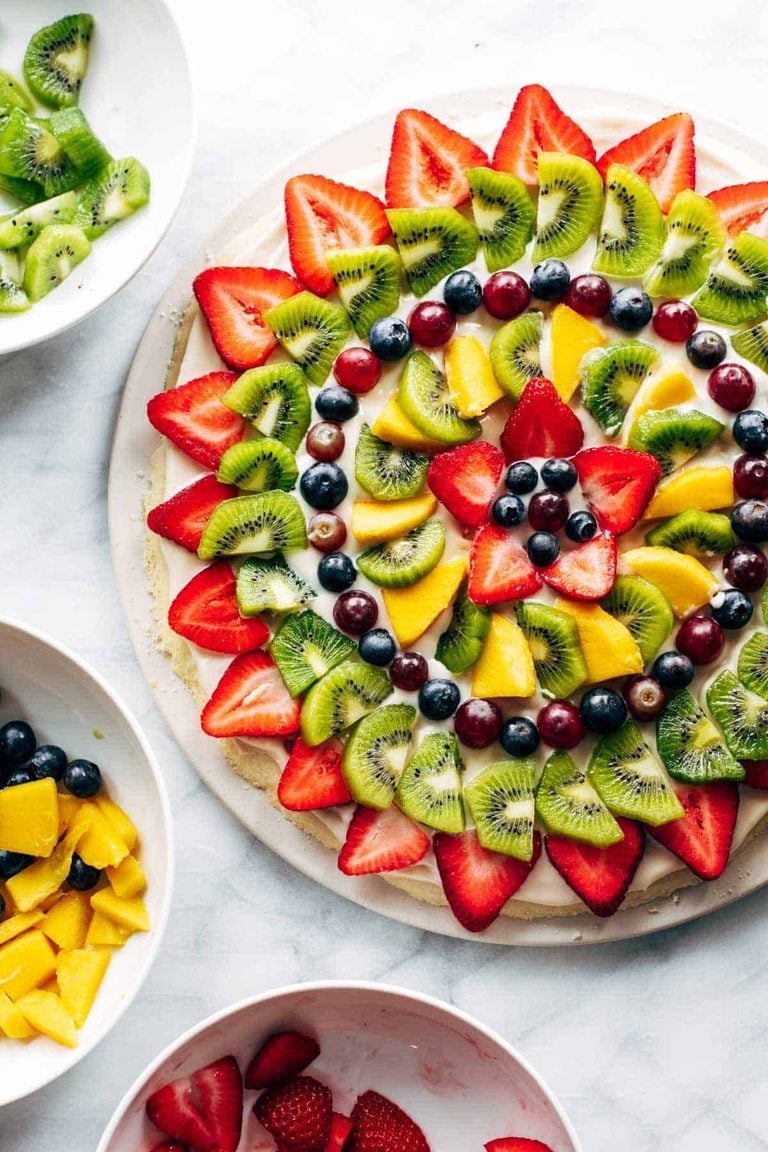
    Fruit pizza.

    Fruit Pizza

    This simple fruit pizza is beautiful and delicious! A soft sugar cookie crust with a cream cheese frosting and topped with sliced fruit. So simple and oh-so good!

    70 reviews / 4.8 average

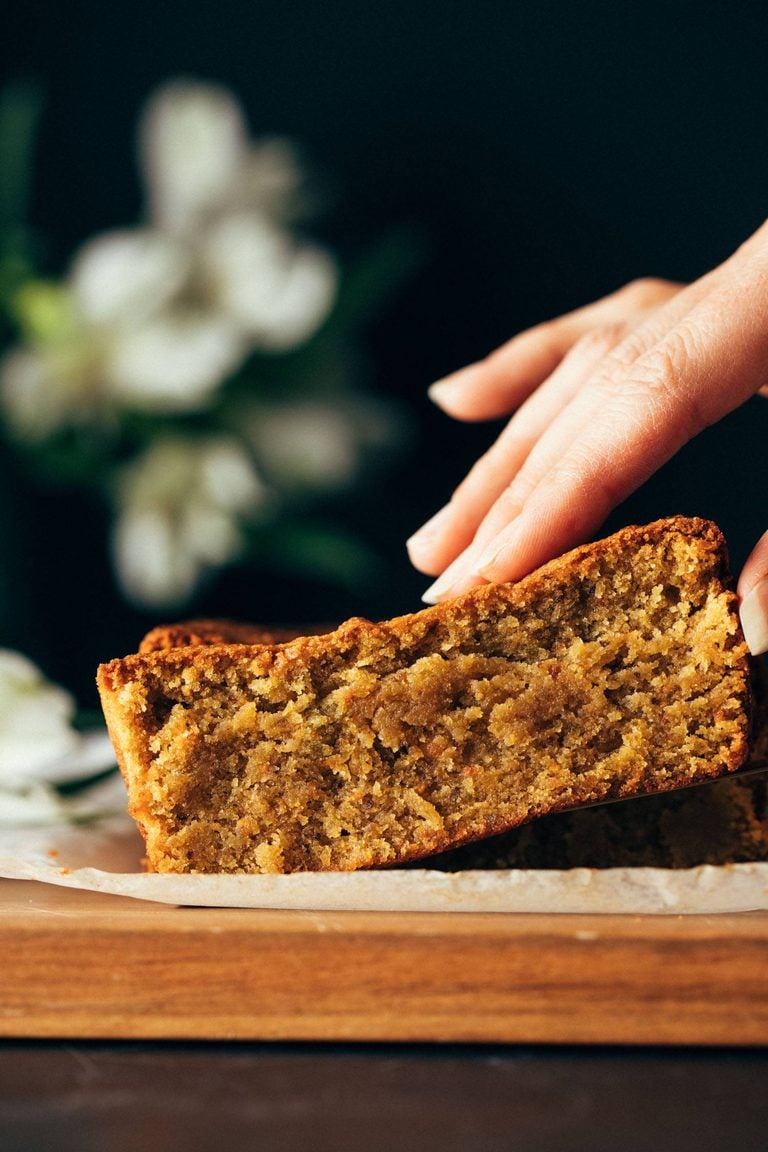
    Pistachio loaf sliced.

    Pistachio Loaf

    It’s nearly springtime and we’re making this beautiful Pistachio Loaf! Grab your baking essentials – like butter, eggs, and sugar – plus a few extras, like pistachios and coconut flour, and get baking!

    435 reviews / 4.8 average

    Peanut butter pie with slice lifted out.

    The Best Easy Peanut Butter Pie

    The BEST Easy Peanut Butter Pie! A simple cookie crust under a layer of fluffy peanut buttery filling that is pillowy, light, and incredibly rich all at the same time.

    38 reviews / 4.8 average

    Almond butter zucchini bar.

    Almond Butter Chocolate Chip Zucchini Bars

    These Almond Butter Chocolate Chip Zucchini Bars are wholesome and perfect and just everything your summer needs! Made with oats, almond butter, zucchini, dates, and maple syrup. So many feel-good ingredients packed into one bar!

    32 reviews / 4.9 average

    Blueberry sauce in a bowl.

    Easy Homemade Blueberry Sauce

    This easy blueberry sauce is made with fresh blueberries, sugar, vanilla, and corn starch. Thick, sweet, and perfect for topping pancakes.

    66 reviews / 4.8 average

    Homemade oreos stacked together.

    Old School Homemade Oreos

    Life-changing Homemade Oreos that are soft, buttery, moist, perfectly dense chocolate cookies stuffed with cream cheese frosting. SO GOOD.

    7 reviews / 5 average

    S'mores bowl.

    Deep Dish S’mores Bowls For Two

    A graham-cracker loaded cookie base, top it with little squares of chocolate bars, piled high with marshmallows. An ooey-gooey, golden brown, melty, cookie-loaded miracle.

    14 reviews / 4.6 average

    Banana cream pie in jars.

    Two-Person Banana Cream Pies

    Two-Person Banana Cream Pies! Low maintenance, high enjoyment, unfussy banana cream pies in jars are yours for the taking.

    17 reviews / 4.8 average

    Chocolate chip cheesecake bars.

    Peanut Butter Chocolate Chip Cookie Cheesecake Bars

    These peanut butter chocolate chip cookie cheesecake bars are just as extreme as they sound. SO GOOD.

    58 reviews / 4.8 average

    Raspberry crumble in a ramekin.

    Two Person Raspberry Crumbles

    The BEST easy summer dessert – for two! A layer of oat-brown-sugar crust, juicy, sticky, bubbly raspberries, and topped with a buttery crumble that’s baked to perfection.

    26 reviews / 4.9 average

    Blender lemon pie.

    Blender Lemon Pie

    Blender Lemon Pie! Eggs, butter, sugar, and a WHOLE LEMON blended up and poured into a crust. Springy, custardy, simple lemon magic.

    61 reviews / 4.3 average

    Golde grahams bars.

    Golden Grahams Bars

    Crunchy, chocolatey, and made with just FIVE ingredients. Even better: it’s no-bake a super easy to make. Winning!

    25 reviews / 4.9 average

    Mocha peanut butter pie.

    Mocha Peanut Butter Pie

    Mocha Peanut Butter Pie! A mocha cookie crust filled with creamy peanut butter cheesecake and topped off with chocolate ice cream and plenty of peanut butter cups. My new favorite dessert!

    16 reviews / 5 average

    Raspberry crumble bars.

    Raspberry Crumble Bars

    These Raspberry Crumble Bars are THE BEST! So soft, buttery, and delicious. My favorite summer dessert.

    110 reviews / 4.8 average

    Vegan chocolate pie.

    Mind-Blowing Vegan Chocolate Pie

    This vegan chocolate pie is a five-ingredient, no-bake miracle. The ultra-thick and creamy chocolate pie filling is made with (wait for it)… tofu, almond butter, almondmilk, and melted chocolate. Easy!

    103 reviews / 4.7 average


    Bonus: Really Good Summer Snacks

    Summer is snack time in our house! Whether we’re running out the door to the park, having last-minute friends over in the backyard, or hosting a playdate, these are the snacks and apps I reach for.

    • Boursin Appetizer with Pistachios and Honey: My all-time fav! Ridiculously easy to pull together at the last-minute and SO good.
    • Cookie Dough Energy Bites: I keep these on hand in the fridge/freezer all summer long. Easy to make, extremely transportable to all kinds of activities, and my kids love them.
    • 2-Minute Creamy Avocado Dip: Another one that’s fast and easy. Love to put this on the table with chips for an easy pre-dinner snack.
    • Elote Corn Queso: A little more involved but very much worth it. Perfect use for all that summer corn!
    • Pickled Strawberries: An unexpected little treat! I love these on sourdough toast with goat cheese and honey.

    The post 22 Must-Make Summer Dessert Recipes appeared first on Pinch of Yum.

    This post was originally published on this site.

  • Pizza Burgers

    Pizza Burgers

    My Grandma Knew.

    Lindsay Ostrom headshot.

    A crisped English muffin brushed with garlic butter, topped with a savory meat sauce and melty cheese? Oh MAN these are good.

    I’m currently very obsessed with these, which is kind of making me chuckle, because it feels like a peak 90s Midwestern mom moment. HERE FOR IT!

    “Pizza burgers” are a staple of my childhood. My grandma made these all the time, and whenever she would come visit our family, she’d re-up our freezer stash.

    This recipe is like a collab between my grandma and me: she always did them on English muffins, and I prefer ground Italian sausage (or turkey, or chicken), and brushing all of it with garlic butter.

    They’re just my favorite for the end-of-school-year madness right now:

    • They’re MINDLESSLY EASY.
    • My kids love them.
    • Fun toppings can be mixed in (my fave = pepperoncini).
    • And, importantly: they can be pulled out of the freezer and reheated one at a time – ideal for the times we are trying to get out the door to soccer or find something to eat quickly between work meetings and just questioning every life decision that led us to this moment.
    Pizza burger on a plate with potatoes, cucumber, and salad.

    While in the process of writing this post, I literally just ate two of them for lunch. Oh man, so good.

    Pulled out of the freezer. Air-fried for 8 minutes. Drizzled them with good olive oil (DELICIOUS) and topped with some kosher salt and served alongside a pile of supremely crunchy cucumbers. It was a moment!
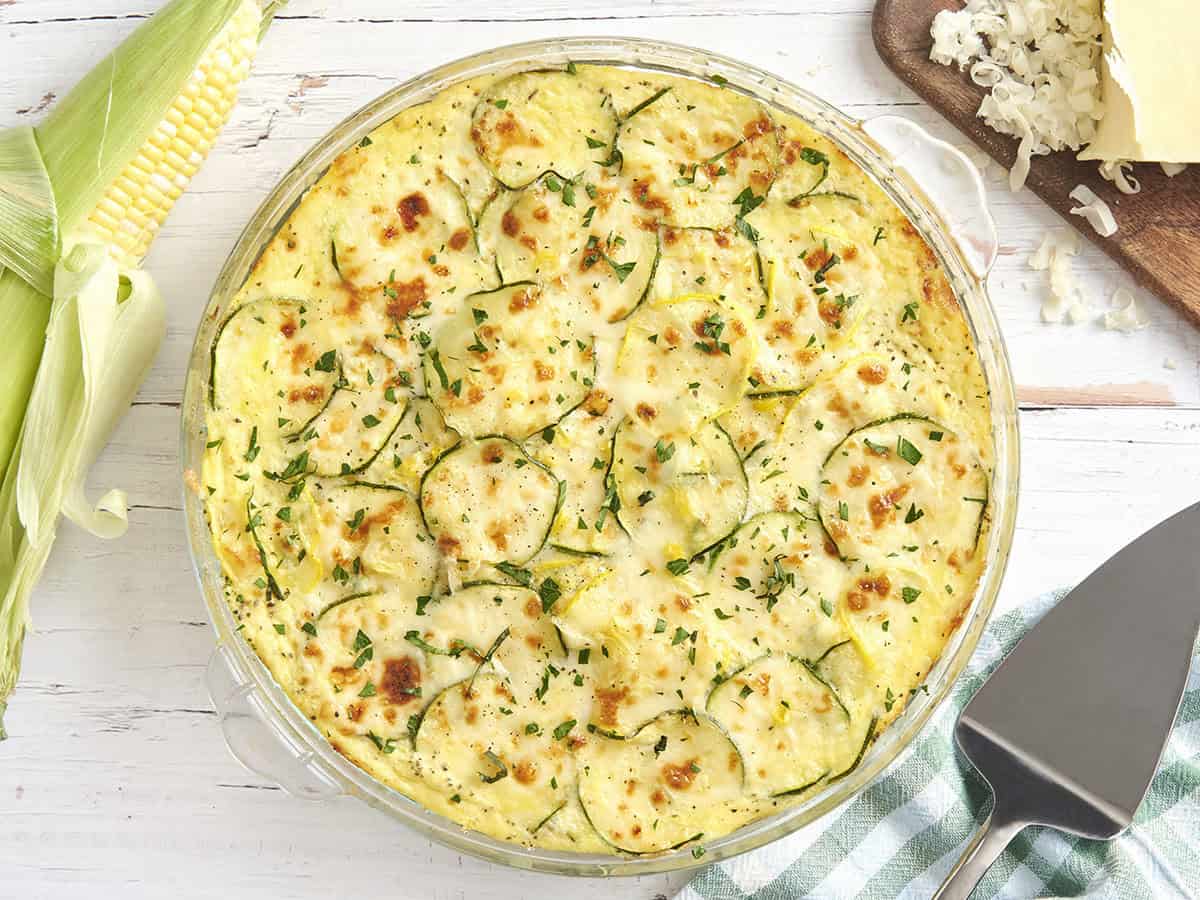
    Hope you love these! From my Midwestern grandma, to me, to all of us. 🙂

    Lindsay signature.

    How To Make Pizza Burgers

    1

    Make Your Filling

    You have options. My grandma always did ground beef, but I prefer Italian sausage or well-seasoned ground turkey!

    Adding marinara sauce to cooked sausage in a pan.

    2

    Brush with Garlic Butter

    This is obviously a very good flavor move.

    Brushing english muffins with garlic butter.

    3

    Top the English Muffins

    A spoonful of sauce, pepperoncini slices if you’re me, and a little sprinkling of cheese.

    Pizza burgers with cheese on top before baking.

    4

    Air Fry

    You can air fry these guys from fresh OR frozen! Deliciously crisped and golden brown.

    Pizza burgers in an air fryer.

    5

    You’re Done! Yum!

    Suggestion: sprinkle with more Italian seasoning, or a dollop of pesto, maybe a drizzle of good olive oil. I mean. I MEAN.

    Finished pizza burgers.

    How To Make Pizza Burgers (Video)

    Print

    Pizza burger with melted cheese.

    Pizza Burgers


    5 Stars 4 Stars 3 Stars 2 Stars 1 Star

    5 from 11 reviews


    • Author:
      Lindsay


    • Total Time:
      20 minutes


    • Yield:
      4 servings 1x

    Description

    These pizza burgers are a family favorite! Mindlessly easy, loved by my kids, and just fun to make. Great for meal prep, too!


    Ingredients


    Units

    Meat Filling

    • 1 tablespoon olive oil or avocado oil
    • 1 lb. ground turkey, chicken, or Italian sausage
    • 1 teaspoon kosher salt (reduce if using Italian sausage)
    • 1/2 teaspoon onion powder
    • 1/2 teaspoon garlic powder
    • 1/2 teaspoon Italian seasoning
    • 1 1/2 cups marinara sauce (I use Rao’s)
    • 1/2 cup shredded mozzarella cheese
    • 1/2 cup chopped pepperoncini (optional)

    English Muffins and Toppings

    • 68 English muffin halves
    • 1/2 cup salted butter, melted
    • 1 clove garlic, grated (or a few shakes of garlic powder)
    • 1 1/2 cups shredded Mozzarella cheese
    • 1/2 cup finely grated Parmesan

    Instructions

    1. Prepare the filling: Heat oil in a large skillet. Brown the meat. Add garlic powder, onion powder, Italian seasoning, and salt. Add the tomato sauce; stir to combine. Remove from heat and stir in the cheese.
    2. Prepare the English Muffins: Mix the melted butter and garlic. Place English muffins face-up on a sheet pan. Brush with the garlic butter mixture.
    3. Arrange the Pizza Burgers: Put a few spoonfuls of the meat mixture on top of the English muffins. Cover each one with shredded Mozzarella, then a pinch of grated Parmesan.
    4. For cooking immediately: Place on a baking sheet and bake at 350 for 5-7 minutes, and then broil as needed to get the cheese melted and browned. You can also air fry at 350 for 4-5 minutes, until golden brown and slightly crisped.
    5. For freezing: Place individual pizza burgers on a plate or small baking sheet lined with parchment and tuck it into the freezer. When they are solid, you can put them into a bag or container together. To reheat, I prefer to air fry at 350 for 6-8 minutes to get them warmed and crispy.

    Notes

    If you’re using Italian sausage, it’s already going to have a lot of a great flavor so you don’t need to season the meat as much as what is directed here. But if you’re using ground turkey or chicken, I would use the amounts of seasoning listed in the recipe (and/or taste and adjust so the meat takes on lots of flavor). 

    • Prep Time: 5 minutes
    • Cook Time: 15 minutes
    • Category: Dinner
    • Method: Air Fryer
    • Cuisine: Italian American

    Keywords: pizza burgers, easy dinner, air fryer dinner

    More Family-Favorite Dinners

    The post Pizza Burgers appeared first on Pinch of Yum.

    This post was originally published on this site.

  • 35 Easy Summer Dinners To Make on Repeat

    35 Easy Summer Dinners To Make on Repeat

    Summer is my favorite time to cook – not because I want to spend hours in a hot kitchen, but because I genuinely don’t have to. That summer produce does all the work. Juicy tomatoes, sweet crunchy corn, crisp cucumbers, and fresh herbs that make everything taste like it came straight from the garden when really it came together in 30 minutes on a Tuesday night.

    These 35 recipes are my tried-and-true summer go-tos – the ones I come back to year after year when I want dinner to feel bright, fresh, and flavorful without a ton of effort. They’re the recipes I genuinely make for my own family that never disappoint. Hope you love them, too!


    The Best Summer Dinner Recipes

    Salmon with rice, tomatoes, and green sauce.

    Salmon with Basil Sauce and Tomato Salad

    We’re making a summery salmon with a beautiful, big-flavored basil sauce that is so good, you’re going to want to just drink it. Perfectly-spiced, fresh, and a dinner for everyone!

    66 reviews / 4.9 average

    Spicy shrimp tacos with slaw.

    Spicy Shrimp Tacos with Garlic Cilantro Lime Slaw

    THE BEST shrimp tacos loaded with avocado, spicy shrimp, and a homemade creamy lime slaw? HELLO YUMMY!

    309 reviews / 4.8 average

    Pepperoncini chicken with hummus.

    Grilled Chicken with Pepperoncini Garlic Butter

    This is such a fun one! Grilled marinated chicken, a quick tomato cucumber salad, tangy bits of feta, and a zippy pepperoncini garlic butter sauce poured over the whole thing.

    68 reviews / 5 average

    Smash burger with house sauce.

    Smash Burgers with House Sauce

    The famous Smash Burger! Deeply crisped, craggy, juicy, squashed patties covered with melty cheese, piled on a buttery bun, and topped with a dreamy zip of secret sauce.

    53 reviews / 4.9 average

    Pasta salad in a bowl.

    The Best Pasta Salad

    Super easy Pasta Salad – with pasta, tomatoes, fresh mozzarella, spicy salami, pepperoncini, olives, and easy Italian dressing. DANGEROUSLY GOOD.

    130 reviews / 4.5 average

    Shrimp curry with rice.

    Thai Shrimp Curry with Yummy Shallot Crispies

    This shrimp curry is the curry of my dreams! Incredible flavor, just a few simple ingredients, and easy enough for a weeknight!

    24 reviews / 4.8 average

    Burger bowl with house sauce on top.

    Burger Bowls with House Sauce and Ranch Fries

    A burger in a bowl! Ranch-seasoned fries topped with a burger patty and all the fixings, with a drizzle of house sauce to take it over the top!

    42 reviews / 5 average

    Roasted red pepper pasta.

    Roasted Red Pepper Pasta

    Restaurant-level pasta, easy enough to be SOS! Caramelized shallots folded into a silky red pepper sauce, and tossed with noodles. Heaven!
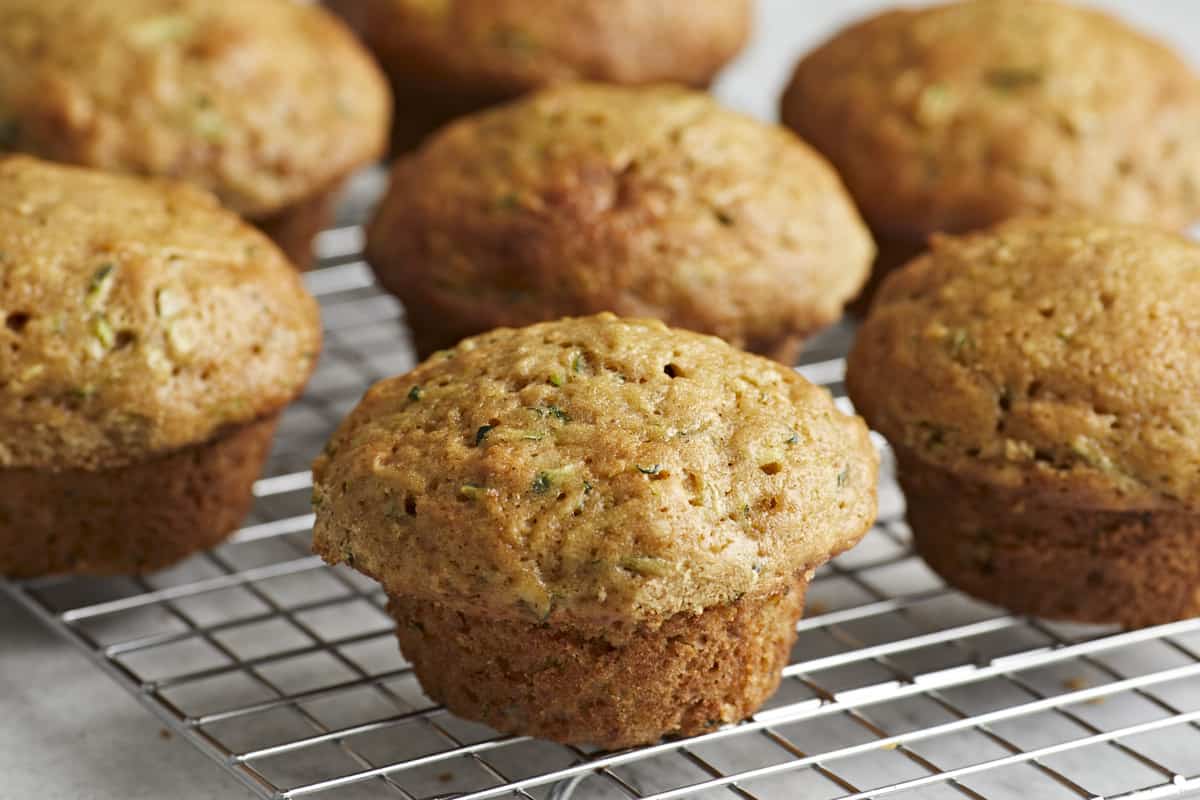
    36 reviews / 4.8 average

    Salmon in a bowl with rice and mango salsa.

    BBQ Salmon Bowls with Mango Avocado Salsa

    BBQ Salmon Bowls with Mango Avocado Salsa! An easy and impressive dinner with yummy smoky-sweet flavor and a zip of zesty homemade salsa to take it over the top. The BEST weeknight dinner.

    191 reviews / 4.9 average

    Fried chicken sandwich with slaw.

    Summertime Fried Chicken Sandwiches with Tangy Slaw

    All my friends raved about these fried chicken sandwiches! This recipe for fried chicken is surprisingly easy and SO GOOD. Just soak, dredge, and fry!

    33 reviews / 4.8 average

    Miso crunch salad.

    Miso Crunch Salad

    Shredded cabbage and kale, shrimp, avocado, cilantro and chili-flavored peanuts, and the perfect sweet miso dressing.

    36 reviews / 4.9 average

    Chipotle salmon with rice and aji verde.

    Chipotle Salmon with Orange Salsa and Aji Verde

    Sweet-and-smoky chipotle salmon topped with fresh orange salsa and creamy aji verde! An easy, delicious, restaurant-level salmon dinner.

    70 reviews / 5 average

    Chicken shawarma with lemon rice, slaw, and tzatziki.

    Trader Joe’s Chicken Shawarma with Lemon Rice

    Easy Trader Joe’s chicken shawarma bowls with fluffy lemon rice, crunchy cabbage, and creamy feta sauce. Fast, flavorful, and perfect for weeknights!

    12 reviews / 4.8 average

    Thai peanut chicken noodle bowl.

    Thai Peanut Chicken Bowls

    I love a shortcut dinner hack! These bowls feature caramelized peanut chicken, a tangle of vermicelli noodles, fresh herbs and cucumber salad, and peanut sauce all over top.

    30 reviews / 4.9 average

    Bang bang salmon in a bowl with rice and cucumber.

    Bang Bang Salmon with Avocado Cucumber Salsa

    Bang Bang Salmon! Creamy, sweet, savory, and punchy. Served with some steamy rice and an avocado cucumber salsa. Weeknight perfection!

    59 reviews / 4.9 average

    Spaghetti topped with crispy cheesy zucchini.

    Spaghetti with Crispy Zucchini

    This Spaghetti with Crispy Zucchini is the perfect end-of-summer song! It doesn’t get much better than fresh summer zucchini coated in a crispy, cheesy breading piled high on top of spaghetti with fresh herbs. YUM!

    48 reviews / 4.9 average

    Cashew crunch salad in a serving bowl.

    Cashew Crunch Salad with Sesame Dressing

    This Cashew Crunch Salad is loaded up with crunchy veg, chow mein noodles, edamame, and roasted cashews and it’ll make you ACTUALLY WANT TO EAT A SALAD. And the sesame dressing – OMG!

    124 reviews / 4.9 average

    Roasted tomato puttanesca.

    Roasted Tomato Puttanesca

    The easiest Roasted Tomato Puttanesca with all the silky, all the briney, and all the zippy summer freshness.

    45 reviews / 4.8 average

    Coconut grilled chicken with rice.

    Coconut Lime Grilled Chicken and Rice

    Grilled marinated chicken, fluffy rice, and excessive handfuls of mint and cilantro, finished off with a generous drizzling of big and flavorful creamy coconut lime sauce.

    28 reviews / 4.8 average

    Creamy vegan roasted red pepper pasta.

    Creamy Vegan Red Pepper Pasta with Blistered Tomatoes

    This Creamy Vegan Red Pepper Pasta is seriously delicious and seriously vegan! Perfectly chewy rigatoni, blistered juicy tomatoes, a creamy-but-cream-less roasted red pepper sauce, all sprinkled with fresh chives and basil.

    59 reviews / 4.9 average

    Grilled chicken skewers.

    Honey Chipotle Chicken Skewers

    These chicken skewers are a family favorite! Very easy, deliciously smoky, nice and sweet, with a good amount of spice and bite. Air fryer, grill, and oven-friendly!

    31 reviews / 4.9 average

    Spicy shrimp with peach salad and rice.

    Spicy Shrimp with Peach Salad

    This is summertime in a bowl! Spicy shrimp with all the delicious heat, smoke, and sweetness we want, alongside a fresh peach and cucumber salad.

    13 reviews / 4.9 average

    Salmon tacos with salsa on top.

    Salmon Tacos with Mango Corn Salsa

    Super easy salmon tacos loaded with a mango, sweet corn, and cucumber salsa!

    32 reviews / 5 average

    Summer chipotle chicken cobb salad with cilantro vinaigrette.

    Summer Chipotle Chicken Cobb Salad with Cilantro Vinaigrette

    This juicy salad tastes like summer! With chipotle chicken, sweet corn, avocado, cilantro vinaigrette, bacon crumbles, and fresh strawberries for a pop of sweetness.

    83 reviews / 5 average

    Chicken in a bowl with banza arice nd tomato salad.

    Banza Chicken Bowls with Calabrian Chili Sauce

    This bowl has it all! The crunch of the tomato cucumber salad, the thin slips of bitey red onion, the golden crisped air fryer chicken cut into tender little strips, a big pile of perfectly chewy Banza, and a dollop of tangy calabrian chile sauce on top.

    22 reviews / 5 average

    Shrimp veracruz in a bowl with rice.

    Spicy Shrimp Veracruz

    Shrimp Veracruz – my new favorite recipe!! Juicy shrimp in a pepper / tomato spicy, briny sauce served over rice. Oh my gosh, THIS IS SO GOOD.

    31 reviews / 4.9 average

    Chicken lettuce wraps with lime sauce poured on top.

    Chicken Lettuce Wraps with Lime Drench

    These lettuce wraps are a SUMMER DREAM. Mountains of crumbled-crisp ground chicken, fluffy quinoa, and/or rice for added satisfaction, and garlicky gingery sautéed veggies in crisp butter lettuce leaves.

    32 reviews / 4.8 average

    Creamy tomato pasta with shrimp.

    Creamy Shrimp Pasta with Corn and Tomatoes

    Creamy Shrimp Pasta with Corn and Tomatoes! A seriously delicious fresh summer pasta. Creamy, silky noodles, garlicky shrimp, and a punch of fresh corn, cherry tomatoes, and basil.

    57 reviews / 4.9 average

    Crunchy roll bowl with spicy mayo on top.

    Crunchy Roll Bowls

    A block of tofu, nicely browned in teriyaki sauce, served on a bed of sticky rice with edamame, cucumber, avocado, jalapeño, and a handful of crushed-up crunchy onions, buried under a thick drizzle of extra teriyaki and spicy mayo. 

    475 reviews / 4.9 average

    One-pan farro with tomatoes and kale.

    One-Pan Farro with Tomatoes and Kale

    This One-Pan Farro with Tomatoes and Kale is a straight-up DREAM! Rustic farro cozied up to cherry tomatoes, onions, garlic, and kale. So good and so wholesome!

    39 reviews / 4.9 average

    Ginger chicken meatballs in a sandwich.

    Ginger Chicken Meatball Sandos

    Golden brown chicken meatballs cozied up next to fixings like cucumbers, shallots, kewpie mayo, mint, a bit of chili crisp, and some fresh cilantro to make the ultimate chicken sando!

    47 reviews / 4.8 average

    Peanut kale crunch salad.

    Roasted Peanut Kale Crunch Salad

    OOOH BABY, this salad is so good! Crunchy kale and cabbage, fresh herbs and fresno peppers, chopped peanuts, and a perfect roasted peanut vinaigrette that tucks into all the salad nooks and crannies.

    34 reviews / 4.9 average

    Gochujang burger.

    Gochujang Chicken Burgers with Kimchi Bacon Jam

    Wow wow wow! These Gochujang Chicken Burgers are next-level good. And a perfectly sweet-spicy kimchi bacon jam piled high on top? Yes, please!

    100 reviews / 5 average

    Shrimp and tomatoes on parmesan risotto.

    Garlic Shrimp and Tomatoes with Parmesan Orzo

    Shrimp laced with buttery garlic and thyme and a burst tomato sauce served on a creamy Parmesan orzo.

    19 reviews / 4.8 average

    Creamy pappardelle in a skillet.

    Burst Tomato Pappardelle with Zucchini, Sweet Corn, and Pan-Fried Chicken

    Meet your next fave summertime pasta! Egg pappardelle tossed in a luscious cream sauce with fresh, bursty summer veg and the best crispy pan-fried chicken. Here we goooo!

    19 reviews / 4.8 average


    Bonus: Summer Desserts, Apps, and More!

    Summer Desserts

    Summer Appetizers

    Summer Drinks

    The post 35 Easy Summer Dinners To Make on Repeat appeared first on Pinch of Yum.

    This post was originally published on this site.