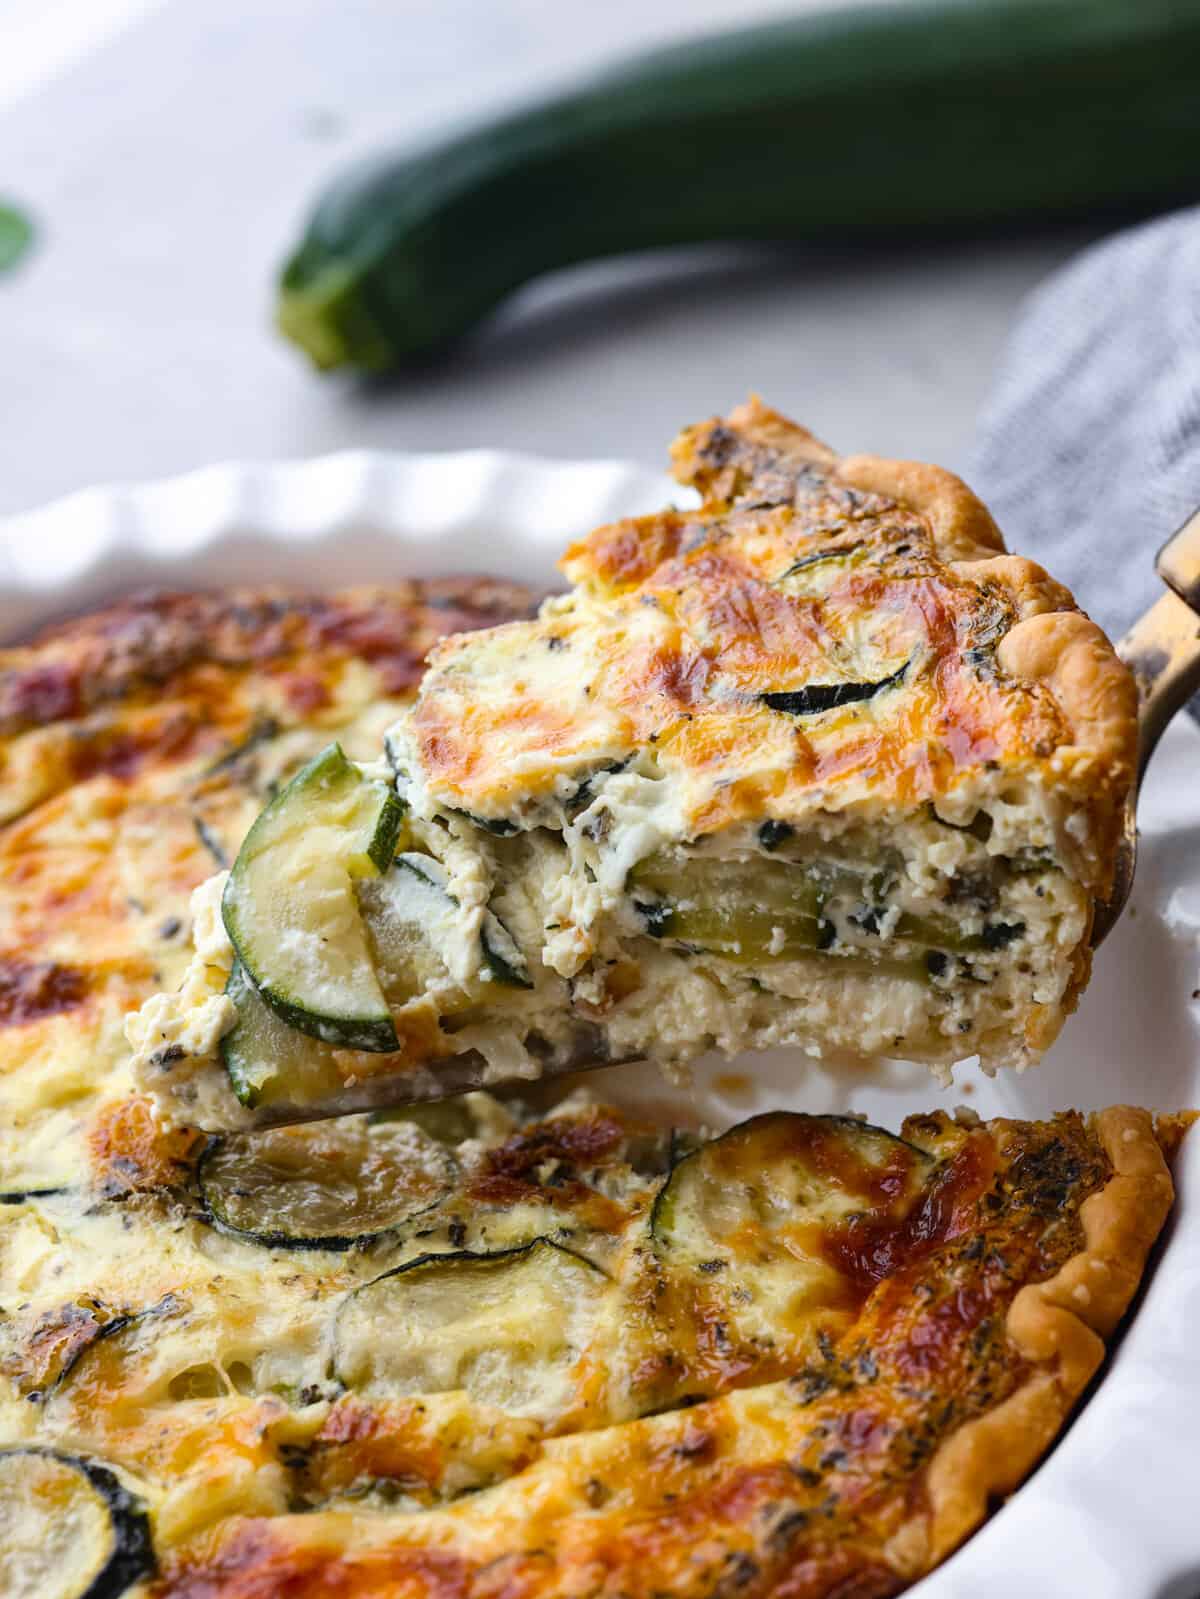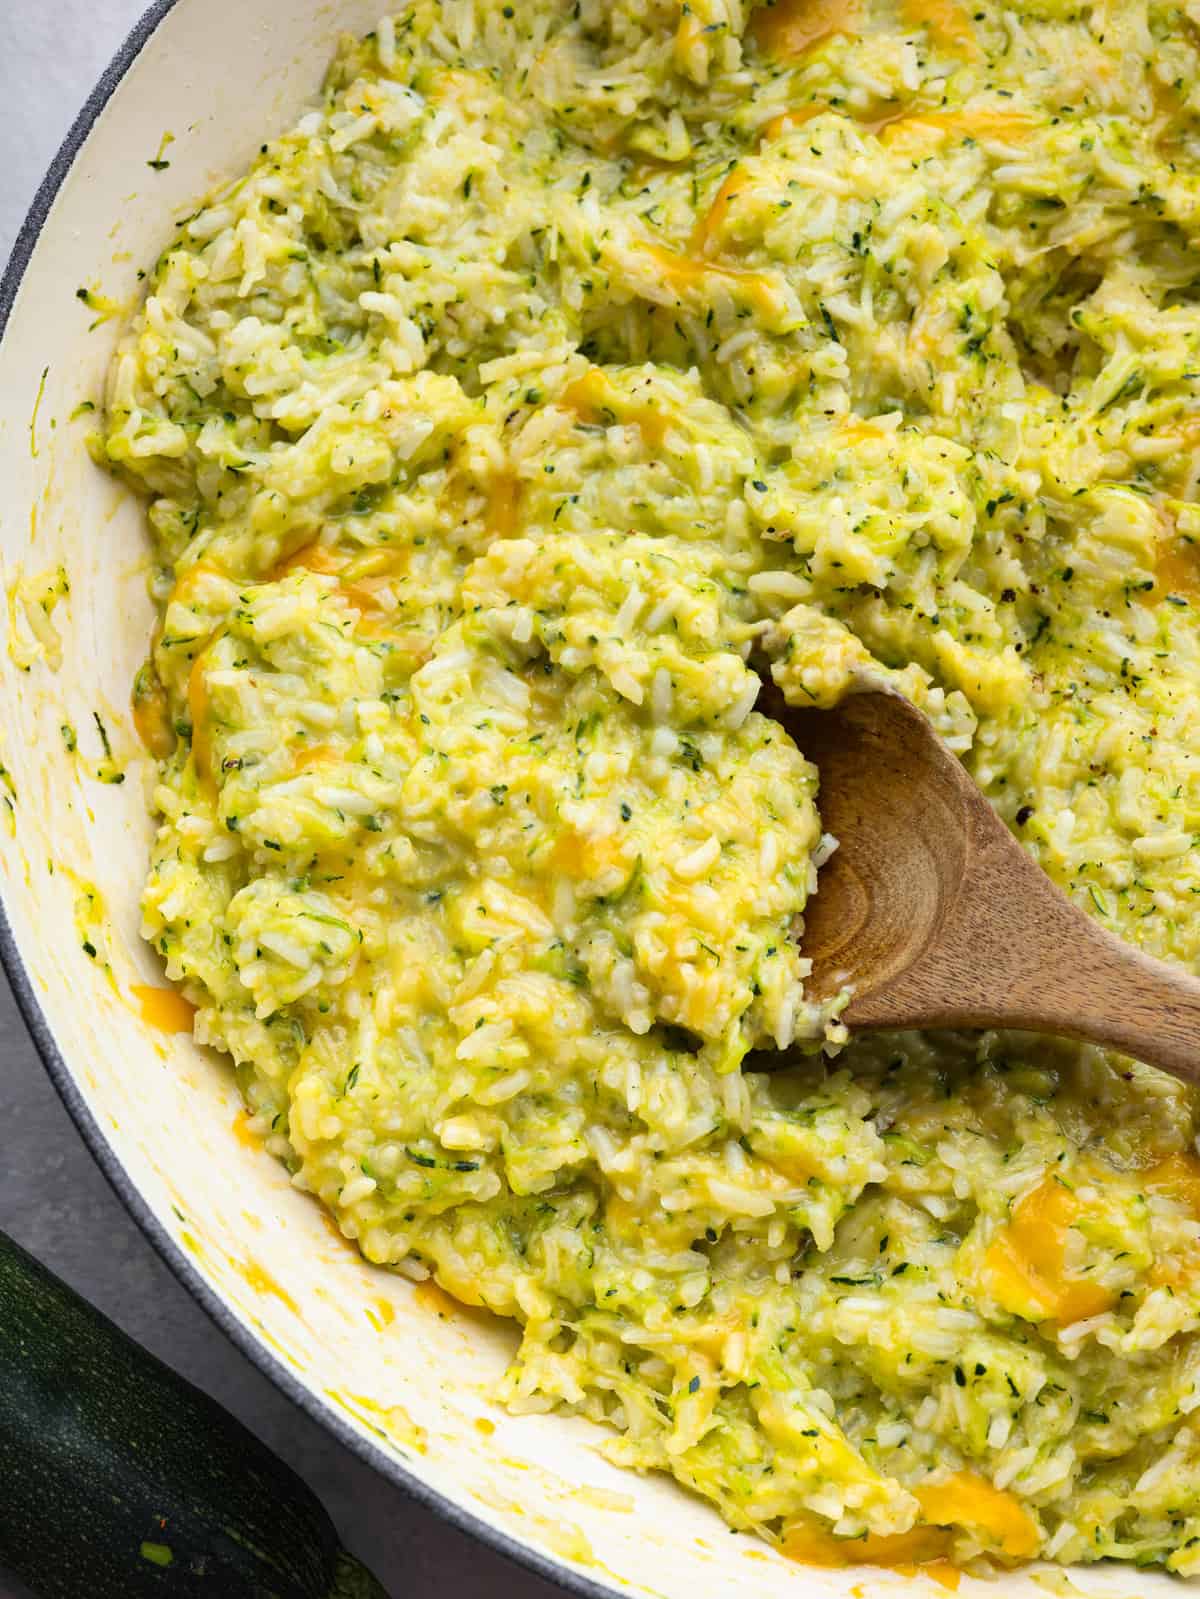
Tag: SNN Cooking

  • Chicken Sliders

    Chicken Sliders

    If there’s a tray of warm Chicken Sliders at a party, potluck, or game day spread, you can pretty much guarantee I’m heading straight for it. These easy chicken sliders are made with sweet Hawaiian rolls stuffed with a creamy rotisserie chicken filling, plenty of cheddar cheese, and a savory seasoned butter topping. They bake in about 30 minutes until warm, melty, and golden. The cream cheese keeps the filling rich and creamy, while the buttery topping and soft rolls make every slider irresistible for feeding a group.

    My Favorite Easy Dinner for a Crowd

    I start this recipe with the same sweet Hawaiian rolls I use in my classic sliders, but this time I swap the ground beef filling for pulled chicken mixed with red onion, cream cheese, mayo, and seasonings. Then I cover the chicken filling with cheddar cheese, sandwich it between the rolls, brush on a melted Dijon-Worcestershire butter topping, and warm everything in the oven to golden, melty perfection.

    These chicken sliders are so worth making when you need something actually easy and crowd-friendly for dinner, 4th of July, or a casual potluck. They’re quick to make and sturdy enough for people to grab straight from the tray. For the simplest prep, I start with chilled rotisserie chicken and shred it before mixing the filling. The one I found in the refrigerated prepared meats section at my local Walmart was cheaper than the hot rotisserie chicken AND SNAP-approved at my store (making this shortcut extra budget-friendly!)

    Recipe Success Tips

    1. Keep the rolls attached when slicing. Use a serrated knife to slice the Hawaiian rolls in half horizontally, almost like one big sandwich. Keeping them connected makes the rolls easier to fill, bake, and cut into neat little pull-apart sandwiches.
    2. Shred the chicken into smaller pieces. I like the chicken pulled or chopped small enough to mix evenly with the mayo, cream cheese, red onion, and seasonings. Smaller pieces make the filling easier to spread and help every slider get some of the creamy chicken filling.
    3. Customize the filling if you want. I kept this filling simple and creamy, but you can add celery, pickles, relish, bacon, bell peppers, mustard, hot sauce, or your favorite herbs and spices. Just avoid adding too many wet ingredients at once, since a looser filling can make the rolls soften faster.
    4. Cover first, then uncover. The foil is important because it helps the chicken filling heat through and the cheddar melt before the tops of the rolls get too dark. Removing the foil for the last 10 minutes gives the butter mixture time to toast the tops until they’re golden, savory, and lightly crisp around the edges.
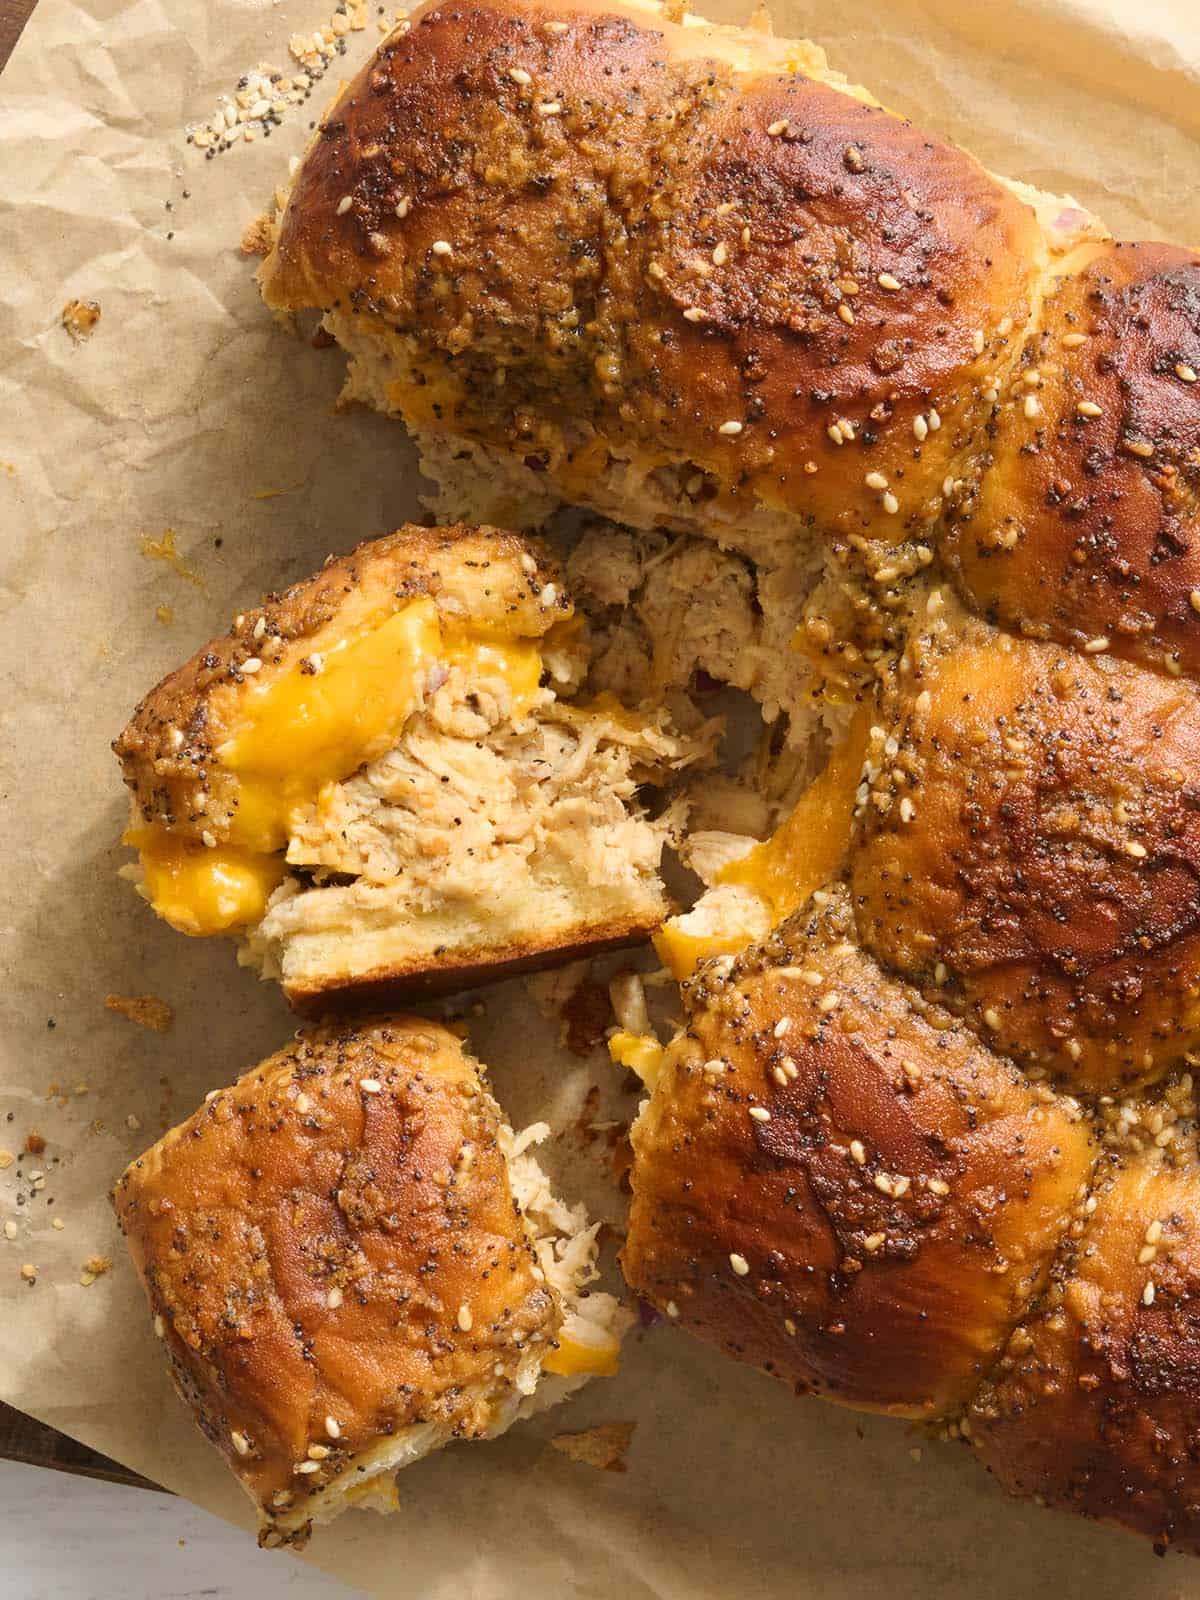
    Overhead view of chicken sliders.

    Print
    Add to Collection Go to Collections

    Chicken Sliders

    These easy Chicken Sliders are made with Hawaiian rolls, creamy rotisserie chicken filling, cheddar cheese, and a savory butter topping. Ready in 45 minutes!
    Course Appetizer, Main Course
    Cuisine American
    Total Cost $9.42 recipe / $1.57 serving
    Prep Time 15 minutes
    Cook Time 30 minutes
    Total Time 45 minutes
    Servings 6 servings (2 each)
    Calories 594kcal

    Equipment

    • 9×11” Oven Safe Dish
    • Medium Bowl
    • Small Bowl

    Ingredients

    Chicken Sliders

    • nonstick cooking spray $0.01
    • 12 Hawaiian sweet rolls $2.68
    • 1 lb. rotisserie chicken shredded, (about 4 cups) $3.97*
    • ¼ red onion small dice (about ¼ cup, 60g) $0.26
    • ½ cup mayonnaise 135g, $0.57**
    • 2 oz. cream cheese softened, $0.49**
    • ½ tsp salt $0.02
    • ¼ tsp black pepper freshly cracked, $0.04
    • ½ tsp garlic powder $0.02
    • 1 cup cheddar cheese grated, (100g) $0.79***

    Butter Topping

    • 2 Tbsp butter melted, $0.22
    • 1 Tbsp Dijon mustard $0.07
    • 1 Tbsp Worcestershire sauce $0.05
    • 1 Tbsp everything bagel seasoning $0.23****

    Instructions

    • Gather and prepare all ingredients. Preheat your oven to 350°F and grease a 9×11” baking dish.
    • Slice the rolls in half lengthwise and place the bottom half in the baking dish.
    • In a medium bowl, combine the shredded chicken, diced red onions, mayonnaise, cream cheese, salt, pepper, and garlic powder.
    • Layer the chicken mix evenly on the bottom of the Hawaiian rolls.
    • Top the chicken evenly with the cheddar cheese.
    • In a small bowl, stir together the melted butter, Dijon mustard, Worcestershire sauce, and everything bagel seasoning.
    • Place the top of half of the Hawaiian rolls on the chicken and cheese. Using a brush, evenly cover the top rolls with the melted butter mixture.
    • Cover the dish with aluminum foil.
    • Place the dish on the center rack in the oven and bake for 20 minutes, then remove the aluminum foil and continue cooking for an additional 10 minutes.

    See how we calculate recipe costs here.

    Notes

    *I used a whole chilled rotisserie chicken found in the refrigerated prepared meats section of my local Walmart. It’s cheaper than the hot rotisserie chicken and SNAP approved. You can also use 1lb. of our crockpot shredded chicken, leftover baked chicken breasts, or even grilled chicken.

    **You can substitute the mayo or cream cheese with sour cream or plain yogurt for a tangier flavor. You can also omit either and make it a drier, less-creamy tasting chicken filling.

    ***I love cheddar and think it goes well with these easy chicken sliders. You can also use provolone, mozzarella, or your favorite melty cheese.

    ****Everything bagel seasoning is a mix of sesame seeds, poppy seeds, dried garlic, dried onion, and salt. If you don’t have it, swap in your favorite herb or spice blend, or keep it simple with just sesame seeds or poppy seeds.

    The meat from one rotisserie chicken can weigh over one pound, so make sure to utilize any extra in another recipe! I’ve shared some ideas for using leftover rotisserie chicken under the step-by step photos below.

    Nutrition

    Serving: 1serving (2 sliders) | Calories: 594kcal | Carbohydrates: 32g | Protein: 32g | Fat: 38g | Sodium: 1122mg | Fiber: 0.2g

    how to make Chicken Sliders Step-by-Step Photos
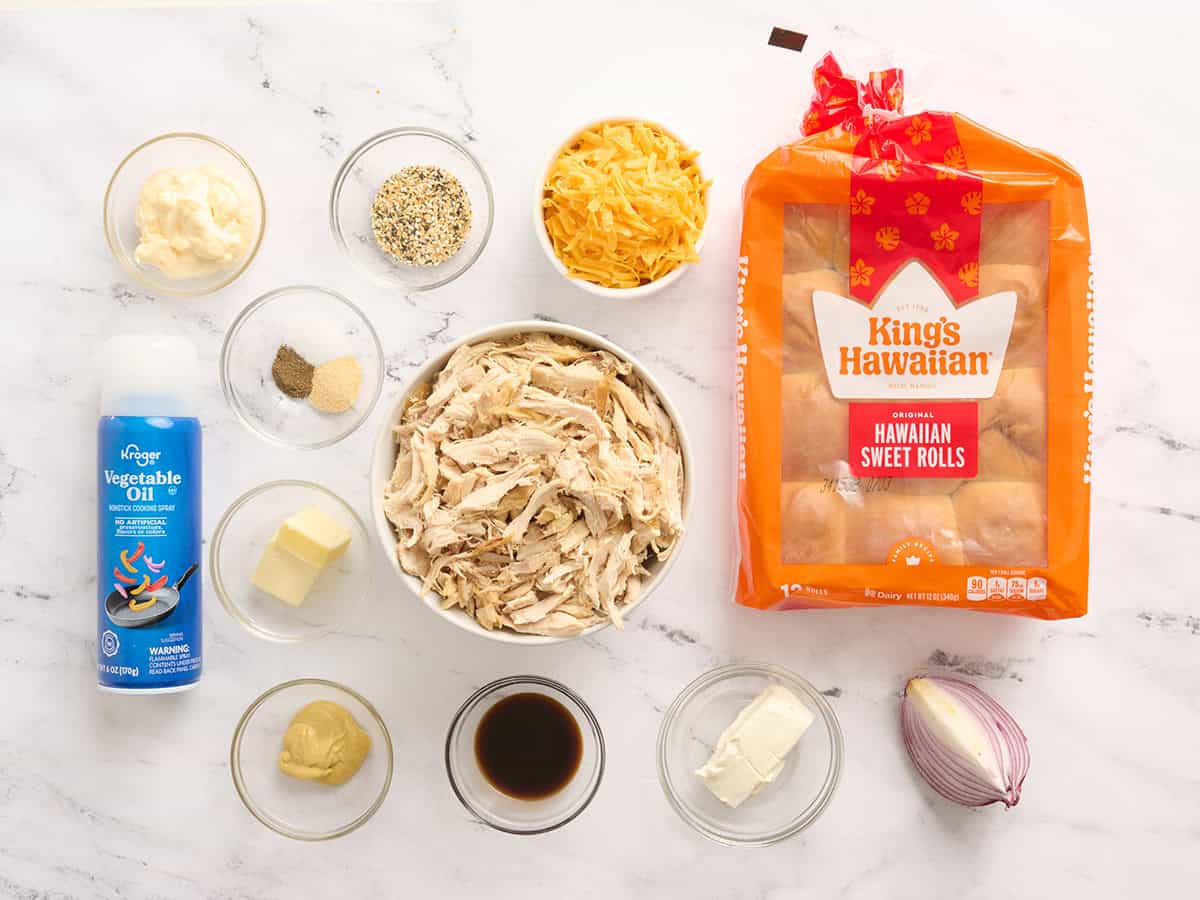
    The ingredients to make chicken sliders.

    Gather and prepare all ingredients. Preheat the oven to 350°F and lightly grease a 9×11-inch baking dish with nonstick cooking spray.
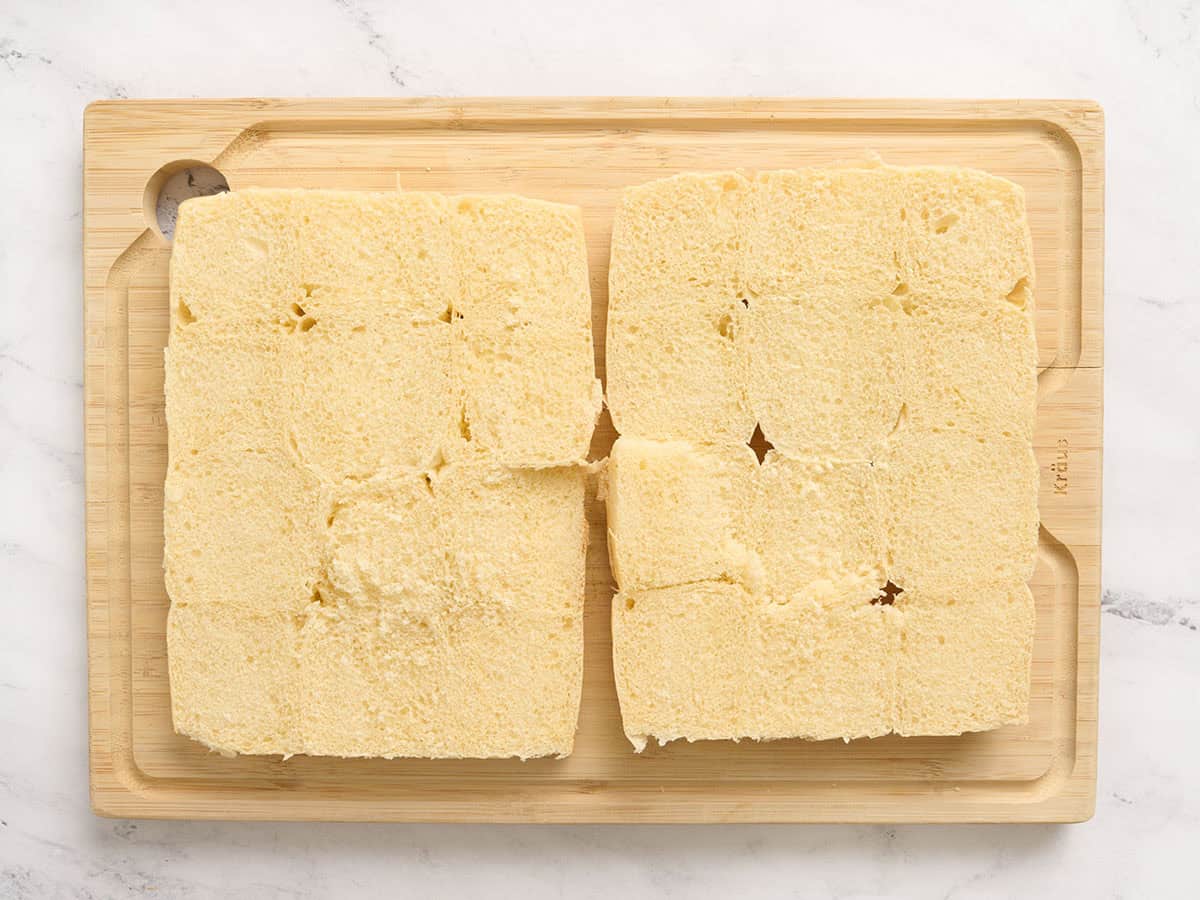
    Hawaiian rolls sliced in half on a wooden cutting board.

    Prep the rolls: Keep the 12 Hawaiian sweet rolls connected, then slice them in half horizontally with a serrated knife. Place the bottom half of the rolls into the prepared baking dish, cut side up. If any of the rolls do disconnect, don’t worry! Just try to keep them snug together in the baking dish so the filling stays tucked inside.
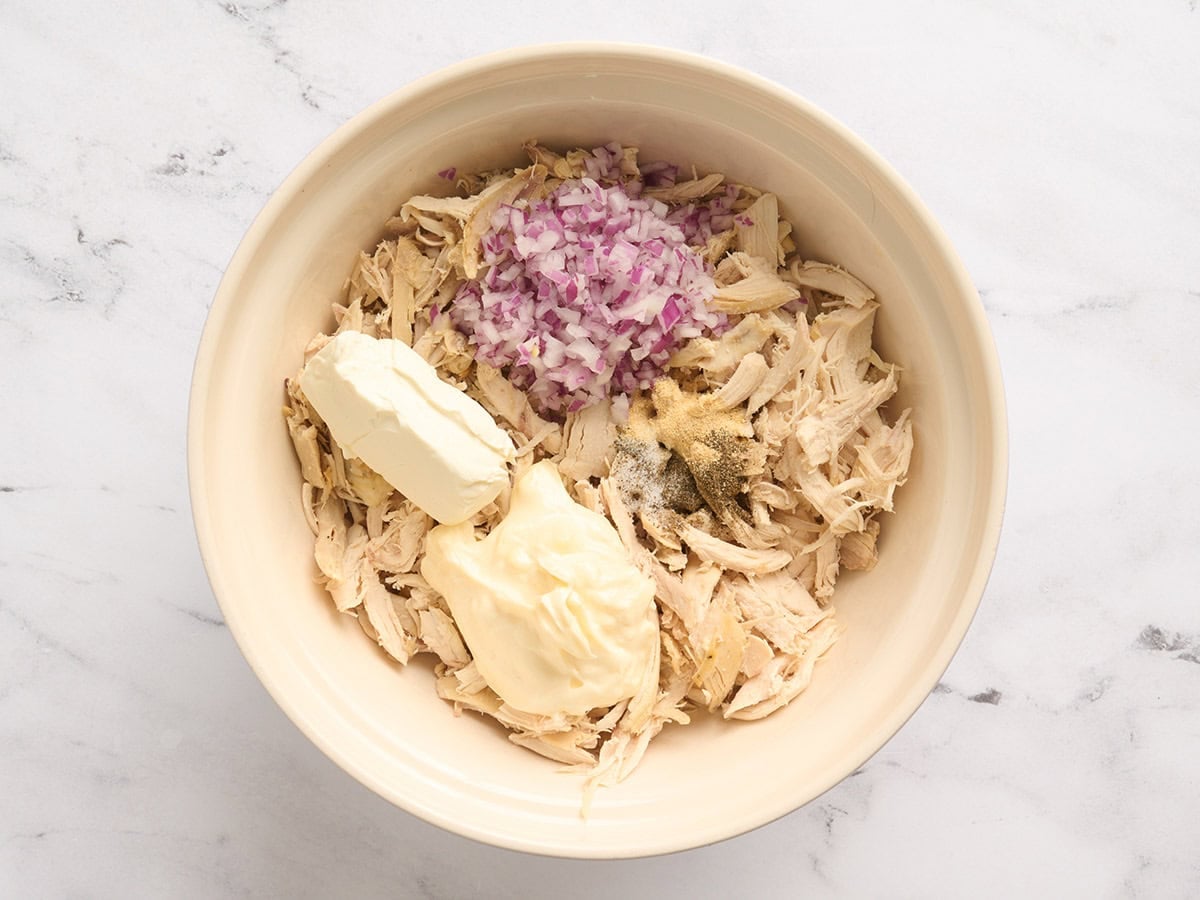
    Shredded chicken, diced red onion, mayo, cream cheese and seasonings in a mixing bowl.

    Make the chicken filling: Add 1 lb. rotisserie chicken (shredded) to a medium bowl with ¼ red onion, finely diced, ½ cup mayonnaise, 2 oz. softened cream cheese, ½ tsp salt, ¼ tsp pepper, and ½ tsp garlic powder. Stir until the chicken is evenly coated and the mixture looks creamy. The softened cream cheese should blend into the mayo without leaving big lumps.
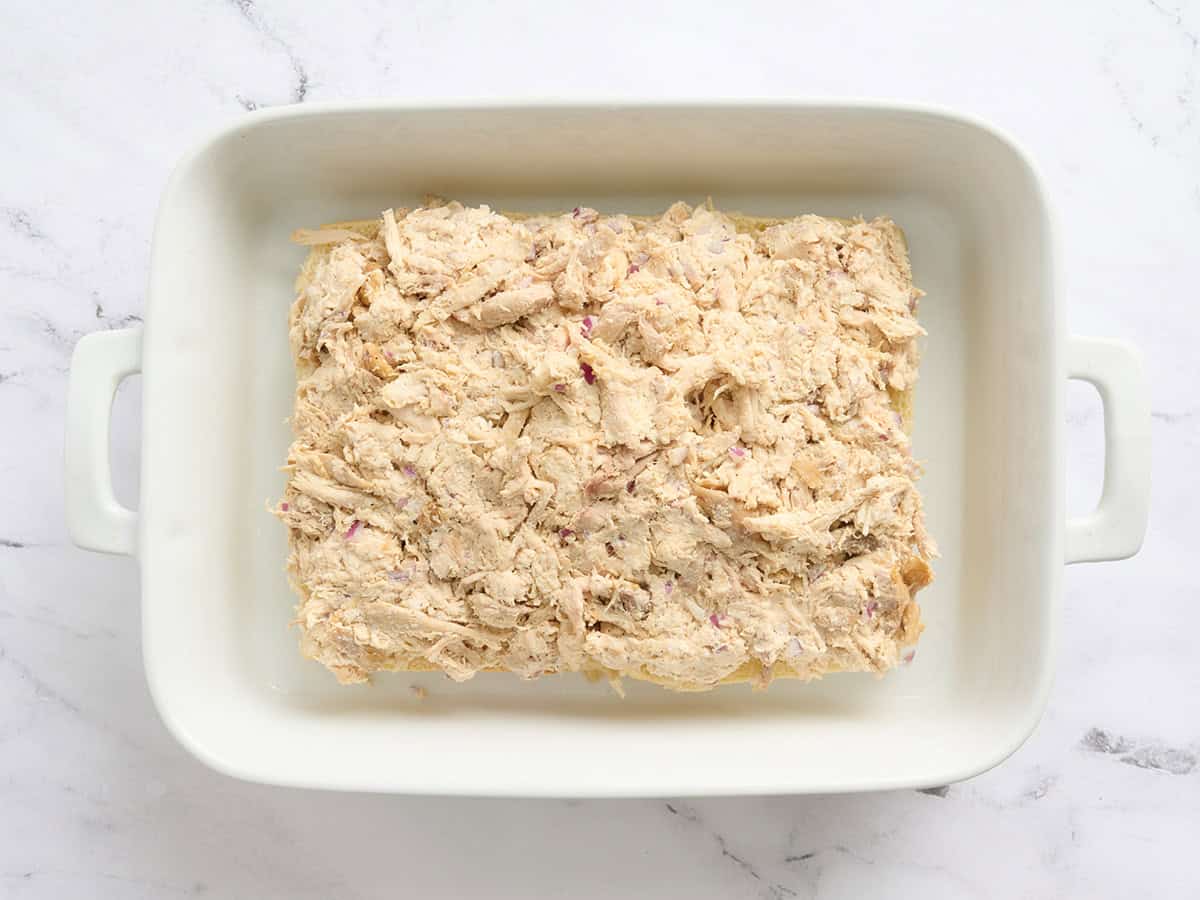
    Chicken filling placed on top of hawaiian sliders in a baking dish.

    Layer the chicken filling: Spread the chicken mixture evenly over the bottom half of the rolls, pushing it to the edges so every slider gets plenty of filling. Try to keep the layer even rather than mounded in the center so the tops sit flat and the sliders are easier to slice.
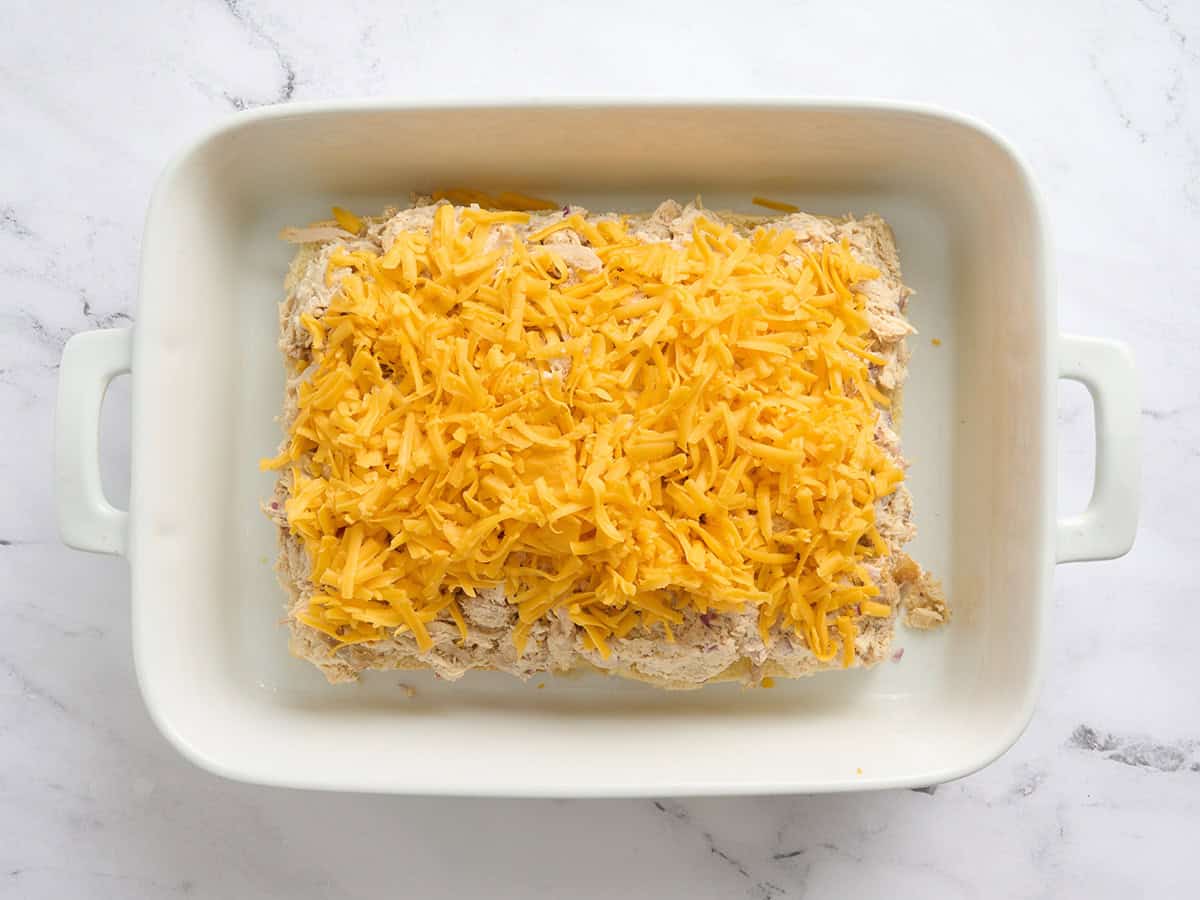
    Shredded cheddar added to chicken sliders in a baking dish.

    Make it cheesy: Sprinkle 1 cup shredded cheddar cheese evenly over the chicken mixture. The cheese should cover most of the surface. This helps the rolls and filling stick together once baked.
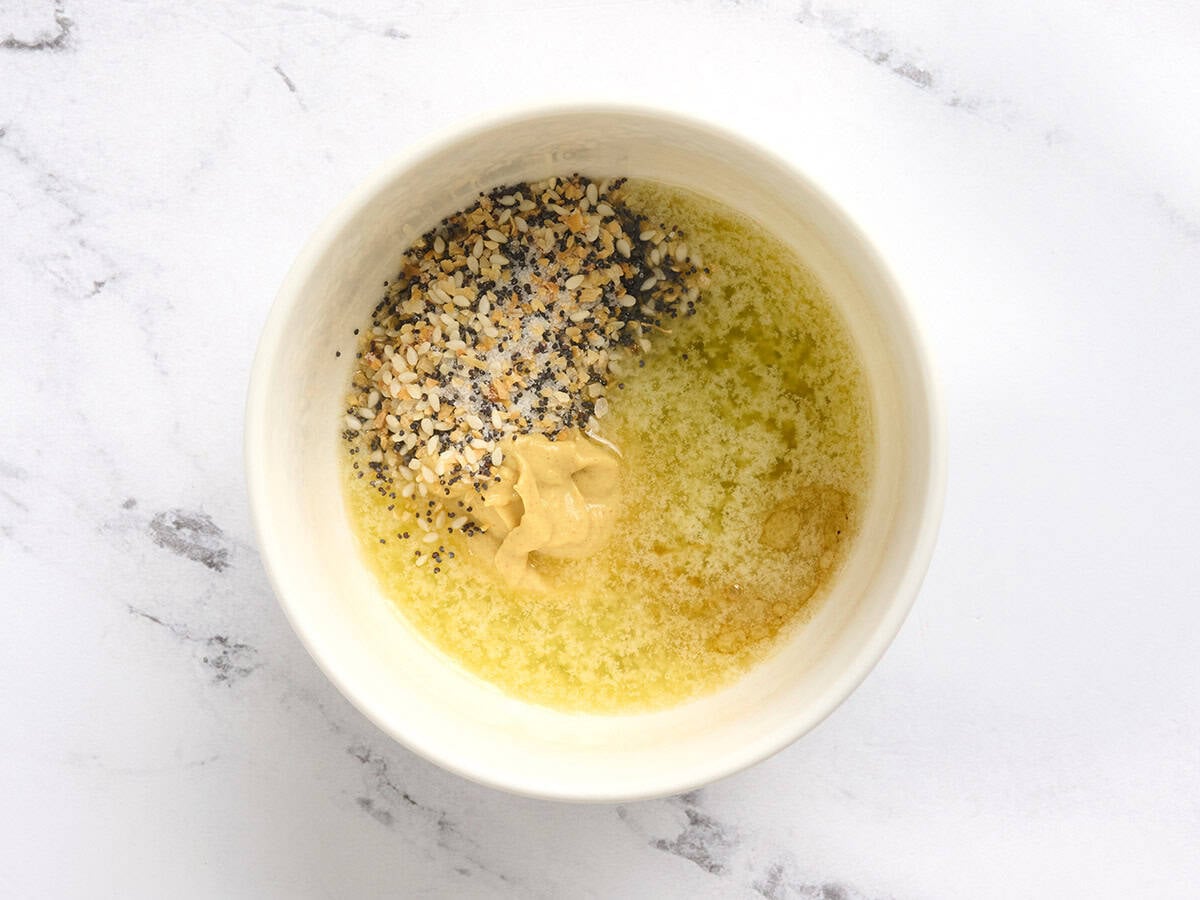
    Butter topping in a mixing bowl.

    Make the buttery topping: In a small bowl, stir together 2 Tbsp melted butter, 1 Tbsp Dijon mustard, 1 Tbsp Worcestershire sauce, and 1 Tbsp everything bagel seasoning until combined. The mixture will look glossy and speckled with seasoning.
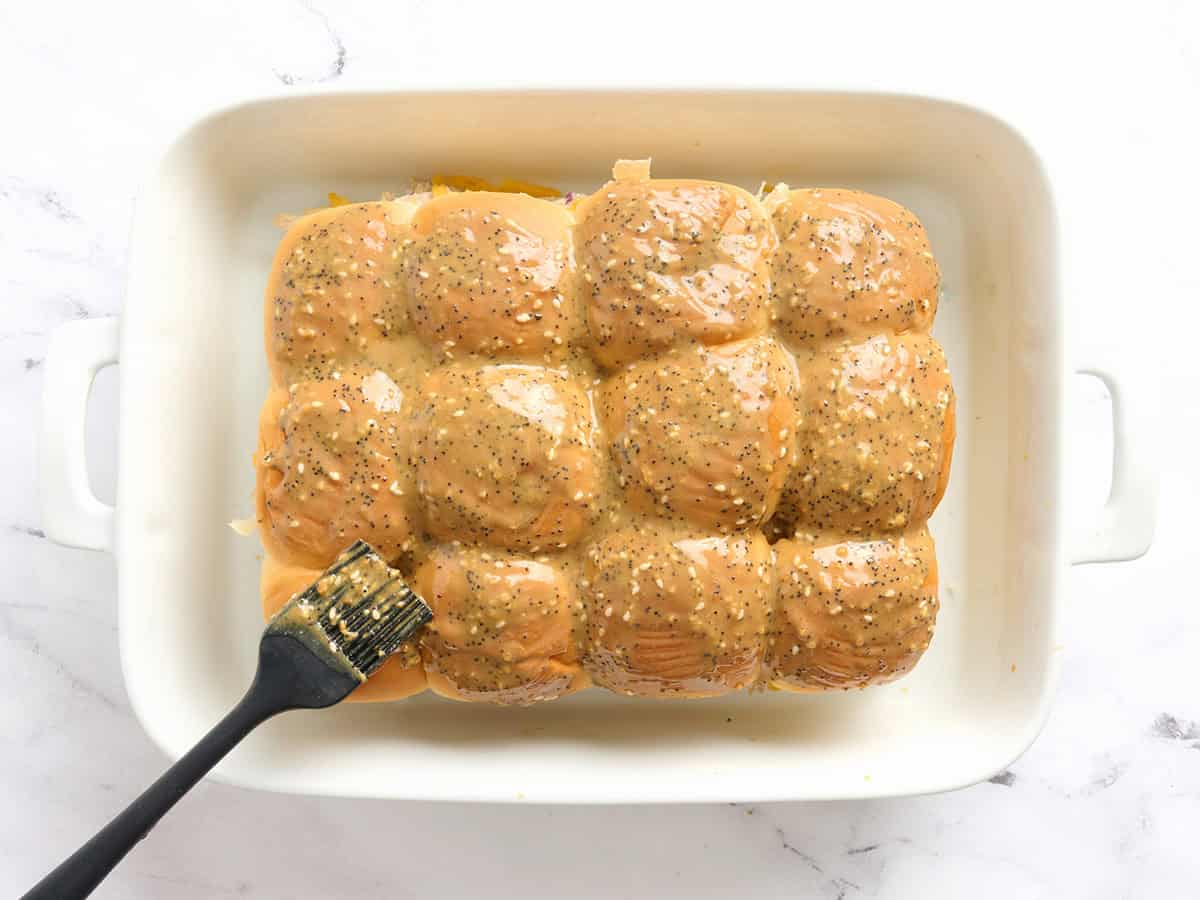
    A pastry brush brushing chicken sliders with a butter topping.

    Add the topping: Place the top half of the Hawaiian rolls over the chicken and cheese. Brush the butter mixture evenly over the tops of the rolls, letting some of the seasoning settle into the creases between each slider.
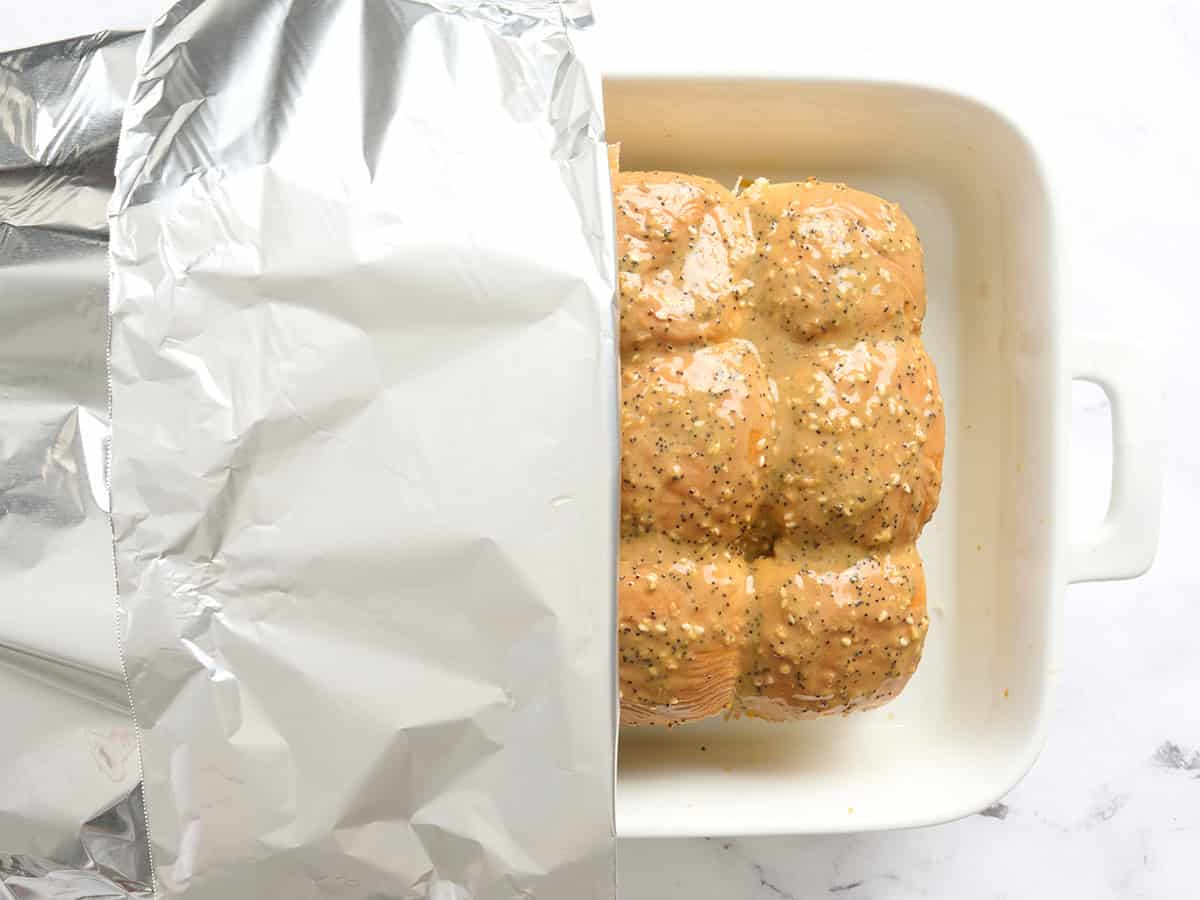
    A baking dish of chicken sliders being covered with foil.

    Cover the dish: Cover the baking dish with aluminum foil. This helps the cheese melt and the centers warm through without over-browning the tops too quickly.
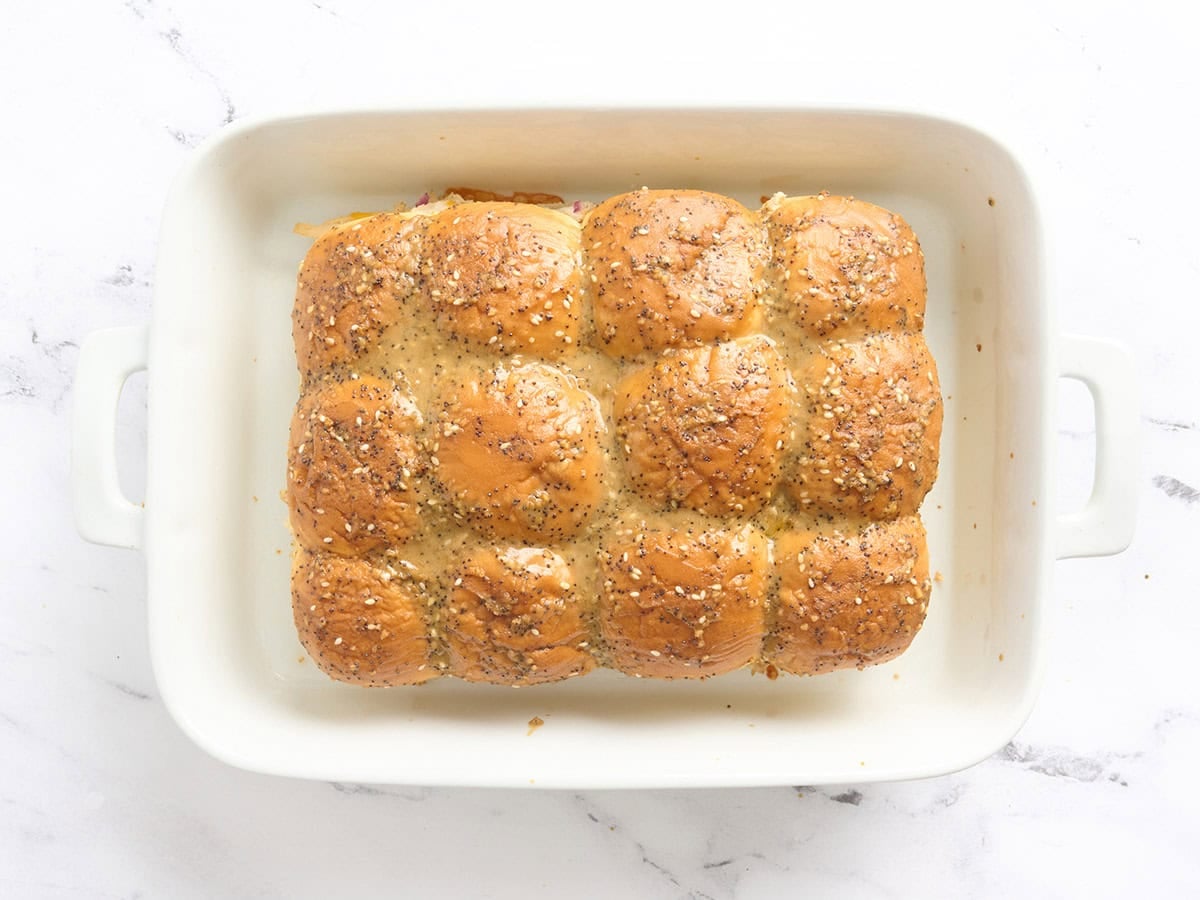
    Chicken sliders in a baking dish fresh out of the oven.

    Bake: Bake on the center rack for 20 minutes, or until the sliders are hot in the middle and the cheese is melted. Remove the foil and bake for another 10 minutes, until the tops are golden, glossy, and lightly crisp around the edges.

    Let them rest for a few minutes before slicing. This gives the creamy chicken filling a chance to settle slightly, so the sliders are easier to pull apart and serve. Enjoy!
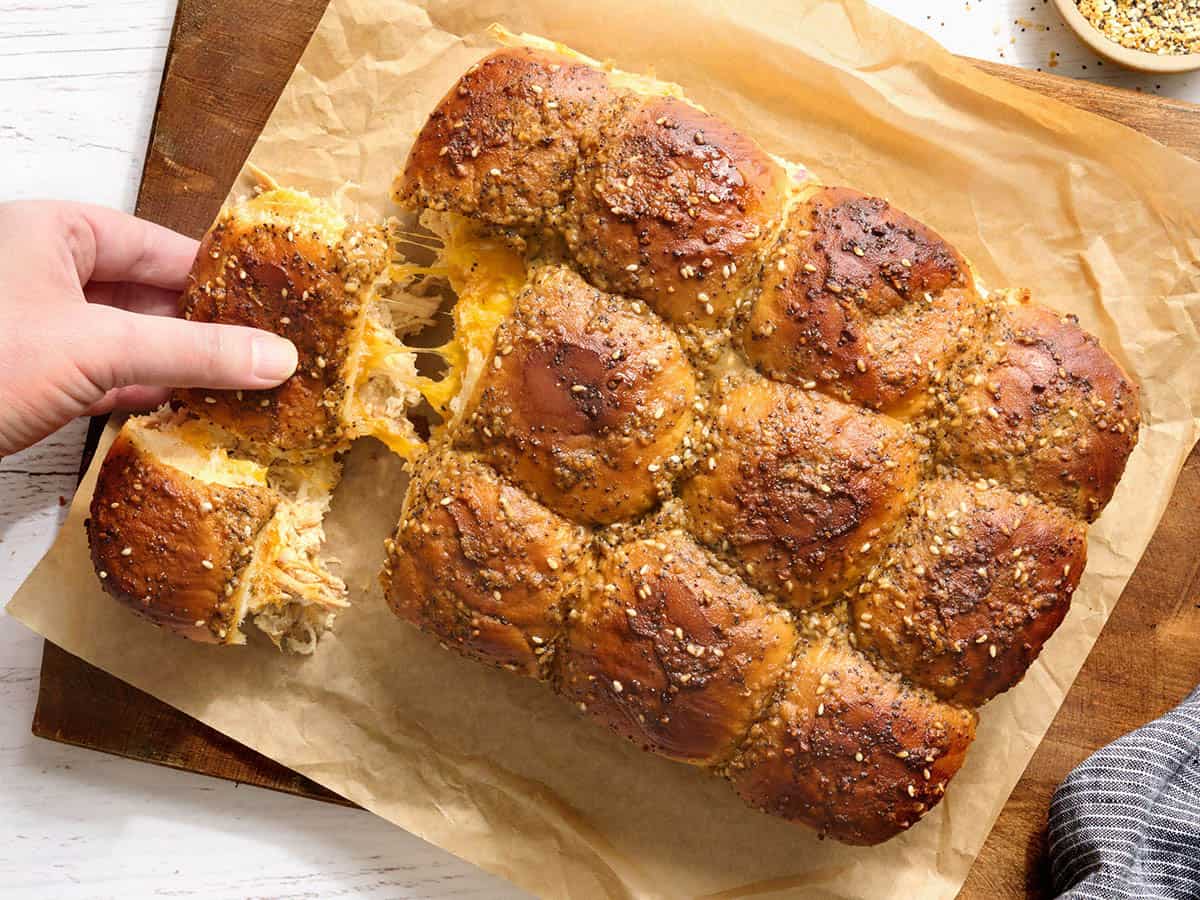
    Overhead view of chicken sliders with a hand taking one.

    Prep it Ahead!

    I think these shredded chicken sliders are best served fresh because the rolls start to soften the longer they sit with the creamy filling. If you want to get ahead, mix the chicken filling, shred the cheese, and stir together the butter topping. Store everything separately in the fridge for a day or two, then assemble and bake right before serving. Just remelt the butter topping before brushing it over the rolls.

    If you don’t need all 12 sandwiches, cut the recipe in half and bake 6 rolls in a smaller baking dish. Use half the filling ingredients and half the buttery topping. The bake time should stay close to the same, but check a few minutes early since smaller pans can heat a little faster.

    Serving Suggestions

    I count two chicken sliders as a serving when I’m pairing these with a few sides, especially if I’m making them for dinner or bringing them to a gathering. They’re best served fresh while the cheese is melty and the tops are still buttery. I like pairing them with a cold, make-ahead side to keep the rest of the meal easy!

    These sliders are great with a pasta salad for a classic potluck combo, or you can serve them with spinach orzo salad if you want something a little lighter, tangier, and more herby alongside the cheesy chicken. The lemony tahini dressing in our roasted cauliflower salad works especially well with the savory chicken sliders, and it can also be served warm or cold, depending on how you want to make the meal work. Chips, pickles, raw veggies, or a simple slaw would also be great if you’re keeping things extra low-effort.

    Got Leftover Chicken? Here’s How to Use it

    One rotisserie chicken can easily give you more than the 1 lb. of shredded chicken needed for these sandwiches, so don’t let the extra go to waste! Pull the meat from the bones, then refrigerate the extra in an airtight container for another meal.

    I’ll be using my extra rotisserie chicken to make our traditional chicken salad⁠ for an easy meal-prep lunch. If you don’t have the full amount of chicken called for in the recipe, just reduce the dressing and add-ins. These chicken kale Caesar wraps⁠ are another great option because a little chicken goes a long way once it’s wrapped up with kale, Caesar dressing, and a tortilla. Or tuck the leftovers into our spinach artichoke quesadillas⁠. You don’t need loads of chicken for those because the spinach, artichokes, and cheese already make them filling and delicious! See all our recipes for leftover chicken for even more ideas.

    Storage & rEHEATING

    While these chicken sliders are best the day they’re baked, I’d still enjoy any leftovers as a quick lunch or snack! Store them, once cooled, in an airtight container in the refrigerator for 3-4 days. Just know the rolls will soften the longer they sit.

    Reheating

    For the best texture, reheat leftovers in the oven at 350°F until warmed through. Cover them loosely with foil first so the tops don’t over-brown before the filling is hot, then uncover for the last few minutes. You can also microwave individual sliders in short bursts, but the rolls will turn out much softer.

    Freezing

    I don’t recommend freezing baked chicken sliders. The creamy chicken filling and soft Hawaiian rolls don’t thaw with the best texture, and the sliders can turn soggy once reheated. If you want to plan ahead, freeze plain shredded cooked chicken instead, then thaw it and mix the filling fresh before baking.

    Try These Slider Recipes Next!

    • These ground beef Sliders use simple pantry seasonings like Worcestershire, garlic powder, and paprika for classic burger flavor.
    • These Ham and Cheese Sliders only need 10 minutes of prep, which is exactly what I want for a party tray!
    • I’d make these BBQ Bean Sliders when I want smoky BBQ flavor without slow cooking a big piece of meat.
    • Turkey Sliders turn leftover turkey, cranberry sauce, Swiss cheese, and Hawaiian rolls into a cozy pull-apart meal.

    The post Chicken Sliders appeared first on Budget Bytes.
    This post was originally published on this site.

  • Zucchini Roll-Ups

    Zucchini Roll-Ups

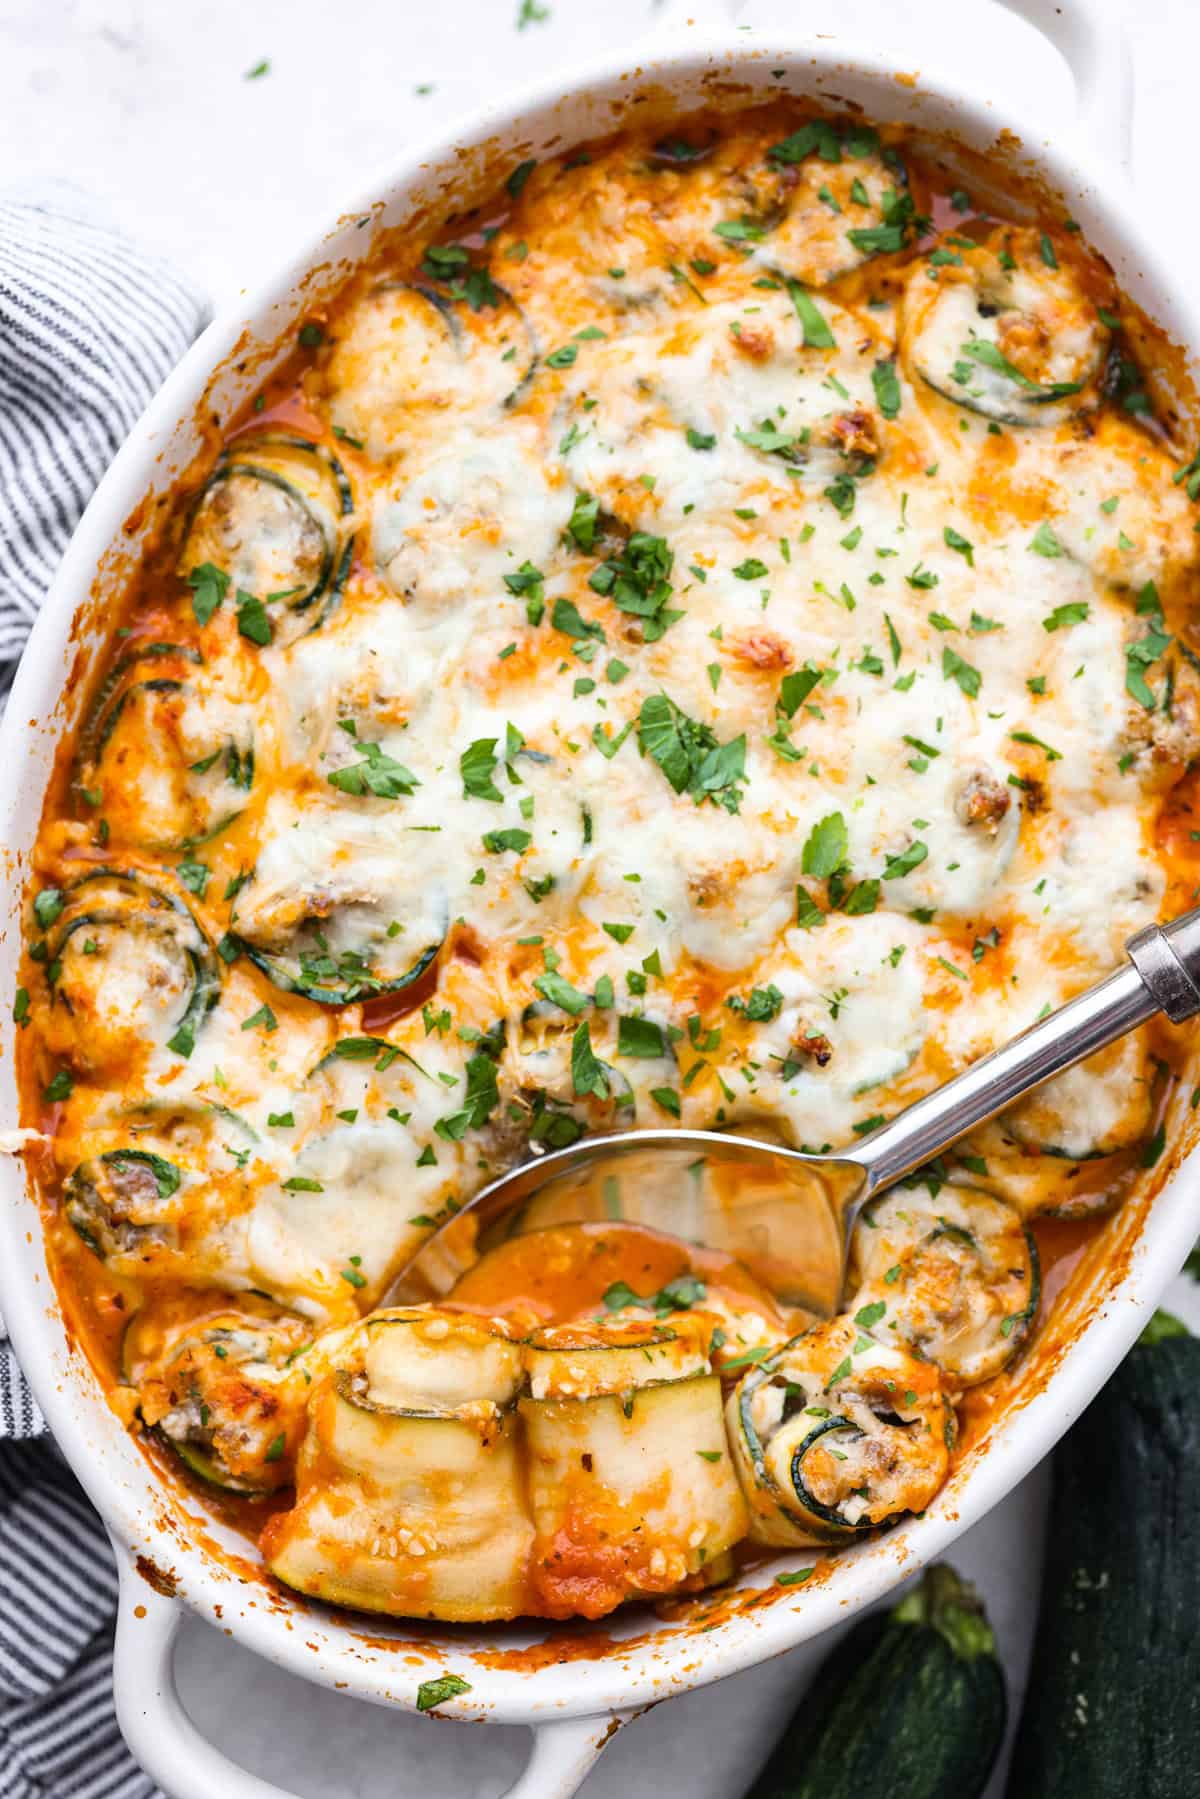
    These zucchini roll-ups have all the cozy lasagna flavor, but use tender zucchini instead of noodles. Thin zucchini slices are filled with sausage and ricotta, covered with sauce and cheese, then baked until hot and bubbly.

    Reasons You Will Love This Recipe

    • Light and Low Carb: These zucchini rolls are a lighter take on lasagna roll-ups, but they are still filling and so good.
    • So Delicious: Sausage, ricotta, sauce, and zucchini make each bite cheesy, saucy, and full of flavor.
    • Uses Up Zucchini: This recipe uses four whole zucchini, so it is great when your garden is full or you want more veggies.

    Zucchini Roll Ups Ingredients

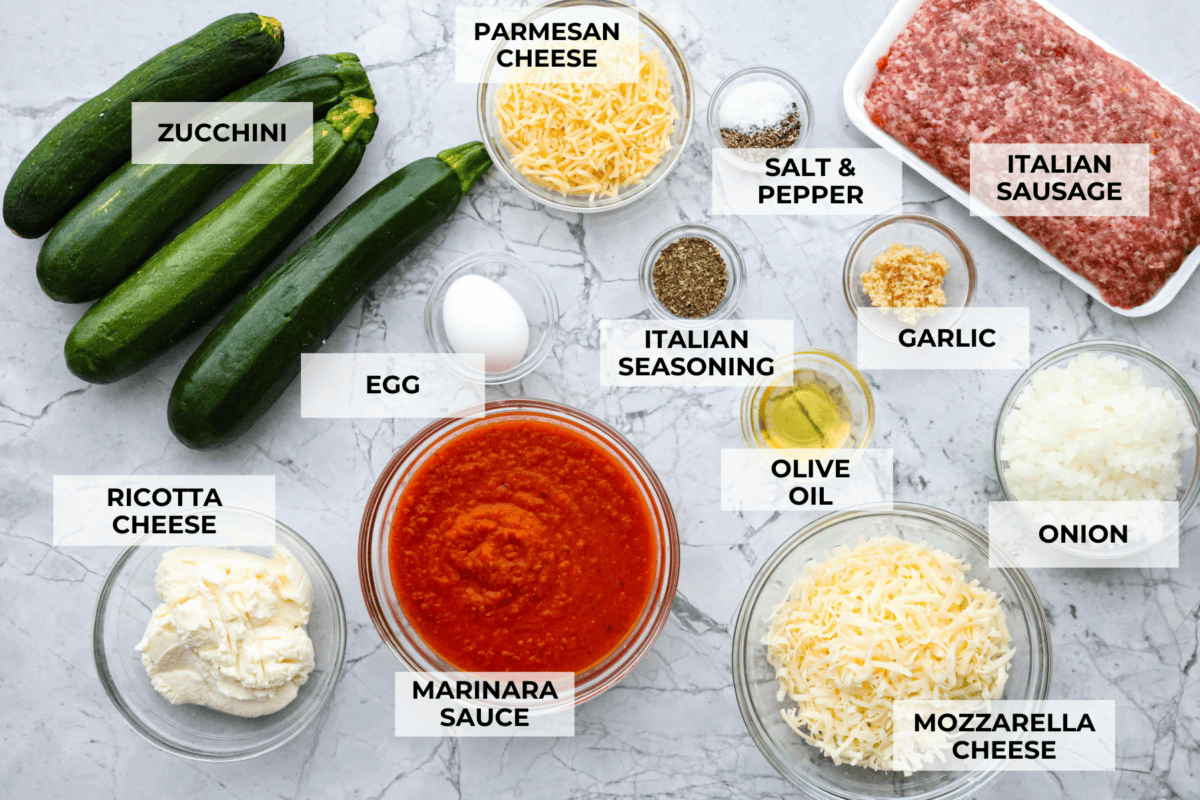
    Overhead shot of labeled ingredients.
    • Italian Sausage: I like Italian sausage because it adds a lot of flavor. Ground beef works too.
    • Marinara Sauce: Use store-bought sauce or try my homemade marinara sauce.
    • Try a Different Sauce: You can use pesto or Alfredo sauce instead of marinara.
    • Add Spice: Use hot Italian sausage if you want a little heat.
    • Mozzarella Cheese: Freshly grated cheese melts best and gives the best flavor.
    • Garnish Ideas: Top your dish with fresh basil or parsley.

    How to Make Zucchini Lasagna Roll-Ups

    There are a few steps, but they are simple. I will walk you through each one. The photos help a ton, too. While these bake, make some air fryer garlic bread for a complete meal!

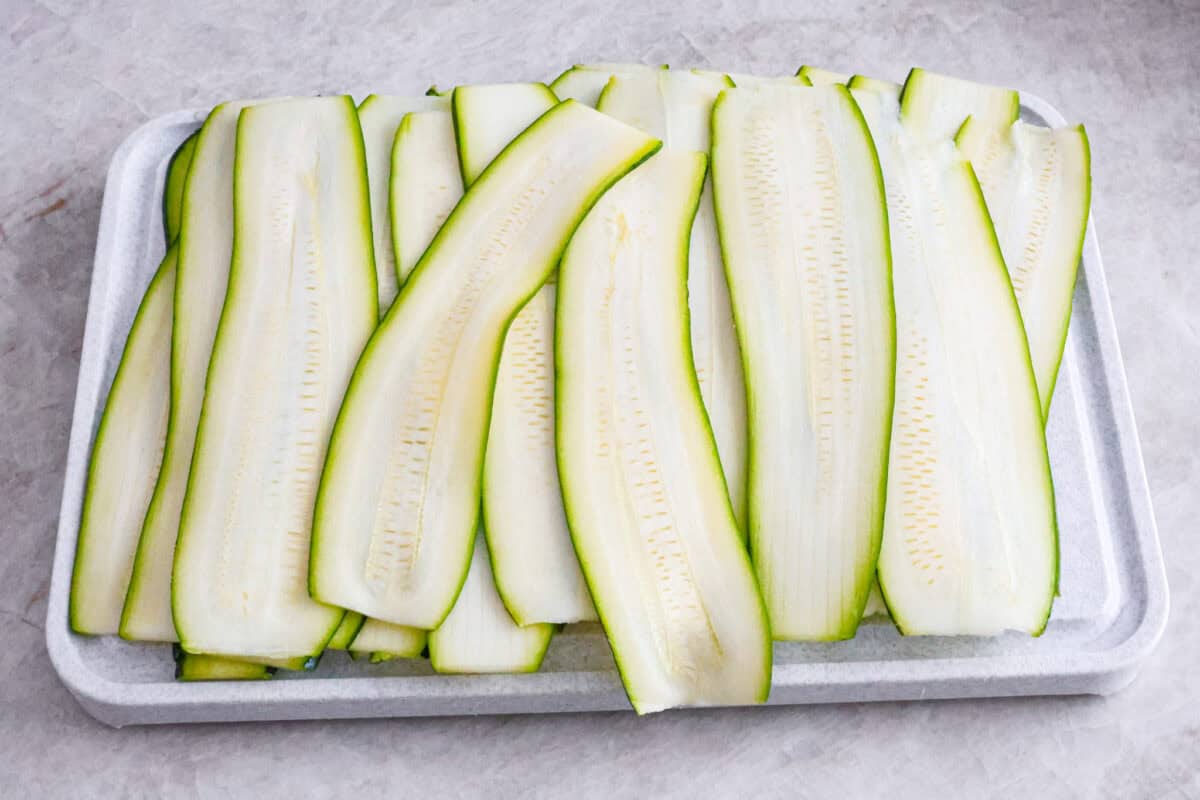
    1. Prep: Preheat the oven to 400°F and spray a 9×13 baking dish with cooking spray. Trim the zucchini and slice it into ⅛-inch ribbons. A mandoline makes this easy. Place the ribbons in a bowl of water while you make the filling.
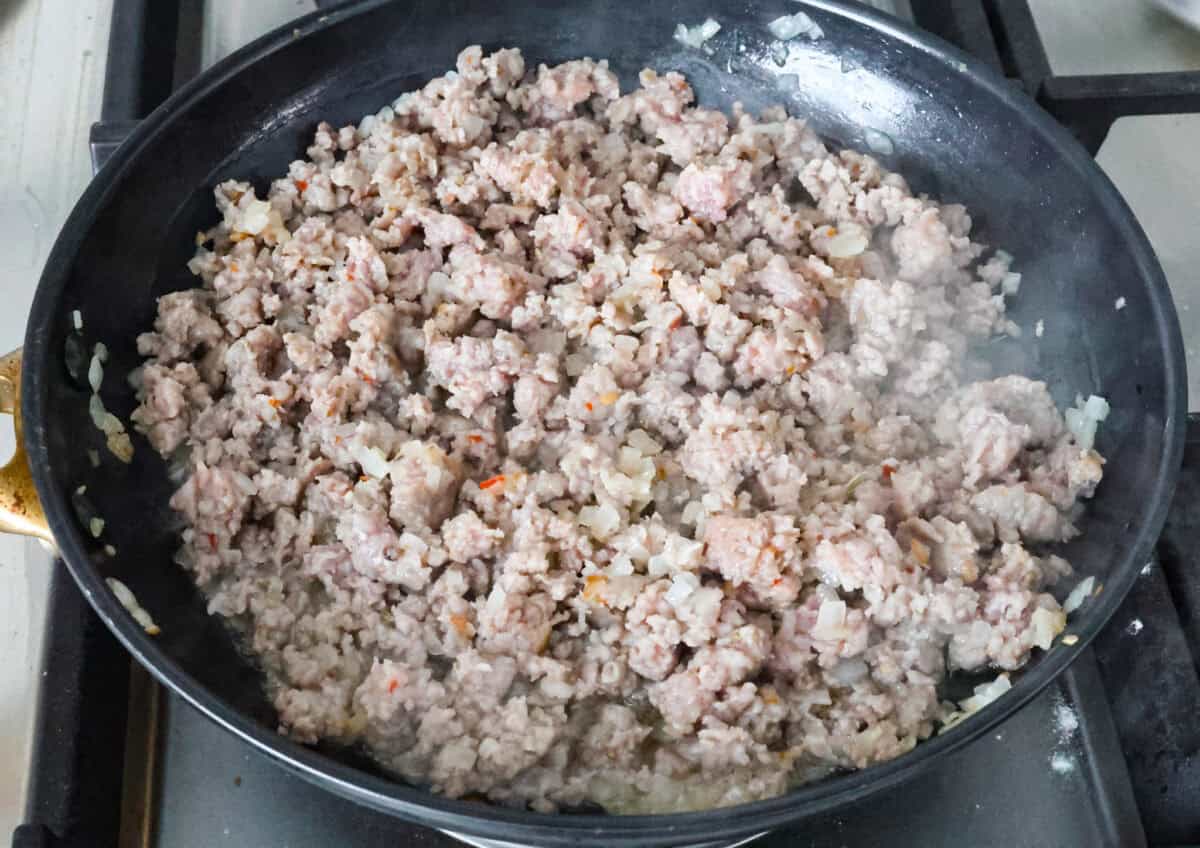
    2. Cook Sausage: Heat the olive oil in a skillet over medium-high heat. Cook the onion until soft. Add the sausage and cook until browned. Stir in the garlic and cook for 1 minute. Remove from heat.
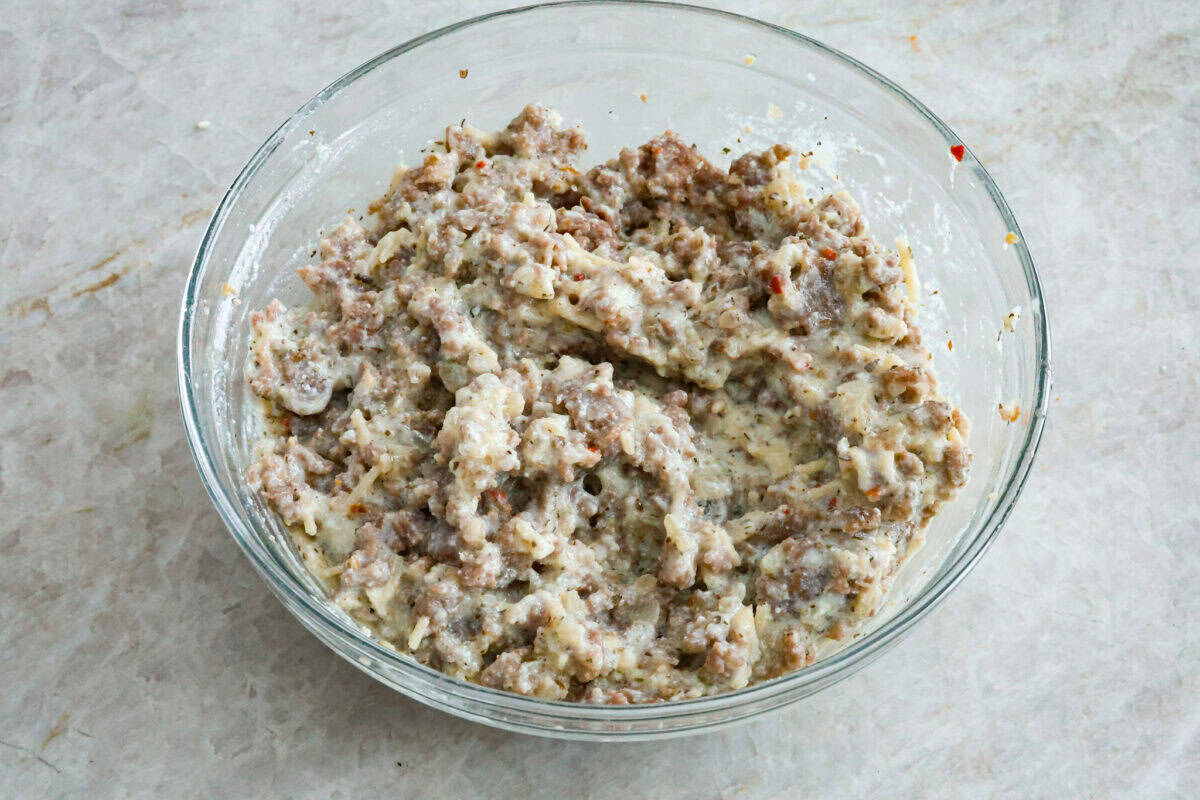
    3. Make Filling: In a large bowl, mix the ricotta, egg, ½ cup Parmesan, Italian seasoning, salt, and pepper. Let the sausage cool a bit, then stir it into the ricotta mix. In another bowl, mix the rest of the Parmesan with the mozzarella.
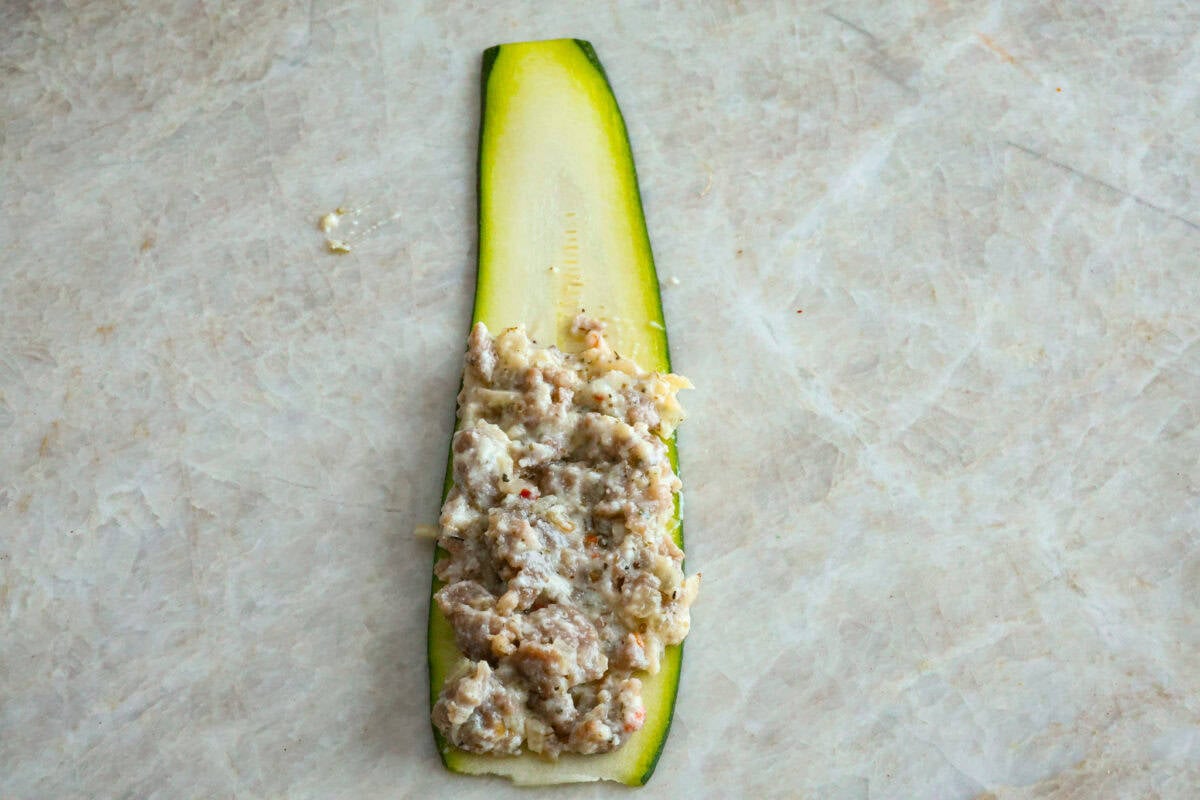
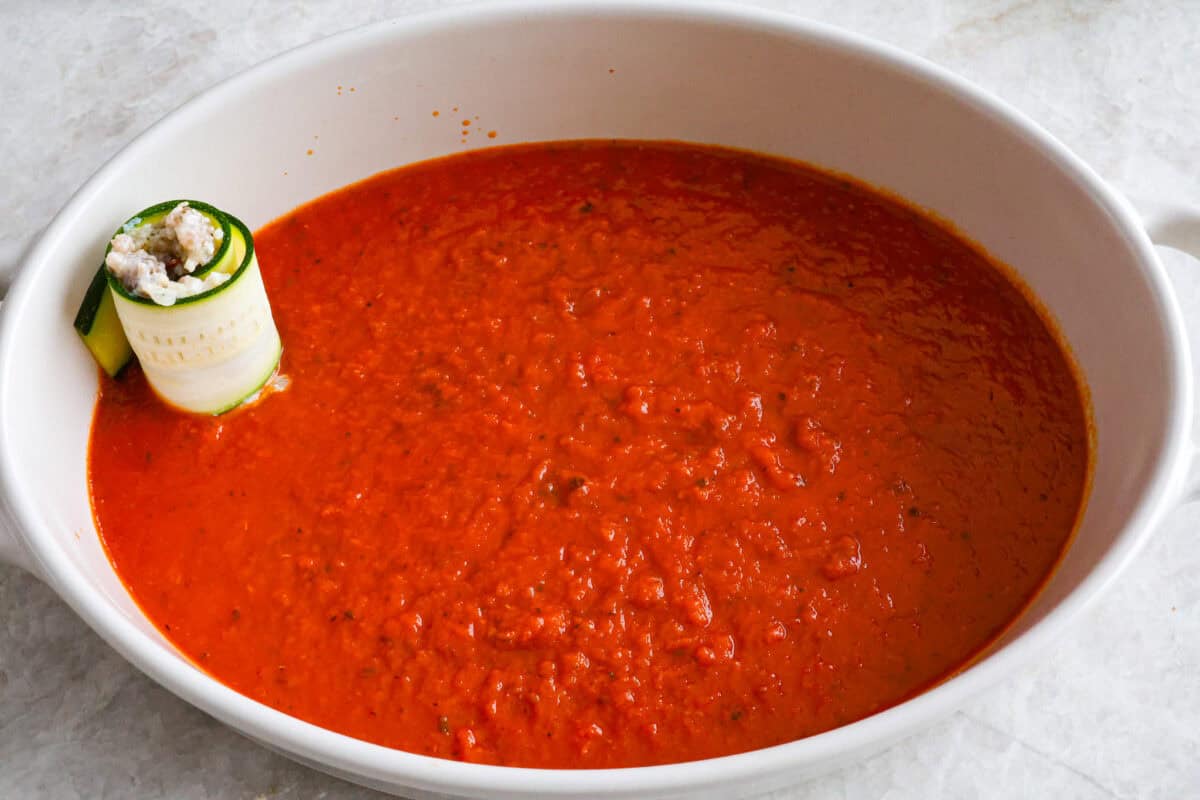
    4. Fill Zucchini: Pour the marinara into the baking dish. Pat the zucchini dry with paper towels. Spread about 1 tablespoon of filling halfway up each ribbon.
    5. Roll: Roll each zucchini ribbon from the filled side to the empty side. Place it seam-side down in the sauce. Repeat with the rest of the zucchini and filling.
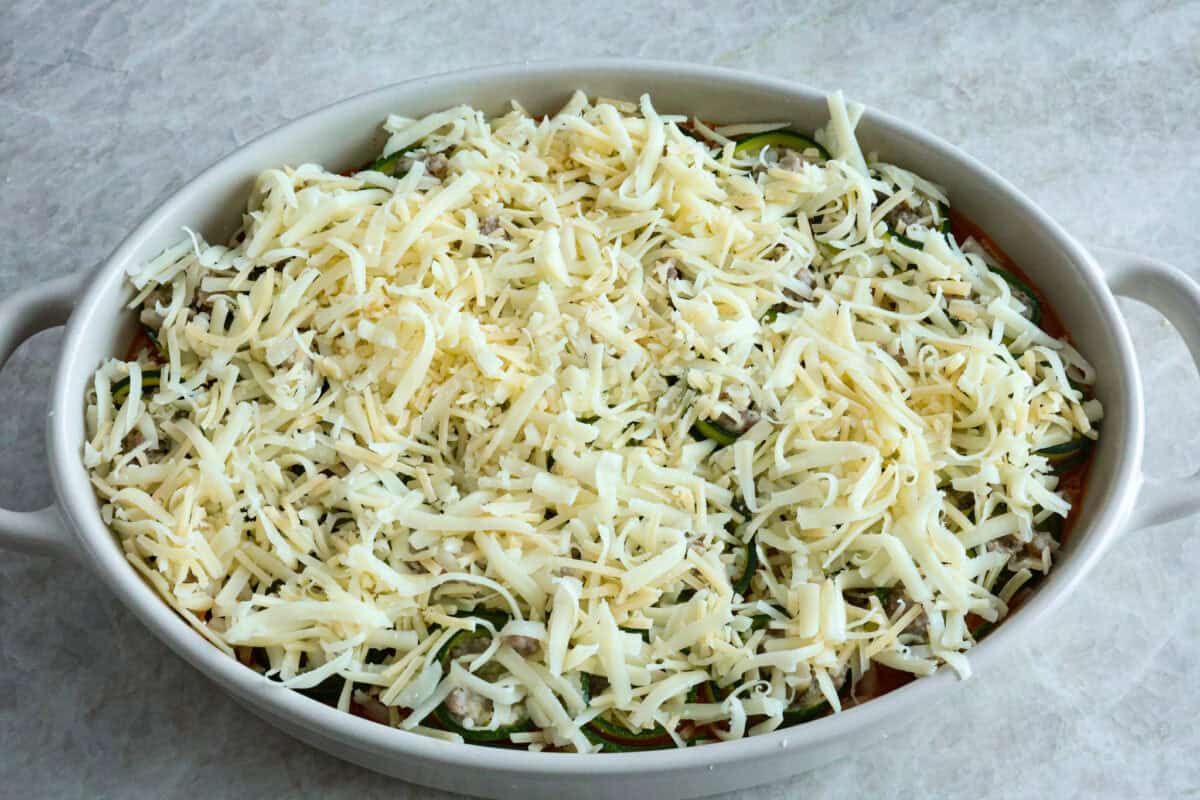
    6. Bake: Sprinkle the top with the cheese mix. Cover with foil and bake for 20 minutes. Uncover and bake 5 more minutes, or until the cheese is browned. Let the zucchini roll-ups cool for 5 minutes before serving.

    Alyssa’s Pro Tip

    Zucchini Slices: Slice the zucchini into very thin slices, about ⅛ inch thick. A mandoline slicer makes this fast and easy.

    Must Have Tools For This Recipe

    • Skillet: Cooks the sausage, onion, and garlic.
    • Mandoline Slicer: Makes thin, even zucchini ribbons.
    • Mixing Bowls: Help combine the ricotta filling and cheese topping separately.
    • Baking Dish: Holds the marinara and zucchini roll-ups while they bake until bubbly.

    Print

    Zucchini Roll-Ups

    These zucchini roll ups are filled with a savory sausage ricotta mixture, baked in marinara, and topped with melty cheese for a lighter, cozy dinner everyone will love.
    Course Dinner
    Keyword low carb, zucchini roll ups
    Prep Time 30 minutes
    Cook Time 25 minutes
    Total Time 55 minutes
    Servings 6 people
    Calories 534kcal
    Author Alyssa Rivers

    Ingredients

    • 4 large zucchini
    • 1 tablespoon olive oil
    • ½ yellow onion, minced
    • 1 pound Italian sausage
    • 1 clove garlic, minced
    • 1 cup ricotta cheese
    • 1 large egg
    • 1 cup parmesan cheese, divided
    • 1 tablespoon Italian Seasoning
    • salt and pepper to taste
    • 2 cups marinara Sauce
    • 1 cup mozzarella cheese, shredded

    Instructions

    • Preheat the oven to 400 degrees Fahrenheit and spray a 9×13-inch baking dish with cooking spray.
    • Clean 4 large zucchini, cut the ends off, and slice them lengthwise into ⅛ inch thick ribbons. Using a mandoline is easiest if you have one. Place the ribbons in a bowl of water while you prepare the rest of the ingredients.
    • Heat 1 tablespoon olive oil in a skillet over medium-high heat. Saute ½ yellow onion, minced, until it’s translucent. Add 1 pound Italian sausage to the skillet and cook until browned. Add 1 clove garlic, minced, and saute for another minute. Remove from heat.
    • Whisk 1 cup ricotta cheese, 1 large egg, ½ cup of the 1 cup parmesan cheese, and 1 tablespoon Italian Seasoning in a large bowl. Add salt and pepper to taste.
    • Once the sausage mix has cooled, add it to the ricotta mixture and mix well to combine. In a separate bowl, mix together the remaining Parmesan cheese and 1 cup mozzarella cheese,.
    • Pour 2 cups marinara Sauce into the 9×13-inch baking dish. Dry the zucchini and lay one out in front of you. Spread about a tablespoon of the sausage ricotta filling halfway up the zucchini ribbon.
    • Roll the ribbon from the filled side to the empty side and place it in the sauce. Continue with the remaining zucchini and filling.
    • Once the pan is filled, top all the zucchini rolls with the mozzarella cheese mixture. Cover with foil and bake for 20 minutes. Uncover and bake for another 5 minutes or until the cheese browns on top.
    • Remove from the oven, let it cool at room temperature for at least 5 minutes, and serve!

    Notes

    Leftover Instructions

    • Refrigerator: Store leftovers in an airtight container in the fridge for up to 3 days. 
    • Do Not Freeze: I don’t recommend freezing this dish; the zucchini will become mushy after freezing and reheating.

    Nutrition

    Calories: 534kcal | Carbohydrates: 13g | Protein: 29g | Fat: 41g | Saturated Fat: 18g | Polyunsaturated Fat: 4g | Monounsaturated Fat: 17g | Trans Fat: 0.003g | Cholesterol: 132mg | Sodium: 1.38mg | Potassium: 884mg | Fiber: 3g | Sugar: 7g | Vitamin A: 1.109IU | Vitamin C: 31mg | Calcium: 444mg | Iron: 3mg
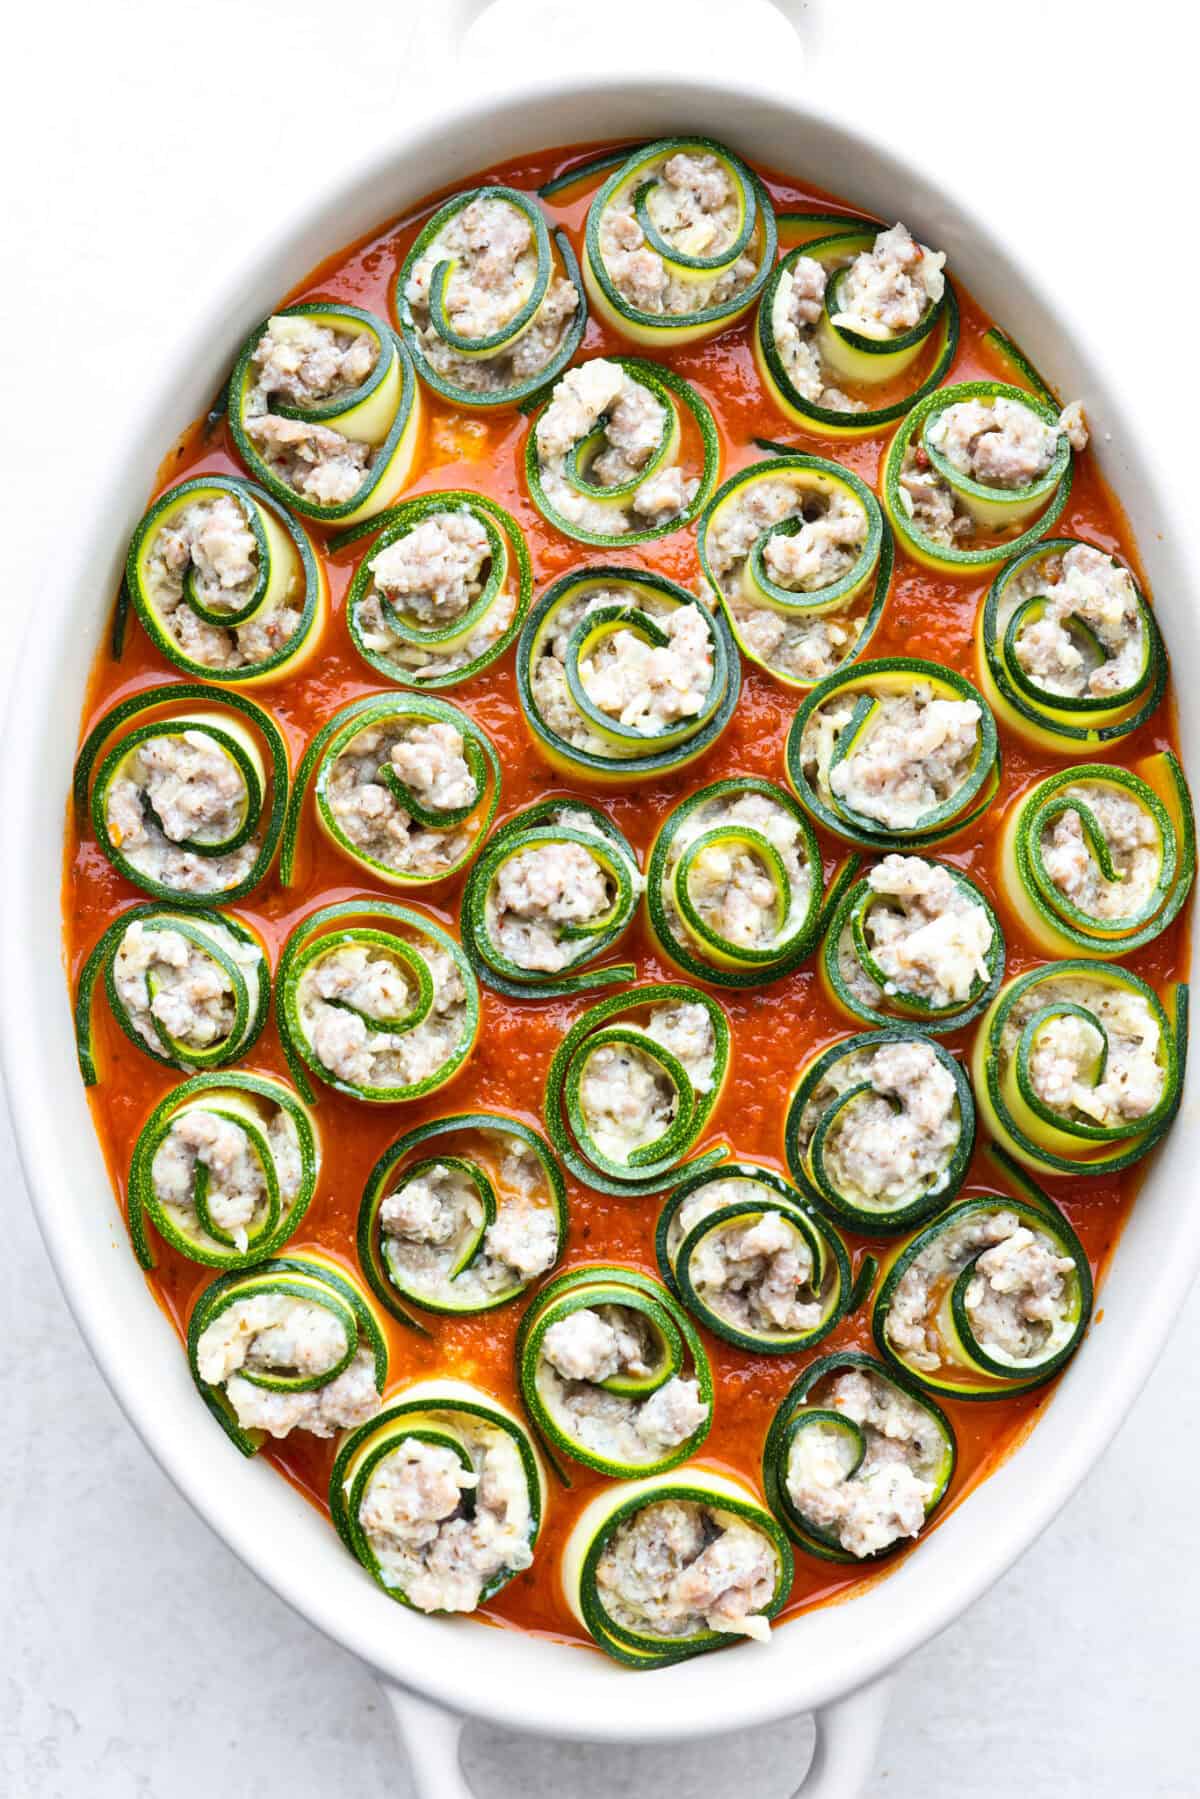
    Overhead shot of zucchini rolls in marinara sauce in pan.

    More Delicious Zucchini Recipes

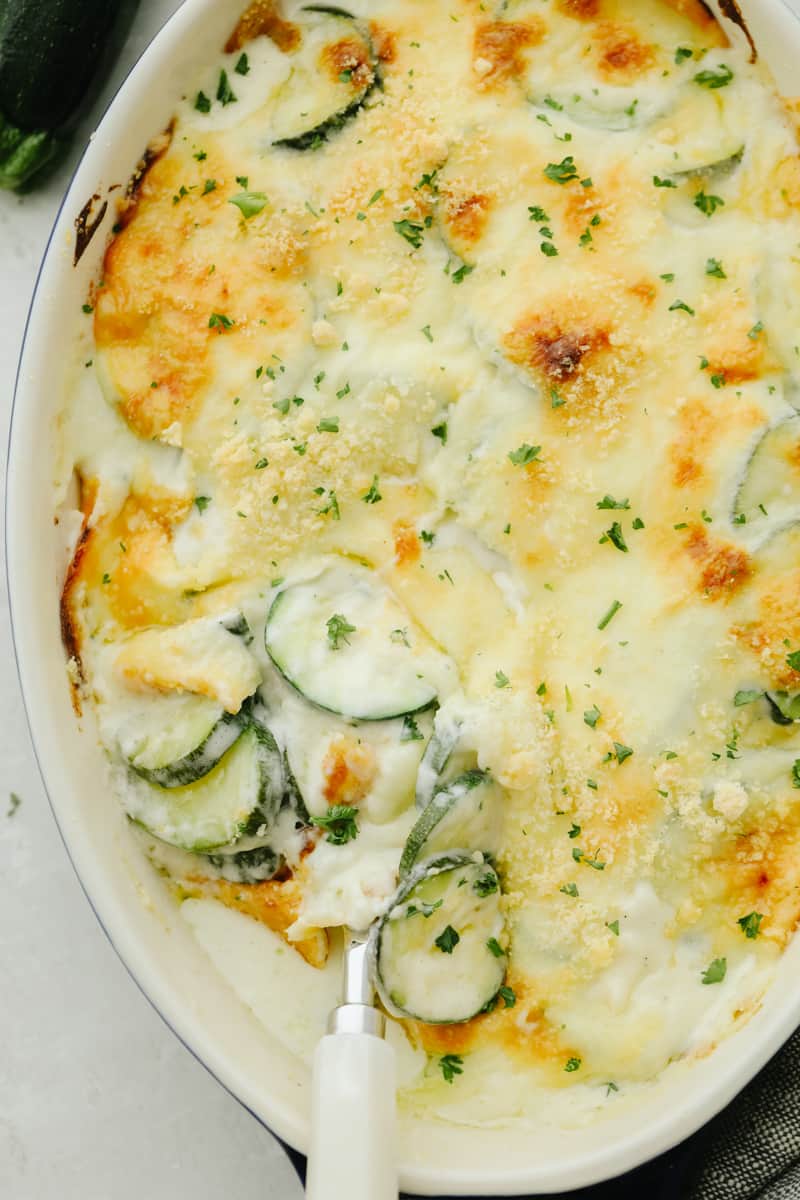
    I love how versatile zucchini is! Not only is it a great side dish, like this cheesy zucchini gratin, but it’s also great for baking into desserts and bread. Try these other favorite recipes next, and be sure to check out all of our zucchini recipes!

    This post was originally published on this site.

  • Grilled Shrimp Salad

    Grilled Shrimp Salad

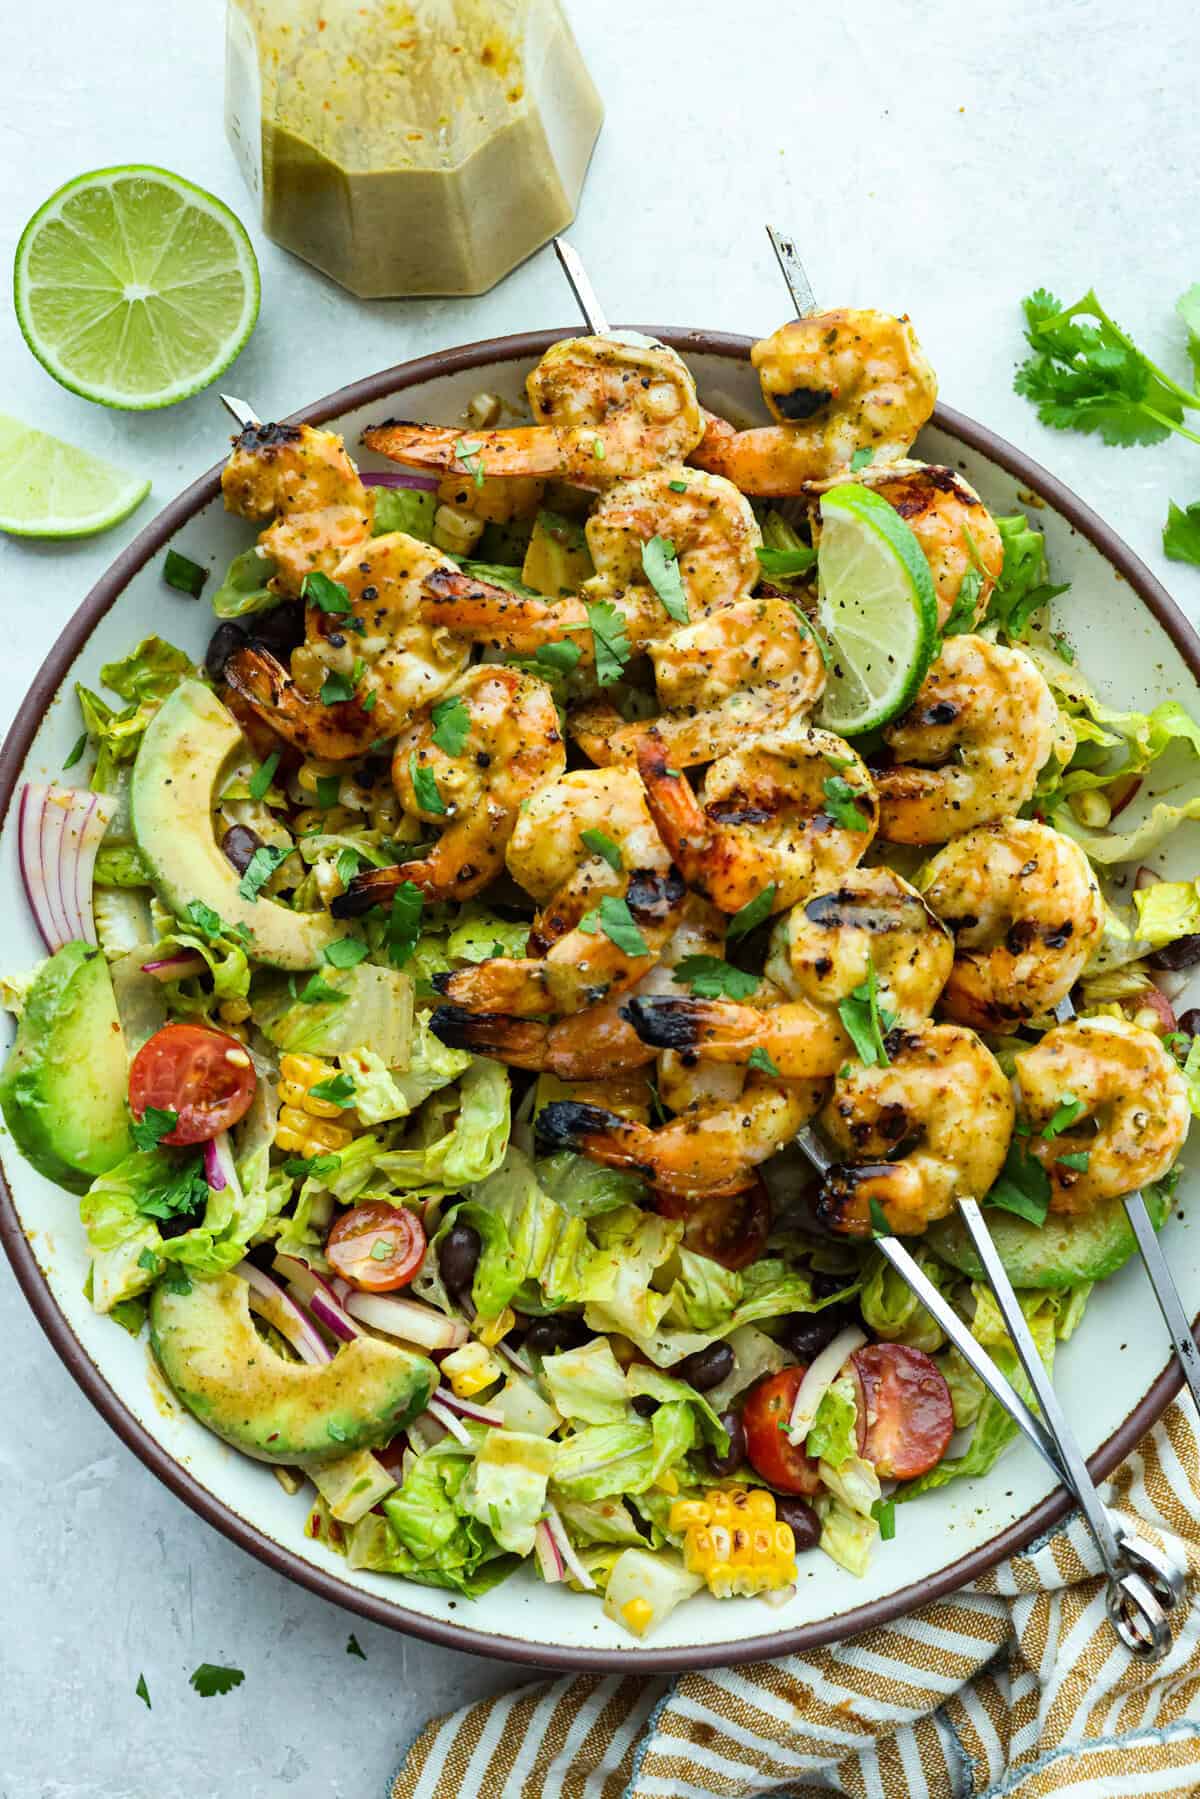
    I love salads in the summer, and this grilled shrimp salad is such a good one. It’s fresh, colorful, and filling without feeling heavy. And the dressing? Oh my gosh. The chipotle-lime flavor is so good, you’ll want to pour it on everything.

    Why This Salad is ‘Shrimply’ the Best

    • Big grilled flavor: The shrimp cook quickly on the grill, giving them that smoky, charred flavor while keeping them juicy and tender.
    • That Dressing! The chipotle-lime dressing works as both the shrimp marinade and the salad dressing, so every bite has bold, fresh flavor.
    • It’s hearty enough for dinner: With shrimp, black beans, avocado, grilled corn, and crisp romaine, this salad is light and fresh but still filling.

    A Reader’s Review

    The dressing is awesome and can be used on many other dishes! Great flavor and made for a very satisfy dinner!!

    Jeff

    Ingredients For Grilled Shrimp Salad

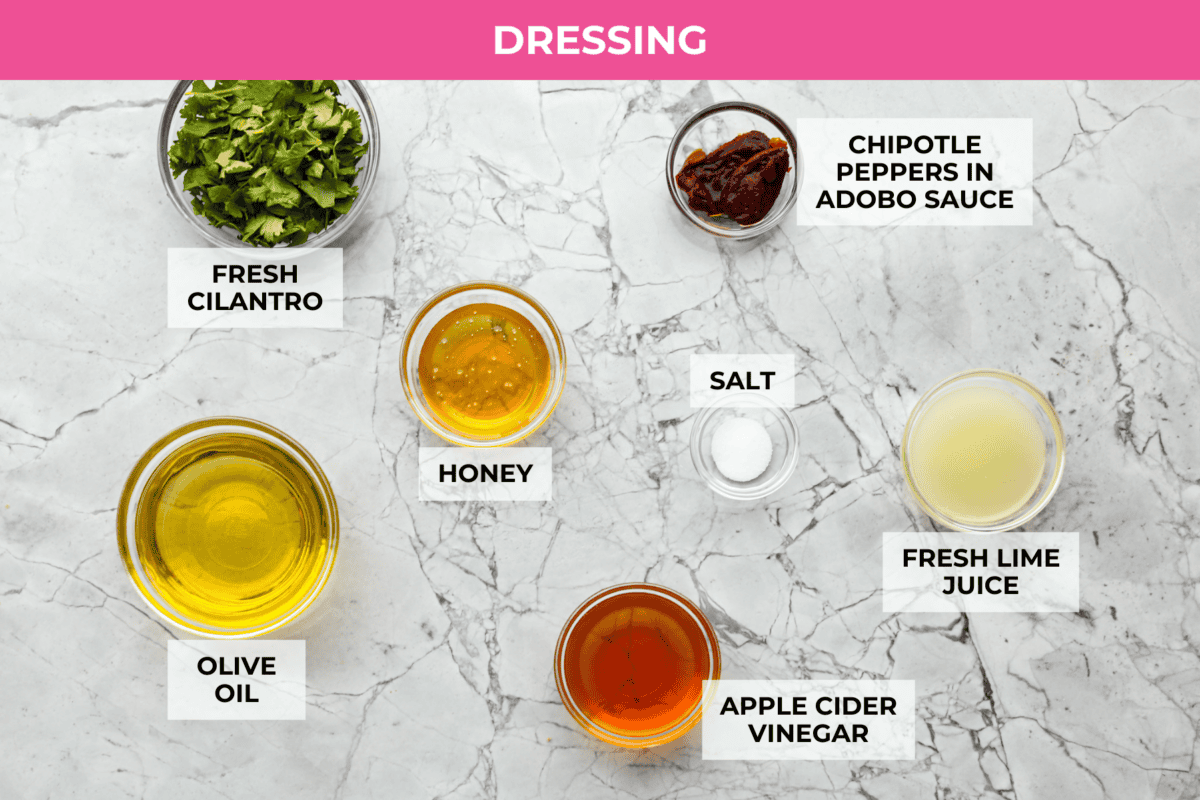
    Overhead shot of labeled dressing ingredients.
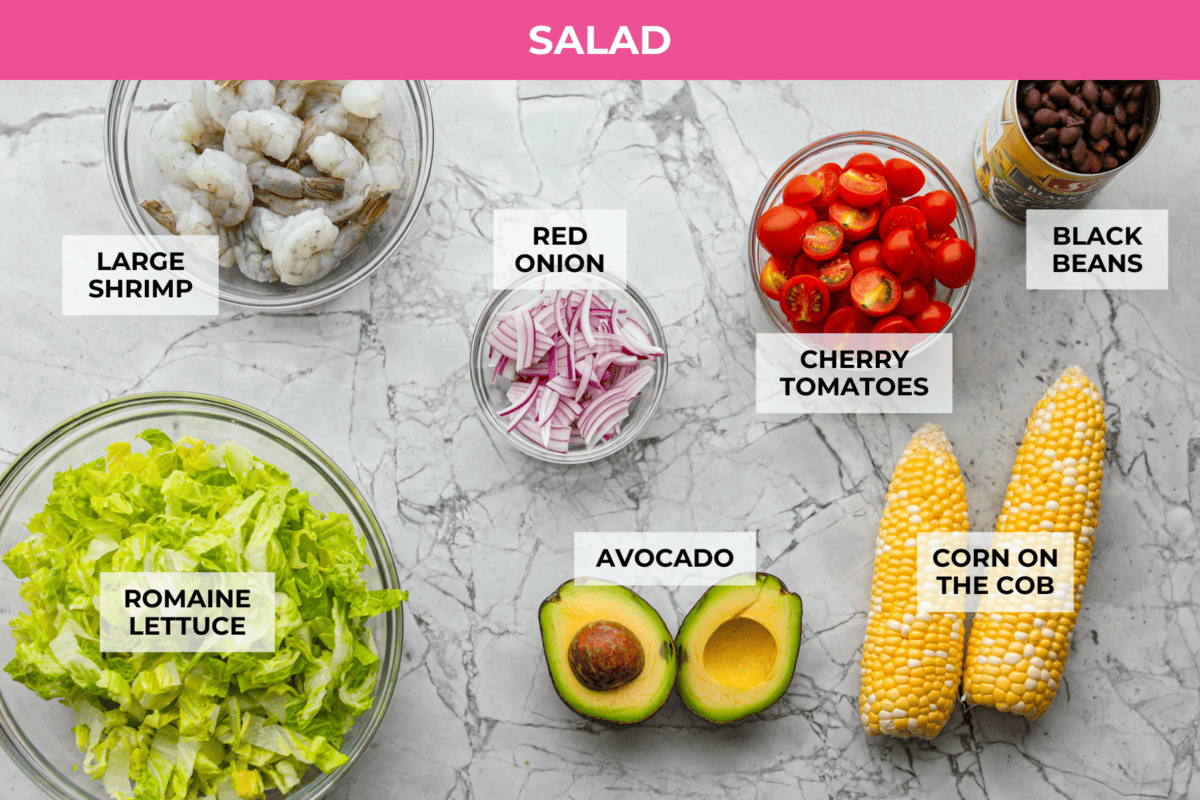
    Overhead shot of labeled grilled shrimp salad ingredients.
    • Corn Tip: Use canned corn to make this salad faster and easier.
    • Shrimp Size: Any size shrimp works. Smaller shrimp cook faster, and larger shrimp may need 1–2 extra minutes.
    • Don’t Overcook: Shrimp is done when it turns opaque and feels firm with a little spring.
    • Frozen Shrimp: Thaw frozen shrimp before cooking. Let it sit overnight in the fridge or run the sealed bag under cold water.

    How to Make Grilled Shrimp Salad

    Eating salad in the summer is my go-to, and this grilled shrimp salad is always on repeat! It has so much flavor, and I just love shrimp. Make it on its own for lunch, or add garlic bread, watermelon salad, and Brazilian lemonade for a complete dinner.

    Dressing

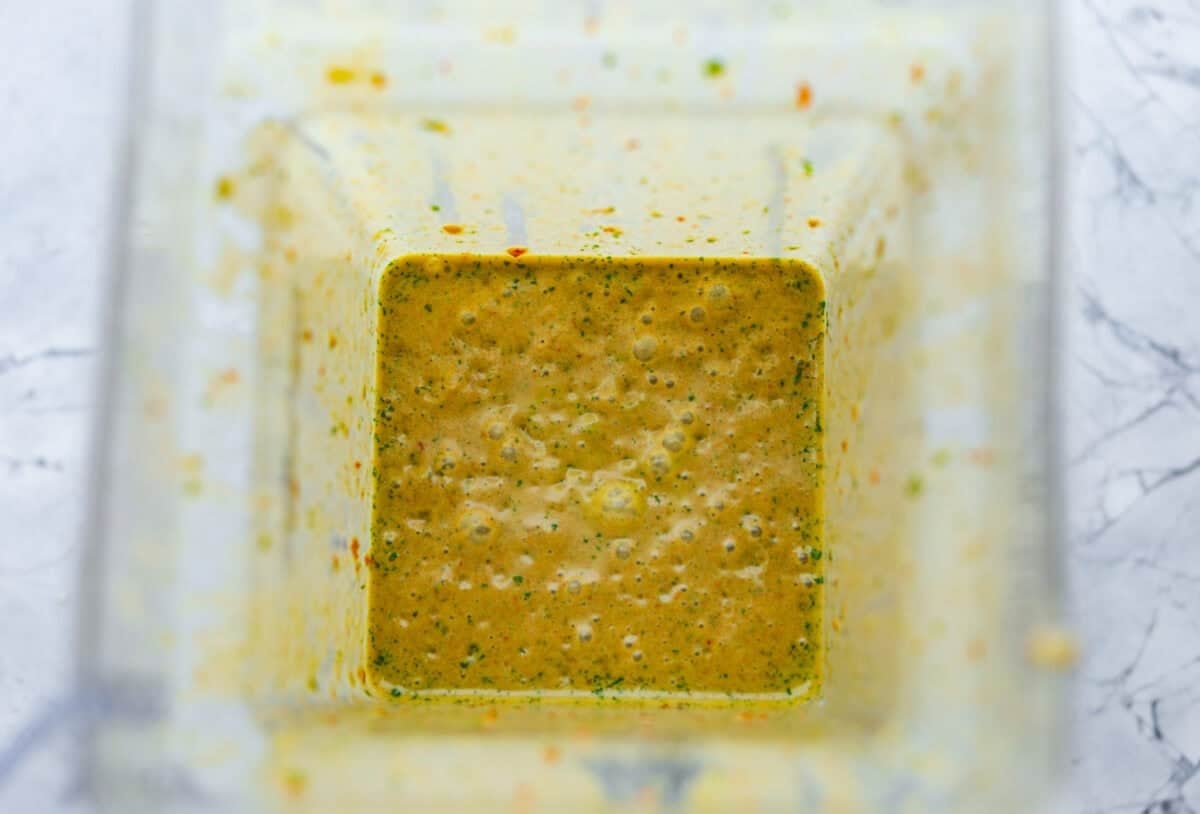
    1. Chipotle Lime Dressing: Add olive oil, cilantro, apple cider vinegar, lime juice, honey, chipotle peppers in adobo sauce, and salt to a blender and blend until smooth and combined. Taste and adjust the salt as needed.
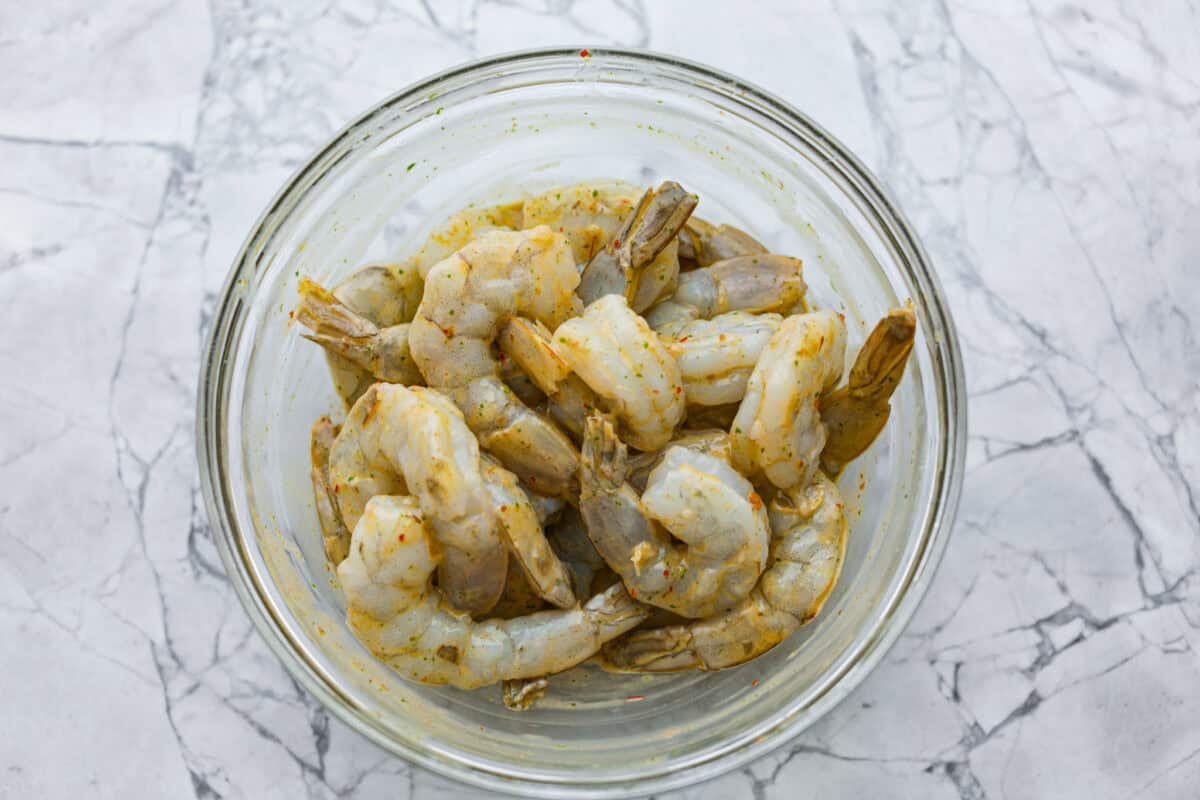
    2. Marinate: Add ¼ cup of the dressing to a bowl with the peeled shrimp to marinate for 15 minutes. Set the remaining dressing aside.

    Grilled Shrimp Salad

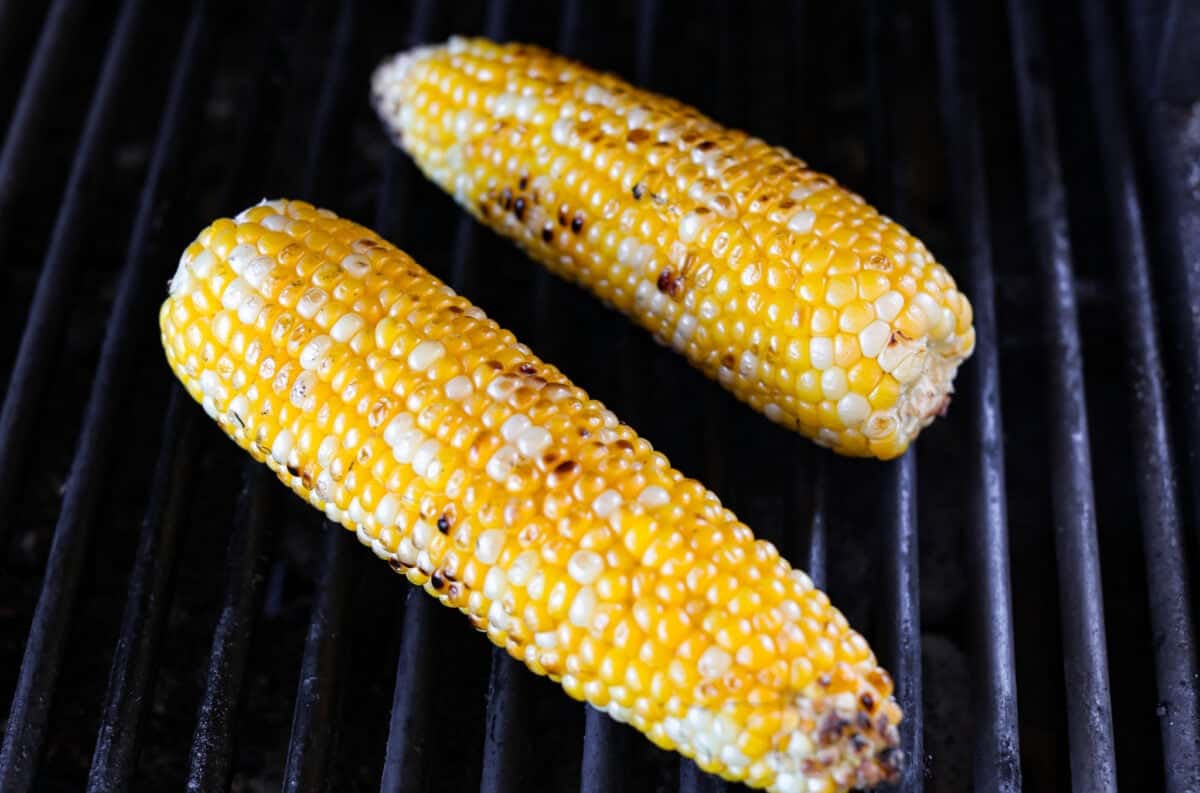
    1. Cook Corn: Heat the outdoor grill to medium heat. While the shrimp marinates, place the corn onto the grill and cook for 10-12 minutes, rotating a few times.
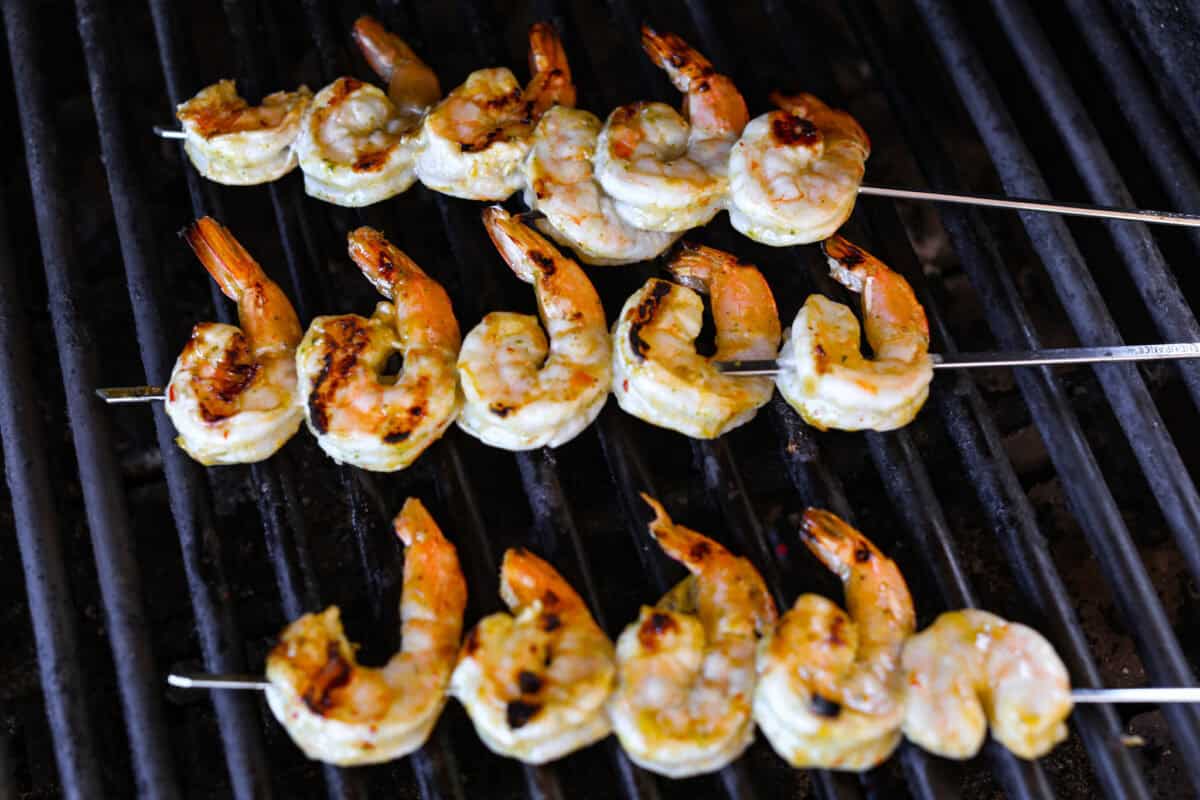
    2. Cook Shrimp: Thread the marinated shrimp onto metal skewers, then grill for 2 minutes per side. Remove the shrimp skewers and corn from the grill.
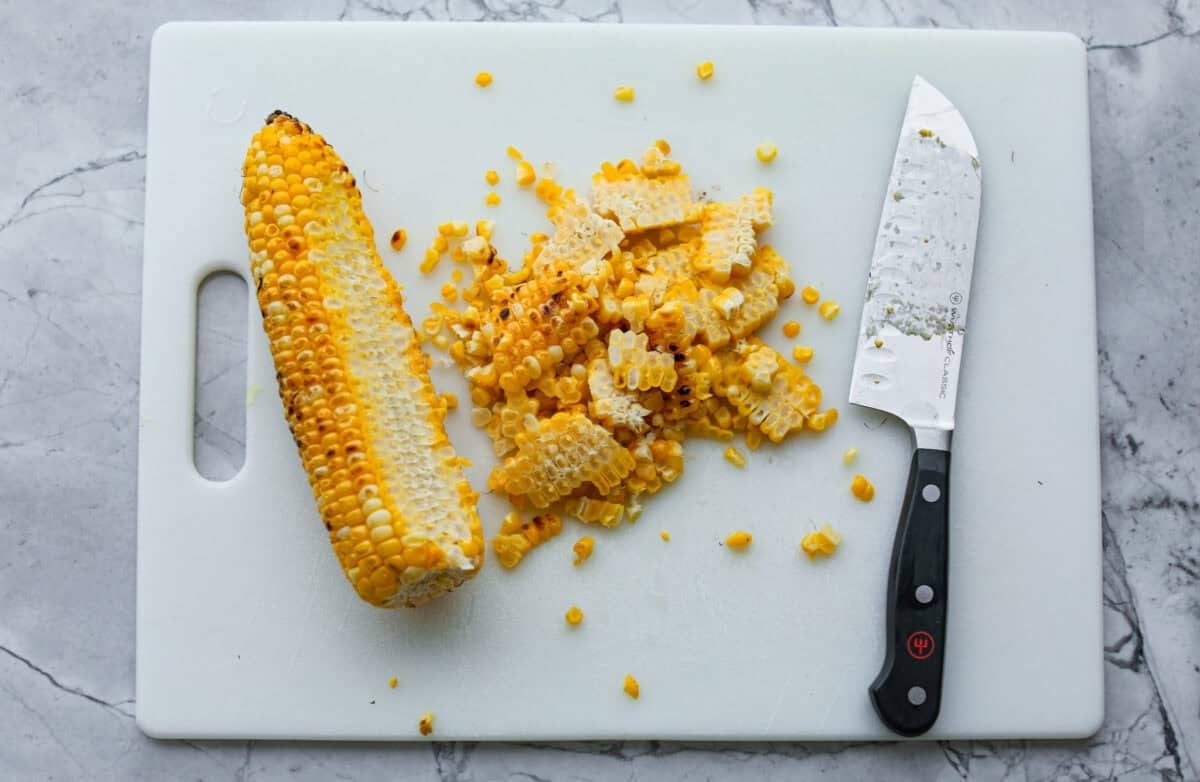
    3. Cut Corn: Carefully cut the kernels off the cob.
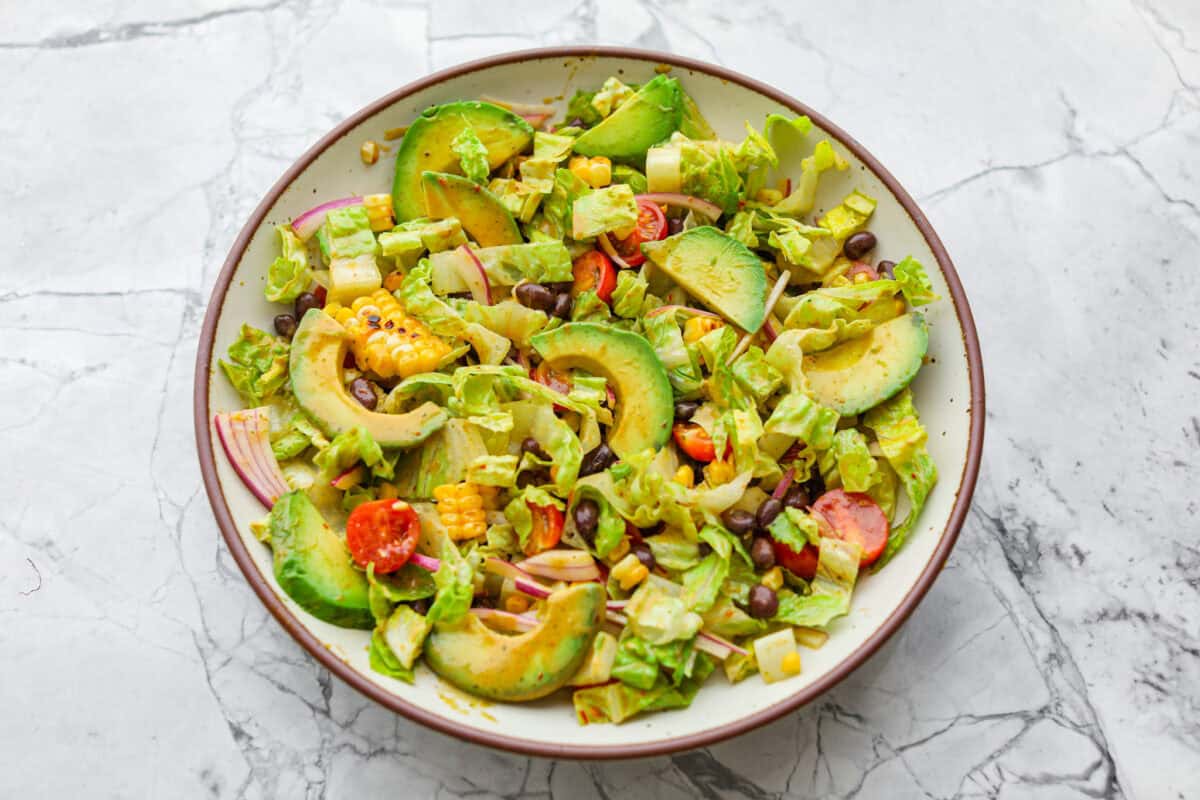
    4. Assemble Salad: Toss romaine lettuce hearts, black beans, avocado, red onion, cherry tomatoes, and corn kernels. Then drizzle it with the dressing. Top with the shrimp and serve immediately.

    Must Have Tools For This Recipe

    • Blender or Immersion Blender: Blends the dressing until smooth and creamy.
    • Stainless Steel Skewers: Hold the shrimp together so they’re easy to grill and flip. Note: If you use wooden skewers, soak them in water for 20 min prior to cooking.

    Print

    Grilled Shrimp Salad

    This easy Grilled Shrimp Salad recipe is the perfect solution to your summer dinner needs! It’s healthy, quick and full of grilled chipotle flavor.
    Course Salad, Side Dish
    Cuisine American
    Keyword green salad with shrimp, grilled shrimp, grilled shrimp salad, grilled shrimp salad recipe, salad with grilled shrimp, seafood salad, shrimp salad, shrimp salad recipe
    Prep Time 20 minutes
    Cook Time 15 minutes
    marinating time 15 minutes
    Total Time 50 minutes
    Servings 6 servings
    Calories 542kcal

    Equipment

    • Grill gas or charcoal
    • Blender or immersion blender

    Ingredients

    Dressing

    • ¾ cup olive oil
    • 1 cup fresh cilantro packed
    • cup apple cider vinegar
    • 3 tablespoons fresh lime juice about 2 small limes
    • 3 tablespoons honey
    • 2 chipotle peppers in adobo sauce
    • ½ teaspoon salt more or less to taste

    Salad

    • 1 – 1 ½ pounds large deveined and peeled shrimp you may leave the tails on for presentation if desired
    • 2 roughly chopped romaine lettuce hearts about 7-8 cups
    • 1 (14-ounce) can drained and rinsed black beans
    • 1 cup diced avocado 1 large avocado
    • 2 medium ears of sweet corn shucked, or 1 (14-ounce) can drained and rinsed sweet corn
    • ½ cup thinly sliced red onion half a medium onion
    • 1 pint halved cherry tomatoes

    Instructions

    Dressing

    • Add ¾ cup olive oil, 1 cup fresh cilantro, ⅓ cup apple cider vinegar, 3 tablespoons fresh lime juice, 3 tablespoons honey, 2 chipotle peppers in adobo sauce, and ½ teaspoon salt to a blender and blend until smooth and combined. Taste and adjust the salt as needed.
    • Add ¼ cup of the dressing to a bowl with 1 – 1 ½ pounds large deveined and peeled shrimp to marinate for 15 minutes. Set the remaining dressing aside.

    Salad

    • Heat the grill to medium heat.
    • While the shrimp marinates, place 2 medium ears of sweet corn onto the grill and cook for 10-12 minutes, rotating a few times.
    • After it is done marinating, thread the shrimp onto metal skewers and place them on the grill. Cook for 2 minutes, then flip the skewers and cook for 2 additional minutes. Remove the shrimp and the corn from the grill.
    • Carefully cut the kernels off the cob.
    • Assemble the salad by tossing 2 roughly chopped romaine lettuce hearts, 1 (14-ounce) can drained and rinsed black beans, 1 cup diced avocado, ½ cup thinly sliced red onion, 1 pint halved cherry tomatoes, and the corn kernels with the dressing.
    • Top the salad with the shrimp and serve immediately.

    Notes

    Leftover, Make Ahead & Meal Prep Instructions

    • In the Refrigerator: Once tossed with dressing, the salad is best eaten within 1 day. The shrimp can be stored separately in an airtight container for up to 4 days.
    • Make Ahead: Keep the salad, shrimp, avocado, and dressing separate until serving. Wait to cut the avocado so it doesn’t brown.
    • Meal Prep Tip: For longer storage, keep the dressing on the side. The salad and dressing can last up to 4 days when stored separately.

    Nutrition

    Calories: 542kcal | Carbohydrates: 41g | Protein: 24g | Fat: 33g | Saturated Fat: 5g | Polyunsaturated Fat: 4g | Monounsaturated Fat: 22g | Trans Fat: 0.01g | Cholesterol: 143mg | Sodium: 858mg | Potassium: 829mg | Fiber: 10g | Sugar: 15g | Vitamin A: 1691IU | Vitamin C: 27mg | Calcium: 102mg | Iron: 3mg
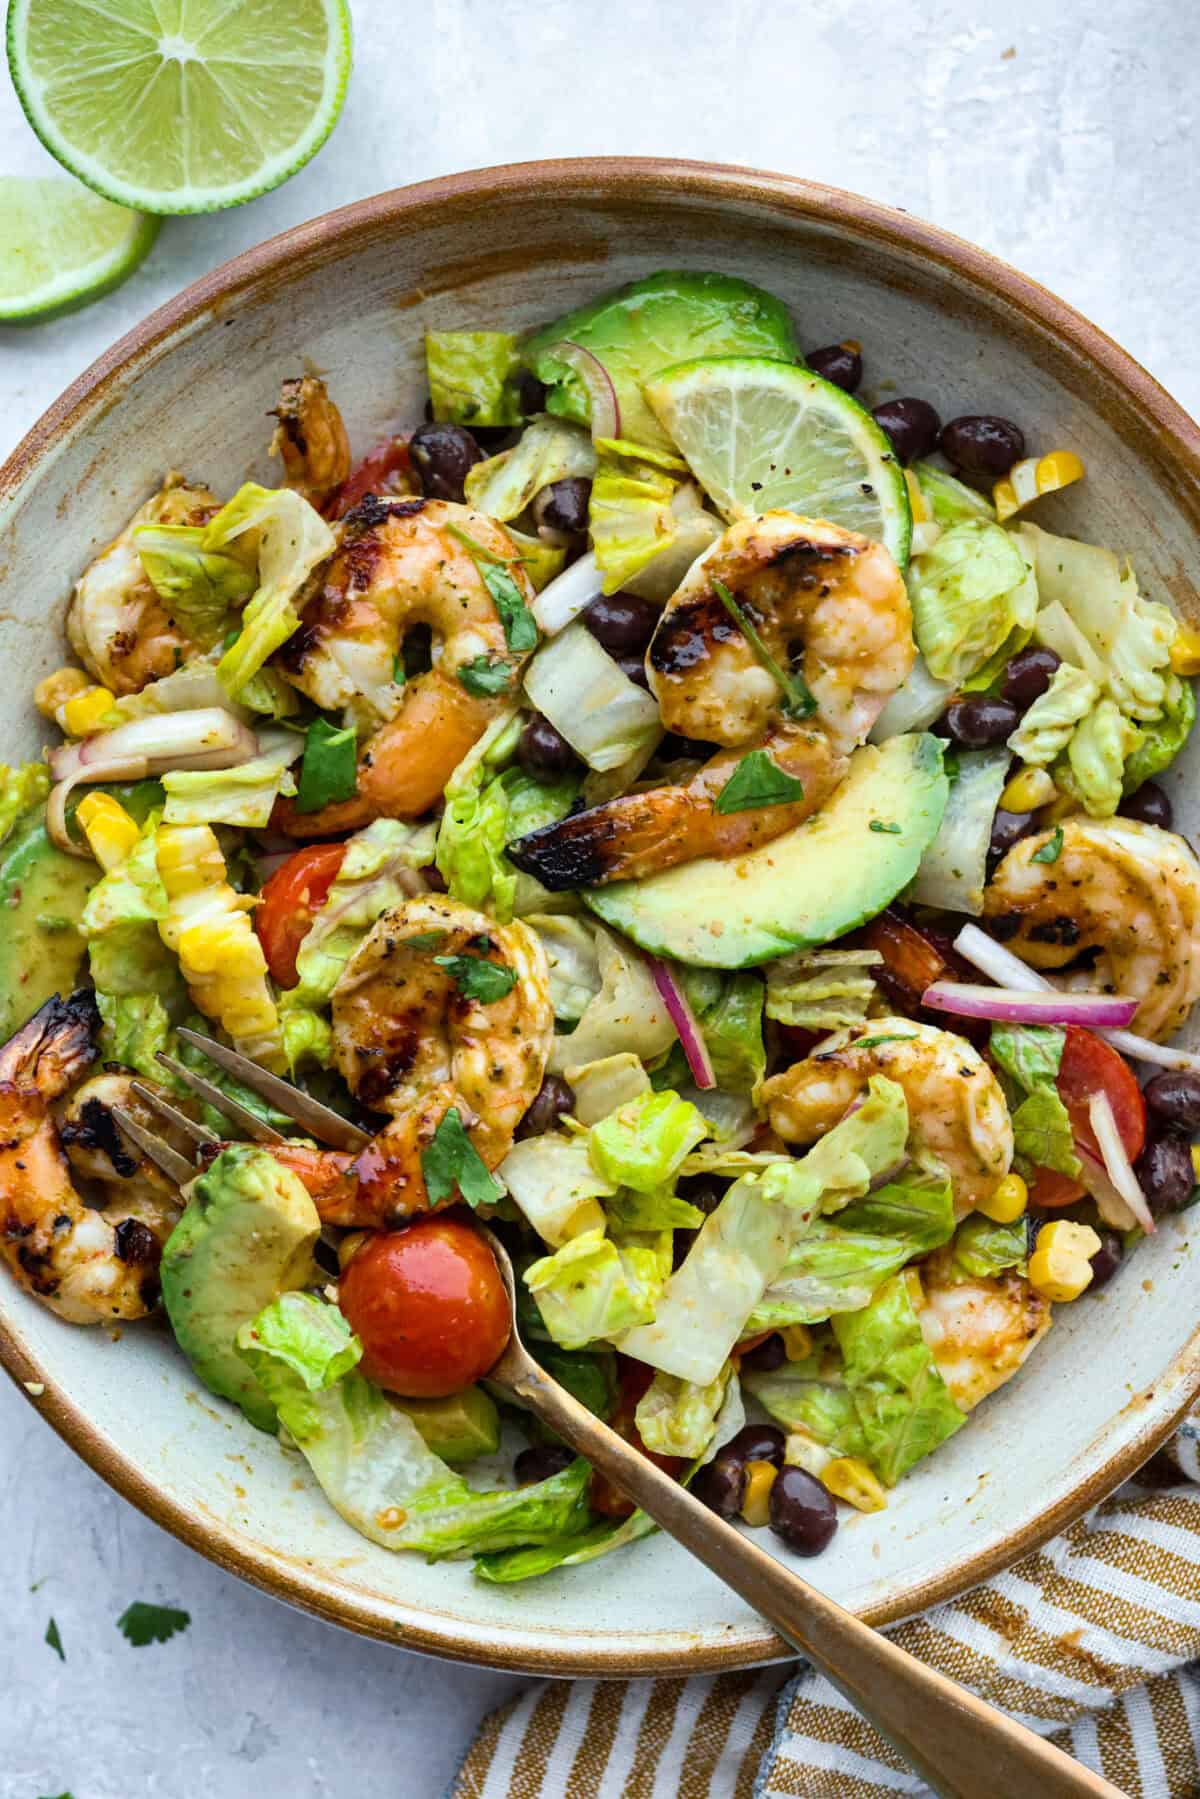
    Serving bowl of grilled shrimp salad.

    More Amazing Summer Salads


    This post was originally published on this site.

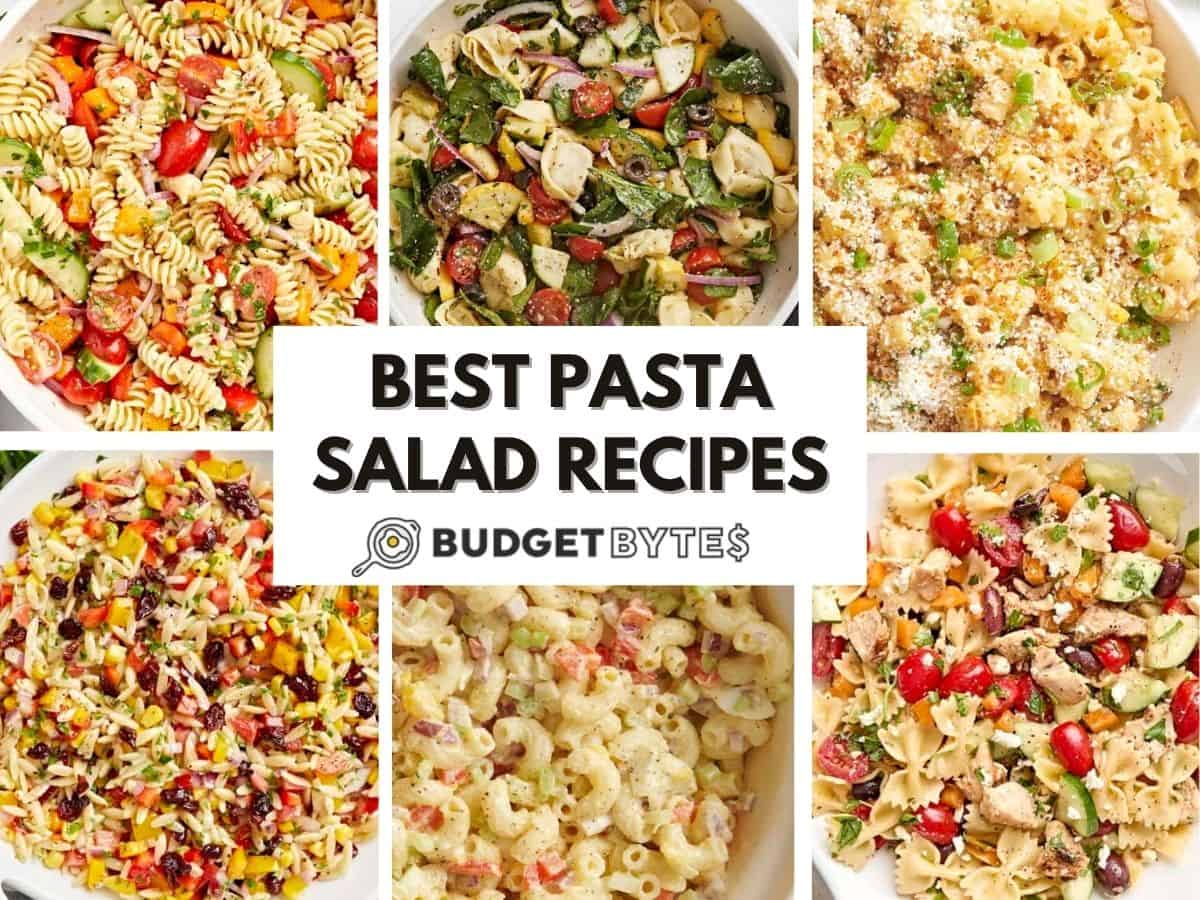
  • Best Pasta Salad Recipes

    Best Pasta Salad Recipes

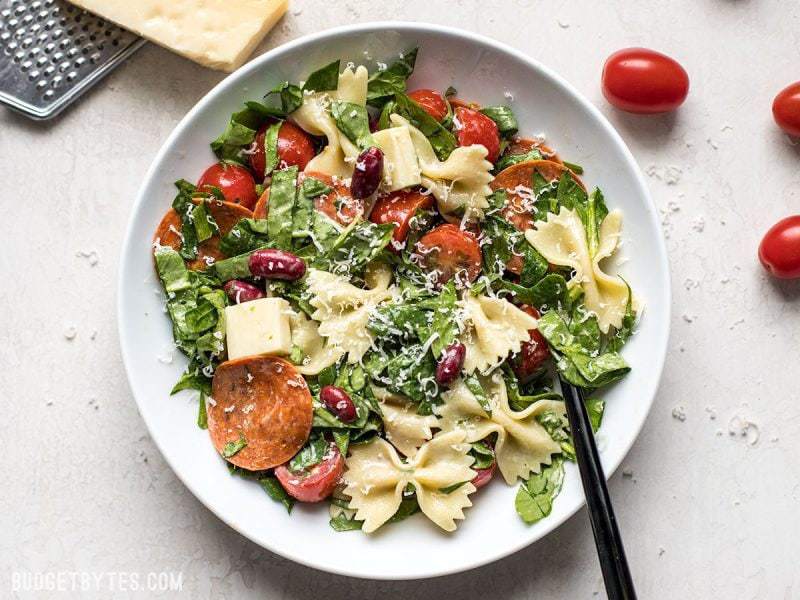
    Pasta salads are one of my favorite recipes to make during the warm summer months. Primarily because I’m a huge pasta lover, but also because I love the combination of chilled pasta mixed with veggies and covered in a tangy vinaigrette dressing. These pasta salad ideas are extremely versatile, easy to make, and they hold up very well in the fridge, which makes them perfect for leftovers. And these recipes make pretty large servings, so they’re great for parties, potlucks, and cookouts too!

    These cold salad ideas are made with a range of typical pasta types, as well as orzo, cous cous, and noodles. So every pasta gets its time to shine! Short pasta shapes work best, but they’re pretty interchangeable in these salads, so don’t be shy!

    Here I’ve gathered 27 of the best pasta salad recipes for you to enjoy at your next family gathering, or simply all by yourself – no judgment here. 😉

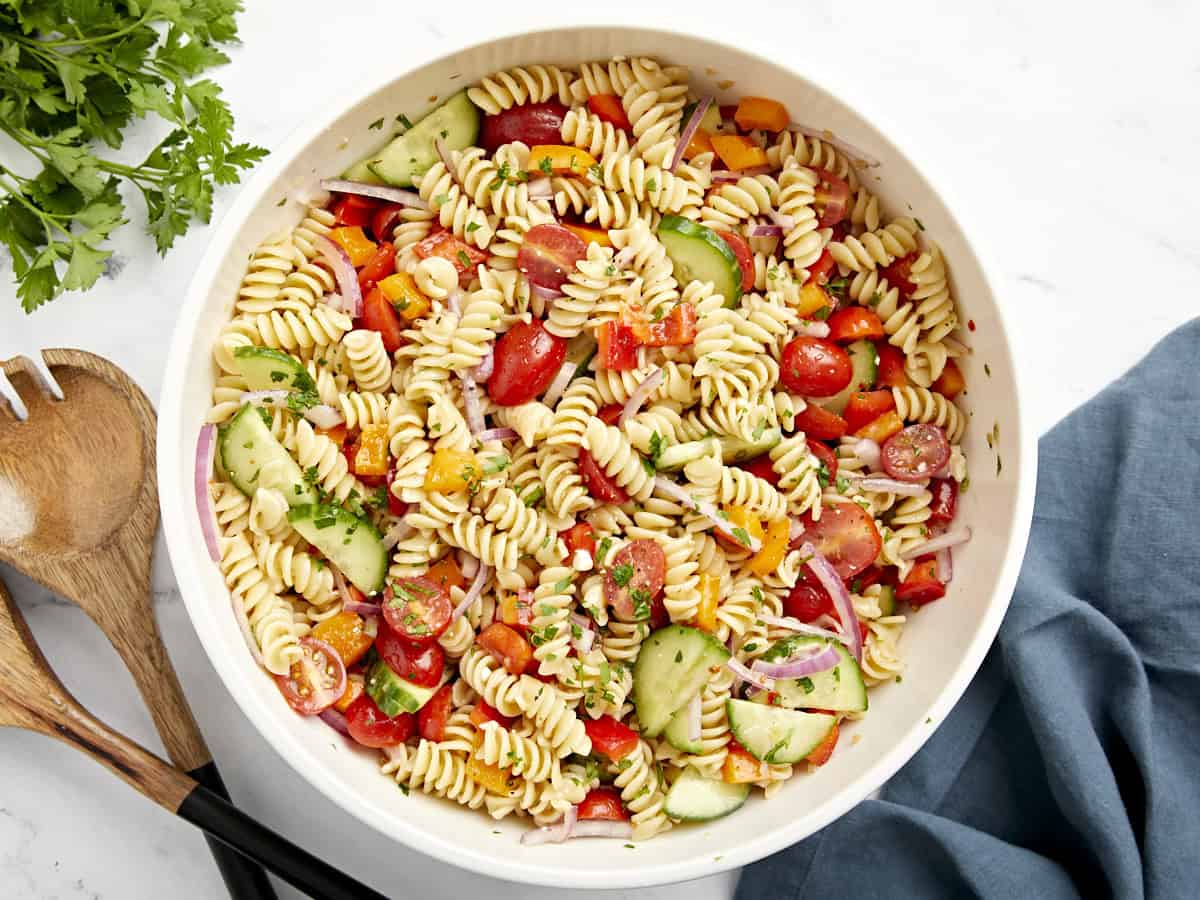
    1. Pasta Salad

    Pasta Salad

    Overhead view of pasta salad in a large white serving bowl with wood serving utensils on the side.

    This easy Pasta Salad is full of fresh flavors and tossed in a zesty Italian dressing. It will be the star at your next BBQ or summer cookout!

    4.70 from 10 votes

    $13.44 recipe / $1.34 serving
    Get the Recipe

    When I talk about pasta salads, this classic pasta salad recipe is what I’m thinking of! It’s filled with fresh veggies and a zesty Italian dressing. Ideal for any family gathering or cookout, it induces satisfied smiles and enthusiastic “yums” every time!

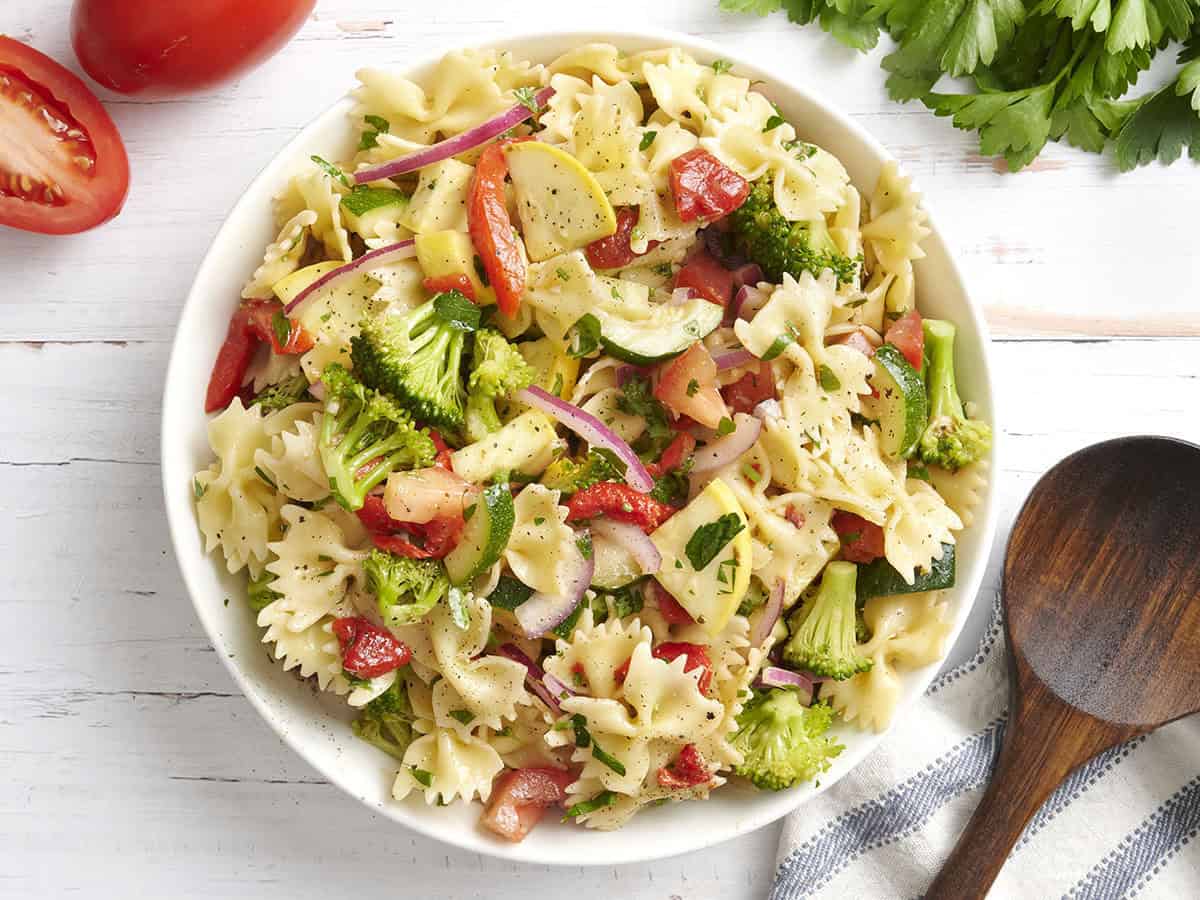
    2. Summer Vegetable Pasta Salad

    Summer Vegetable Pasta Salad

    Overhead view of a bowl of summer vegetable pasta salad.

    This light and fresh Summer Vegetable Pasta Salad is perfect for summer BBQs and potlucks, or your weekly meal prep.

    4.70 from 43 votes

    $10.21 recipe / $1.02 serving
    Get the Recipe

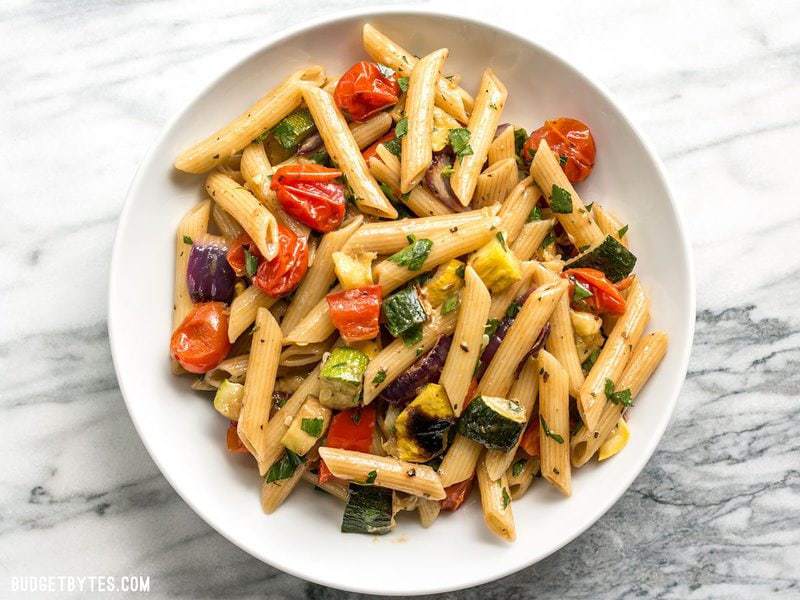
    This summer vegetable pasta salad is my go-to when I want a big, cooling bowl of bowties, crunchy broccoli, zucchini, squash, roasted red peppers, and tangy red wine vinaigrette. It also holds up in the fridge, so it’s great for cookouts, potlucks, or easy lunches all week!

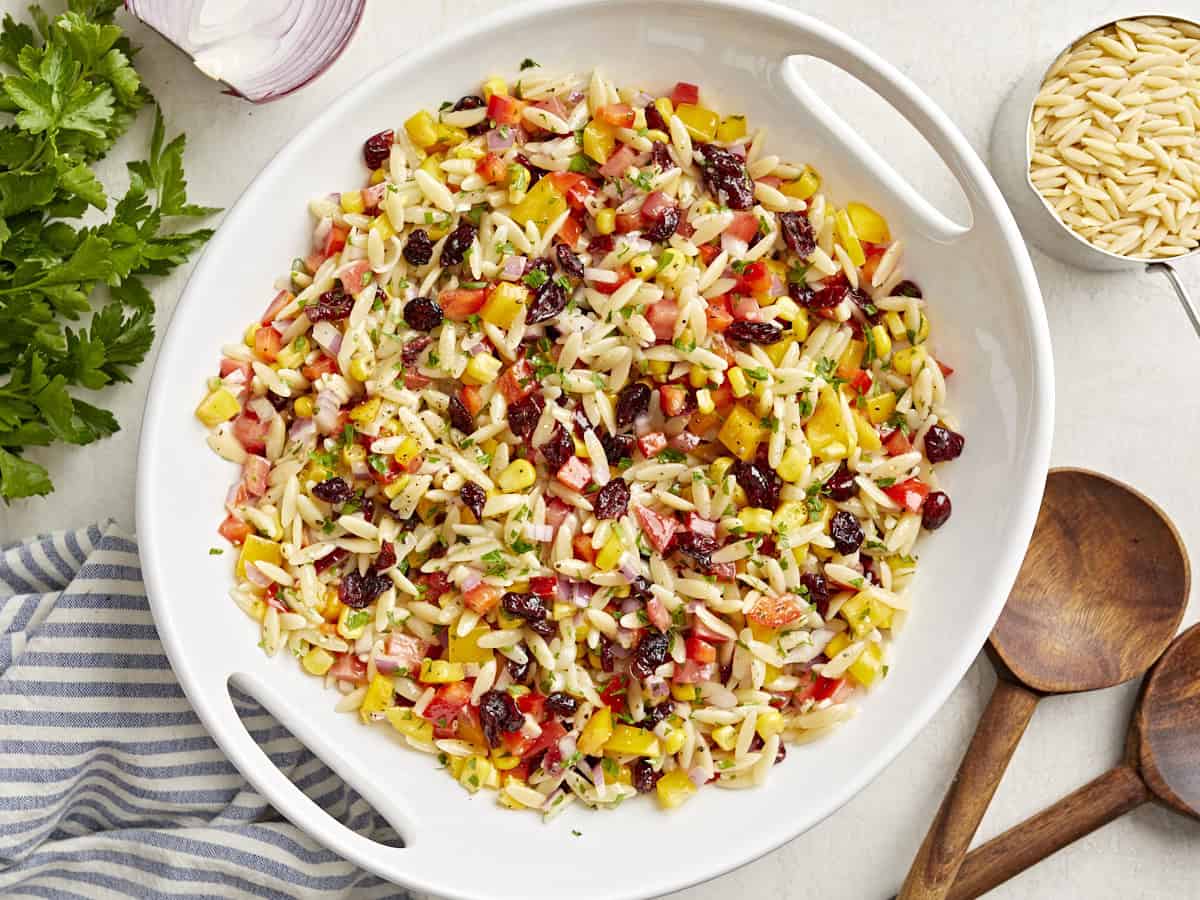
    3. Orzo Pasta Salad

    Orzo Pasta Salad

    Overhead view of Orzo Pasta Salad in a white serving bowl with wood serving spoons on the side.

    This light & fresh Orzo Pasta Salad is full of colorful veggies and a delicious homemade dressing. Perfect for BBQs or meal prep it for the week!

    4.75 from 8 votes

    $9.99 recipe / $1.24 serving
    Get the Recipe

    This orzo salad is a bright and flavorful delight for the taste buds! The tiny pasta, crisp bell peppers, tomatoes, sweet corn, and dried cranberries all get tossed in a bright homemade vinaigrette.

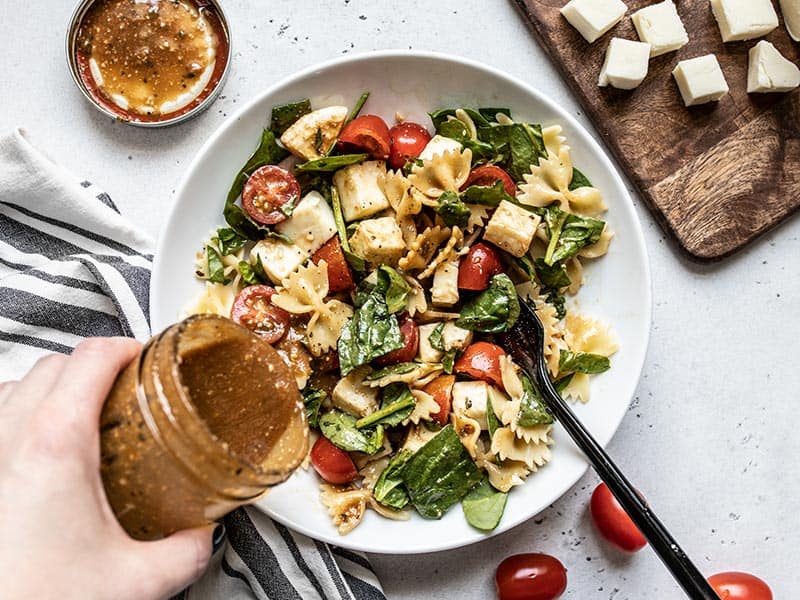
    4. Tomato MOzzarella Pasta Salad

    Tomato Mozzarella Pasta Salad

    Parmesan Balsamic Vinaigrette being poured onto a bowl of Tomato Mozzarella Salad from a jar.

    This Tomato Mozzarella Pasta Salad with homemade Parmesan Balsamic Vinaigrette is the perfect light and fresh summer meal. Perfect for potlucks!

    4.94 from 33 votes

    $8.59 recipe / $1.43 serving
    Get the Recipe

    Our tomato mozzarella pasta salad is basically Caprese salad on a budget, with tender pasta, juicy tomatoes, mozzarella, and a creamy Parmesan balsamic vinaigrette. I like it for hot days because it’s light, refreshing, and easy to make ahead.

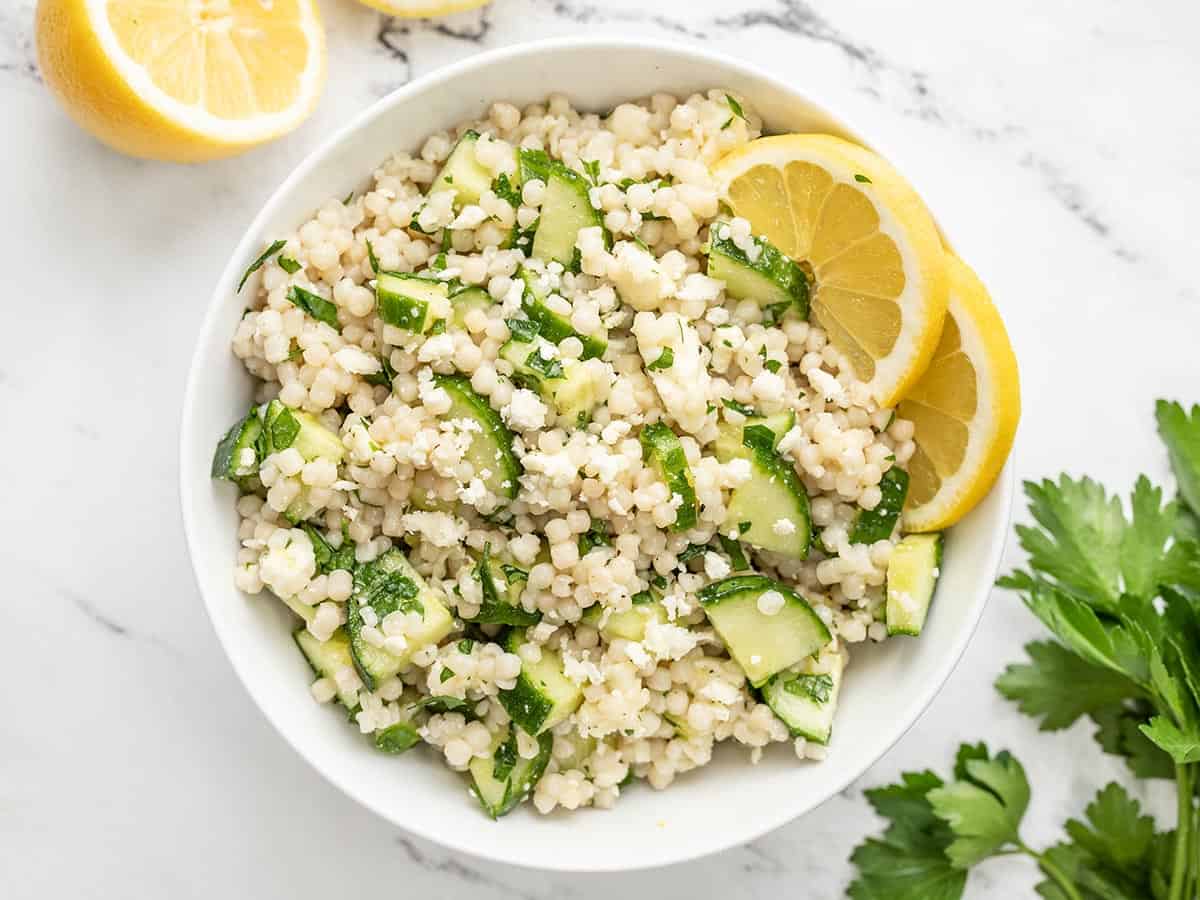
    5. Lemony Cucumber Couscous Salad

    Lemony Cucumber Couscous Salad

    Overhead view of lemony cucumber couscous salad in a bowl garnished with lemons.

    Lemony Cucumber Couscous Salad is a light, fresh, and vibrant pasta salad perfect for any summer meal. 

    4.73 from 83 votes

    $6.46 recipe / $1.08 serving
    Get the Recipe

    This lemony cucumber couscous salad is one I’d bring to every summer BBQ, mostly because pearl couscous has the best bouncy texture, and fresh lemon zest makes the whole bowl taste extra bright. It also keeps well for days, which is always helpful!

    6. Tortellini Salad

    Tortellini Salad

    Overhead shot of tortellini salad in a white bowl.

    This fresh, vibrant, and utterly delicious Tortellini Salad feeds a crowd on a dime. The best part: you can put it together in minutes!

    4.89 from 17 votes

    $14.41 recipe / $1.20 serving
    Get the Recipe

    Tortellini salad gives you built-in cheesy pasta flavor, so the fresh vegetables, herbs, greens, and zesty vinaigrette don’t have to work hard to make it delicious. It feeds a crowd and comes together in about 15 minutes.

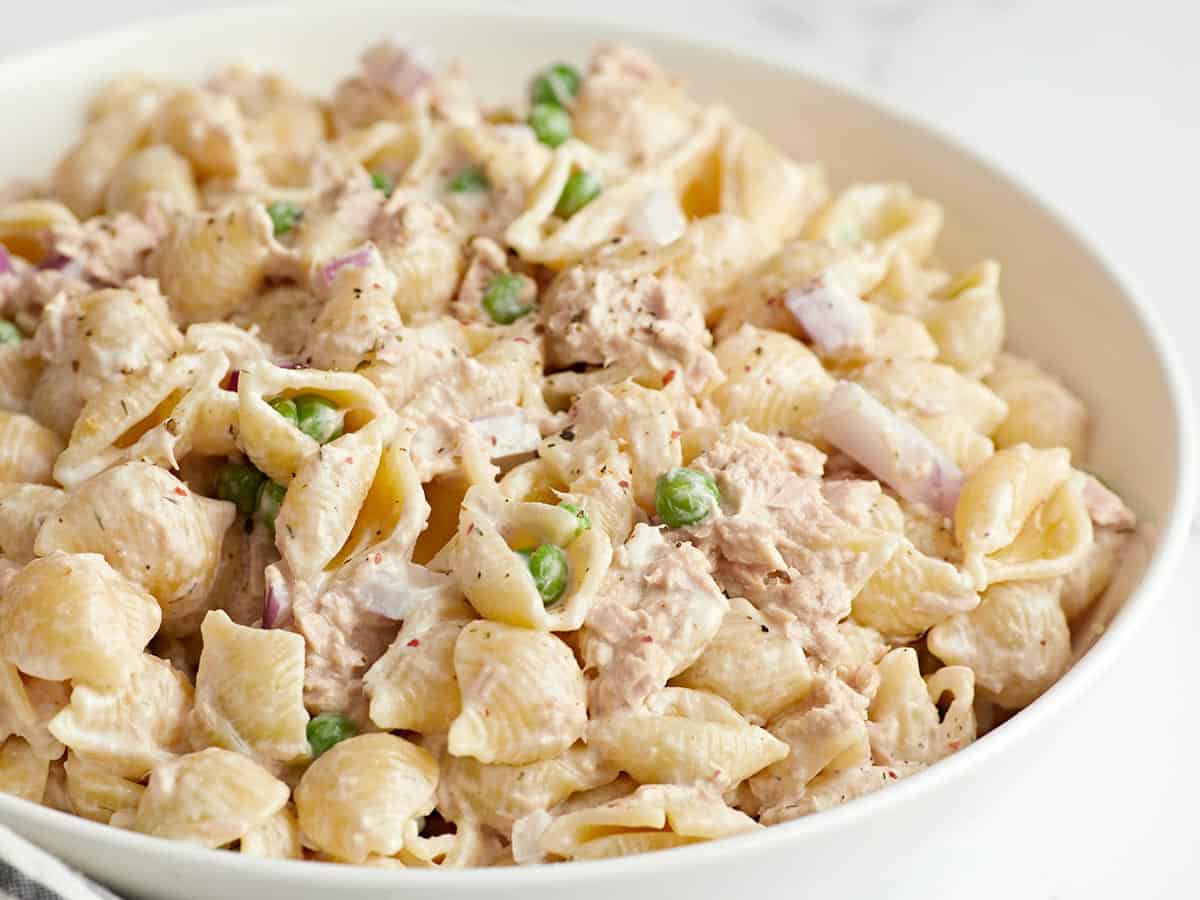
    7. Tuna Pasta Salad

    Classic Tuna Pasta Salad

    Close up side view of a bowl full of tuna pasta salad.

    This Classic Tuna Pasta Salad is cool, creamy, and filling enough to be a meal on its own. It’s easy to make with tender pasta, canned tuna, sweet peas, and a simple dressing for lunches, potlucks, or hot summer nights.

    4.87 from 29 votes

    $4.04 recipe / $0.67 serving
    Get the Recipe

    This tuna pasta salad is cool, creamy, and hearty enough for lunch, with mini shells, canned tuna, sweet peas, and a tangy dressing. I like how the shells catch the tuna and dressing, so every forkful feels extra satisfying.

    8. Dill Pickle Pasta Salad

    Dill Pickle Pasta Salad

    Overhead view of a bowl of dill pickle pasta salad in a bowl.

    This Dill Pickle Pasta Salad is loaded with crunchy pickles, cheddar, bacon, and a creamy homemade dressing. Tangy, fresh, and perfect for BBQs or picnics!

    5 from 3 votes

    $4.46 recipe / $0.56 serving
    Get the Recipe

    Dill pickle pasta salad is unapologetically for pickle people, with chopped pickles, pickle juice in the creamy dressing, sharp cheddar, bacon, and red onion. I’d make it ahead so all that tangy dill flavor has time to settle in.

    9. Ditalini Pasta Salad

    Ditalini Pasta Salad

    Overhead view of a bowl of homemade ditalini pasta salad.

    This easy Ditalini Pasta Salad is packed with roasted summer veggies, tossed in pesto, and finished with a sprinkle of feta. Delicious & meal prep friendly!

    4.67 from 3 votes

    $8.67 recipe / $1.08 serving
    Get the Recipe

    This ditalini pasta salad tastes like summer in a bowl, with tiny pasta tubes, golden roasted zucchini, bell pepper, eggplant, pesto, and a little feta. I like that store-bought pesto keeps it easy, but homemade can be even more budget-friendly.

    10. Summer Sweet Corn Salad

    Summer Sweet Corn Salad

    Close up of a bowl of Summer Sweet Corn Salad with a wooden spoon in the middle

    This Sweet Corn Salad combines fresh corn, crisp vegetables, creamy avocado, pasta shells, and a tangy lemon vinaigrette for a simple and refreshing side dish.

    4.80 from 20 votes

    $7.76 recipe / $0.97 serving
    Get the Recipe

    Fresh sweet corn on the cob is one of the best parts about summer. Take advantage of the season and make this summer sweet corn salad with a simple and fresh lemon-Dijon vinaigrette!

    11. Macaroni Salad

    Macaroni Salad

    Overhead view of a bowl of macaroni salad with a wooden spoon taking some.

    Macaroni Salad is an easy and inexpensive classic for potlucks, summer BBQs, or an easy side dish for dinner.

    5 from 10 votes

    $3.50 recipe / $0.44 serving
    Get the Recipe

    Macaroni salad is the classic creamy cookout side for a reason, and this one keeps it crunchy AND colorful with celery, bell pepper, red onion, hard-boiled eggs, and sweet pickle relish. I’ll happily tuck this next to burgers, veggie skewers, or basically any summer dinner.

    12. Elote (Street Corn) Pasta Salad

    Elote (Street Corn) Pasta Salad

    Overhead of a bowl of elote street corn pasta salad.

    This easy Elote (Street Corn) Pasta Salad is made with smoky corn, zesty lime, and creamy queso fresco for a fresh BBQ, potluck, or weeknight side dish!

    5 from 4 votes

    $5.53 recipe / $0.69 serving
    Get the Recipe

    Our elote pasta salad brings smoky street corn flavor to a budget-friendly pasta salad with charred frozen corn, poblano, chipotle, lime, creamy dressing, and queso fresco. I’m all for a BBQ side that tastes this bold and still costs just a few bucks!

    13. Antipasto Pasta Salad

    Antipasto Pasta Salad

    Overhead view of a bowl of antipasto pasta salad.

    Make this easy Antipasto Pasta Salad loaded with meats, cheeses, olives, and veggies. Perfect for cookouts, potlucks, or quick lunches!

    5 from 2 votes

    $15.77 recipe / $1.42 serving
    Get the Recipe

    Antipasto pasta salad turns the snacky Italian platter idea into a hearty bowl with pasta, cured meats, cheese, olives, artichokes, mozzarella, and zesty dressing. It’s a smart way to use leftover party nibbles and still end up with a proper lunch.

    14. BLT Pasta Salad

    BLT Pasta Salad

    Close up side view of a bowl of BLT pasta.

    This BLT pasta salad recipe is the perfect summer meal! It’s easy to make, full of flavor, and perfect for a potluck or picnic.

    4.81 from 21 votes

    $9.48 recipe / $1.18 serving
    Get the Recipe

    A big bowl of this BLT pasta salad gives you the creamy, tomatoey, bacony flavor of the sandwich in a cold summer salad. The creamy ranch pasta salad dressing is my favorite part of this simple recipe!

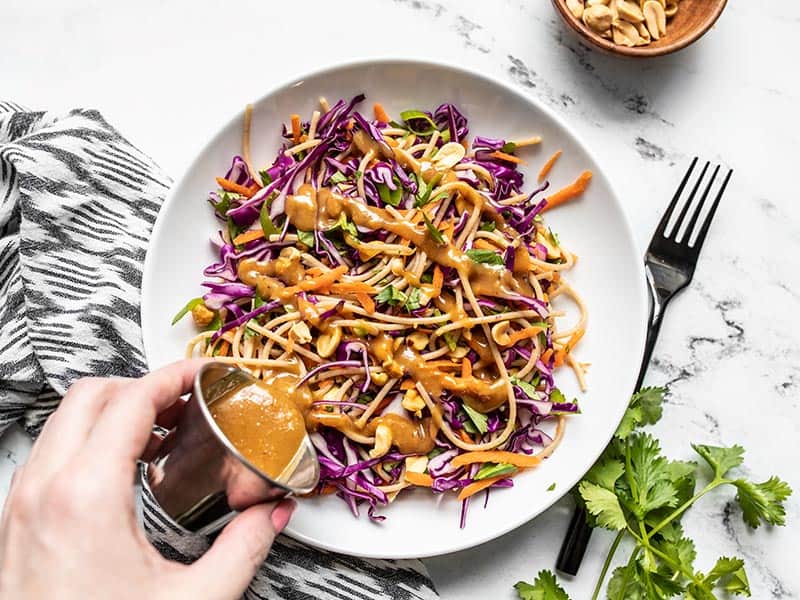
    15. Cold Peanut Noodle Salad

    Cold Peanut Noodle Salad

    Peanut Lime Dressing being poured onto a bowl of Cold Peanut Noodle Salad

    This Cold Peanut Noodle Salad with homemade peanut lime dressing is the perfect meal prep for summer! No reheating necessary.

    4.84 from 122 votes

    $5.30 recipe / $1.33 serving
    Get the Recipe

    Cold peanut noodle salad is the no-reheat meal prep I want when lunch needs to feel fresh but still filling. The peanut-lime dressing is sweet, tangy, creamy, and so very good with crunchy cabbage, carrots, cilantro, green onions, and peanuts.

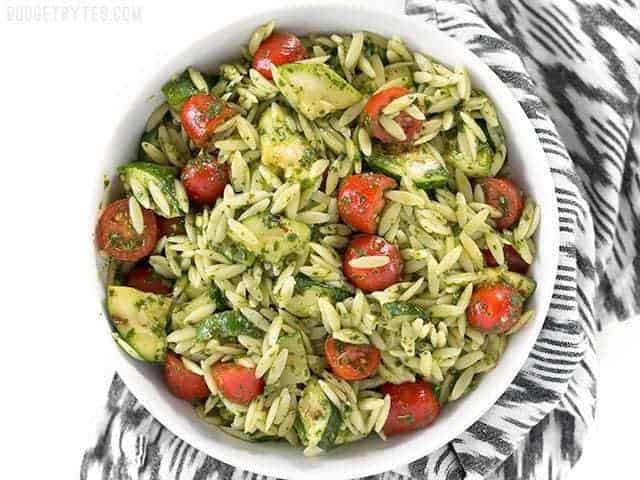
    16. Zucchini and Orzo Salad

    Zucchini and Orzo Salad with Chimichurri

    Zucchini and orzo salad with chimichurri in a bowl.

    Zucchini and Orzo Salad with Chimichurri is a fresh summer salad that makes the perfect fresh and zesty side dish for summer grilling.

    4.69 from 22 votes

    $6.52 recipe / $1.63 serving
    Get the Recipe

    Our zucchini and orzo salad is a quick 35-minute summer side with tender pasta, juicy tomatoes, and a bright chimichurri dressing that wakes everything up.

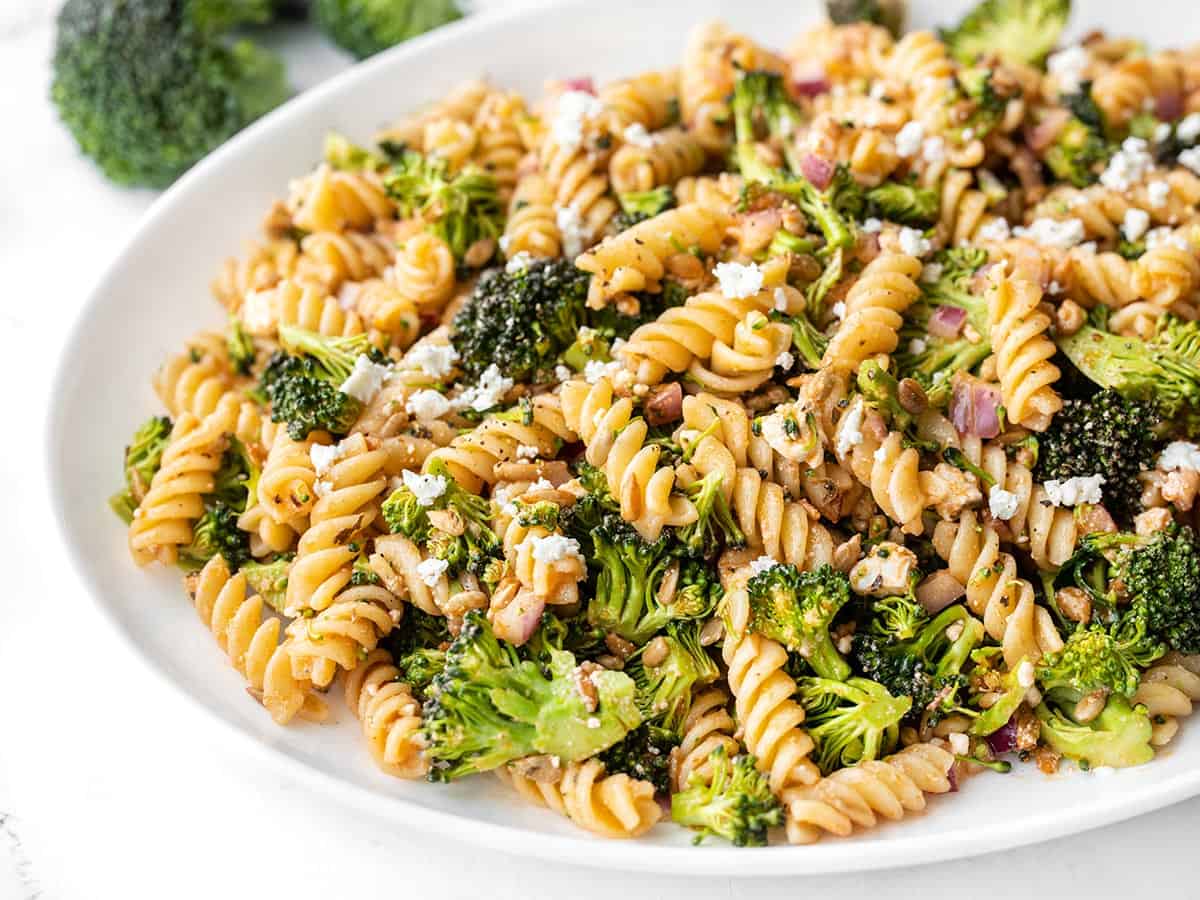
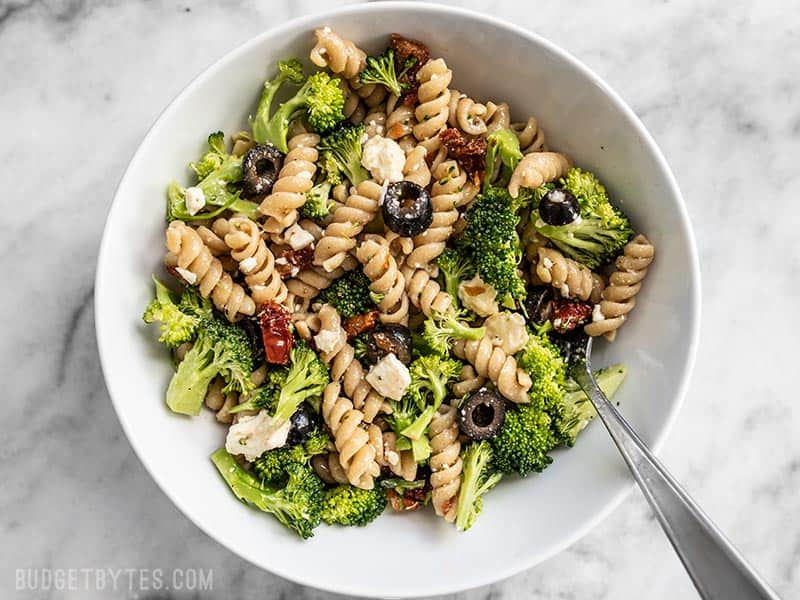
    17. Broccoli Pasta Salad with Tomato Vinaigrette

    Broccoli Pasta Salad with Tomato Vinaigrette

    Close up side view of broccoli pasta salad with tomato vinaigrette on a platter

    This Broccoli Pasta Salad features a tangy homemade vinaigrette, nutty sunflower seeds, and creamy-salty feta.

    4.75 from 24 votes

    $4.67 recipe / $1.17 serving
    Get the Recipe

    Calling all broccoli lovers! This easy and delicious broccoli pasta salad features a homemade tomato vinaigrette dressing and lots of creamy feta cheese. I like that the rotini grabs the dressing in all those little twists!

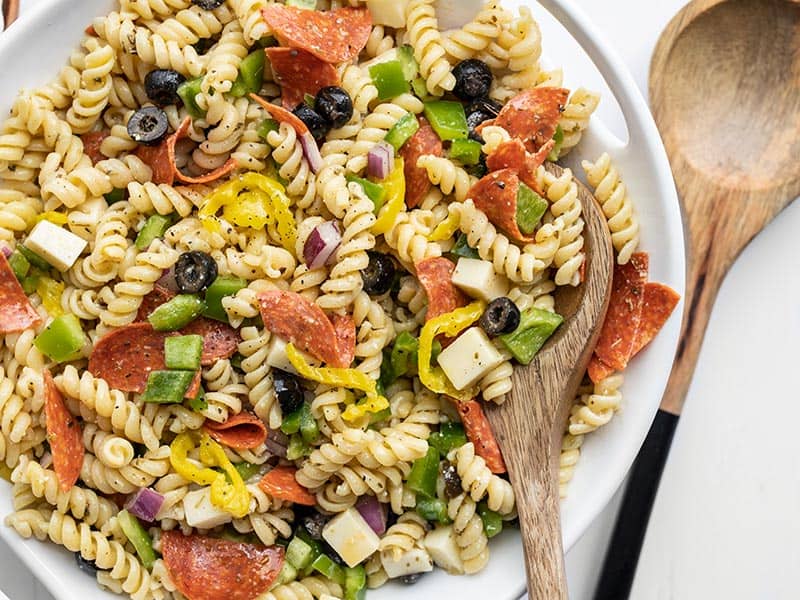
    18. Pizza Pasta Salad

    Italian Pizza Pasta Salad

    Close up of a serving bowl of pizza pasta salad, a wooden spoon in the side

    Repurpose your leftover pizza toppings into this deliciously simple Italian style pizza pasta salad. Including a simple homemade Italian dressing!

    4.75 from 16 votes

    $7.98 recipe / $1.00 serving
    Get the Recipe

    This pizza pasta salad is the easiest way to turn leftover pizza toppings into a fridge-friendly lunch. Our one is made with pepperoni, mozzarella, peppers, olives, onion, banana peppers, and Parmesan Italian dressing, but use whatever ingredients you have on hand!

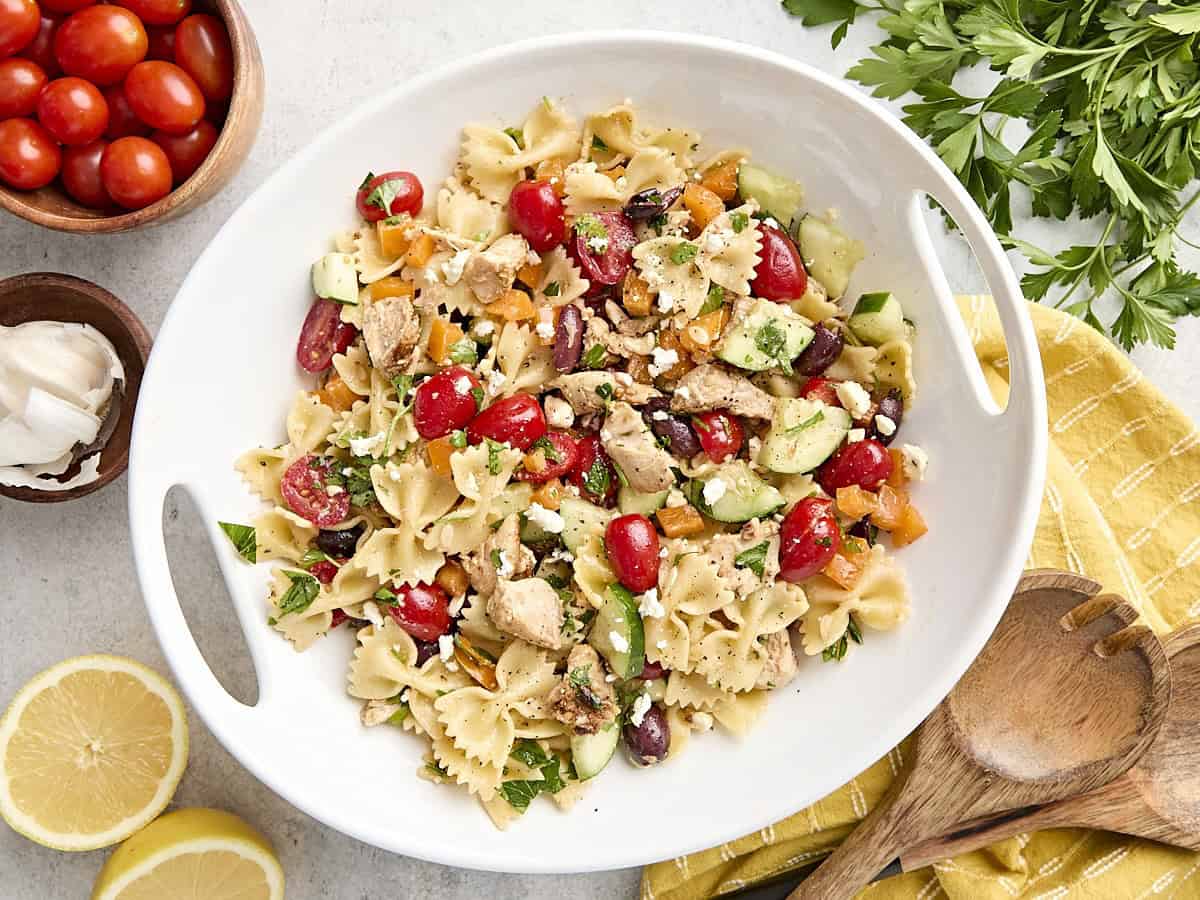
    19. Greek Chicken Pasta Salad

    Greek Chicken Pasta Salad

    Overhead view of a homemade Greek chicken pasta salad on a platter.

    Greek Chicken Pasta Salad is the perfectly refreshing and filling summer meal with its medley of vegetables and tangy lemon garlic dressing.

    4.61 from 64 votes

    $10.67 recipe / $2.66 serving
    Get the Recipe

    Turn your pasta salad into a full meal with this Greek chicken pasta salad recipe. The chicken gets marinated in half of the tangy dressing, giving it an extra boost of flavor!

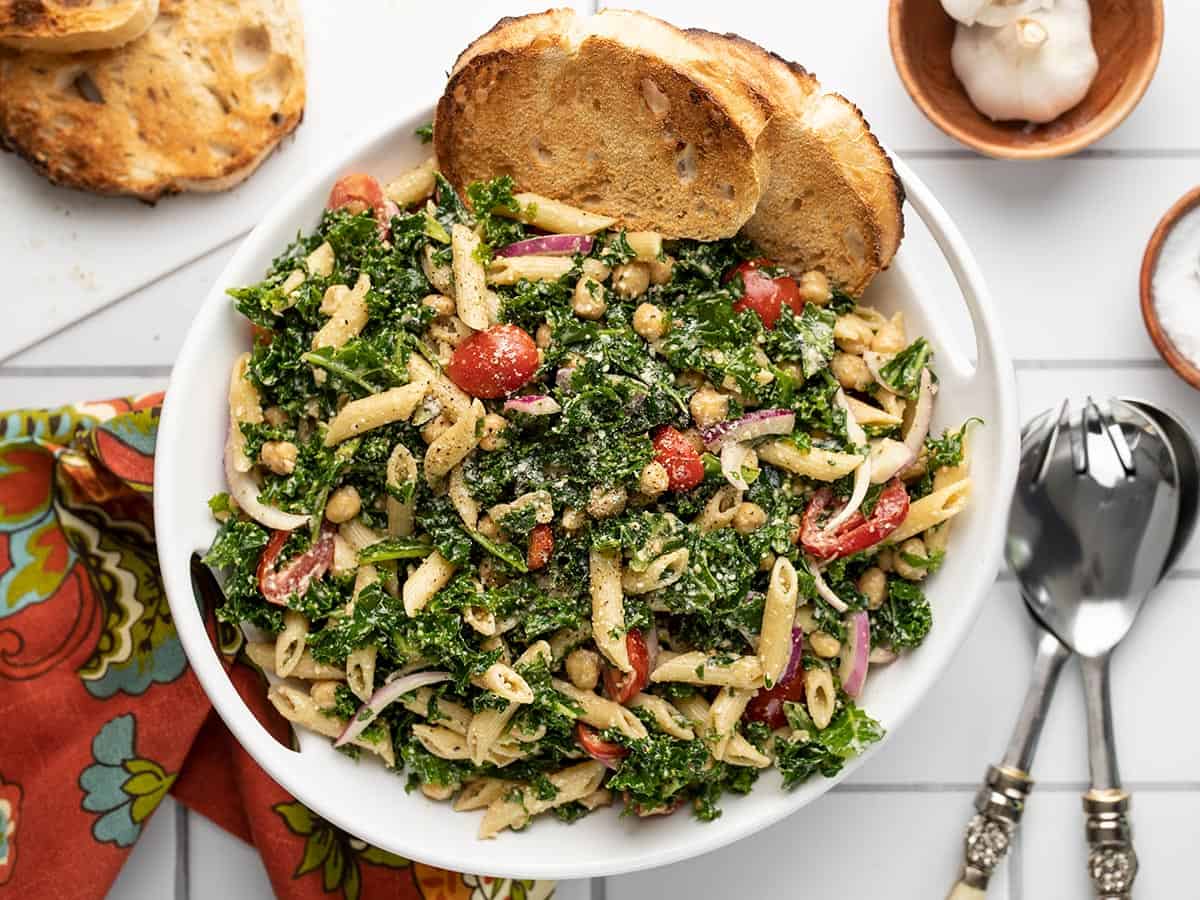
    20. Big Kale Pasta Salad

    BIG Kale Pasta Salad

    Overhead view of the serving bowl full of kale pasta salad.

    This Big Kale Pasta Salad is the perfect fast and filling summer lunch, packed with flavors, textures, and colors. Great for meal prep!

    4.90 from 19 votes

    $7.88 recipe / $1.31 serving
    Get the Recipe

    This hearty, delicious, big kale pasta salad is a cold meal salad I’d happily eat for lunch all week. The kale is massaged until tender, then tossed with pasta, chickpeas, grape tomatoes, red onion, Parmesan, and balsamic vinaigrette. And because kale holds up beautifully in the fridge, the leftovers are actually something to look forward to!

    21. Sweep The Kitchen Pasta Salad

    “Sweep the Kitchen” Pasta Salad

    Overhead view of a bowl of "Sweep the Kitchen" Pasta Salad

    Throw together meals like this “Sweep the Kitchen” Pasta Salad are my favorite way to use up leftovers in the kitchen. Easy, versatile, and never boring! 

    4.86 from 7 votes

    Get the Recipe

    Got some leftover veggies in the fridge? Give this Sweep The Kitchen pasta salad a try! Use what you already have available and add a simple dressing or diced chicken if you want to make it a complete meal!

    22. Italian Orzo Pasta Salad

    Italian Orzo Salad

    Filling enough to serve as a light meal, but light enough to act as an easy side dish, this Italian Orzo Salad is a versatile addition to your weekly meal prep. Budgetbytes.com

    Filling enough to serve as a light meal, but light enough to act as an easy side dish, this Italian Orzo Salad is a versatile addition to your weekly meal prep. 

    4.78 from 18 votes

    $8.77 recipe / $2.19 serving
    Get the Recipe

    A little pasta, a lot of vegetables, and maybe some beans make the best combos for pasta salads. This Italian orzo salad is no exception. It’s perfect as a side dish and also great as a light meal.

    23. Grilled Vegetable Pasta Salad

    Grilled Vegetable Pasta Salad

    This classic summer Grilled Vegetable Pasta Salad features smoky fire licked vegetables and a homemade creamy balsamic vinaigrette. BudgetBytes.com

    This classic summer Grilled Vegetable Pasta Salad features smoky fire licked vegetables and a homemade creamy balsamic vinaigrette. 

    4.84 from 25 votes

    $9.65 recipe / $1.21 serving
    Get the Recipe

    Grilled vegetable pasta salad gets so much flavor from smoky, fire-licked vegetables and a creamy balsamic vinaigrette. I love that the flavor deepens even more in the fridge, making tomorrow’s lunch even better than today’s.

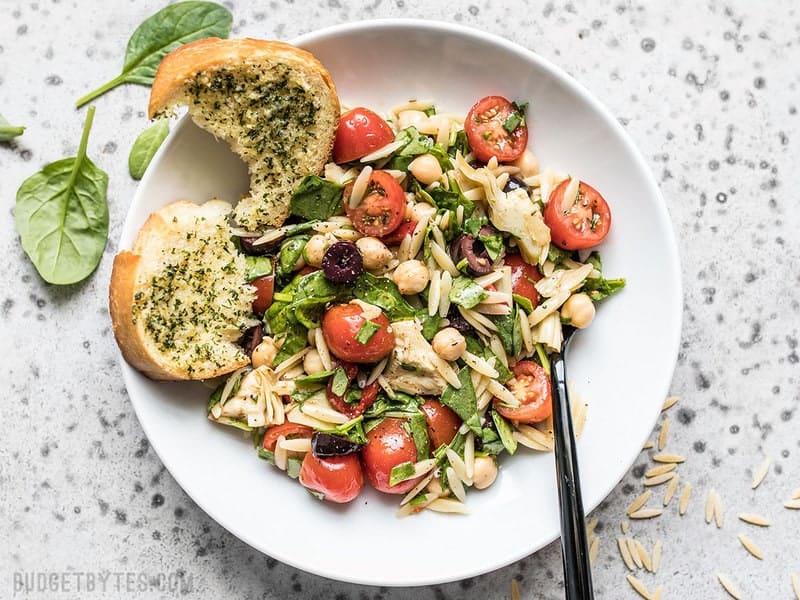
    24. Spinach and Orzo Salad with Balsamic Vinaigrette

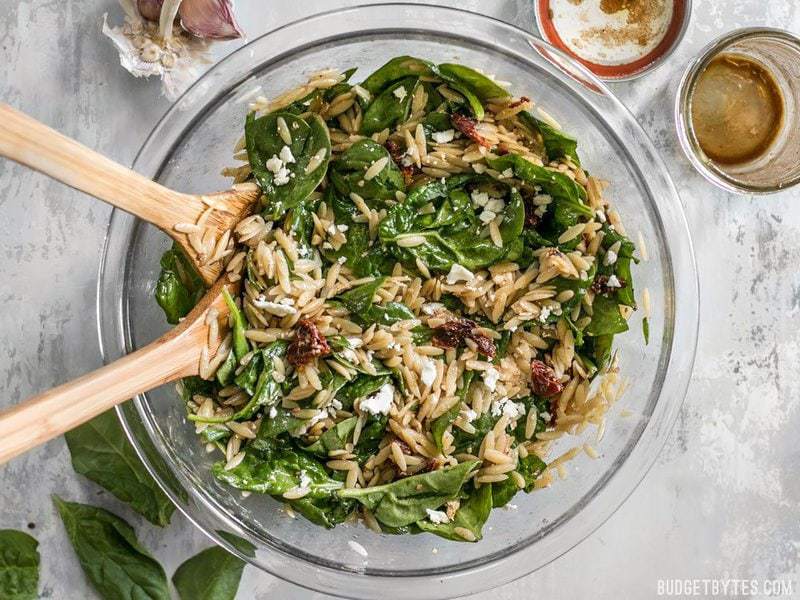
    Spinach Orzo Salad

    A quick homemade balsamic vinaigrette makes this simple Spinach and Orzo Salad extra special. Serve as a light lunch or a side with dinner. BudgetBytes.com

    A quick homemade balsamic vinaigrette makes this simple Spinach and Orzo Salad extra special. Serve as a light lunch or a side with dinner.

    4.78 from 27 votes

    $8.27 recipe / $2.06 serving
    Get the Recipe

    This simple spinach and orzo salad packs in a lot of flavor from the sun-dried tomatoes, creamy feta cheese, and the homemade balsamic vinaigrette dressing. It works great as a light lunch or the perfect side to those summer BBQ cookouts!

    25. Lemon Dill Greek Pasta Salad

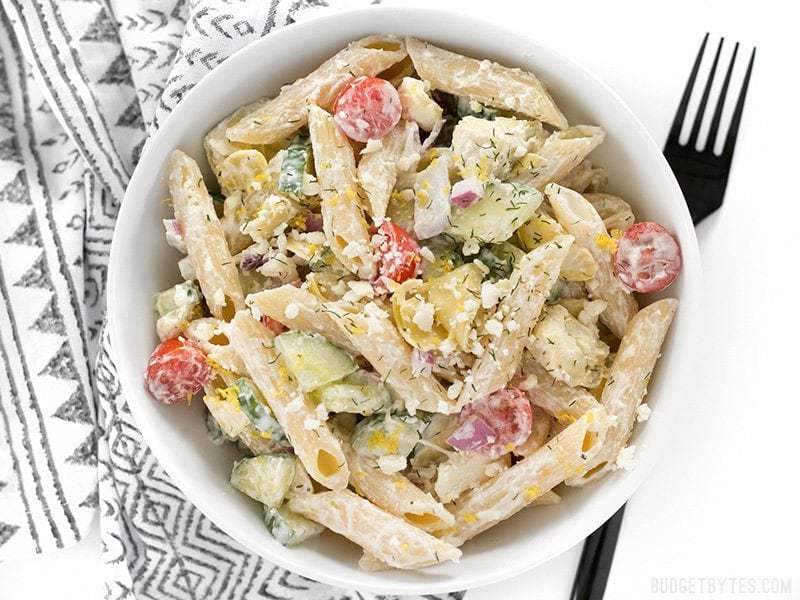
    Creamy Lemon Dill Greek Pasta Salad

    Creamy Greek pasta salad served in a bowl with a fork.

    Creamy Lemon Dill Greek Pasta Salad is packed with bold flavors and fresh vegetables, making it a delicious light lunch. 

    4.87 from 29 votes

    $10.40 recipe / $1.73 serving
    Get the Recipe

    Fresh, zesty, and easy on the budget, this cucumber dill pasta salad is ready in about 30 minutes, so lunch is ready fast. It’s packed with pasta, cucumber, tomatoes, artichokes, feta, and a creamy yogurt dill dressing. The lemony, garlicky flavor makes it hard not to sneak a forkful from the fridge.

    26. Butternut Squash Pasta Salad

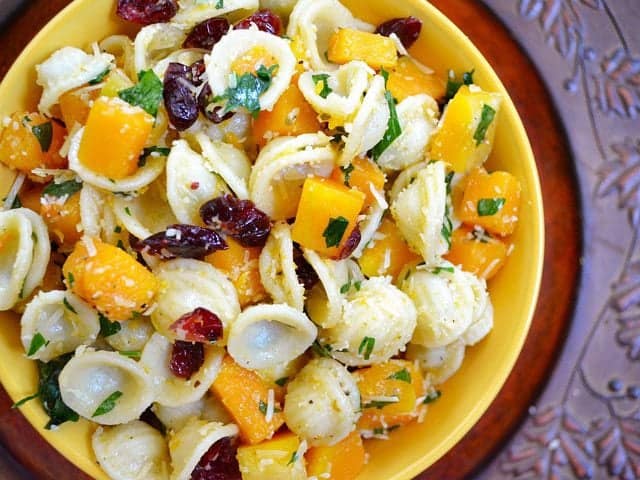
    Butternut Squash Pasta Salad

    Close-up of butternut pasta salad in a bowl.

    This butternut squash pasta salad is both sweet and savory with parmesan cheese and sweet-tart cranberries.

    4.41 from 5 votes

    $8.46 recipe / $1.06 serving
    Get the Recipe

    I usually save this butternut squash pasta salad for the fall, when fresh butternut squash is in season and readily available at the market. Paired with sage, dried cranberries, and Parmesan, it has a cozy autumn flavor. I like orecchiette pasta for this salad!

    27. Pepperoni Pasta Salad

    Pepperoni Pasta Salad

    Pepperoni’s rich and peppery bite is the perfect contrast to mild spinach, mozzarella, and pasta in this Pepperoni Pasta Salad. BudgetBytes.com

    Pepperoni’s rich and peppery bite is the perfect contrast to mild spinach, mozzarella, and pasta in this Pepperoni Pasta Salad. 

    4.55 from 11 votes

    $7.31 recipe / $1.22 serving
    Get the Recipe

    This pasta salad with pepperoni is heavy on the salad side, with plenty of fresh greens and vegetables in the mix. It’s a great option when I want a relatively healthy lunch that helps me clear out my fridge!

    Our Zucchini recipes was originally published 6/2/23. We have updated it to be the best it can be and republished 6/27/26.

    The post Best Pasta Salad Recipes appeared first on Budget Bytes.
    This post was originally published on this site.

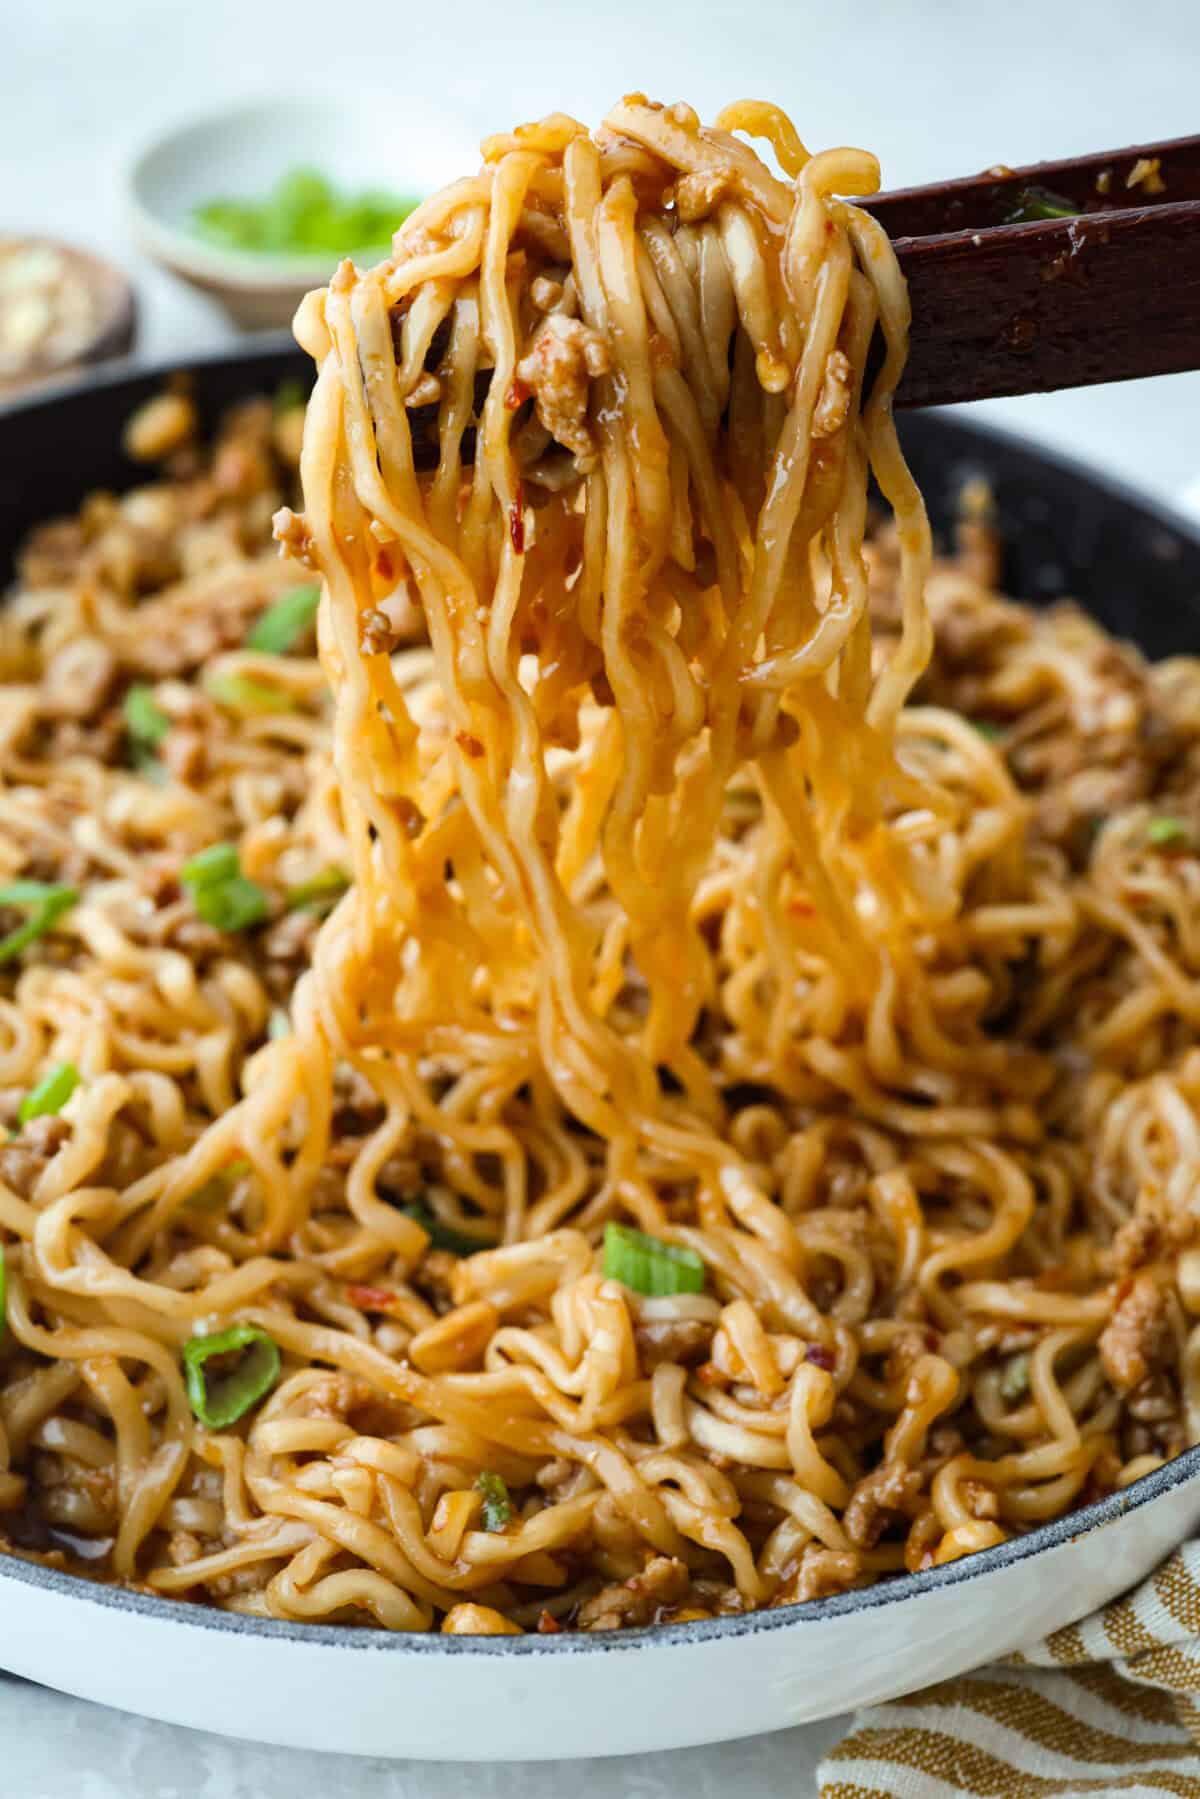
  • Dragon Noodles

    Dragon Noodles

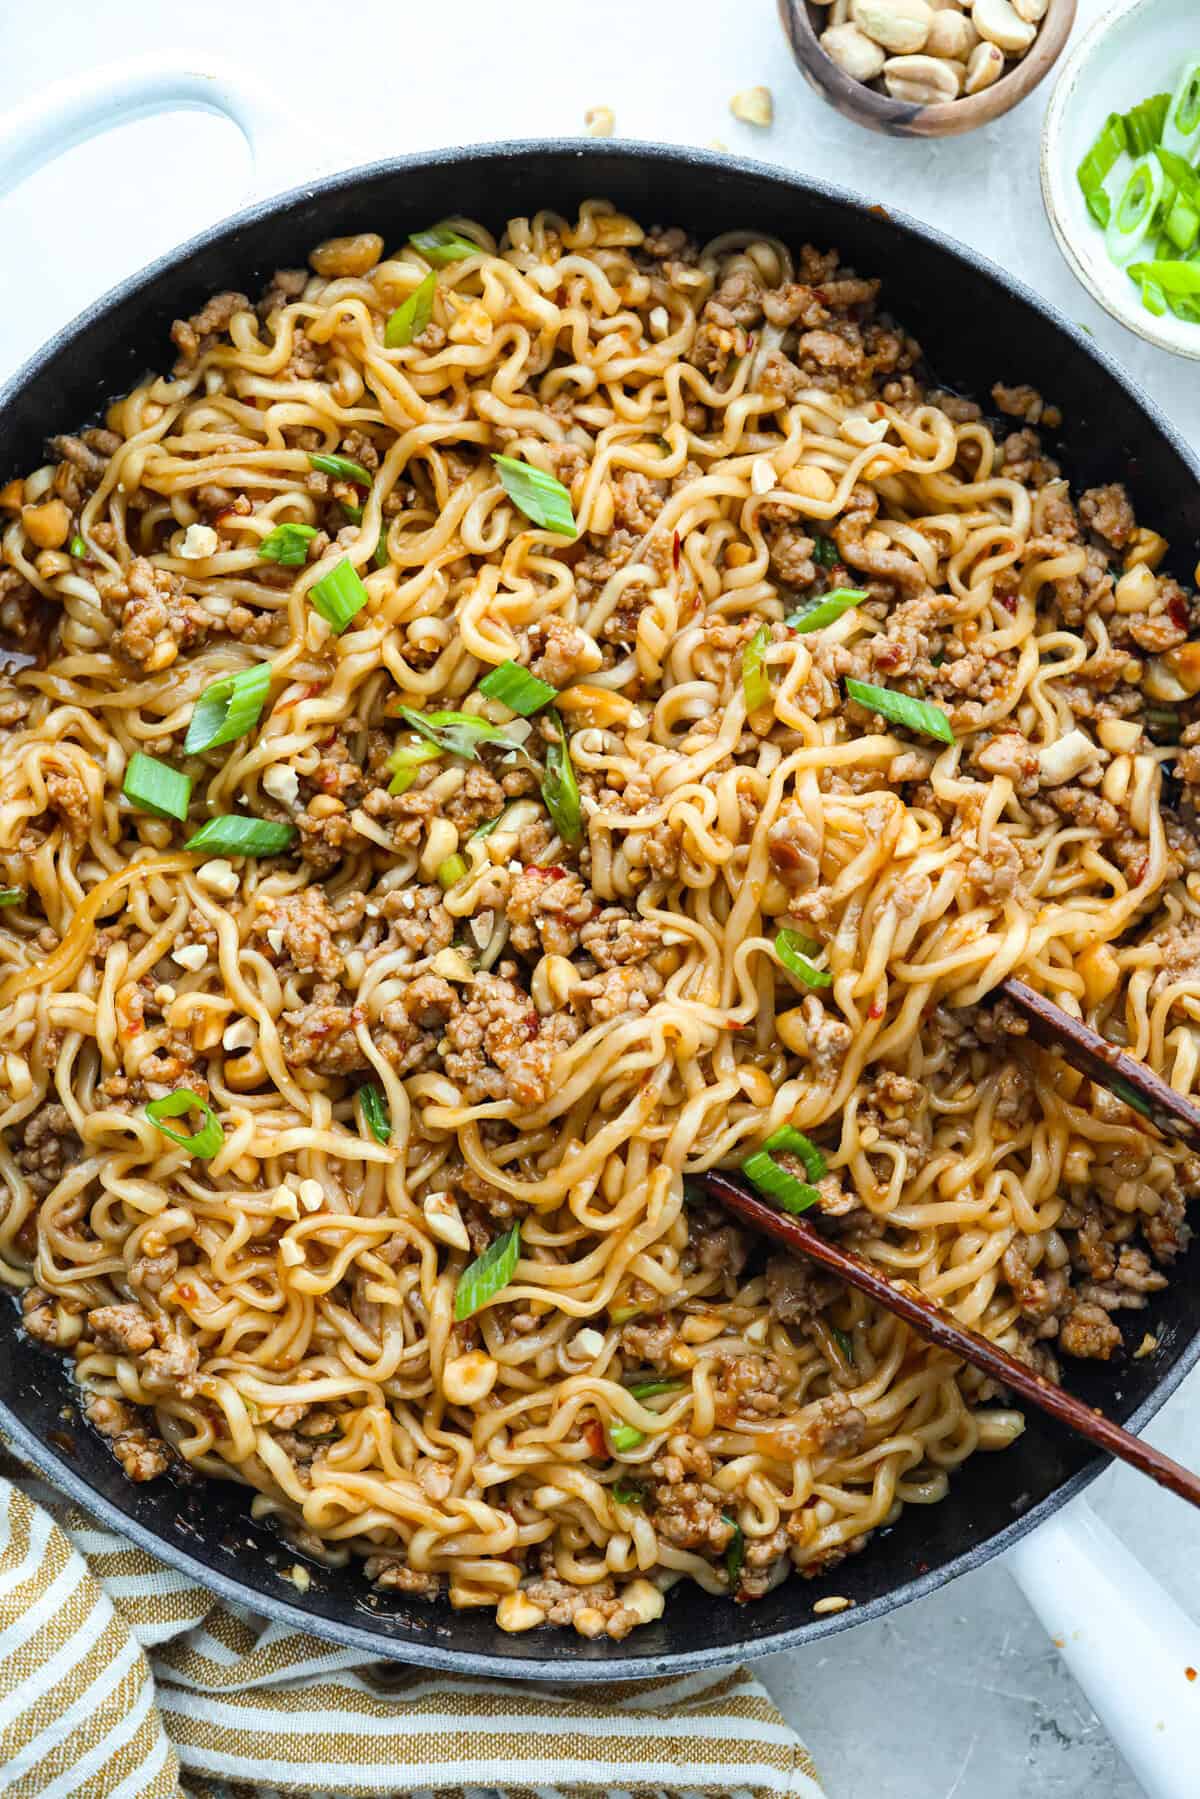
    These dragon noodles are the ultimate weeknight dinner when you’re craving big flavor fast. Tender noodles, spicy-sweet sauce, and savory pork come together for a dish that is fast and seriously addictive.

    Why This Skillet Always Wins

    • Faster and Cheaper Than Delivery: In just 15 minutes, you’ve got a flavor-packed dinner that beats takeout every time. It also uses minimal and budget-friendly ingredients. So affordable!
    • Sweet Heat Obsession: The chili-garlic sauce and brown sugar combo creates a saucy coating with the perfect balance of flavor.
    • One Pan Wonder: Everything cooks in one skillet for easy cleanup and zero dinner stress.

    Ingredients for Dragon Noodles

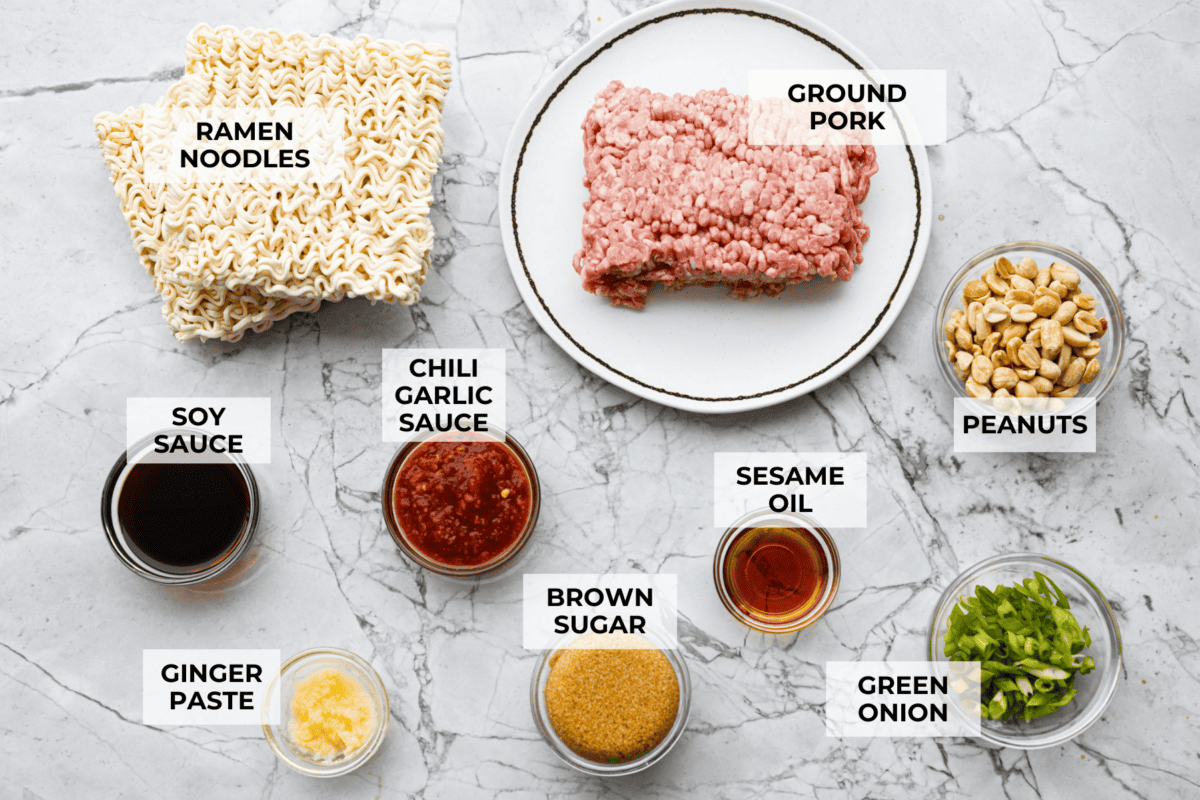
    Overhead shot of labeled dragon noodle ingredients.
    • Type of Noodle: Dragon noodles are typically made with ramen noodles. I love the Buldok brand and discard the seasonings. Linguine or spaghetti work great as well.
    • Ground Pork: Adds rich, savory flavor, but you can also use ground beef, turkey, or chicken. It is also very common to use scrambled eggs as the protein in this dish!
    • Nuts: Cashews are a great alternative if you prefer something other than peanuts.
    • Chili Garlic Sauce: It’s easily adjustable, but it is a key ingredient in this dish! You can use sriracha if thats what you have on hand.
    • Add Veggies: Feel free to toss in extras like bell peppers, carrots, snap peas, or cabbage to bulk the dish up and add color.

    How to Make Dragon Noodles

    My family loves these dragon noodles! I love them too because they are fast, easy, and full of flavor. We usually eat them on their own, but they also go well with veggie egg rolls, edamame, or a simple cucumber salad.

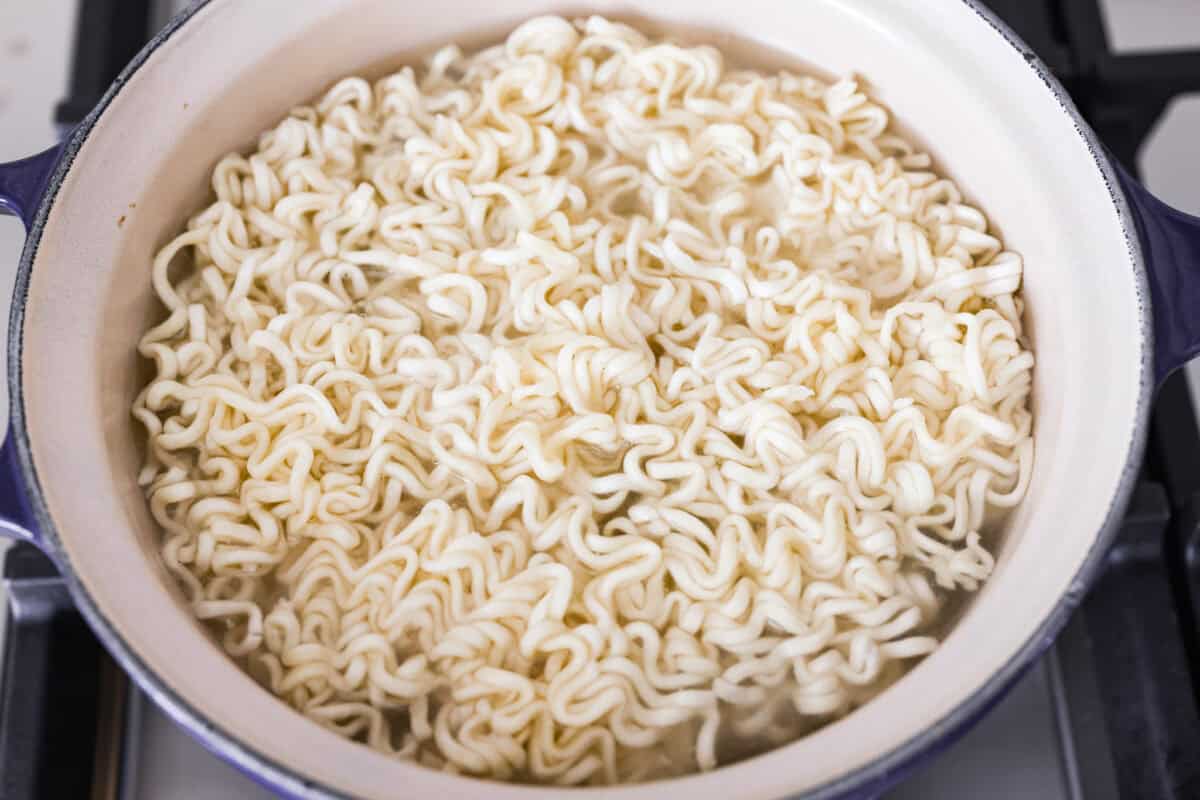
    1. Cook Noodles: Cook the ramen noodles according to the package directions. Drain the noodles in a colander and set aside. Ramen noodles cook fast; I only cook mine for 3 minutes!
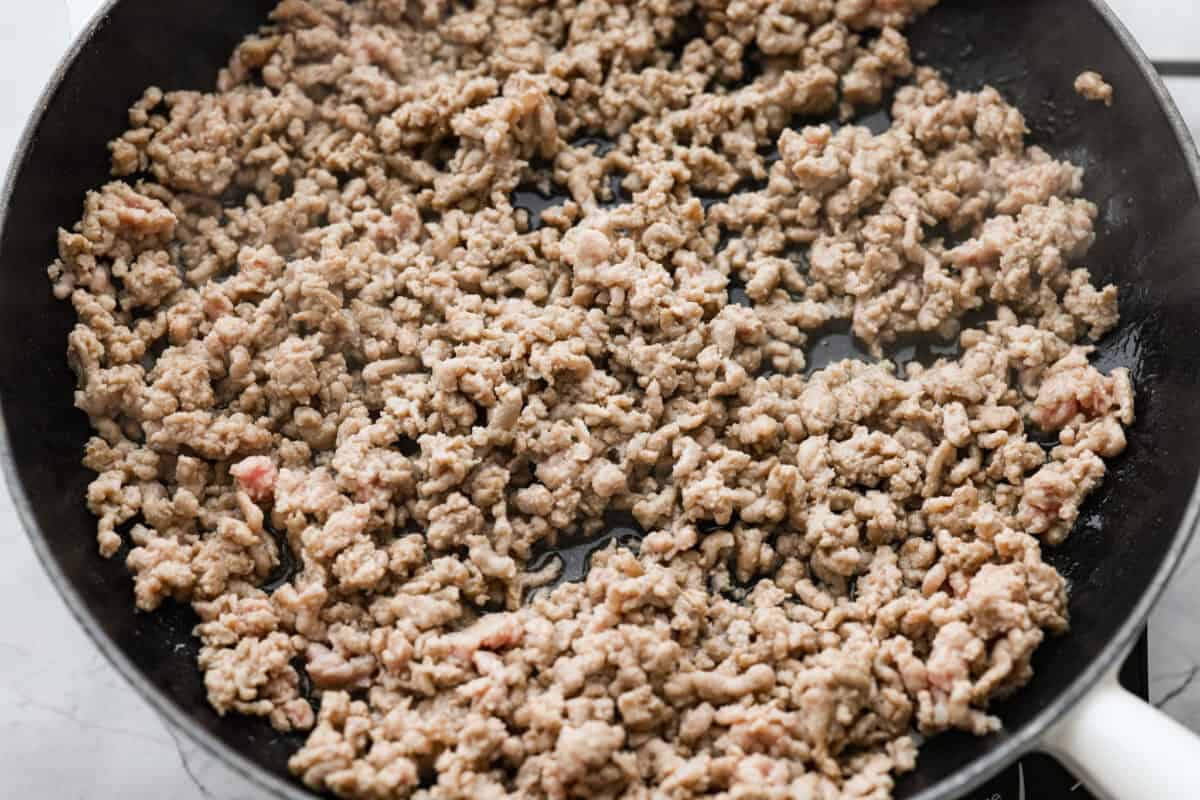
    2. Cook Pork: In a large skillet, add sesame oil and ground pork. Cook over medium-high heat for 7-8 minutes, or until no longer pink.
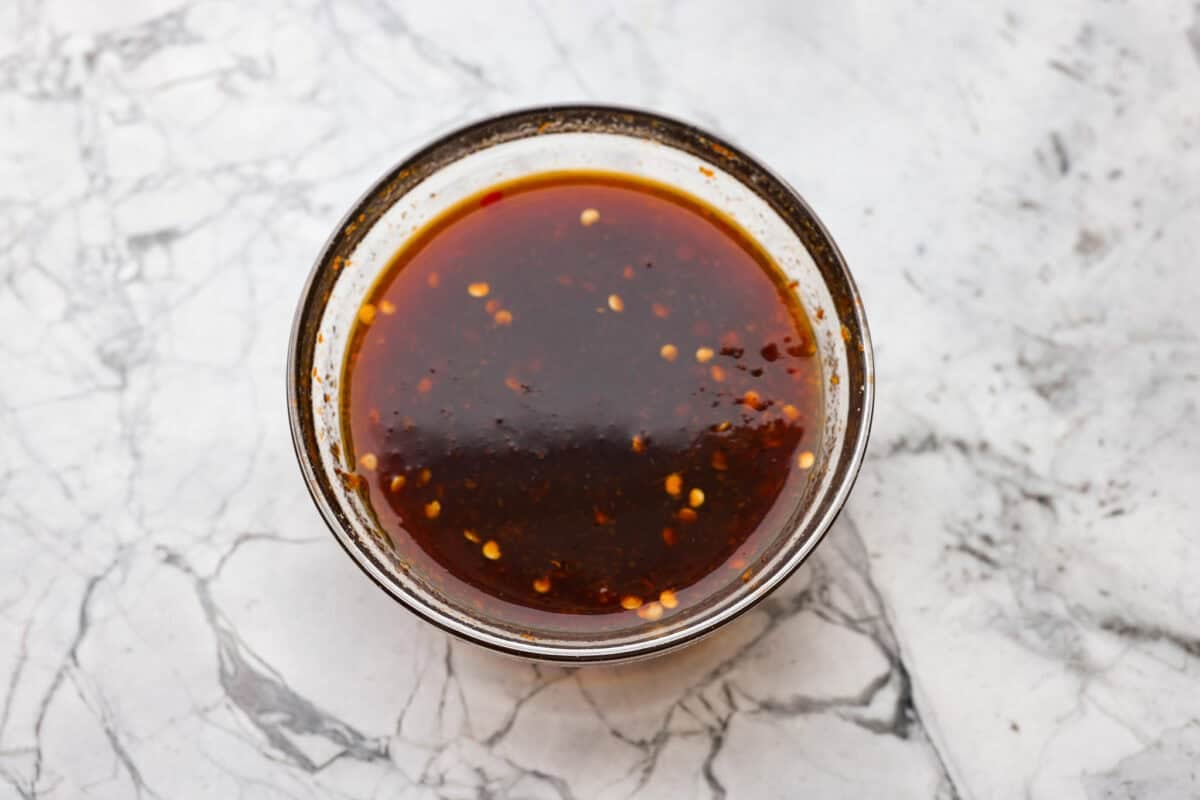
    3. Make Sauce: In a medium bowl, whisk together chili garlic sauce, soy sauce, brown sugar, and ginger paste.
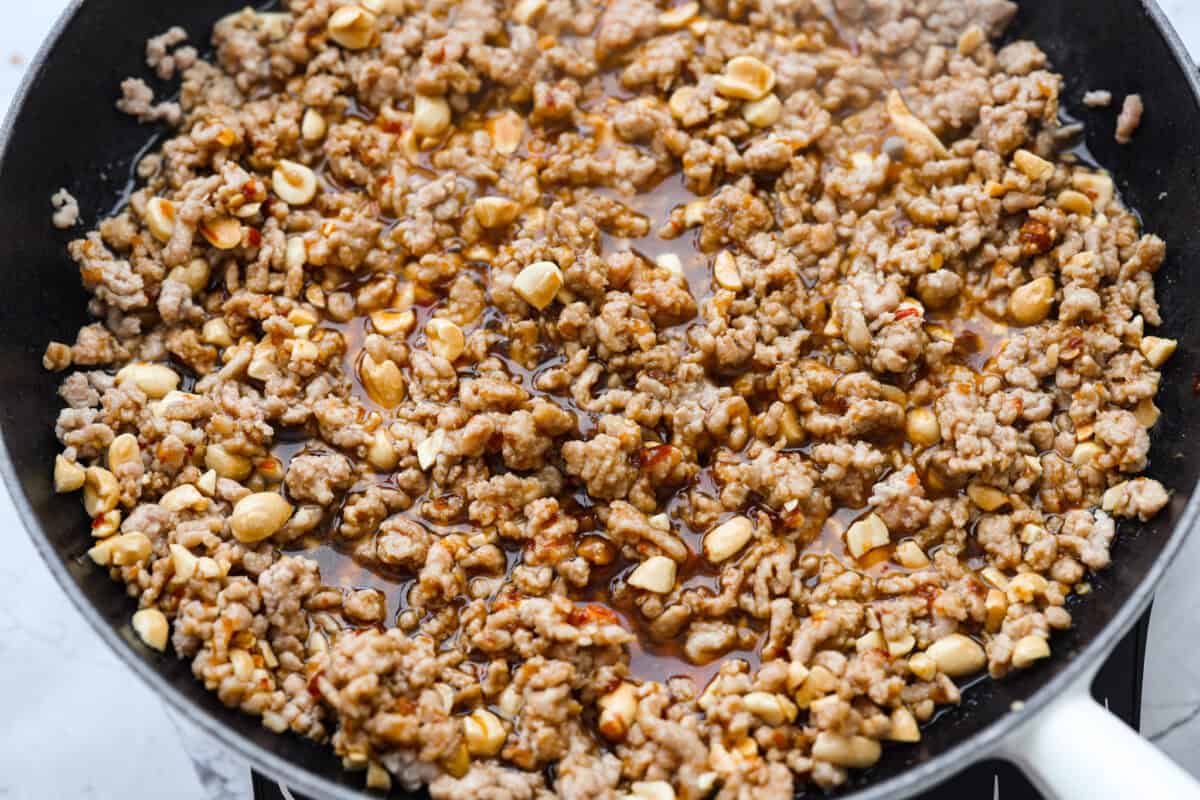
    4. Add Sauce: Stir the sauce and peanuts into the cooked pork to combine. Simmer the pork and sauce for 3 minutes.
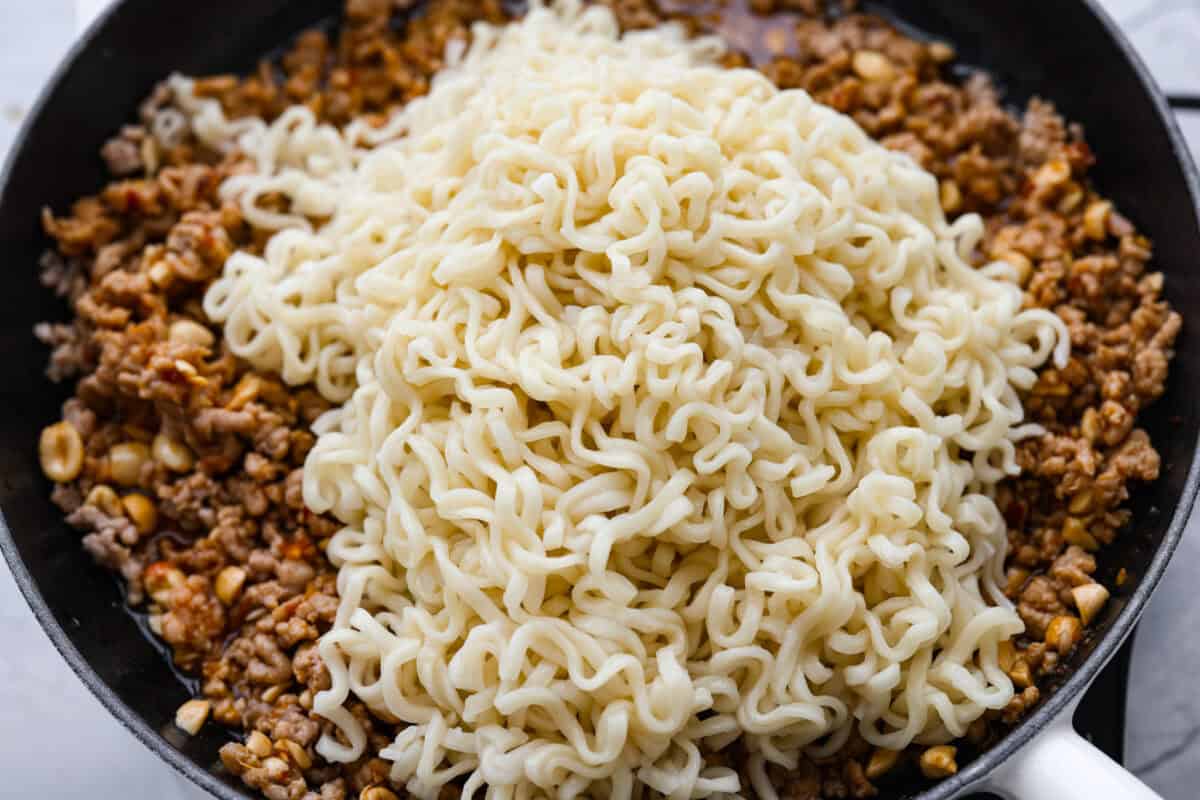
    5. Serve: Add the cooked ramen noodles to the skillet and toss to coat everything in the sauce. Top Dragon Noodles with sliced green onions and serve!

    Must Have Tools For This Recipe

    • Large Saucepan or Pot: For boiling and combining ingredients.
    • Strainer: To easily drain the noodles.
    • Whisk: For mixing sauces until smooth and well combined.
    • Tongs: Perfect for tossing everything together and serving.

    Print

    Dragon Noodles

    Dragon noodles are a fast and flavorful dinner with tender noodles, pork, and a perfectly balanced sauce.
    Course Dinner, Side Dish
    Cuisine American, Asian American
    Keyword dragon noodles recipe, dragon noodles with ground pork, easy
    Prep Time 5 minutes
    Cook Time 10 minutes
    Total Time 15 minutes
    Servings 4 Servings
    Calories 634kcal

    Ingredients

    • ½ pound ground pork
    • 1 tablespoon sesame oil
    • 9 ounces ramen noodles I used Buldak brand, seasonings removed
    • cup chili garlic sauce
    • cup soy sauce
    • cup brown sugar
    • 1 teaspoon ginger paste
    • cup unsalted chopped peanuts
    • ¼ cup sliced green onions

    Instructions

    • Cook 9 ounces ramen noodles according to the package directions. Drain the noodles in a colander and set aside.
    • In a large skillet, add 1 tablespoon sesame oil and ½ pound ground pork and cook over medium-high heat for 7-8 minutes, or until no longer pink.
    • In a medium bowl, whisk together ⅓ cup chili garlic sauce, ⅓ cup soy sauce, ⅓ cup brown sugar, and 1 teaspoon ginger paste.
    • Add the sauce and ⅓ cup unsalted chopped peanuts to the cooked pork and stir to combine. Simmer for 3 minutes.
    • Add the cooked noodles and toss to coat everything in the sauce. Top with ¼ cup sliced green onions and serve!

    Notes

    Leftover Instructions

    • Fridge: Store leftover dragon noodles in an airtight container in the refrigerator for 2-3 days.
    • Reheating: Reheat leftovers in the microwave until heated through!

    Nutrition

    Calories: 634kcal | Carbohydrates: 66g | Protein: 22g | Fat: 32g | Saturated Fat: 11g | Polyunsaturated Fat: 6g | Monounsaturated Fat: 14g | Cholesterol: 41mg | Sodium: 3388mg | Potassium: 450mg | Fiber: 4g | Sugar: 23g | Vitamin A: 74IU | Vitamin C: 2mg | Calcium: 63mg | Iron: 4mg
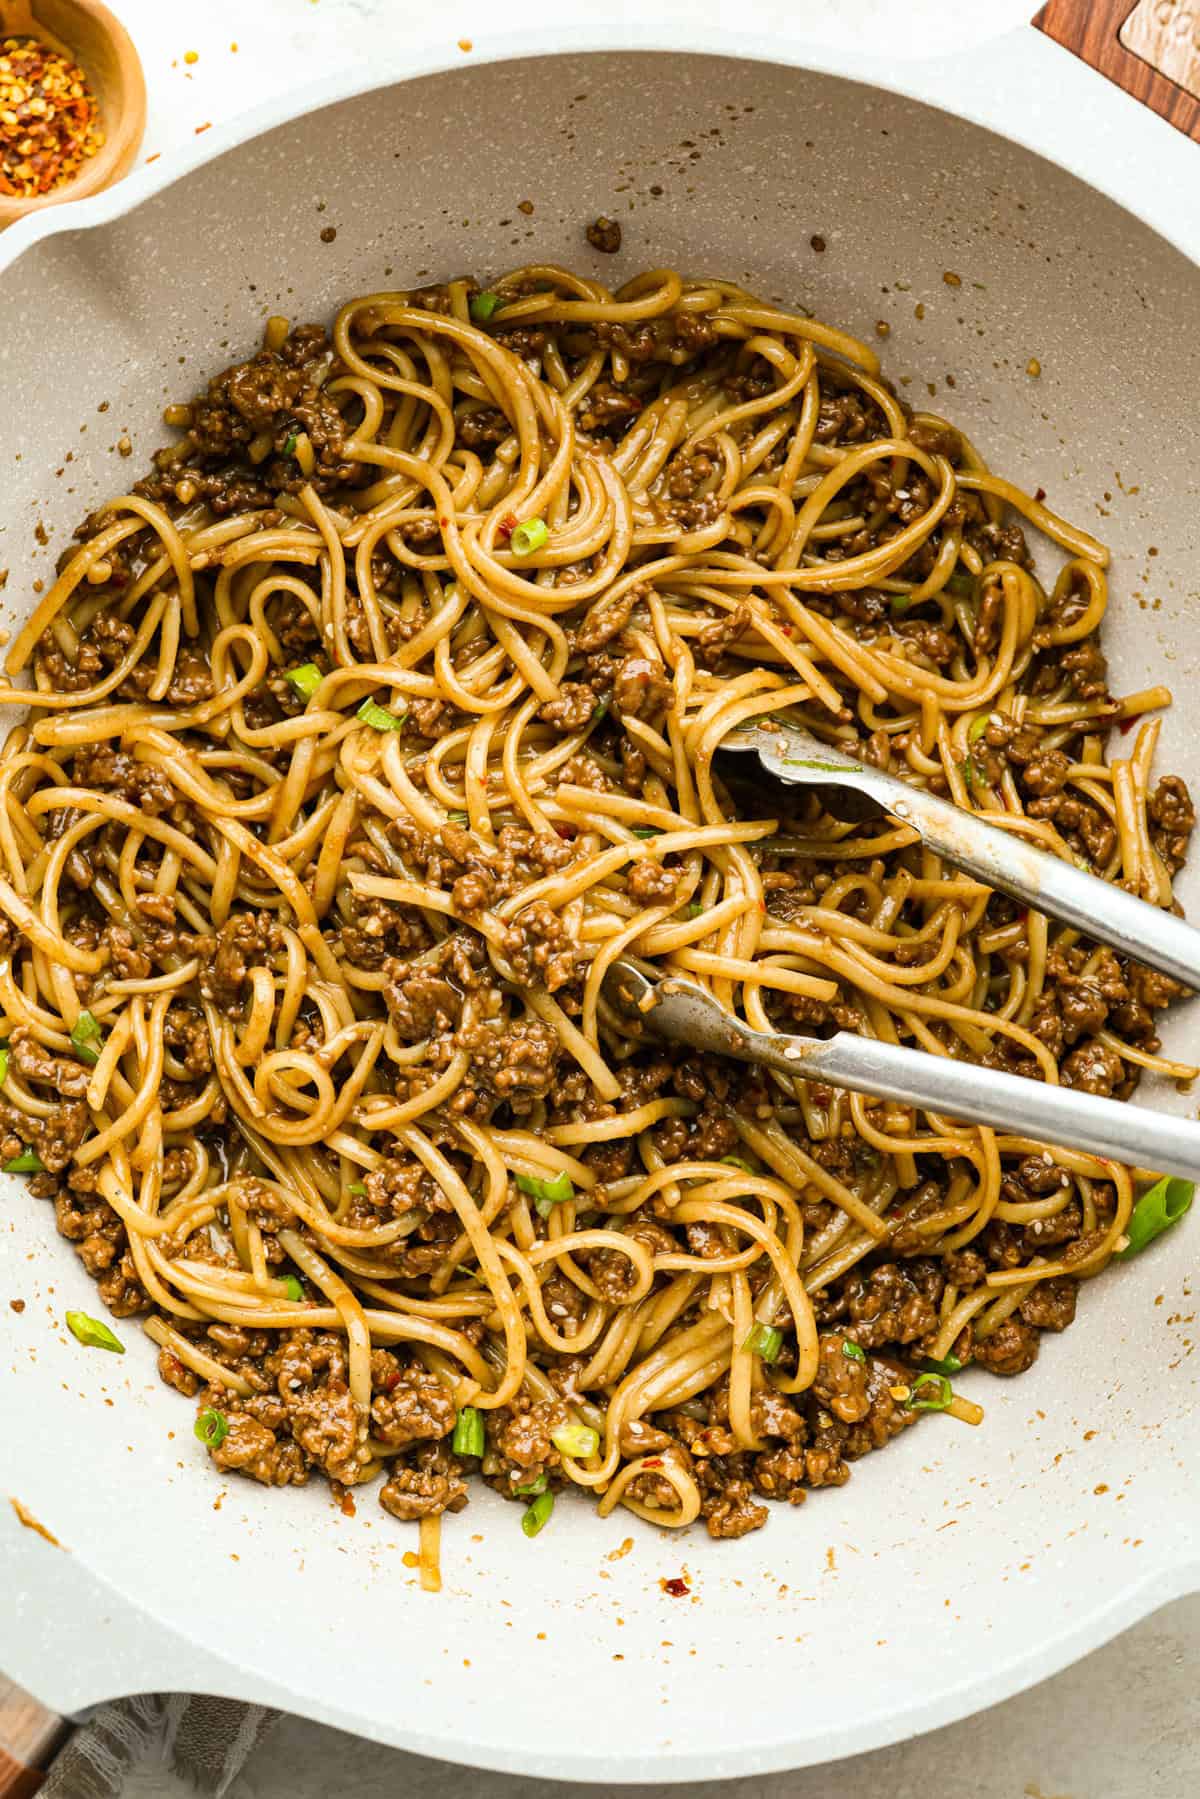
    Meat and sauce mixture combined with the cooked dragon noodles.

    More Asian Noodle Recipes to Love

    We love easy noodle dinners in our house, so I wanted to share a few more family favorites we make all the time.

    This post was originally published on this site.

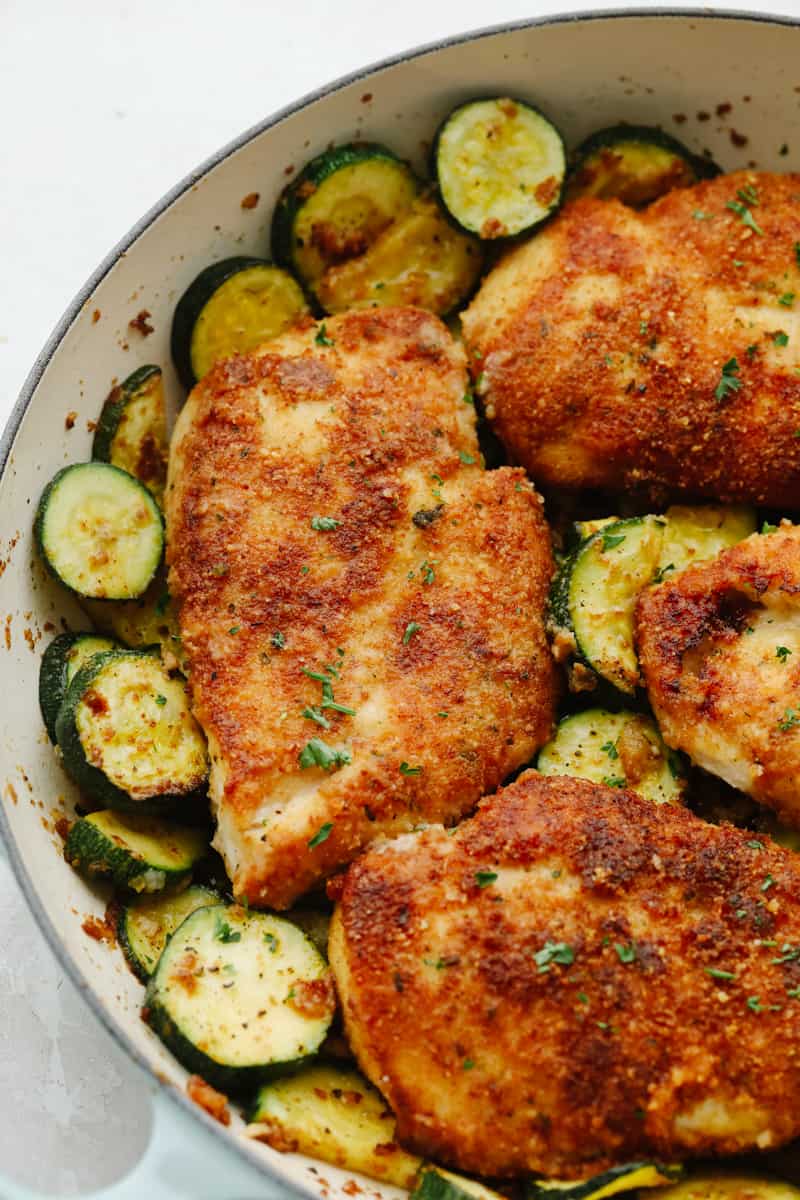
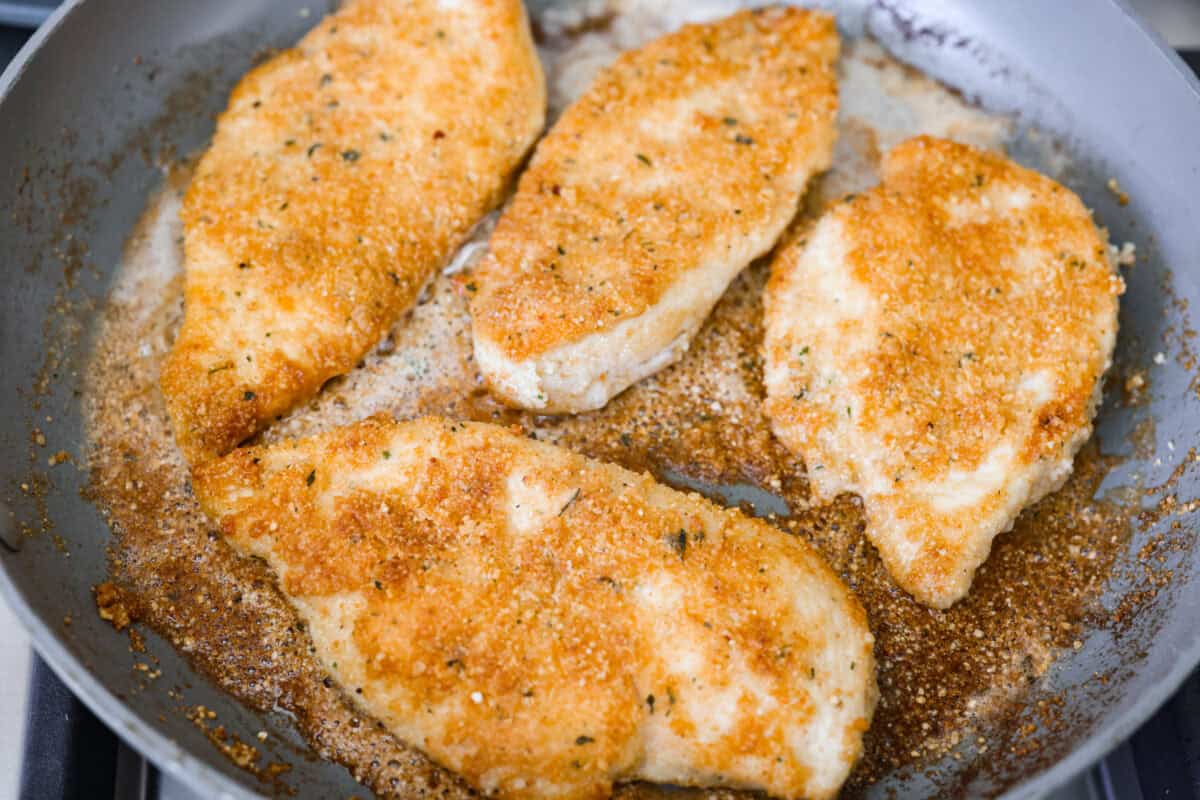
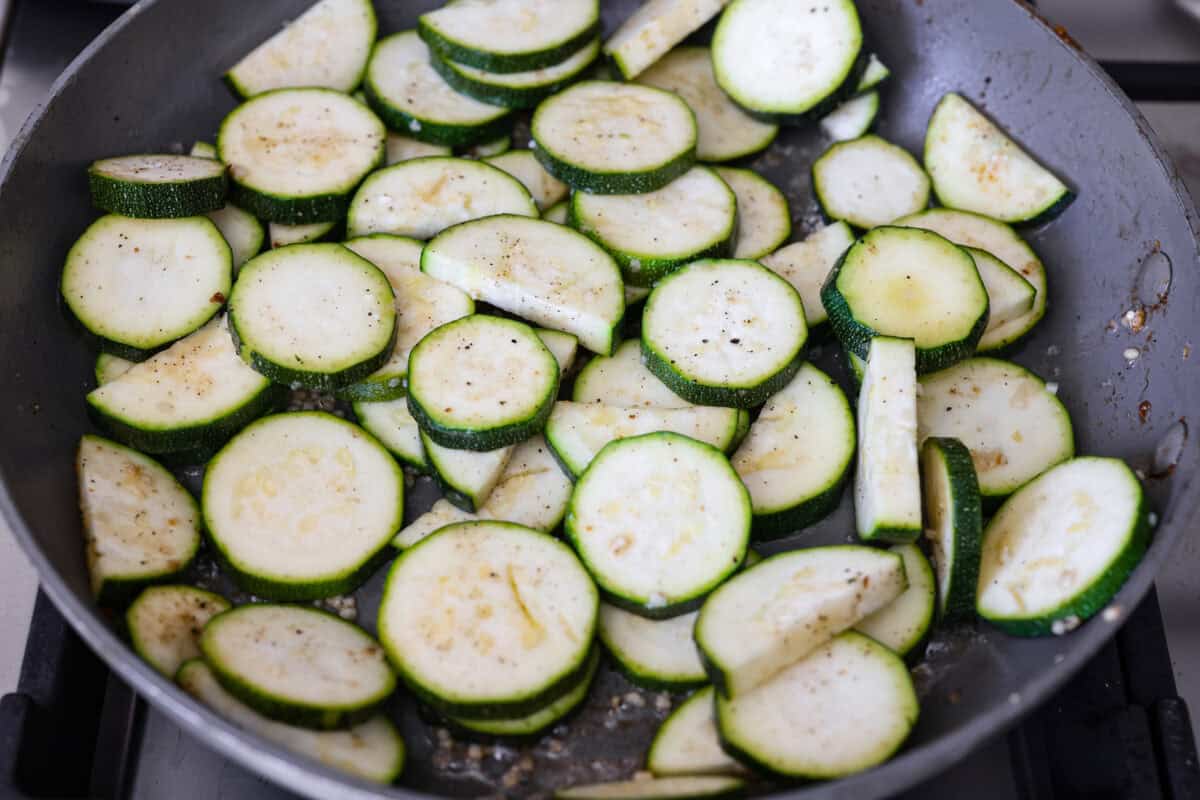
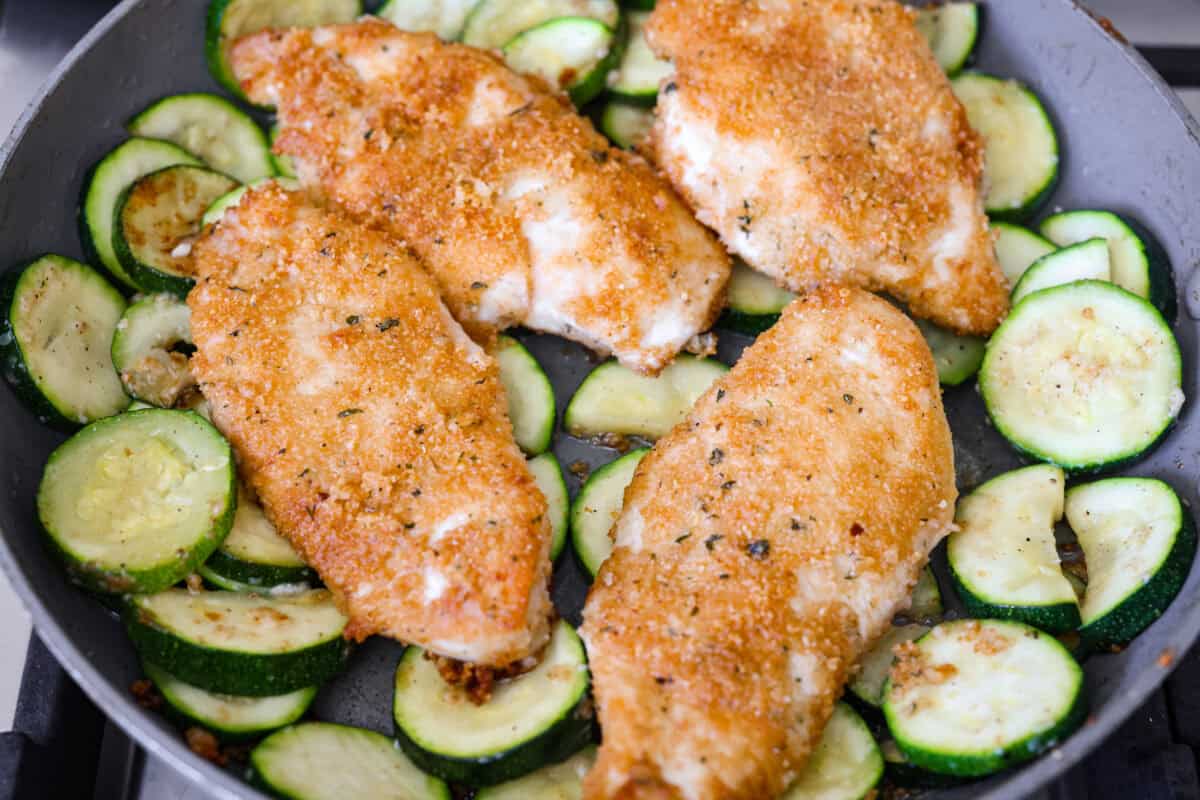
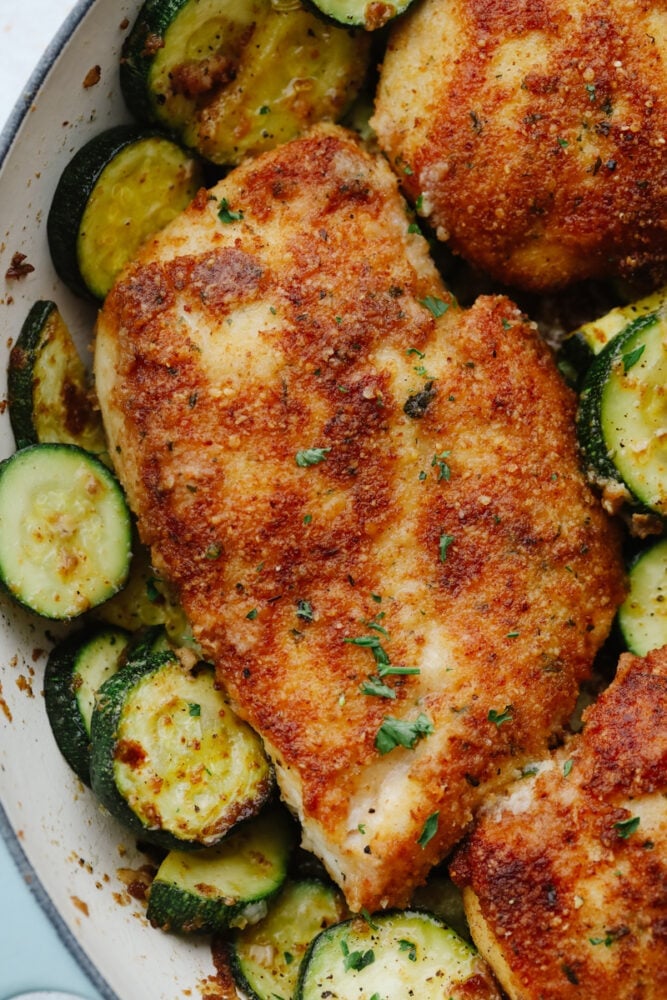
  • Crispy Parmesan Garlic Chicken With Zucchini

    Crispy Parmesan Garlic Chicken With Zucchini

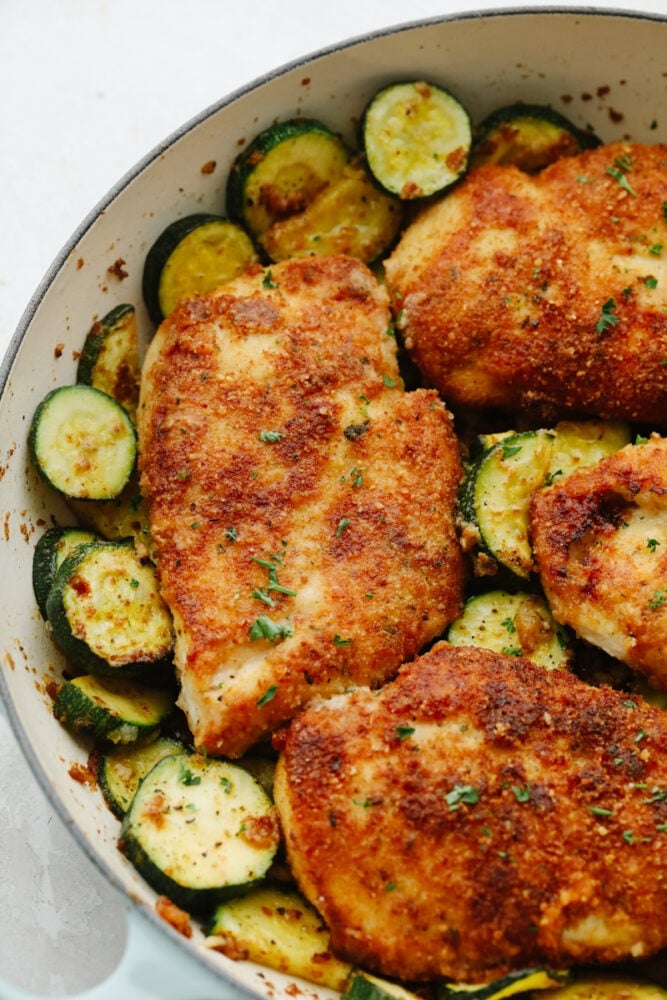
    My crispy parmesan garlic chicken with zucchini is a weeknight dinner hero. You get golden chicken with the best garlic parmesan crust. The tender zucchini cooks right in the same pan, so dinner is easy and full of flavor.

    Cooked parmesan garlic chicken with zucchini in a white bowl.

    Why You’ll Be Obsessed

    • Ready Fast: It’s quick, family-friendly, and has just enough crispy, buttery goodness to make everyone forget they’re eating vegetables.
    • One Pan Wonder: Crispy chicken, garlic butter zucchini, and only one skillet to wash? Yes please.
    • That Crust Though: The chicken is coated in breadcrumbs and parmesan. Then it cooks until golden, crispy, and so good.

    A Reader’s Review

    This is one of my staple recipes – I absolutely LOVE it and everyone I serve it to gives it rave reviews. This will be a family favourite for years to come!

    – Cayla

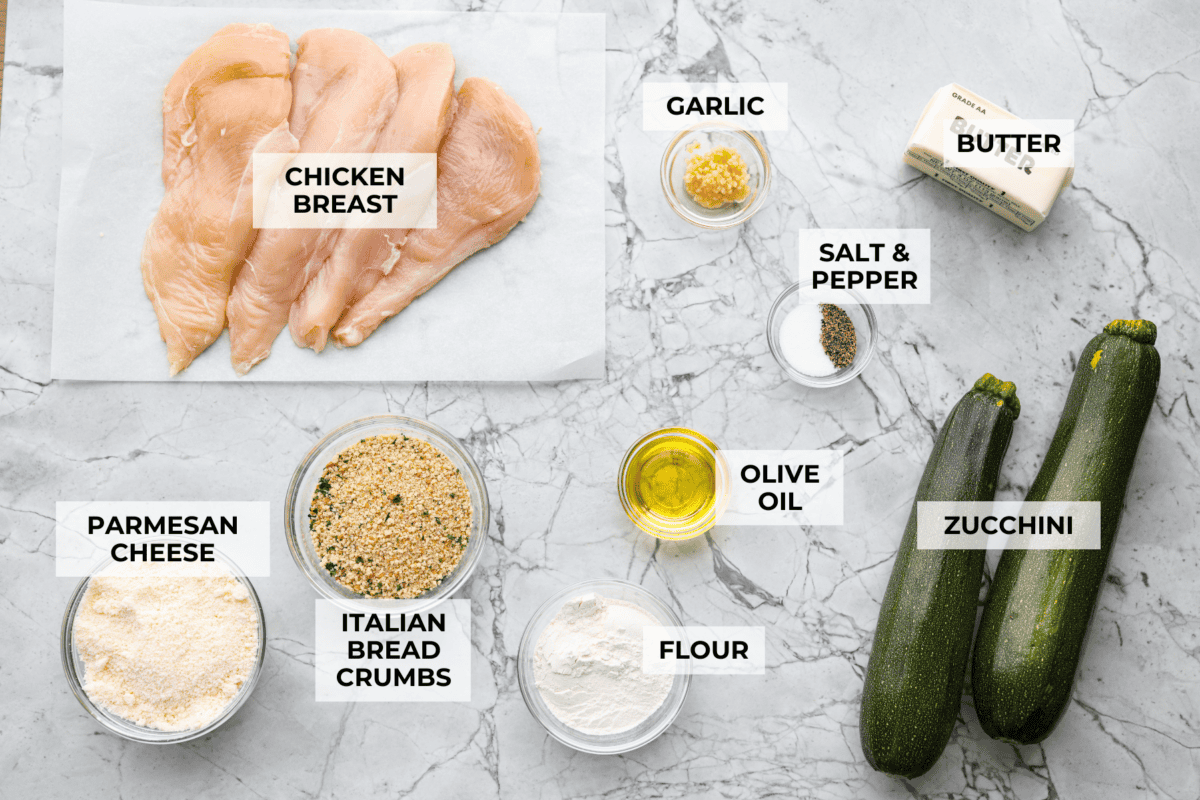
    Garlic Chicken with Zucchini Ingredients

    Overhead shot of labeled ingredients.
    • Breadcrumbs: Plain breadcrumbs work too! Just add Italian seasoning, garlic powder, salt, and pepper.
    • Chicken Breast: Use thin, even chicken breasts so they cook fast and cook evenly.
    • Zucchini: Swap it with yellow squash, broccoli, or Brussels sprouts if that’s what you have.ve.

    How to Make Parmesan Garlic Chicken with Zucchini

    If your garden is full of zucchini, this is such a good way to use it up! The crispy parmesan chicken makes it filling enough for dinner. The garlic zucchini keeps it fresh and perfect for summer.

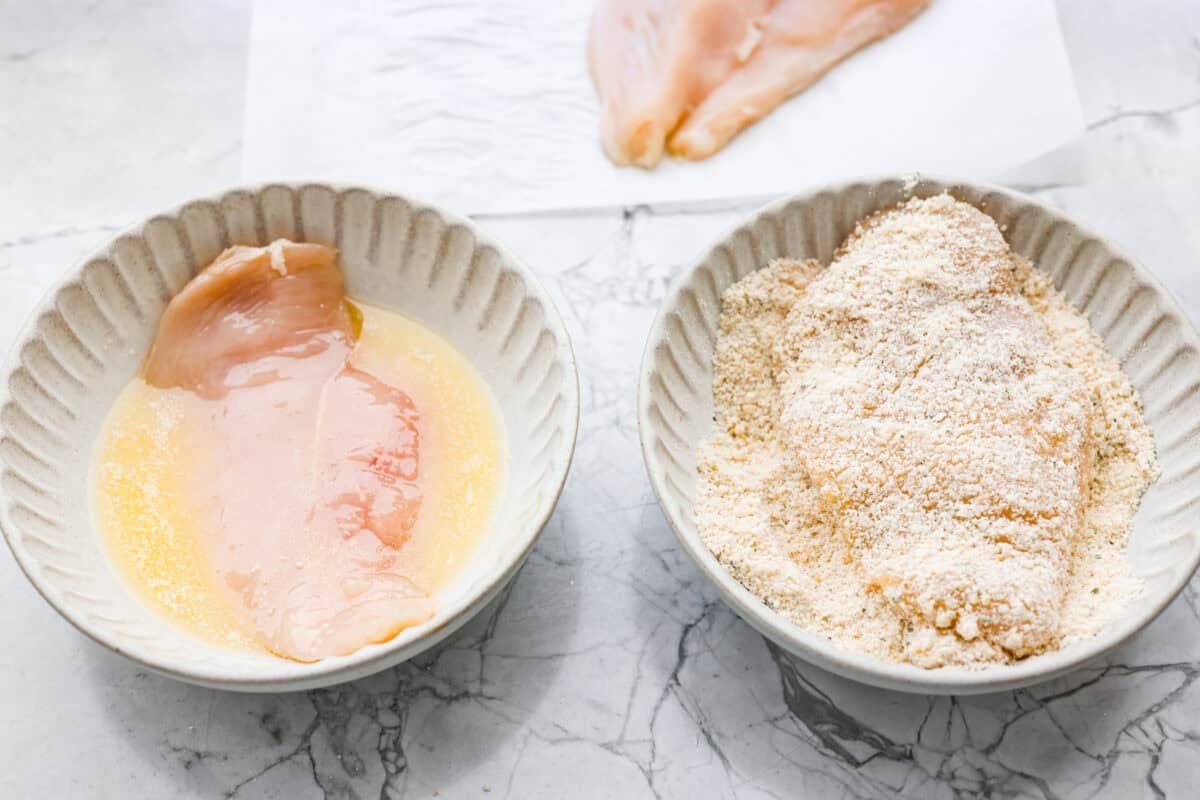
    1. Bread the Chicken: Melt 4 tablespoons of butter in a shallow dish. In another shallow dish, mix the breadcrumbs, parmesan cheese, and flour. Season the chicken breasts with salt and pepper. Dip the chicken in the butter, then coat it in the breadcrumb mix.
    2. Cook the Chicken: Heat 2 tablespoons of butter and olive oil in a large skillet over medium-high heat. Once hot, add the breaded chicken. Cook each side for 3-4 minutes, until the outside is crispy and the chicken is cooked through. Set it aside on a plate.
    3. Sauté the Zucchini: Add the last 2 tablespoons of butter back to the skillet. Add the garlic and zucchini, then sauté until tender. Season with salt and pepper, then add 1 tablespoon of parmesan.
    4. Serve: Add the chicken back to the skillet with the zucchini. Heat for about 1 minute, then serve it right away.

    Alyssa’s Pro Tip

    Keep That Crispy Coating: Make sure the butter and oil are hot before adding the chicken. Once the chicken hits the pan, let it cook on one side before you flip it. This helps the breading get crispy and stay on.

    Must Have Tools For This Recipe

    Print

    Parmesan Garlic Chicken with Zucchini

    Crispy parmesan garlic chicken with zucchini is an easy one-pan dinner with golden breaded chicken and tender garlic butter zucchini.
    Course Dinner, Main Course
    Cuisine American
    Keyword chicken and zucchini, crispy chicken and zucchini, parmesan garlic chicken, parmesan garlic chicken with zucchini
    Prep Time 5 minutes
    Cook Time 20 minutes
    Total Time 25 minutes
    Servings 4 Servings
    Calories 549kcal

    Ingredients

    • 4 thin chicken breasts or 2 thick chicken breasts sliced in half
    • 8 tablespoons butter divided
    • ½ cup Italian bread crumbs
    • ½ cup plus 1 tablespoon grated parmesan divided
    • ¼ cup flour
    • 2 tablespoons olive oil
    • 2 medium sliced zucchini
    • 2 minced garlic cloves
    • salt and pepper to taste

    Instructions

    • Melt 4 tablespoons of butter in a shallow dish. In another shallow dish, combine breadcrumbs, Parmesan cheese, and flour. Lightly season the chicken breasts with salt and pepper. Dip the chicken in the butter and then coat it in the breadcrumb mixture.
    • Heat 2 tablespoons of butter and olive oil in a large skillet over medium-high heat. Once hot, add the breaded chicken. Cook on each side for about 3-4 minutes until the outside is crispy and the chicken is cooked throughout. Set aside on a plate.
    • Add the remaining 2 tablespoons of butter back to the skillet and sauté the minced garlic and zucchini until tender. Season with salt and pepper to taste and add 1 tablespoon Parmesan.
    • Add the chicken back to the skillet with the zucchini and heat for a minute or so. Serve immediately.

    Video

    Notes

    Leftover Instructions

    • Fridge: Store in an airtight container in the fridge for up to 4 days.
    • FreezerIn an airtight container, store your chicken and zucchini for up to 2 months. Thaw overnight before reheating. Reheat in a skillet over medium heat until heated through.

    Nutrition

    Calories: 549kcal | Carbohydrates: 21g | Protein: 32g | Fat: 37g | Saturated Fat: 18g | Polyunsaturated Fat: 3g | Monounsaturated Fat: 13g | Trans Fat: 1g | Cholesterol: 144mg | Sodium: 739mg | Potassium: 753mg | Fiber: 2g | Sugar: 3g | Vitamin A: 1067IU | Vitamin C: 20mg | Calcium: 170mg | Iron: 2mg
    Close-up of crispy parmesan garlic chicken with zucchini.

    More Zucchini Favorite Recipes

    My family and I cannot get enough of this versatile summer vegetable! Take advantage of zucchini being in season and try out some of my other favorite zucchini recipes!

    Save

    This post was originally published on this site.

  • Blueberry Cookies

    Blueberry Cookies

    These Blueberry Cookies are one of my favorite summery treats, and because they start with frozen blueberries, I can enjoy them any time of year. But let me tell you, they’re still one of the best ways to celebrate farmers market season and the warm summer nights. This easy no-chill cookie recipe makes 3 dozen chewy, jammy cookies with brown sugar, white chocolate chips, and just the right amount of cinnamon for a cozy-sweet blueberry flavor. These beauties are summer vacation in cookie form! Get ready for your new favorite way to use blueberries.

    Soft and Chewy Blueberry Cookies

    These blueberry cookies remind me of long summers as a kid growing up in New England. They really are a special treat; I love it when food evokes such strong (happy!) memories. They’ve got the soft, chewy center I want in a homemade cookie, little pockets of juicy blueberry, creamy white chocolate chips, and a hint of cinnamon that makes the berries taste even sweeter and fuller.

    I get the best texture when the blueberries go into the dough fully frozen, even when I’m starting with fresh berries from the farmers’ market or grocery store. The colder, firmer berries are much easier to fold in without smashing. This means the dough doesn’t turn too wet or streaky before it hits the oven. They still bake into those jammy little pockets, but the cookies hold their shape better and stay chewy instead of spreading too much. If you’re in a fruity cookie mood, my strawberry cookies are another fun one to try next!

    Recipe Success Tips

    1. Keep the blueberries fully frozen. Add them to the dough straight from the freezer. If you’re starting with fresh berries, fully freeze them first before using! Soft or thawed blueberries can burst as you fold them in, making the dough too wet and turning it blue or purple before baking.
    2. Fold gently once the berries go in. I use a spatula instead of a hand mixer so the blueberries and white chocolate chips stay mostly intact. A few blueberry streaks are totally fine, but crushed berries throughout the dough can make the cookies bake up wetter than you want.
    3. Don’t overmix after adding the flour. Mix just until the dry ingredients disappear and a sticky dough forms. Overmixing develops the gluten in the flour, which can make the cookies tougher instead of soft and chewy.
    4. Watch the edges, not just the timer. These cookies are done when they’ve spread, and the tops or edges are just starting to turn lightly golden. I like to pull them on the earlier side because the centers keep setting as they cool, which gives you a softer, chewier cookie.
    5. Bake the dough right away. Like I mention in my peaches and cream cookies, I don’t recommend making this cookie dough ahead once the fruit is folded in. Even though the berries start frozen, they’ll thaw as the dough sits and release extra juice. This can make the dough too wet and affect how the cookies spread and bake.
    6. Make them bakery-style! For bigger, coffee shop-style cookies, stack two scoops of dough on top of each other, gently press them together, and leave extra room between each cookie on the baking sheet. This makes fewer cookies, so it’s less budget-friendly per serving, but they still cost way less than buying giant cookies from a bakery or coffee shop (and they make such a fun homemade gift!)

    Why Creaming the Butter and Sugar Matters

    If you’ve ever wondered why cookie recipes don’t tell you to add everything to the bowl at once, this is why. I know it’s tempting to skip it, but taking a few minutes to mix the butter and sugars makes a big difference in the final texture. Here’s what’s happening in the bowl:

    • Creaming creates tiny air pockets. As the sugar is beaten into the softened butter, it creates tiny air pockets throughout the dough. When the cookies hit the oven, the baking powder releases carbon dioxide, which expands into those pockets, helping the cookies bake up softer, thicker, and less dense.
    • Sugar starts dissolving into the butter. Creaming allows the sugar to dissolve into the butter rather than remaining gritty in the dough. That helps the cookies bake more evenly, with soft centers and edges that don’t spread too quickly.
    • It gives the egg a smoother base to blend into. Butter is mostly fat, and eggs add liquid, so they need a little help to emulsify (combine) into one smooth mixture. When the butter and sugar are creamed first, the egg and vanilla mix in more cleanly, making the dough smooth instead of separated.
    • The flour can be mixed gently. Once the flour is added, overmixing can make cookies tough. I like to get the butter, sugar, egg, and vanilla properly combined first, then mix the flour in little by little just until the dough comes together.

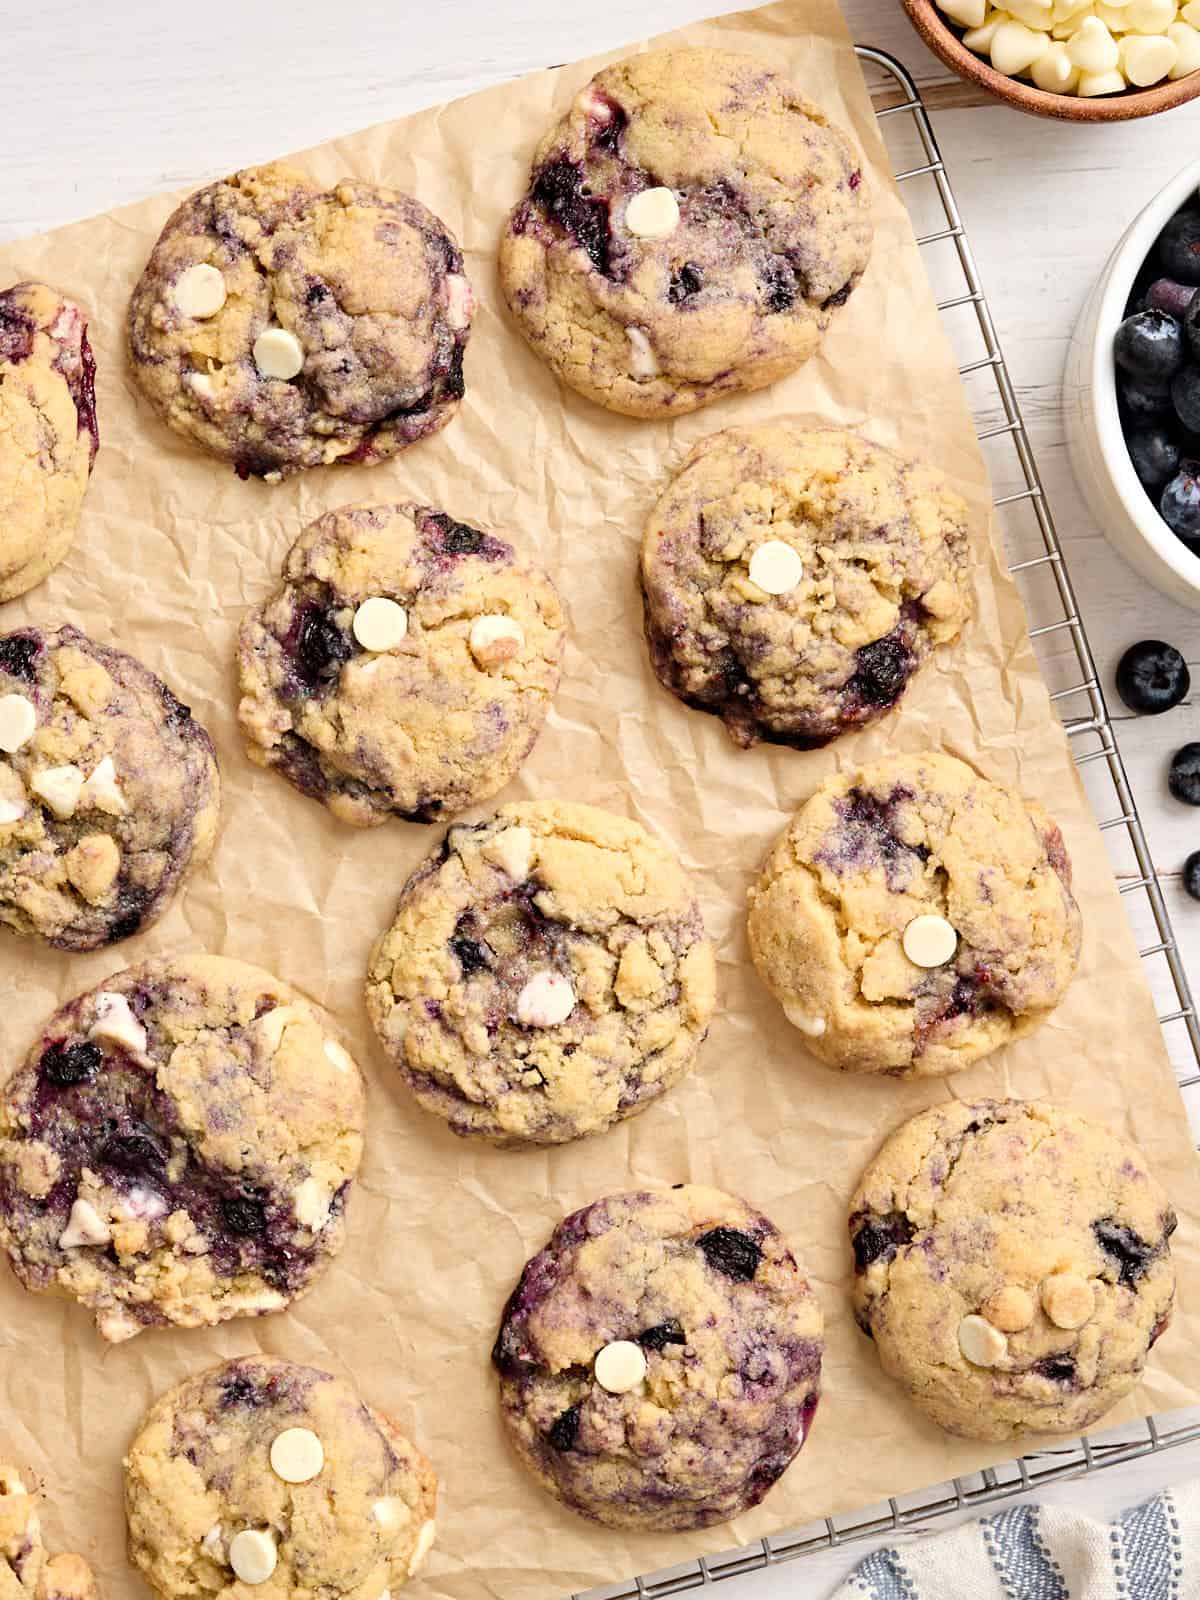
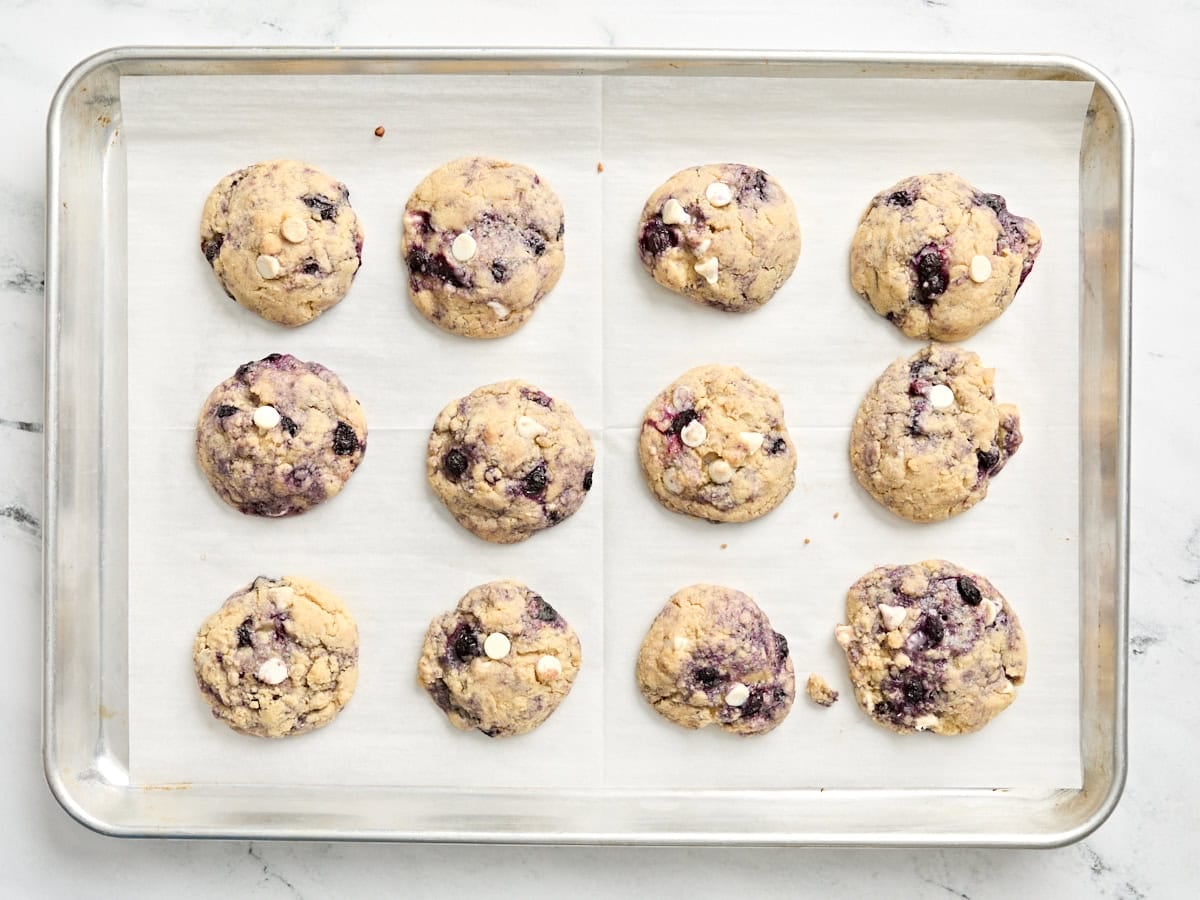
    Overhead view of blueberry cookies on parchment paper.

    Print
    Add to Collection Go to Collections

    Blueberry Cookies

    These easy Blueberry Cookies are soft, chewy, and jammy with frozen blueberries, white chocolate chips, and a hint of cinnamon. No chilling needed!
    Course Dessert
    Cuisine American
    Total Cost $4.77 recipe / $0.13 serving
    Prep Time 15 minutes
    Cook Time 15 minutes
    Total Time 30 minutes
    Servings 36 cookies (1.25oz cookie scoop)
    Calories 97kcal
    Author Jess Rice
    Cost $4.77

    Equipment

    • 2 Large Cookie Sheets
    • Parchment Paper
    • Mixing Bowls
    • Hand Mixer
    • 1.25 oz Cookie Scoop

    Ingredients

    • 10 Tbsp salted butter (1 stick + 2 Tbsp) softened, $1.17
    • 1 cup light brown sugar packed, $0.68
    • ½ cup granulated sugar $0.17
    • 2 cups all-purpose flour $0.24
    • 1 tsp sea salt $0.05
    • 1 tsp baking powder $0.04
    • 1 large egg $0.12
    • ½ tsp cinnamon $0.04*
    • 1 tsp vanilla extract $0.65
    • ½ cup frozen blueberries $1.04**
    • ¼ cup white chocolate chips $0.57

    Instructions

    • Gather ingredients and preheat oven to 350℉. Prepare 2 large cookie sheets with parchment.
    • Combine room temperature butter, brown sugar, and granulated sugar in a large mixing bowl and mix until creamy and well-combined.
    • In a separate bowl, combine flour, salt, and baking powder. Whisk until combined.
    • Beat together the large egg, cinnamon, and vanilla extract. Add it to the creamed butter and sugar. Mix with a hand mixer until combined.
    • Little by little, add some of the dry flour mixture to the wet mixture until a sticky dough forms and all of the flour mixture has been used up.
    • Gently fold in the frozen blueberries and white chocolate chips.
    • Using a cookie scoop (I use a 1.25 oz. cookie scoop), portion out cookies on the lined baking sheets, leaving 2 inches of space between cookies.
    • Baking in the middle rack of 350℉ oven for 15-20 minutes, or until the cookies have spread out and have just a touch of golden color around the edges. (In my oven, they took 15 minutes. In the Budget Bytes oven, they took 20 minutes!) I like my cookies a little chewy, so I pull them right when I start to see them looking a little golden on the tops or edges.
    • Transfer to a cooling rack and let cool 10-15 minutes before you enjoy!

    See how we calculate recipe costs here.

    Notes

    *The cinnamon didn’t make it into my ingredient photo, but it’s a must! It really makes the flavor of the blueberries shine, so don’t forget it.

    **Make sure your blueberries (even if you’re using fresh) are fully frozen when you add them to the dough! If they are soft, they will squish as you fold them in and the dough will become too wet. I like to use the big bags of Wyman’s wild blueberries for these cookies because the berries are a bit smaller and easier to handle, but any variety of blueberry will do. I can find these berries at both my local Kroger and Walmart with ease.

    For the best results, follow the mixing steps in order. Cream the butter and sugars together first, then add the egg, cinnamon, and vanilla. Only then should the remaining dry ingredients be added. This creates the best blueberry cookies with a soft, chewy middle and lightly crisp edges!

    Add a few extra white chocolate chips on top: To achieve showstopping, beautiful cookies, press a couple of extra white chocolate chips into the top of each ball just before baking!

    Make the dough fresh: I don’t recommend refrigerating the mixed dough once the blueberries are folded in, because the berries can thaw and release juice.

    Nutrition

    Serving: 1cookie | Calories: 97kcal | Carbohydrates: 15g | Protein: 1g | Fat: 4g | Sodium: 106mg | Fiber: 0.3g

    how to make Blueberry Cookies step-by-step photos

    The ingredients to make blueberry cookies.

    Gather all your ingredients and preheat the oven to 350°F. Also line 2 large cookie sheets with parchment paper.

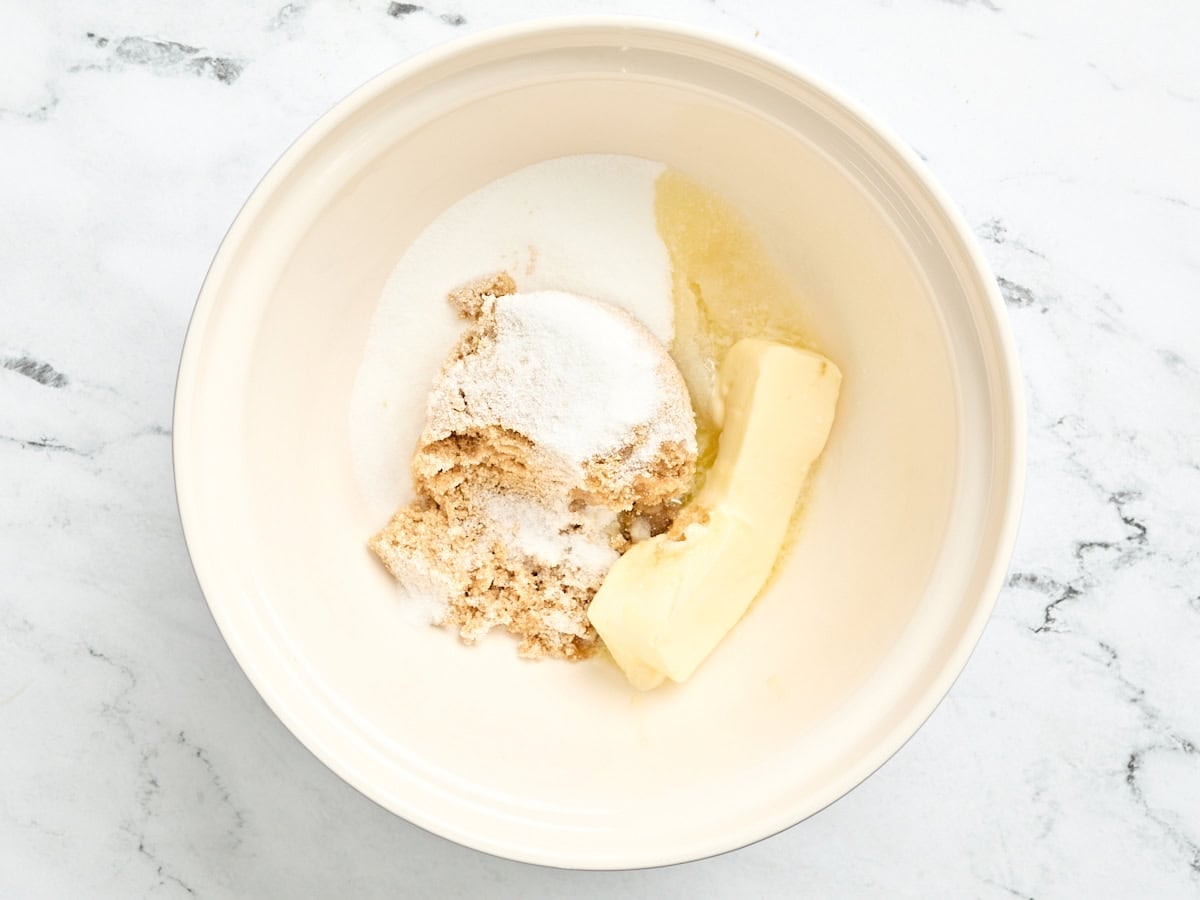
    White and brown sugar in a bowl with butter.

    Cream the butter and sugars: Add 10 Tbsp salted butter (1 stick + 2 Tablespoons) softened to room temperature), 1 cup packed light brown sugar, and ½ cup granulated sugar to a large mixing bowl. Beat until the mixture looks creamy, fluffy, and well combined, scraping down the sides of the bowl as needed.

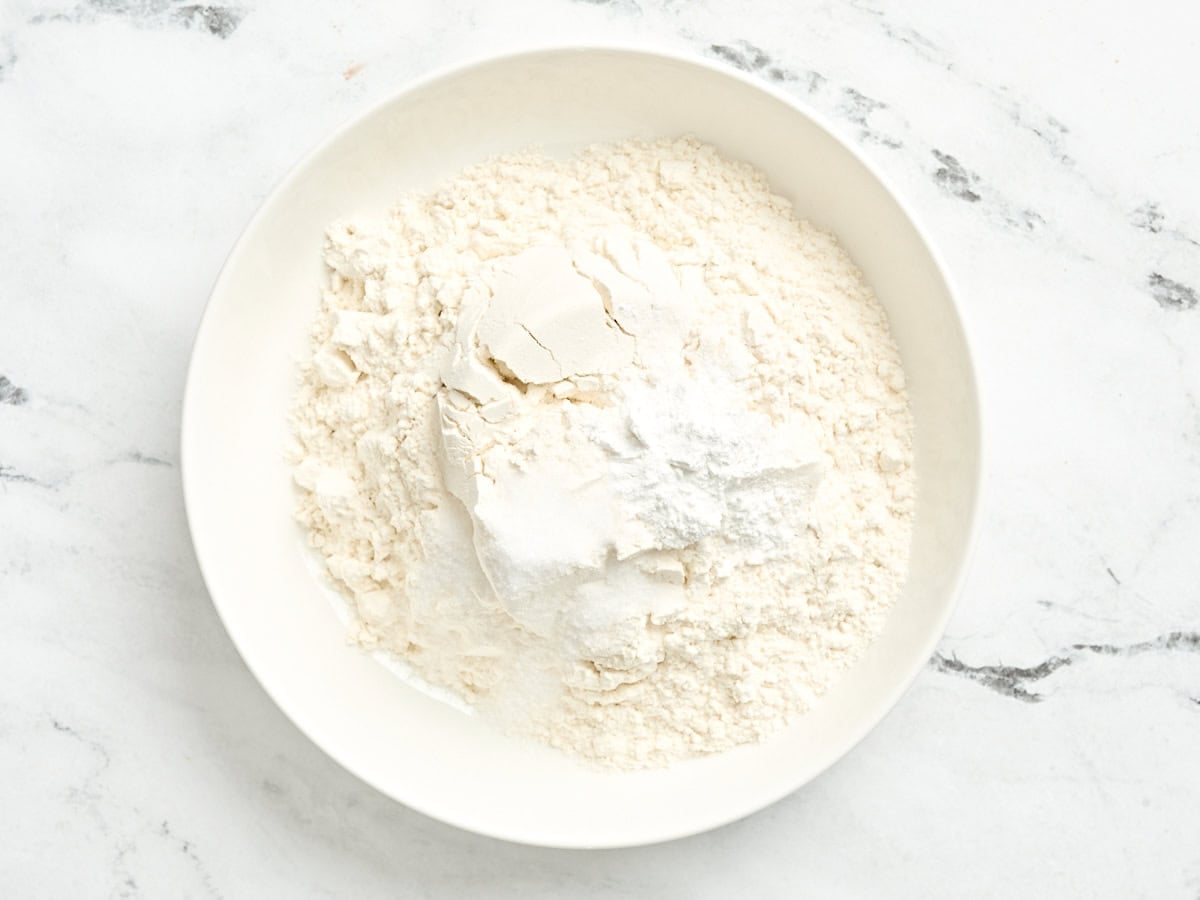
    Dry ingredients for blueberry cookies in a bowl.

    Combine the dry ingredients: In a separate bowl, whisk together 2 cups all-purpose flour, 1 tsp sea salt, and 1 tsp baking powder until evenly combined. This helps the salt and baking powder distribute evenly through the dough.

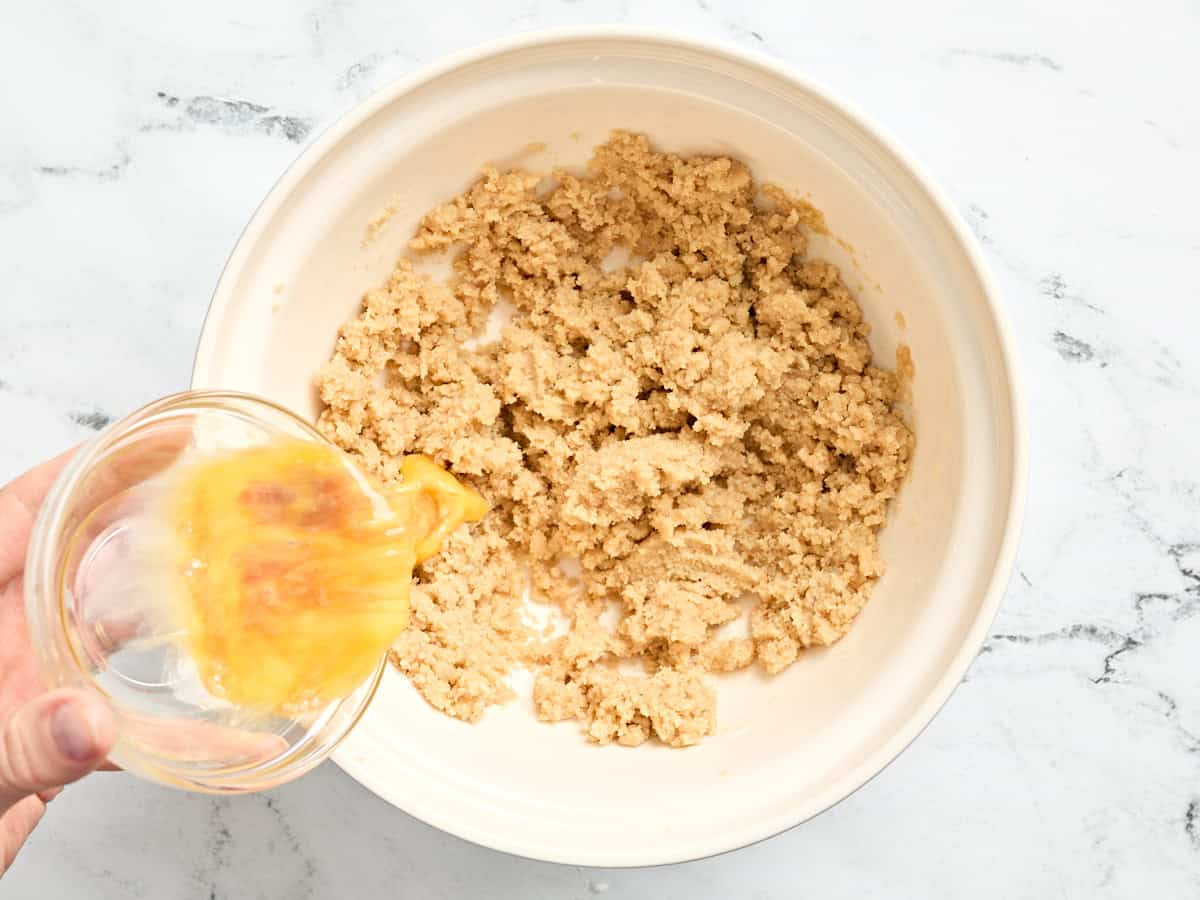
    Egg and vanilla being poured into creamed butter and sugar.

    Add the egg and flavorings: In a small bowl, beat together 1 large egg, ½ tsp cinnamon, and 1 tsp vanilla extract. Pour the egg mixture into the creamed butter and sugar, then mix with a hand mixer until smooth and combined. The dough will smell sweet and lightly spiced from the cinnamon and vanilla.

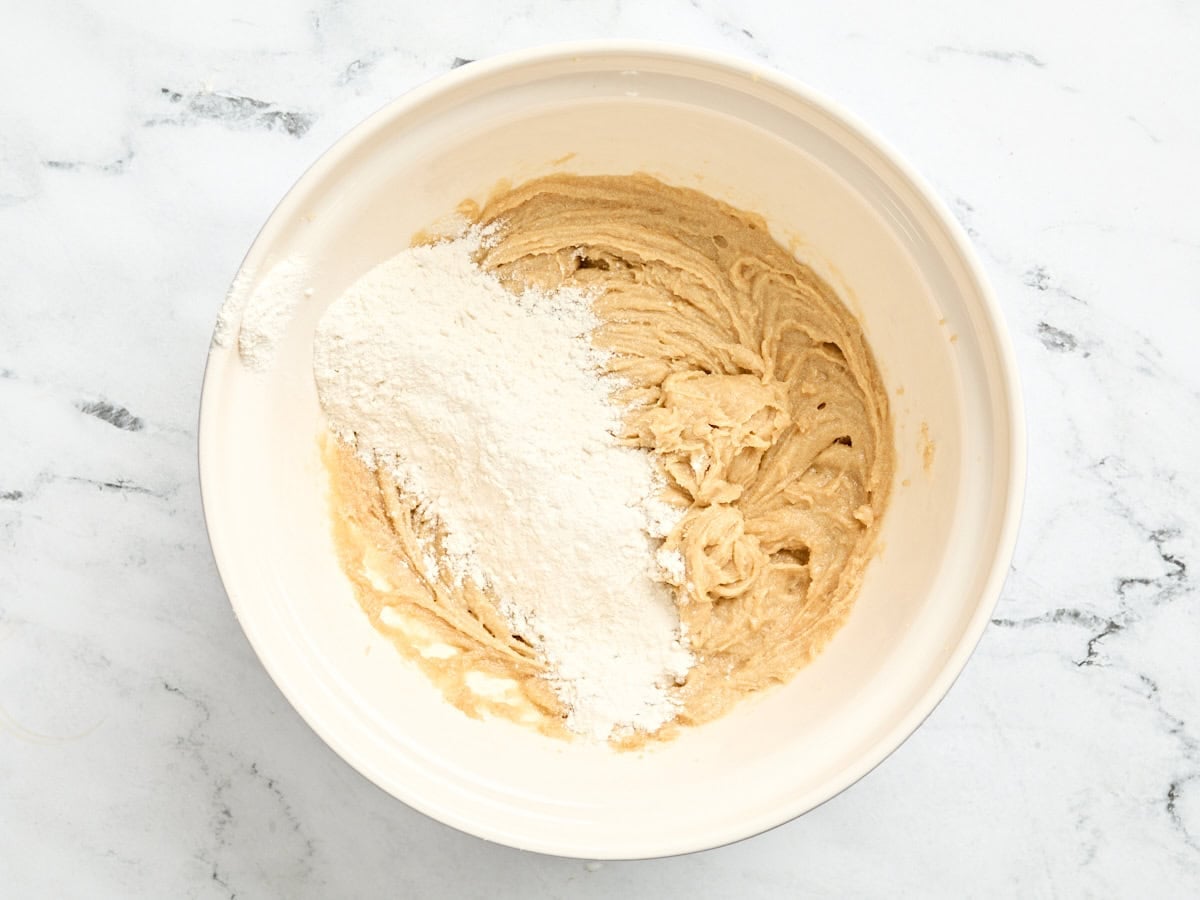
    A little flour added to creamed butter, sugar and eggs in a bowl.

    Make the dough: Add the dry flour mixture to the wet mixture a little at a time, mixing on low speed after each addition. Continue until a soft, sticky cookie dough forms and no dry streaks of flour remain. Try not to overmix once the flour is added, or the cookies can turn out tough once baked.

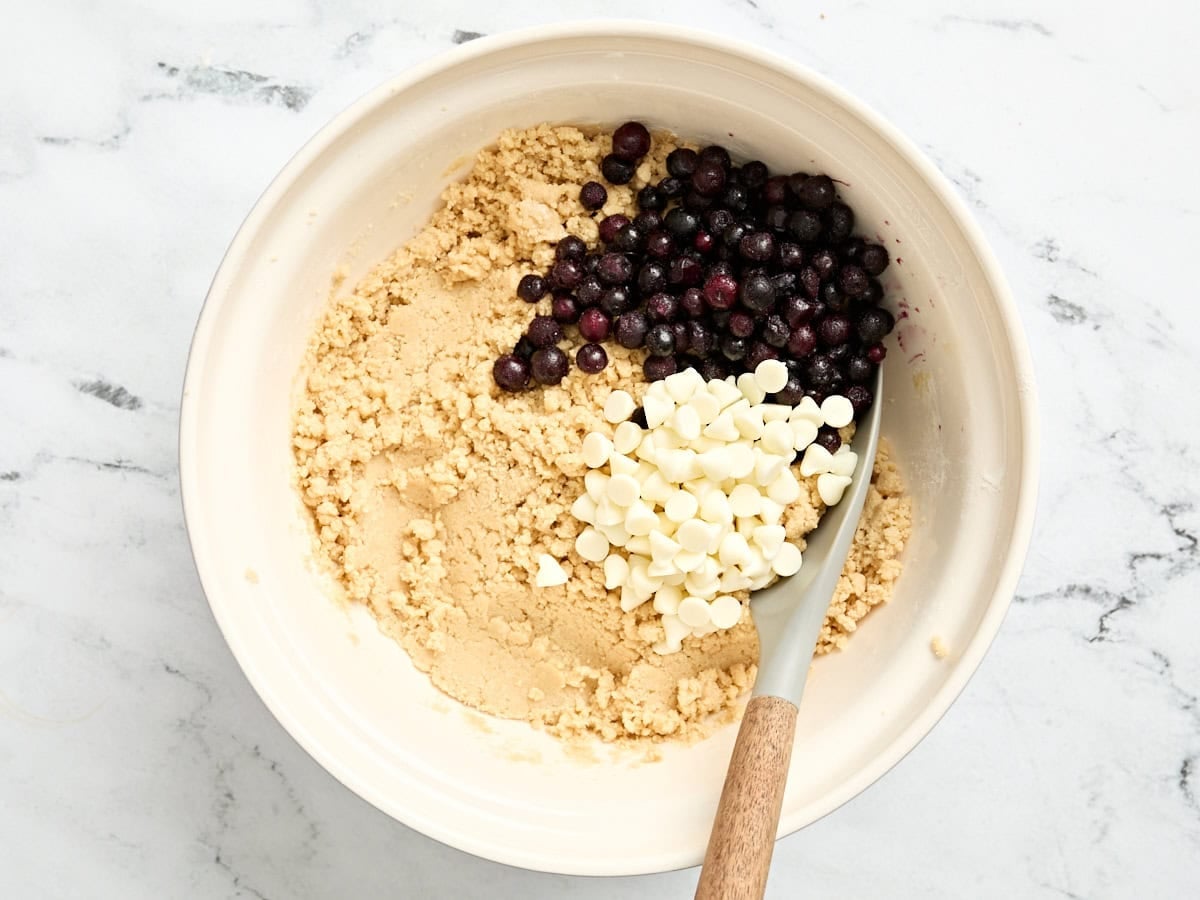
    Blueberries and white chocolate chips added to a bowl of cookie batter.

    Add the blueberries and chocolate: Gently fold in ½ cup frozen blueberries and ¼ cup white chocolate chips. Keep the blueberries frozen and fold carefully so they don’t burst too much or turn the whole dough purple. A few blue streaks are totally fine and make the cookies look pretty!

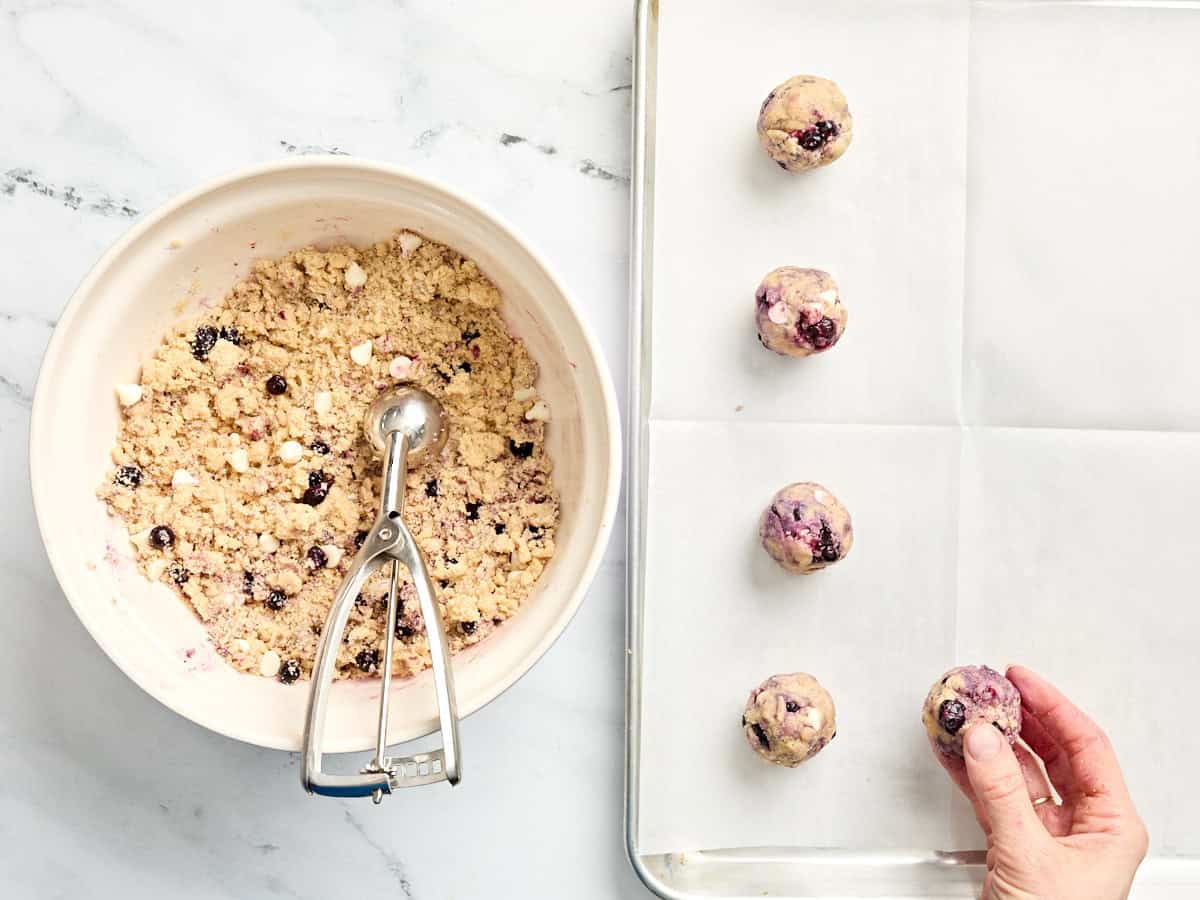
    A bowl of blueberry cookie dough in a bowl with a scoop, next to the balls of cookie dough on a baking sheet.

    Portion the dough: Use a cookie scoop (I use a 1.25 oz scoop), to portion the dough onto the prepared baking sheets. Leave about 2 inches of space between each cookie so they have room to spread in the oven.

    Balls of cookie dough on a baking sheet.

    Bake the cookies: Bake on the middle rack of the 350°F oven for 15-20 minutes, or until the cookies have spread and the edges are just lightly golden. The centers should still look soft and slightly puffy. In my oven, they took about 15 minutes, but in the Budget Bytes oven, they needed closer to 20 minutes, so start checking early.

    I like these blueberry cookies a little chewy, so I pull them right when I start to see them looking a little golden on the tops or edges.

    Blueberry cookies on a baking sheet.

    Cool and serve: Let the blueberry cookies cool on the baking sheet for 10-15 minutes so they can firm up, then transfer them to a cooling rack. The white chocolate will be melty, the blueberries will be jammy, and the cookies will finish setting as they cool. Enjoy!

    Overhead close up view of blueberry cookies on parchment paper.

    Serving Suggestions

    I’ll happily eat these chewy blueberry cookies straight from the cooling rack! They’re a fun treat for summer cookouts, birthdays, or gifting to friends, but they’re also so easy to turn into a summery dessert. Sandwich a scoop of vanilla ice cream between two cooled cookies for the cutest blueberry cookie ice cream sandwiches. The jammy blueberries and white chocolate chips taste so, so good with the creamy vanilla. These cookies also perfect with an iced coffee or cold brew in the afternoon!

    Storage Instructions

    Store the fully cooled cookies in an airtight container at room temperature for up to 2 days. I like to place parchment paper between layers to keep the soft blueberry spots and white chocolate chips from sticking together. Because these cookies have juicy berries baked into them, make sure they’re completely cool before storing, so extra steam doesn’t get trapped in the container and make them too soft.

    Fridge

    For longer storage, you can refrigerate these blueberry cookies in an airtight container for up to 1 week. The fridge will make them a little firmer, so let them sit at room temperature for a few minutes before serving if you want a softer texture.

    Freezer

    Freeze the cooled blueberry cookies in a freezer-safe bag or container for up to 3 months. I recommend freezing them in a single layer first, then stacking them with parchment between layers once firm, so they don’t stick together. Thaw at room temperature, or warm one cookie in the microwave for a few seconds for that just-baked feel!

    Love Blueberry Treats? Try These Recipes Next!

    The post Blueberry Cookies appeared first on Budget Bytes.
    This post was originally published on this site.

  • 4th of July Menu Plan

    4th of July Menu Plan

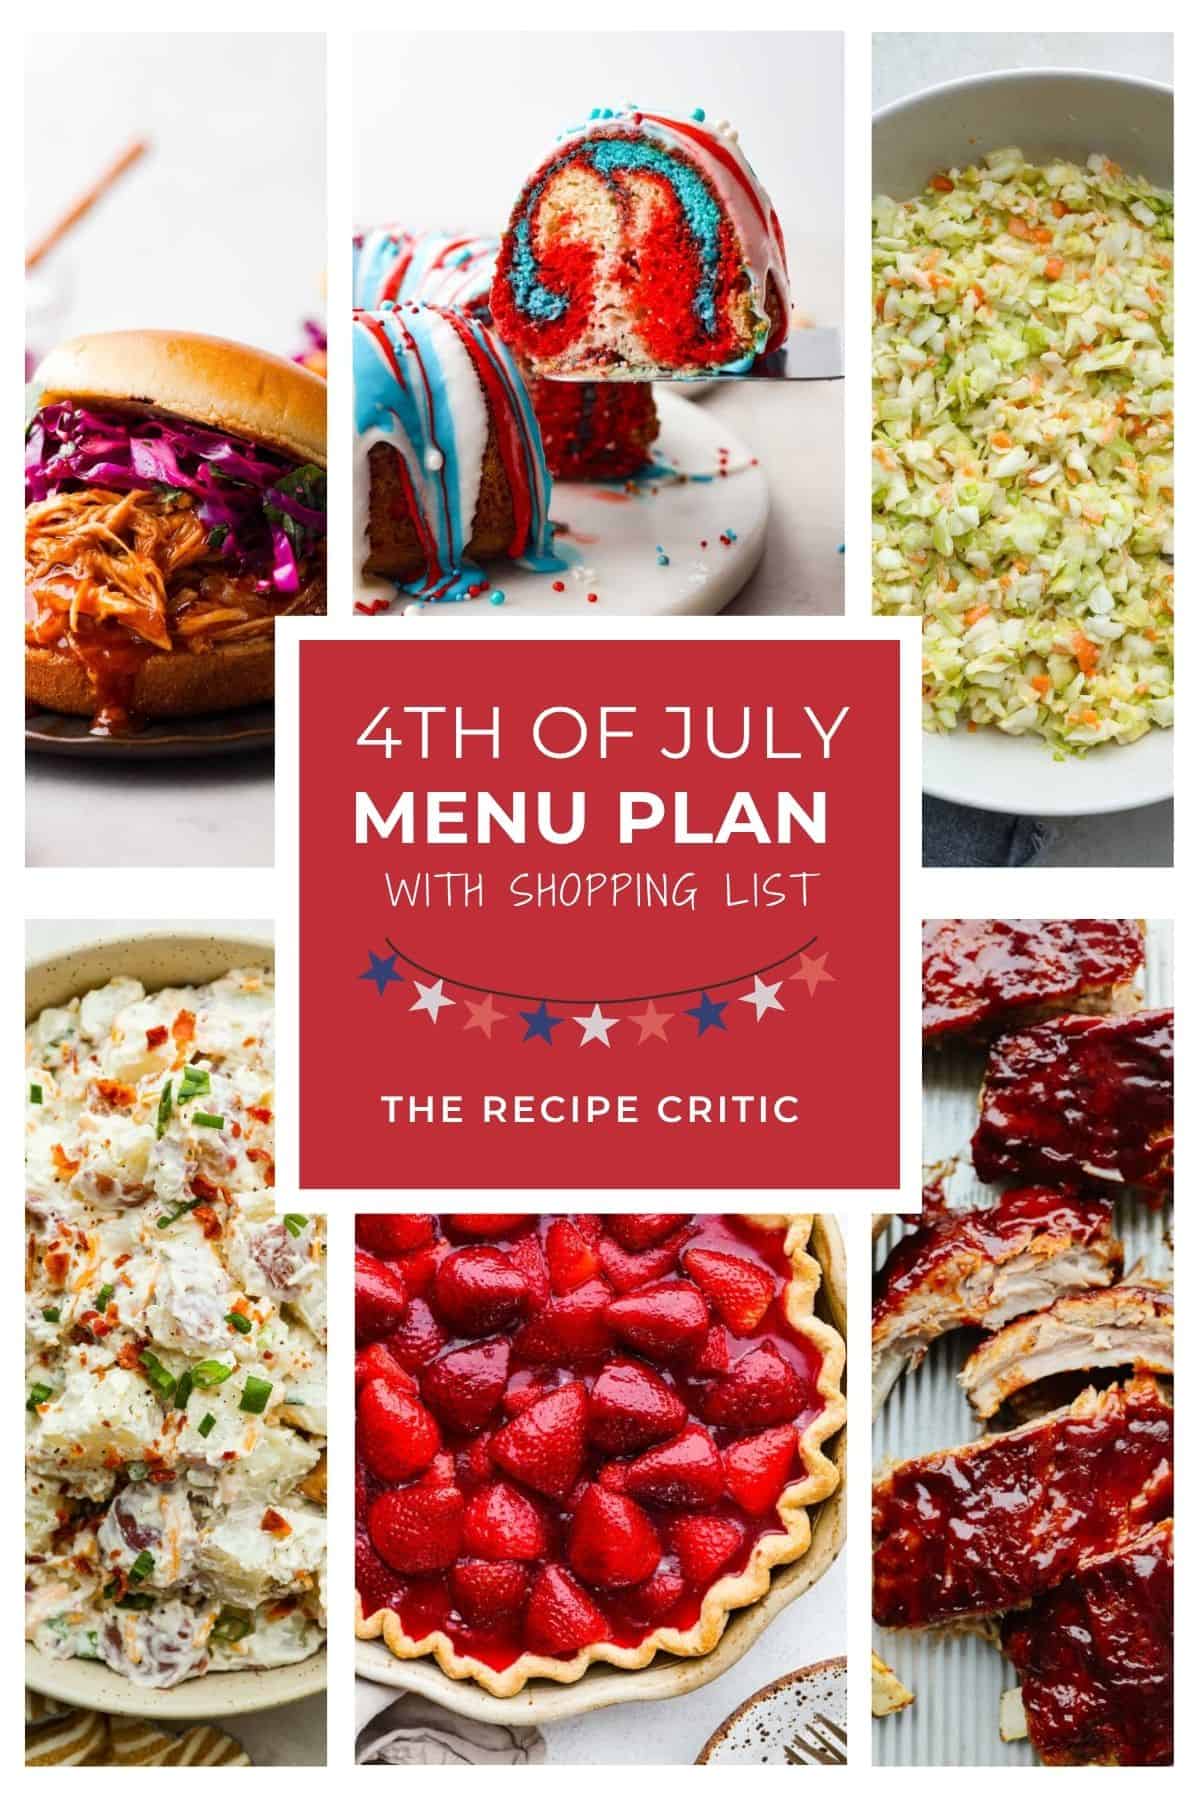
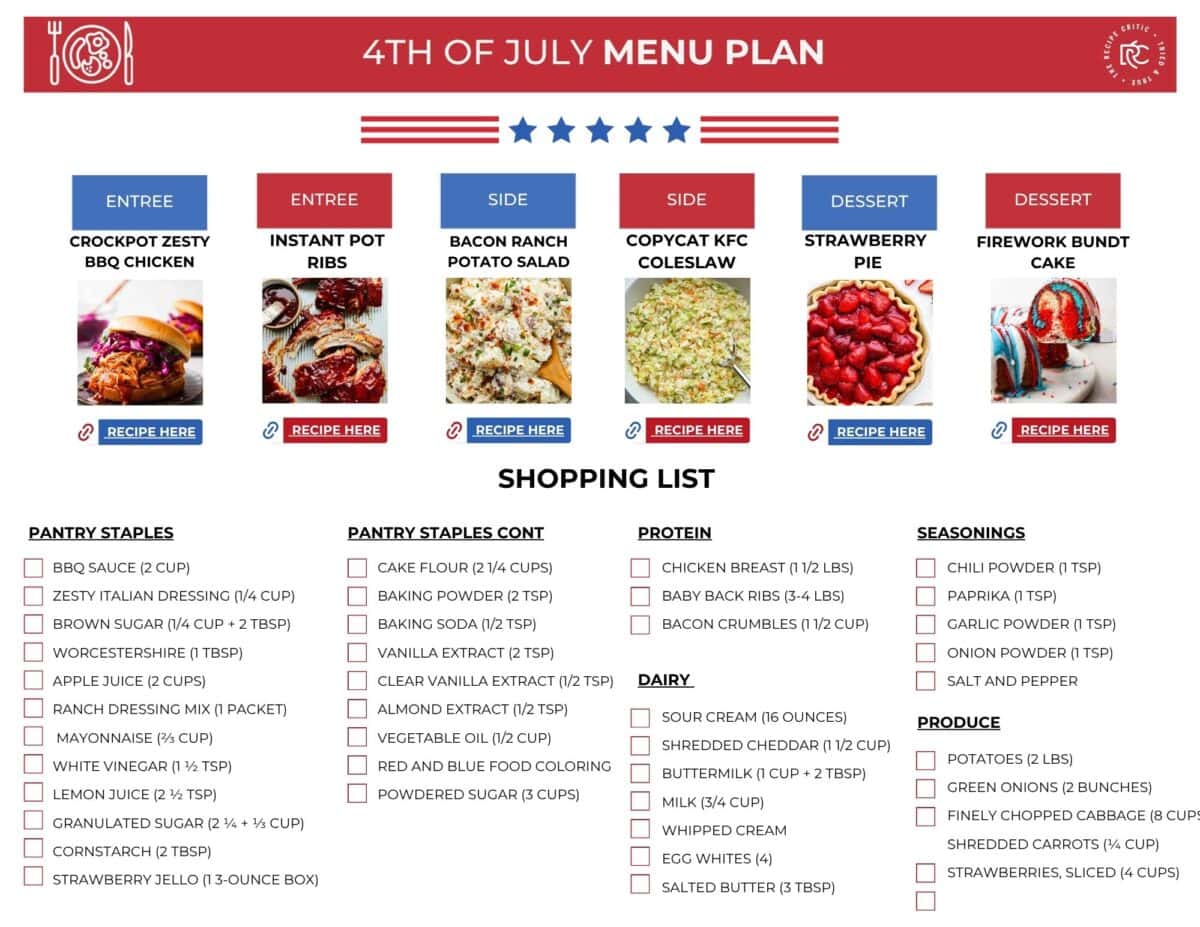
    Get ready for a fun-filled 4th of July with my easy and delicious menu plan, complete with a handy shopping list! From zesty BBQ chicken to refreshing strawberry pie, I’ve got everything you need for the perfect holiday!

    Easy 4th of July Menu Plan

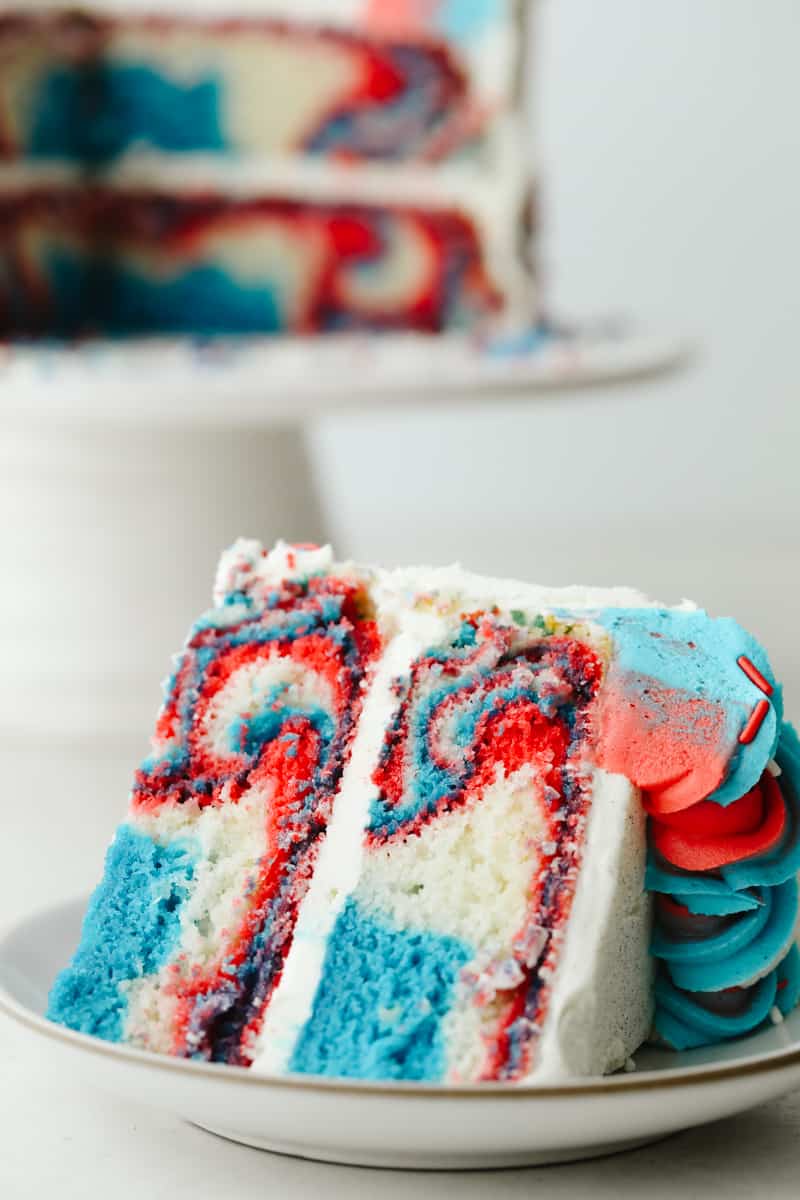
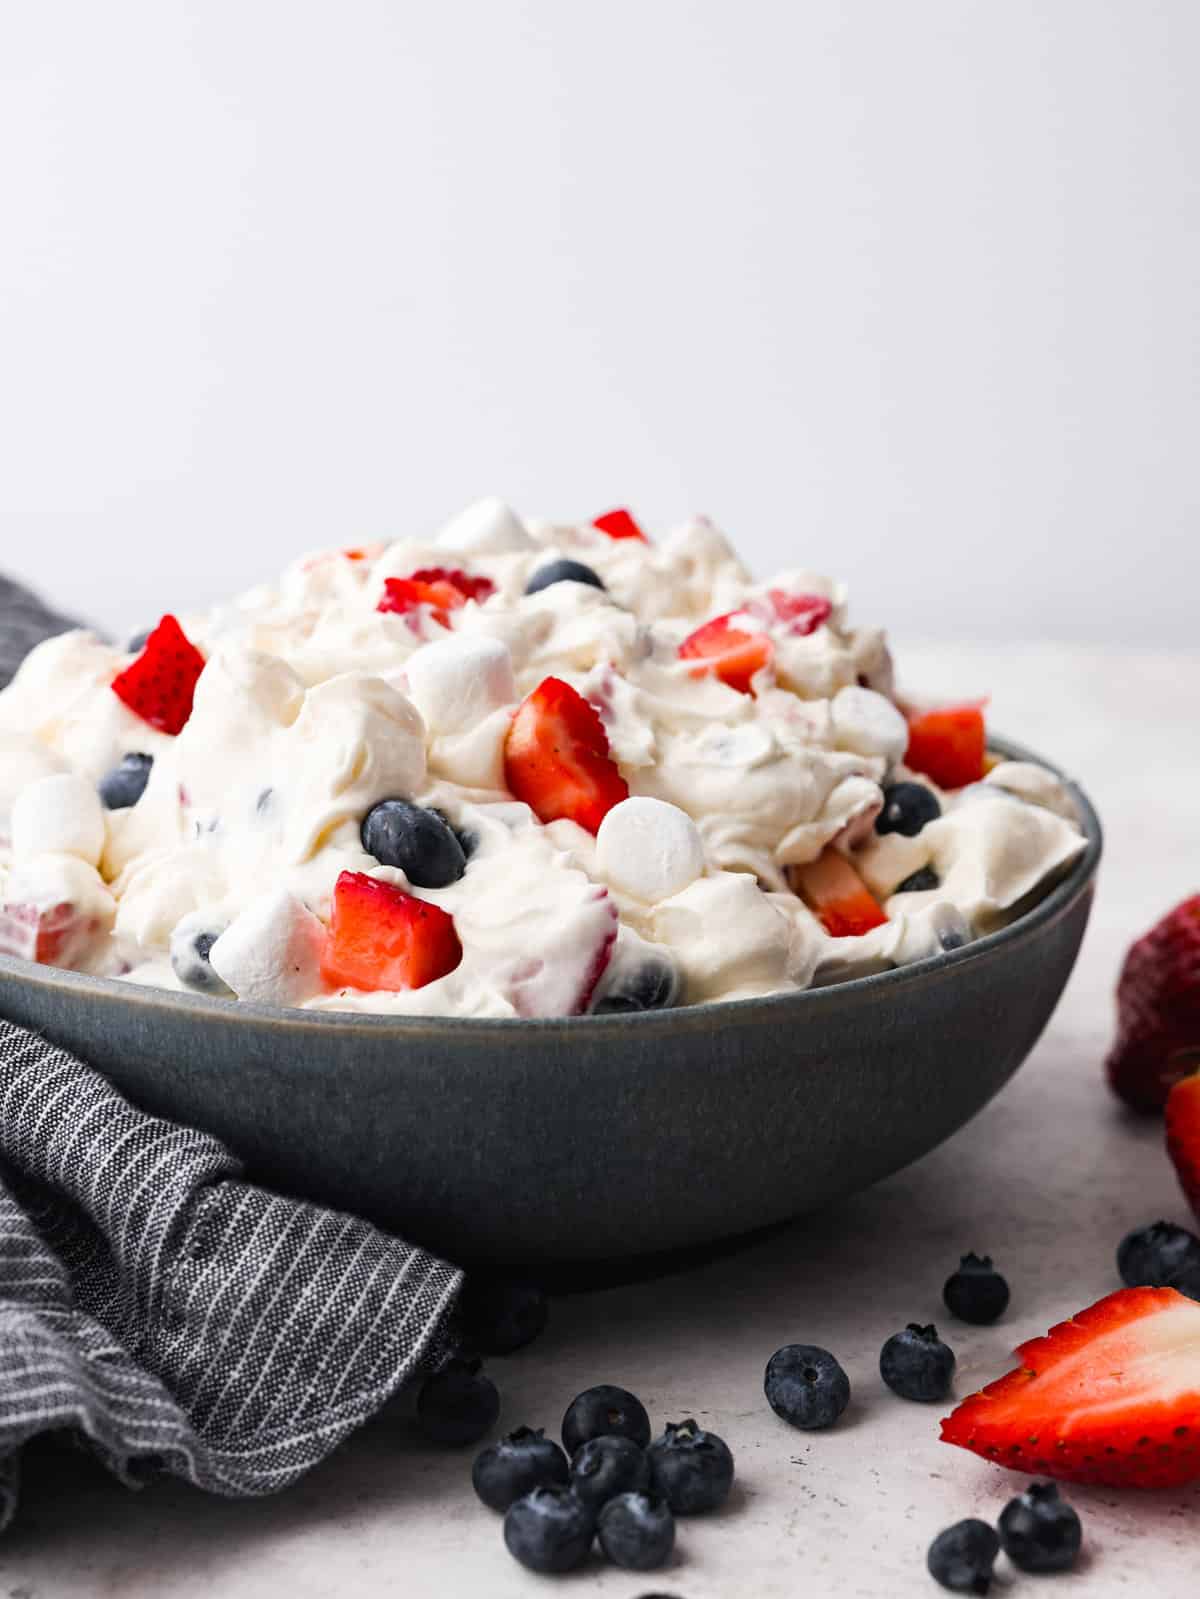
    This easy menu plan takes the stress out of feeding everyone for the 4th, so you can enjoy the parades, pool time, and sparklers. Add some extra red, white, and blue fun with my Red, White, and Blue Cake or Cream Cheese Strawberries, and don’t miss all of my 4th of July recipes for even more festive ideas!

    How Many Does This Feed?

    Each recipe in this 4th of July Day meal plan is meant to serve about 6 adults, so if you are making all of them, this amount of food should easily feed 15+ people. More if it’s a combination of adults and kids!

    Zesty BBQ Chicken

    No ratings yet
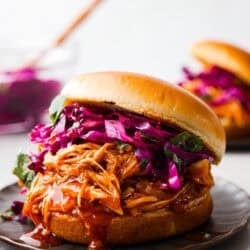
    This zesty BBQ chicken is an easy crockpot recipe that only takes 5 ingredients to make! The slow-cooked tender pulled chicken is dripping in a tasty BBQ sauce. Perfect for busy weeknights or to feed a crowd!

    View Recipe

    Instant Pot Baby Back Ribs

    4 from 1 vote
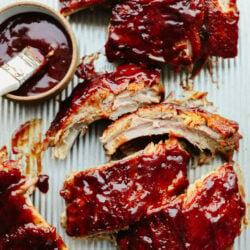
    These Instant Pot ribs are fall off the bone tender, easy to make, and loaded with flavor! Enjoy straight them out of the pressure cooker slathered with your favorite bbq sauce!

    View Recipe

    Bacon Ranch Potato Salad

    5 from 4 votes
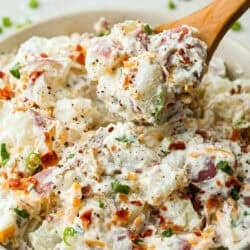
    A creamy and delicious potato salad with amazing ranch flavor and bacon! This is the perfect side to take to a potluck and is sure to be a huge hit!

    View Recipe

    Copycat KFC Coleslaw

    4.75 from 4 votes
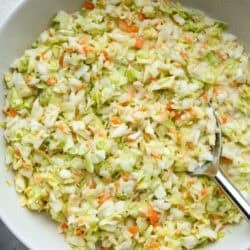
    Copycat KFC Coleslaw is the perfect summer side dish and tastes exactly like the real thing!

    View Recipe

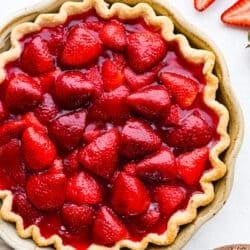
    Fresh Strawberry Pie

    5 from 14 votes
    This fresh strawberry pie is loaded with juicy strawberries in a flaky pie crust and chilled until perfectly glossy, sweet, and sliceable.

    View Recipe

    Firework Bundt Cake

    5 from 1 vote
    This firework bundt cake is exploding with colors and flavor! It not only looks impressive but it tastes so delicious that you will definitely be making this for every Fourth of July! 

    View Recipe

    My weekly menu meal preps always include a printable shopping list that is measured out and ready to go. It makes things so easy! If you don’t see something you like, check out my other weekly meal plans here.

    Picture of the free shopping list for the 4th of July menu plan.

    4th of July Leftovers

    I only meal plan Monday-Friday because we usually have plans over the weekend! And I always have leftovers we can use to finish off the week! If you do have leftovers, make sure to store them properly in an airtight container in your fridge.

    More Red, White, and Blue Recipes

    You can never have enough treats and patriotic snacks on the 4th of July.

    This post was originally published on this site.

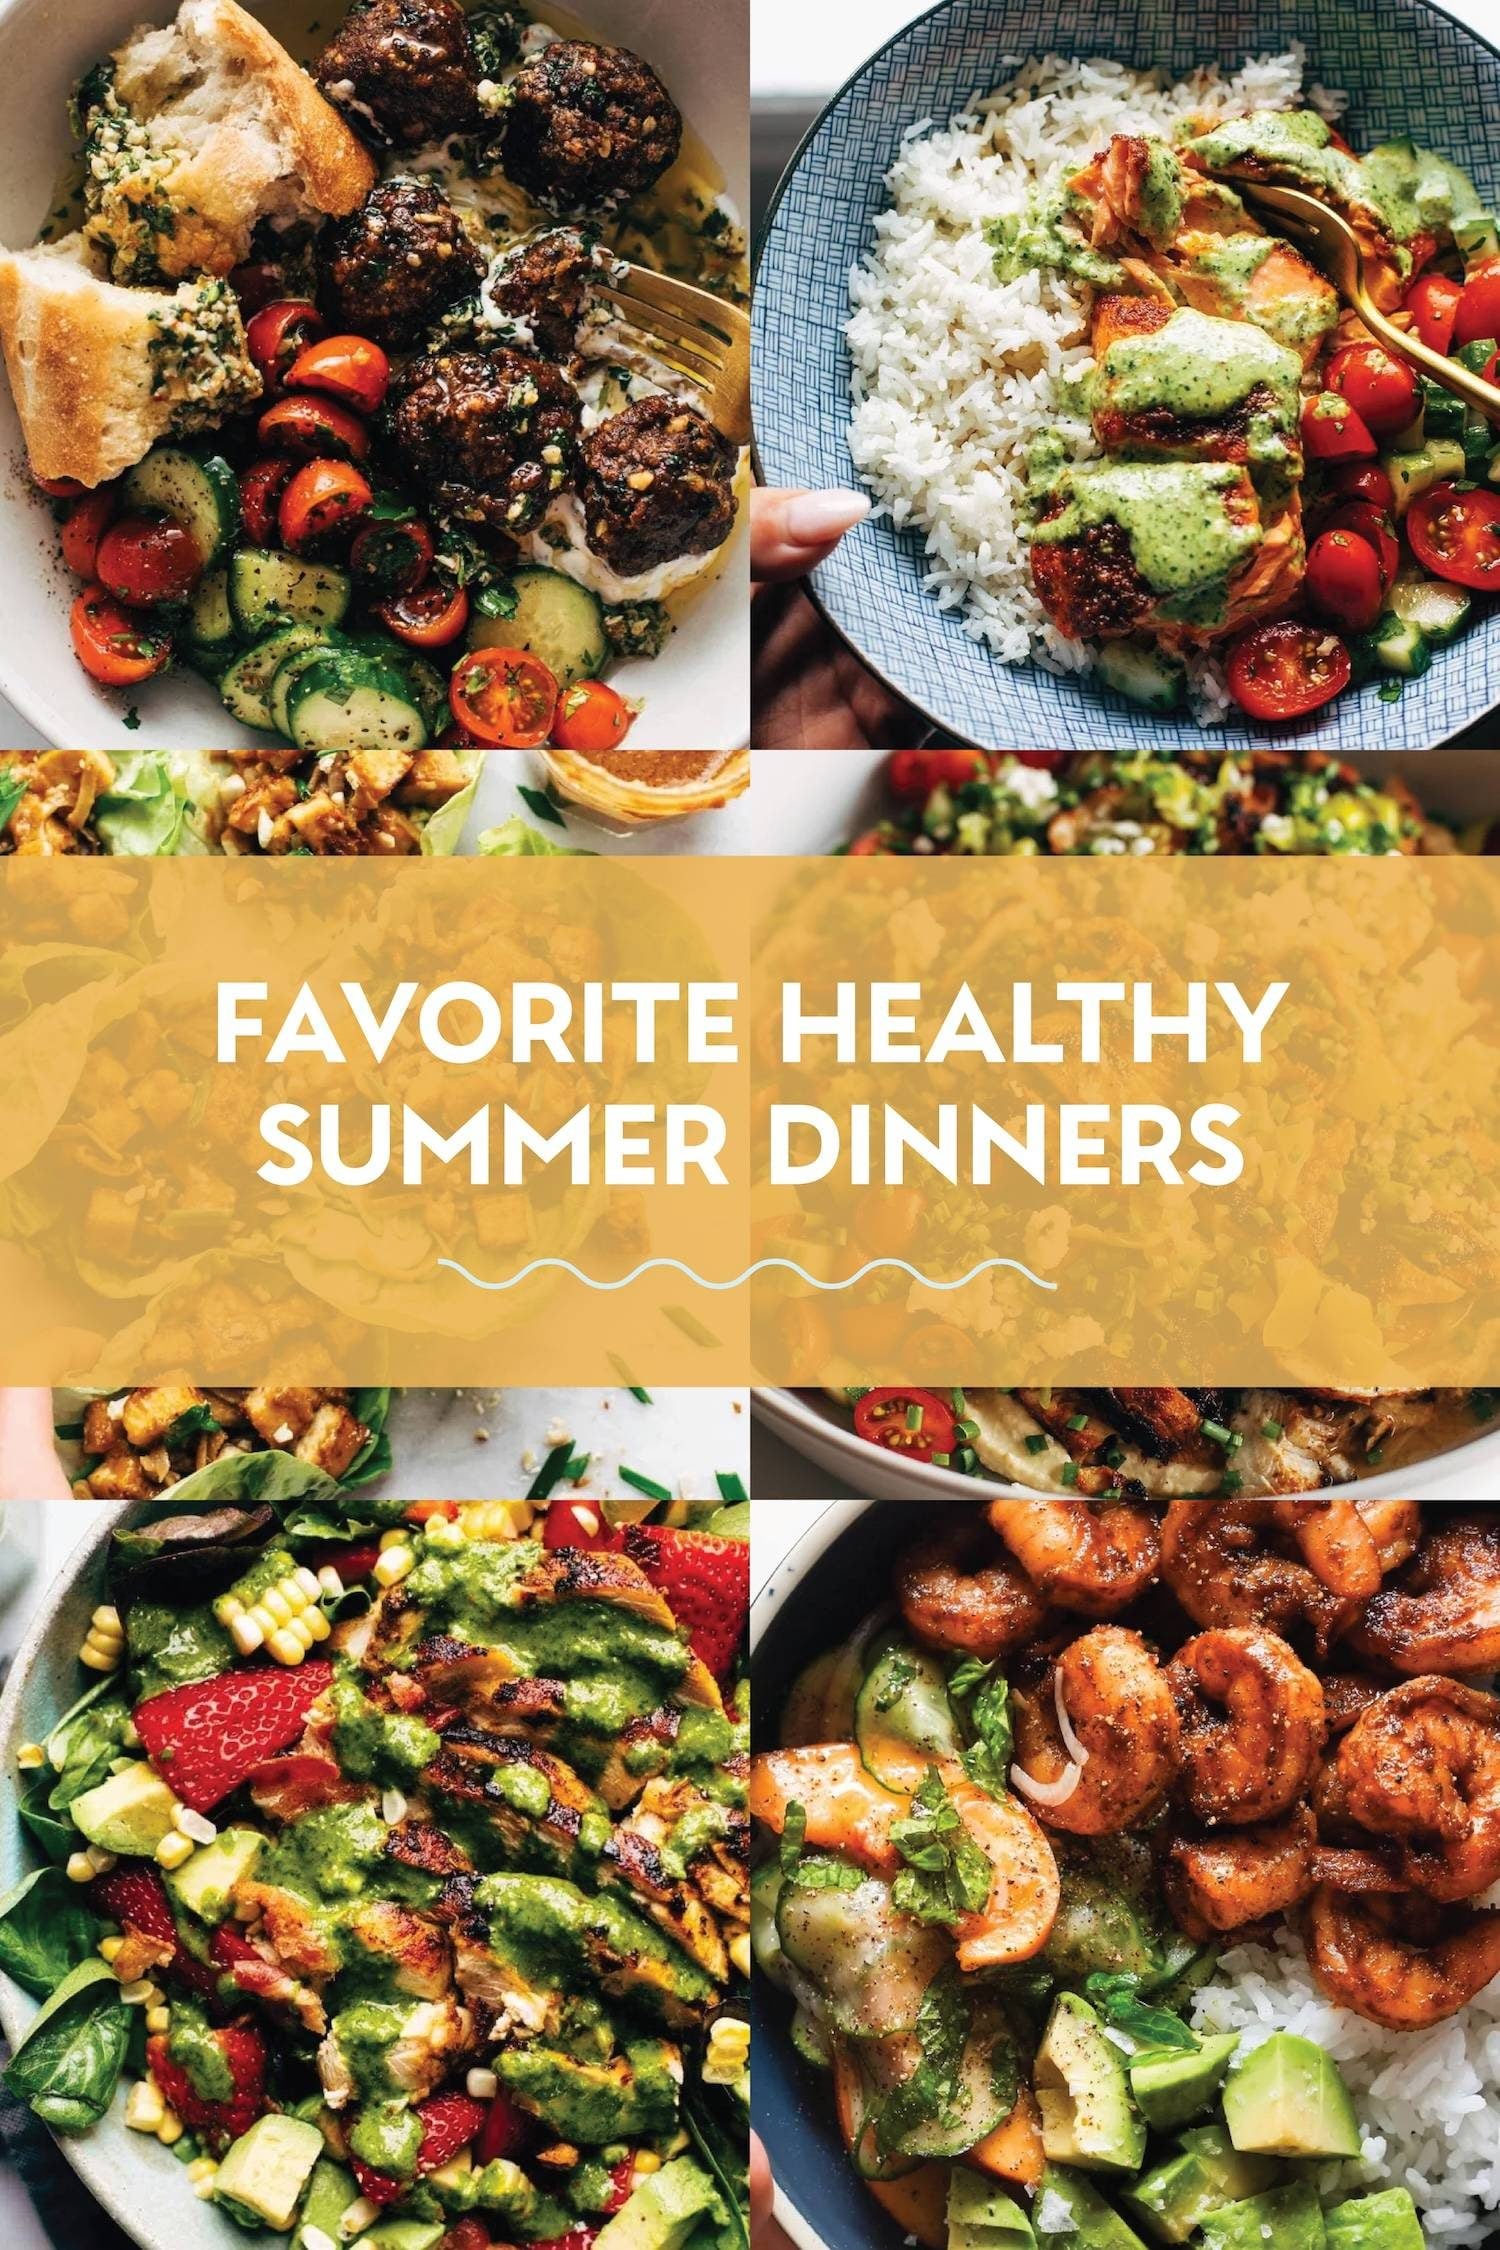
  • 45 Light + Bright Healthy Summer Dinners

    45 Light + Bright Healthy Summer Dinners

    Summer just has a way of making healthy eating feel… actually easy? Like, when tomatoes look like that at the farmers market, and corn is practically begging to be thrown on the grill, you really don’t need much convincing to eat well. Fresh produce does most of the heavy lifting and honestly, the meals kind of make themselves.

    These recipes are some of my favorites to make in the summer when I want things to feel light and breezy. They’re bright, they’re colorful, they’re the kind of dinners that feel good when you eat them and look beautiful on the dinner table, and not a single one feels like you’re trying to be “healthy.” It’s just good food that happens to be exactly what you’re craving right now. ❤️


    Healthy Summer Dinner Recipes

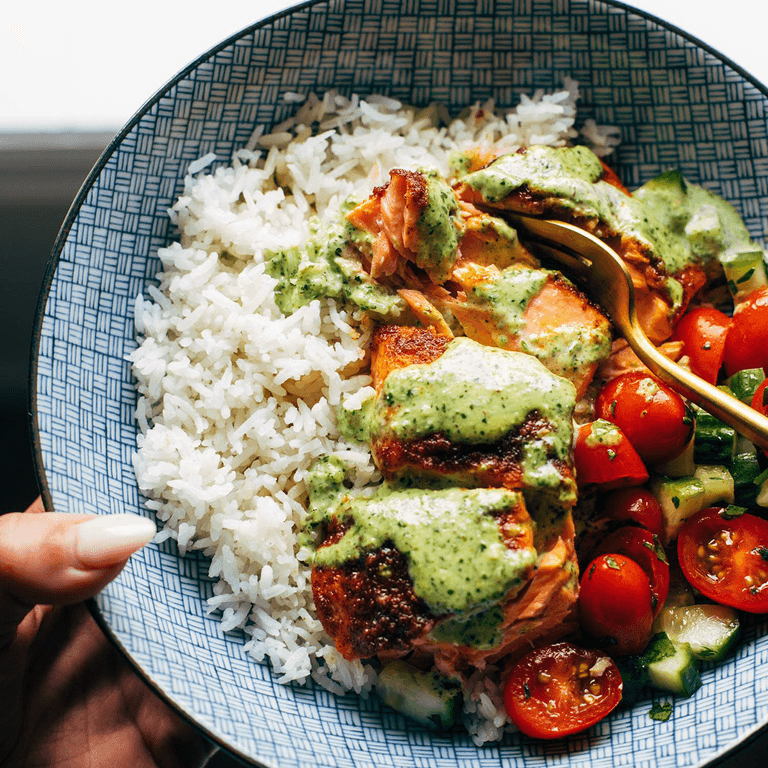
    Salmon with basil sauce.

    Salmon with Basil Sauce and Tomato Salad

    We’re making a summery salmon with a beautiful, big-flavored basil sauce that is so good, you’re going to want to just drink it. Perfectly-spiced, fresh, and a dinner for everyone!

    66 reviews / 4.9 average

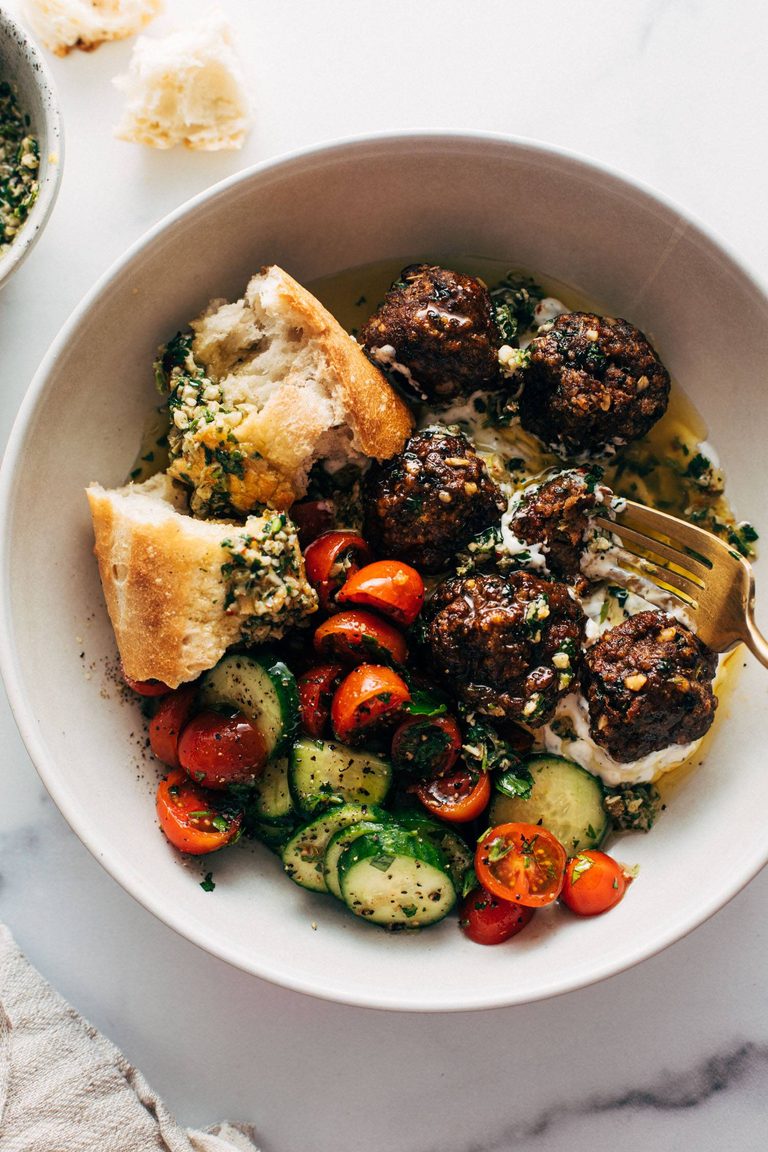
    Sheet pan meatballs with tomato salad.

    Sheet Pan Meatballs with Tomato Salad and Green Sauce

    Juicy little sheet pan meatballs that are salty, zesty, briney, and so so delicious. Pile them on tzatziki, spoon some punchy green sauce over top, and serve with a simple salad and crusty bread.

    50 reviews / 5 average

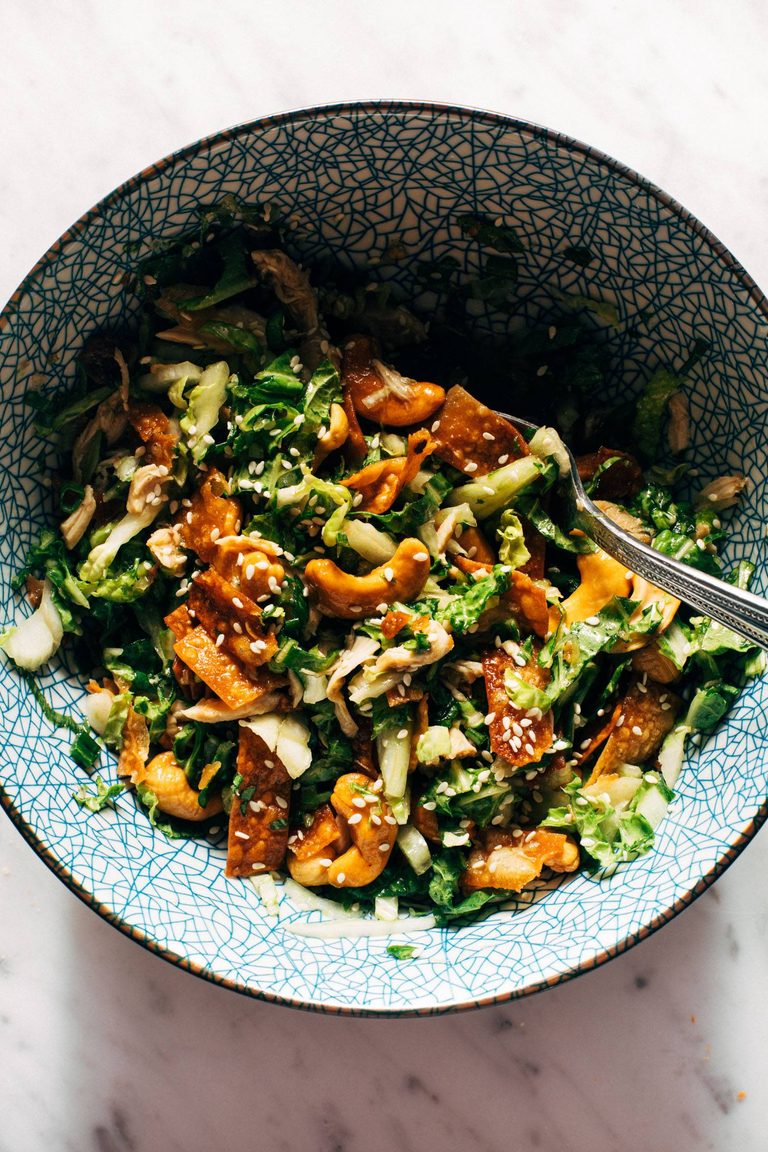
    Napa chicken salad in a bowl.

    Napa Chicken Salad with Sesame Dressing

    This Napa Chicken Salad is crunched up to the MAX! Fresh napa cabbage, juicy rotisserie chicken, a super easy homemade sesame dressing, and crunchy handfuls of cashews, fried wonton strips, dried ramen noodles, crispy fried onions, or sesame sticks…the choice is yours!

    21 reviews / 4.7 average

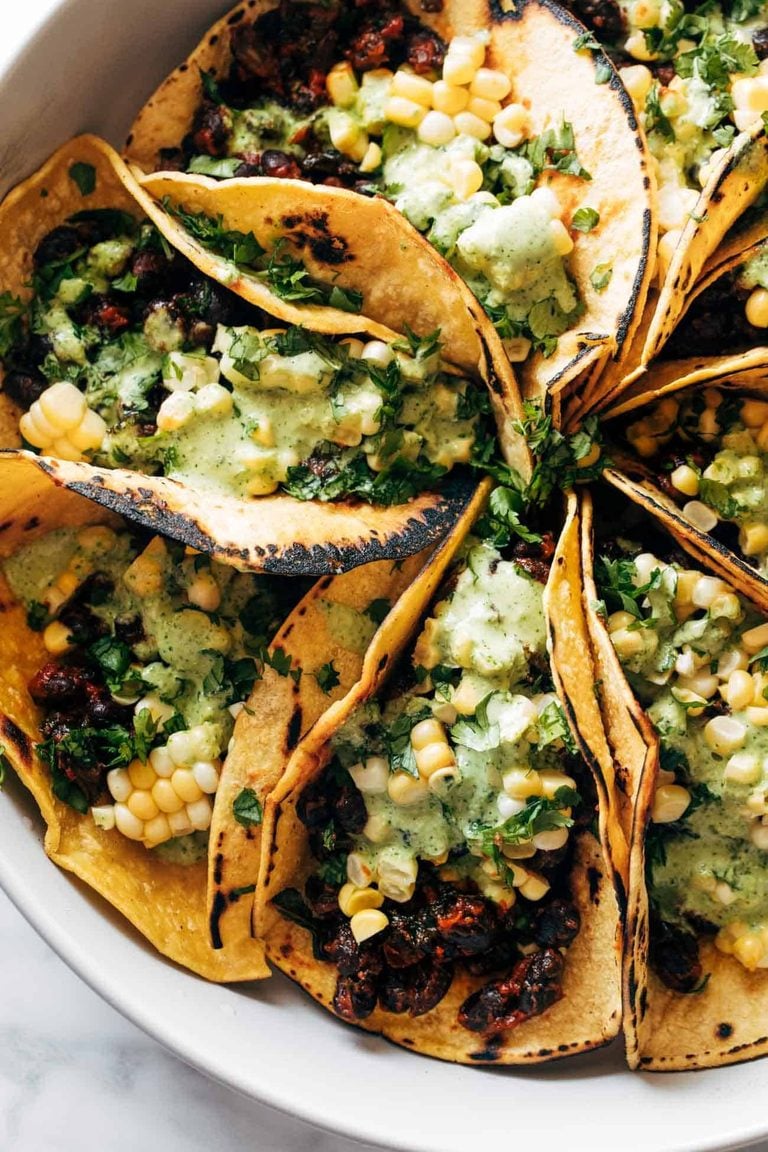
    Smoky beans and greens tacos.

    Smoky Beans & Greens Tacos with Aji Verde

    Three cheers for summertime eating! Smoky black beans sautéed with kale and garlic and spices, tucked into charred corn tortillas, and topped with the best feisty, punchy green sauce – Aji Verde!

    71 reviews / 4.9 average

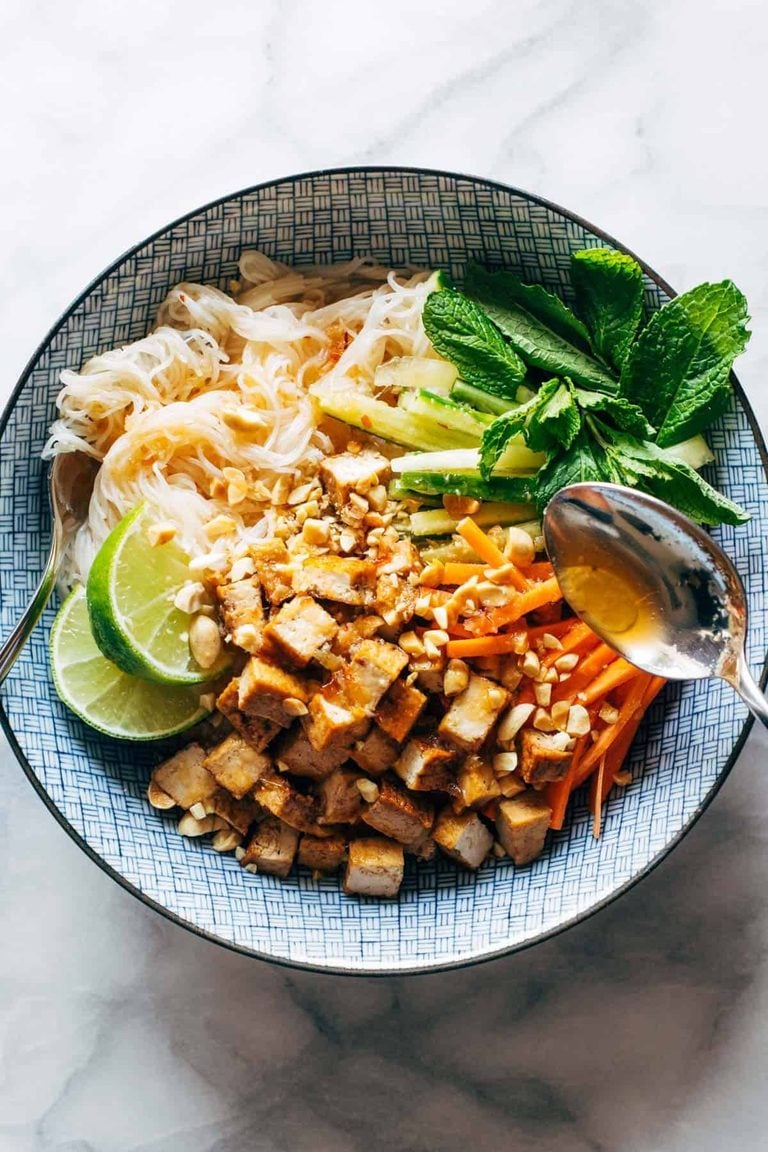
    Lemongrass vermicelli salad.

    Lemongrass Vermicelli Salad

    Lemongrass Vermicelli Salad – a summer showstopper! A twirl of vermicelli noodles, pan-fried tofu, fresh herbs and veggies, and a lime-and-lemongrass-based sauce that just slips all over the plate.

    23 reviews / 4.8 average

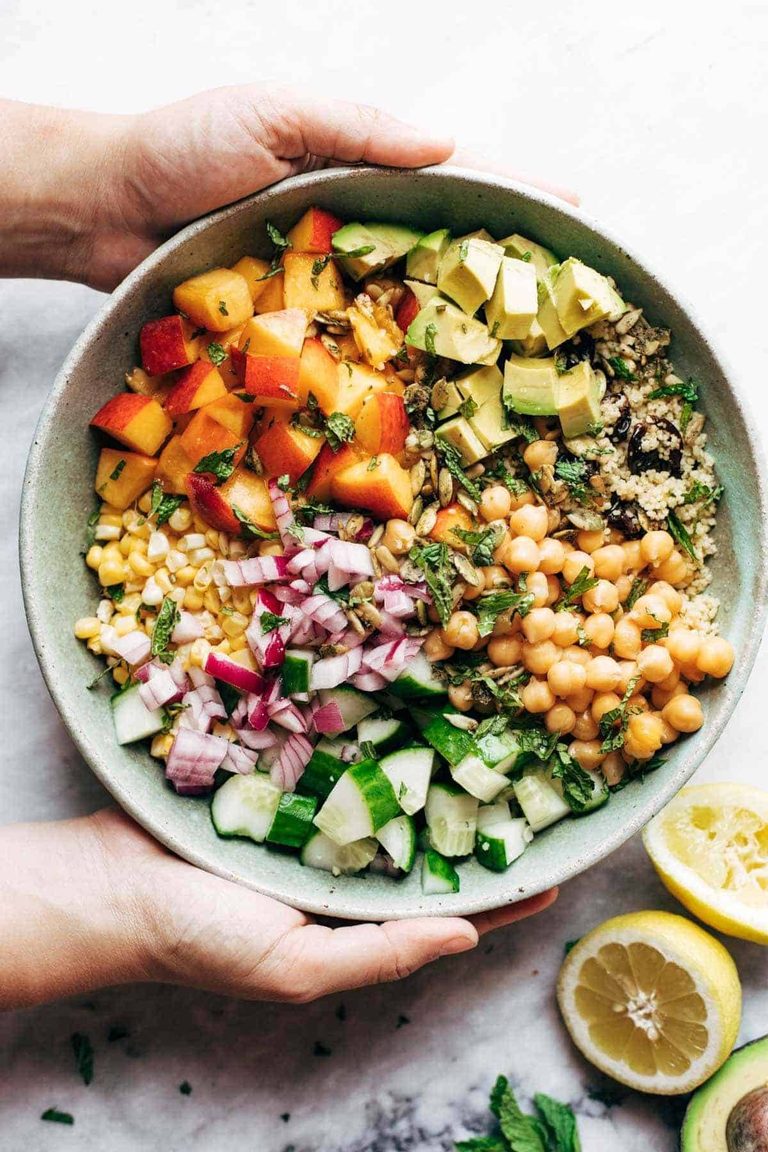
    Couscous summer salad in a bowl.

    Couscous Summer Salad

    Couscous Summer Salad! Spiced couscous, juicy nectarines, crunchy cucumber, avocado, chickpeas, cherries, sweet corn, and mint. It’s sunshine in a bowl!

    39 reviews / 4.7 average

    Chipotle chicken cobb salad.

    Summer Chipotle Chicken Cobb Salad with Cilantro Vinaigrette

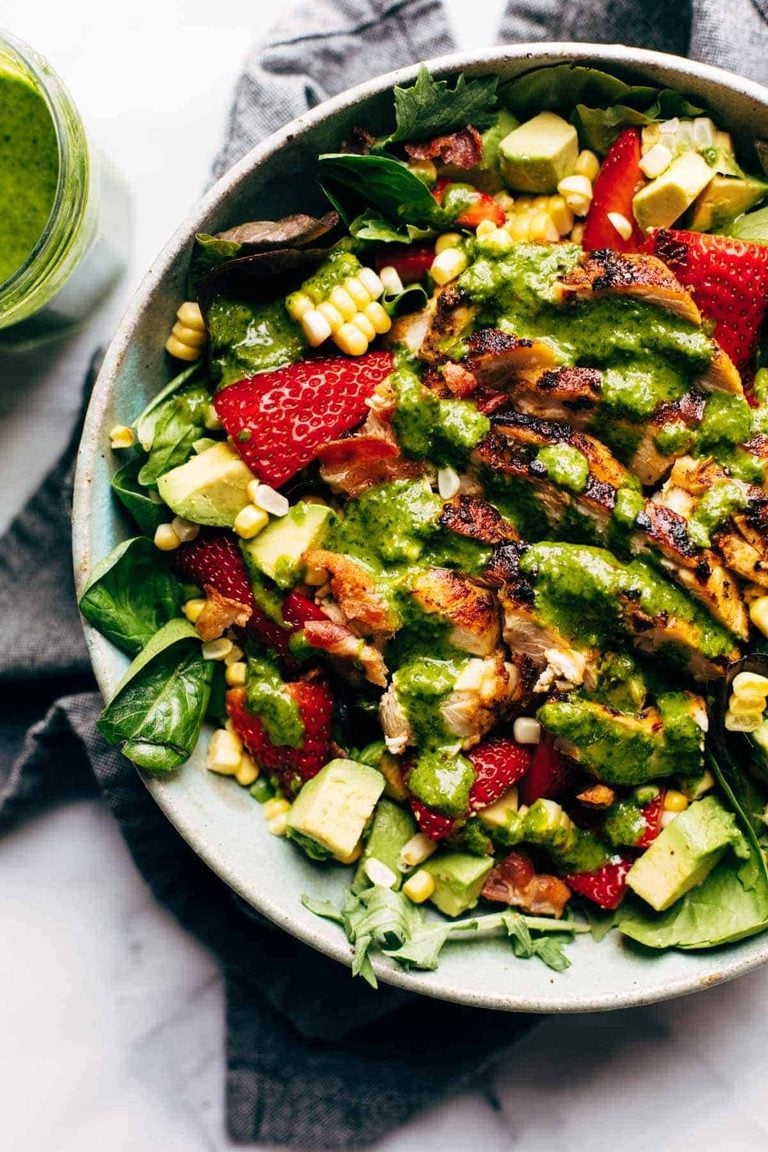
    This juicy salad tastes like summer! With chipotle chicken, sweet corn, avocado, cilantro vinaigrette, bacon crumbles, and fresh strawberries for a pop of sweetness.

    83 reviews / 5 average

    Roasted cauliflower burrito bowl.

    Roasted Cauliflower Burrito Bowls

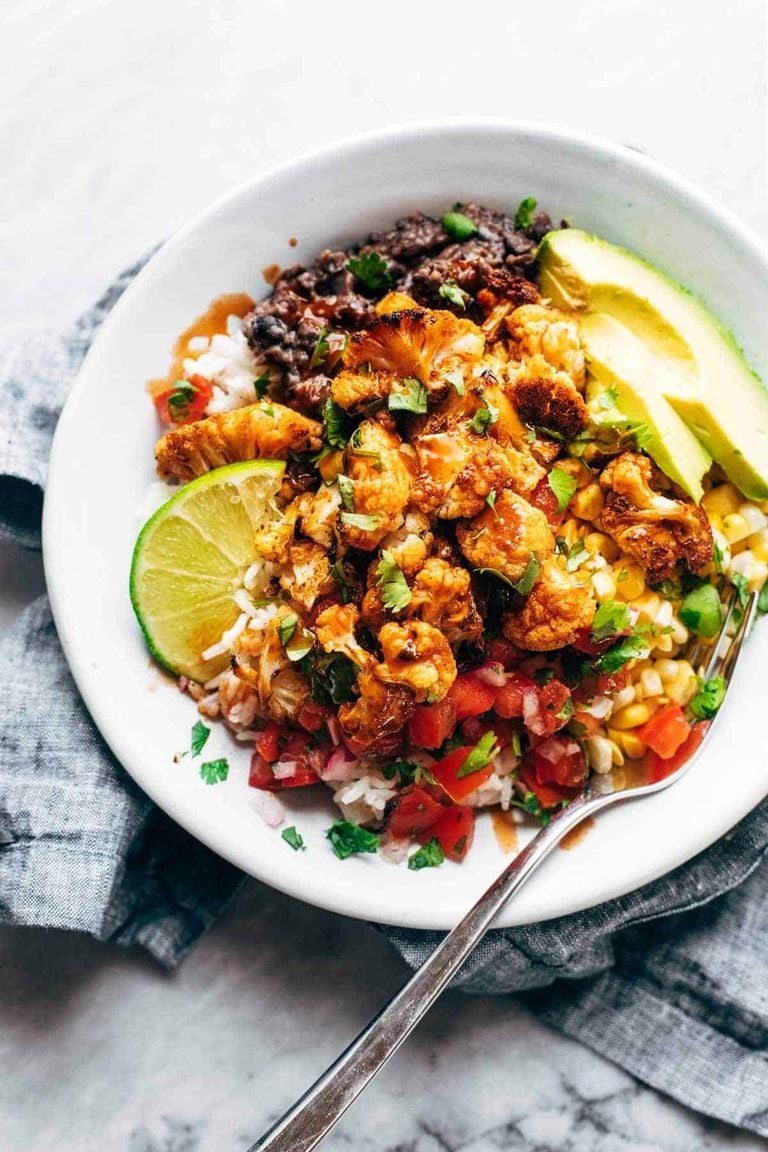
    Nothing fancy to see here – just a healthy, delicious, vegan burrito bowl combo featuring spicy roasted cauliflower, pico de gallo, creamy refried black beans, rice, corn, avocado, and a good lime drench.

    57 reviews / 4.9 average

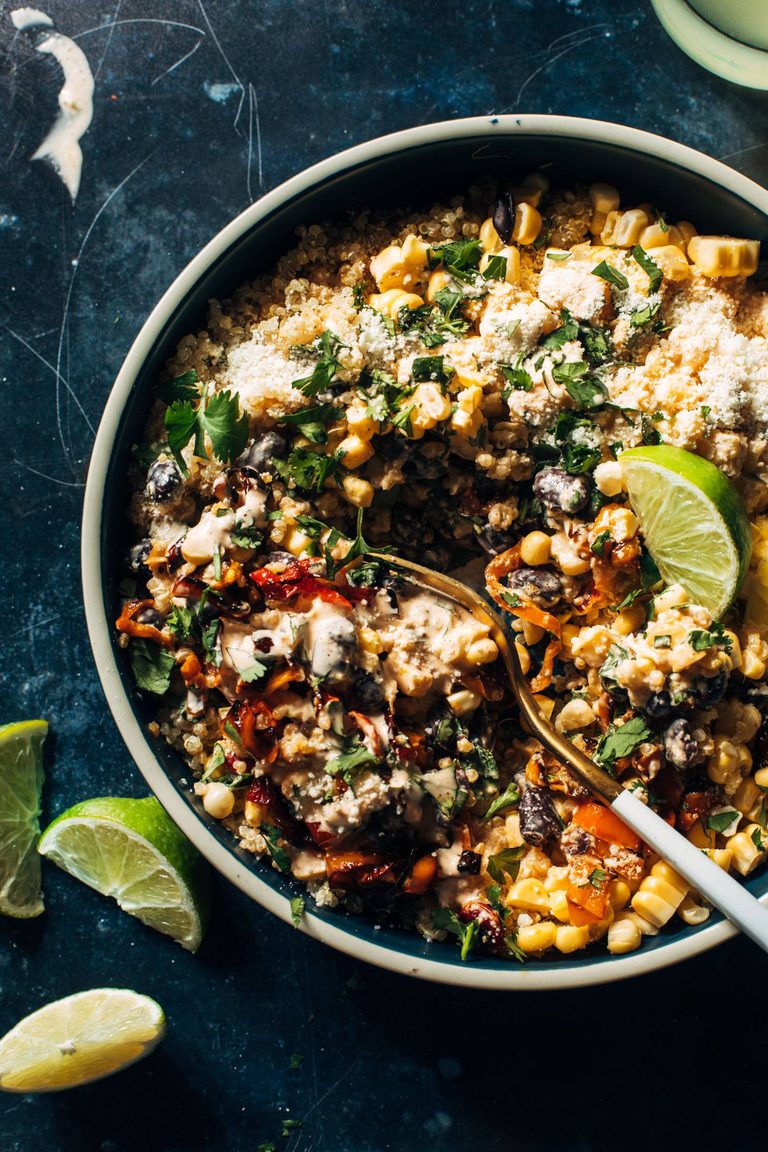
    Quinoa salad with tomatoes, corn, and avocado.

    Corn, Avocado, and Quinoa Salad with Marinated Tomatoes

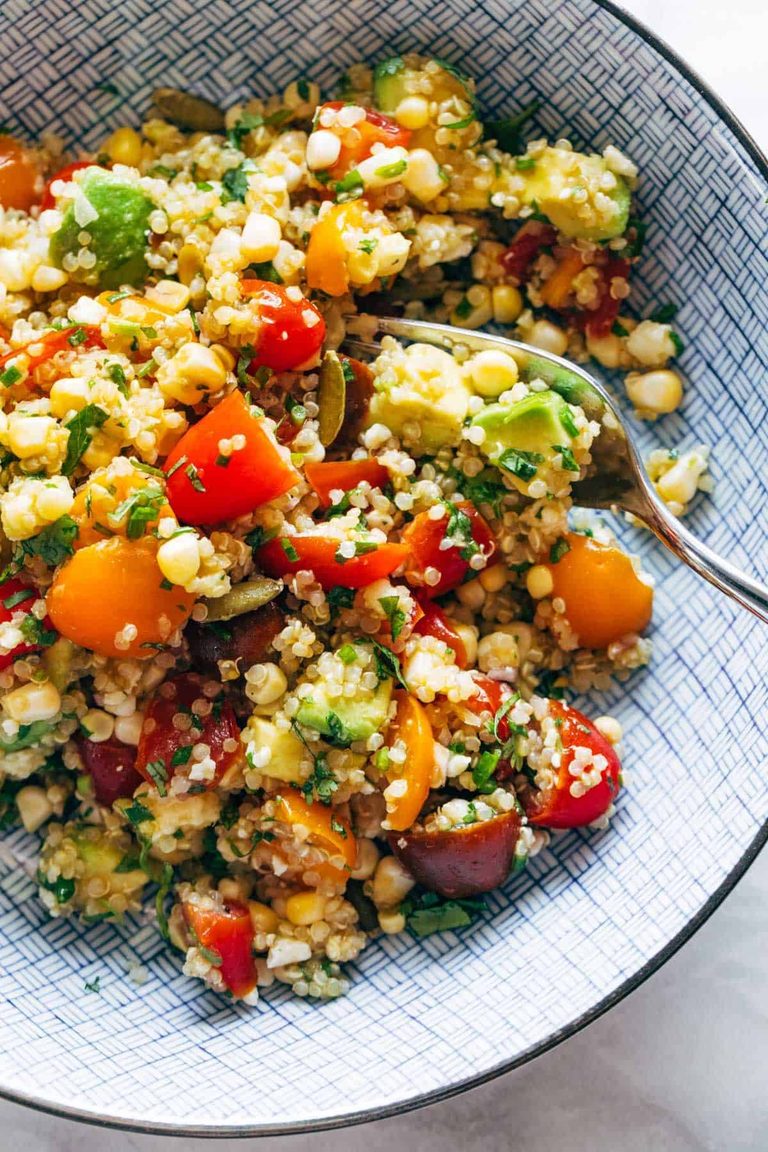
    The perfect summery quinoa salad – fresh corn, buttery avocado, nutty quinoa, juicy marinated tomatoes, and tons of fresh herbs.

    43 reviews / 4.9 average

    Couscous salad in a bowl.

    Couscous Salad with Lime Basil Vinaigrette

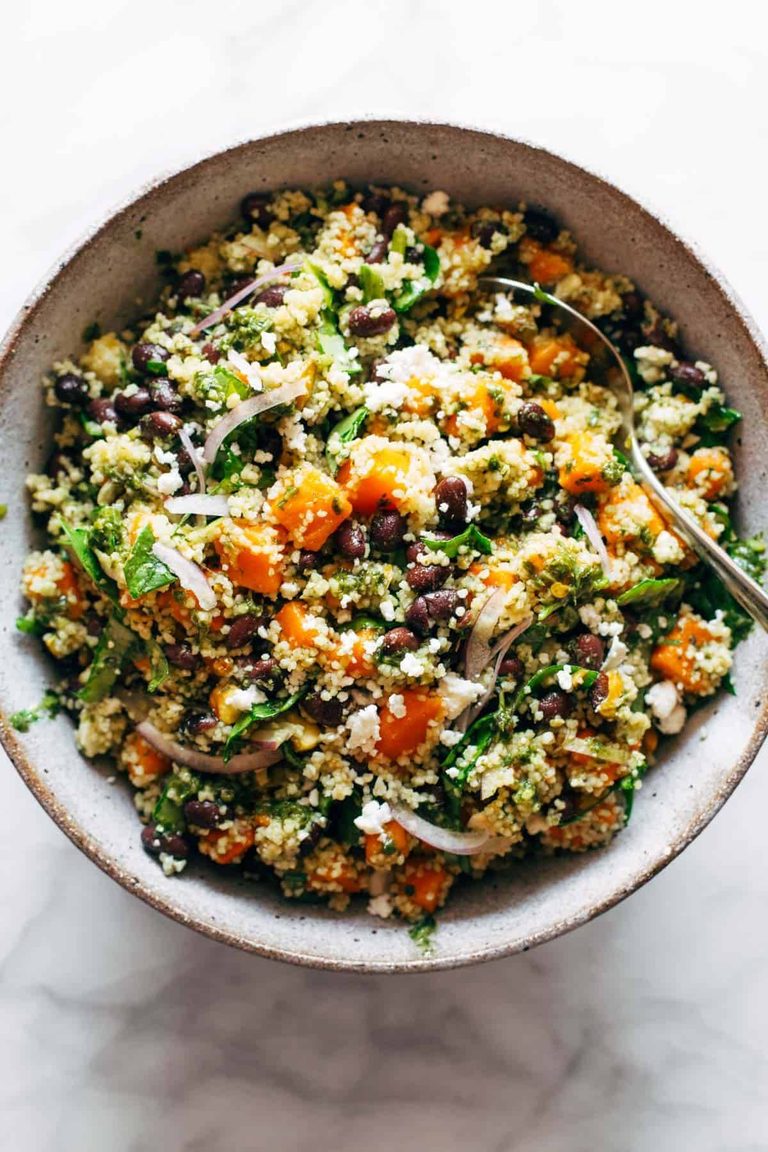
    A bright, zippy, unexpectedly delicious couscous salad that’s packed with sweet potatoes, black beans, spinach, feta, and more – all tossed with a life-changing lime basil vinaigrette!

    74 reviews / 4.9 average

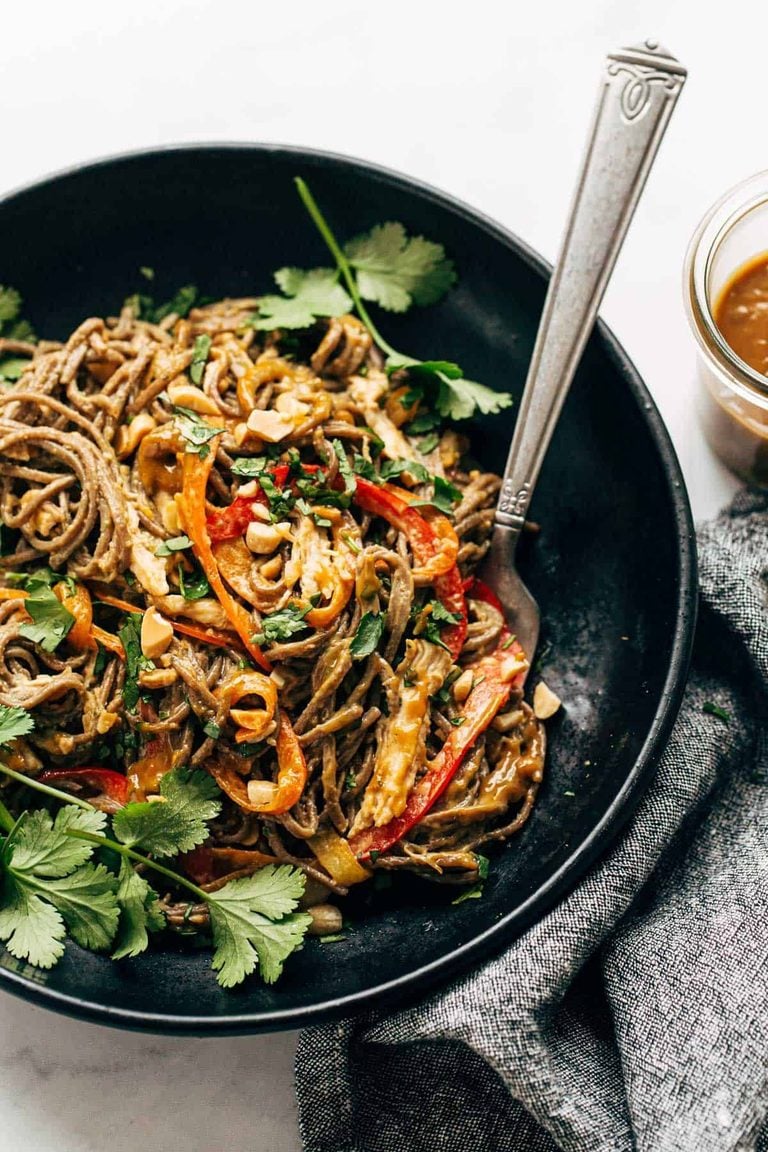
    Peanut soba noodle salad.

    Spicy Peanut Soba Noodle Salad

    This Spicy Peanut Soba Noodle Salad features red peppers, cabbage, chicken, soba noodles, and a quick homemade spicy peanut sauce. Salads don’t get much yummier than this.

    91 reviews / 4.8 average

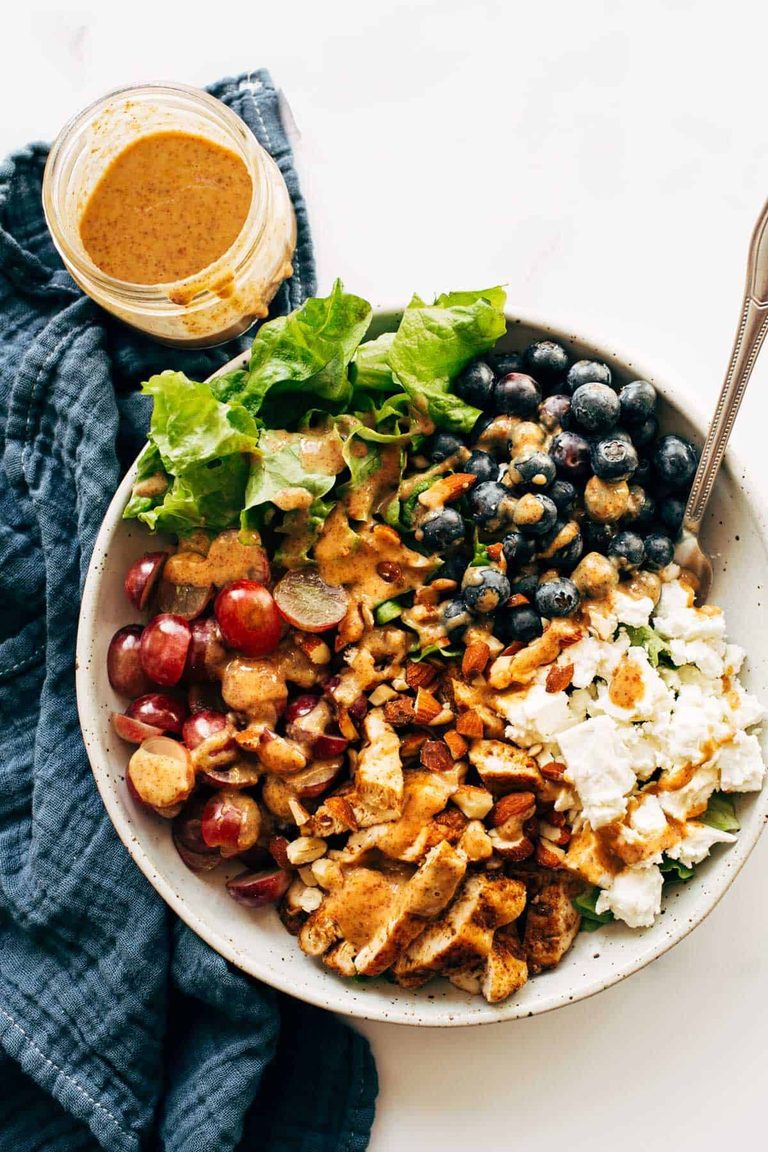
    Rainbow chicken salad in a bowl.

    Rainbow Chicken Salad with Almond Honey Mustard Dressing

    Tender chicken, plump grapes and berries, crisp lettuce, tangy feta cheese, crunchy almonds, and the real star – almond honey mustard dressing! Eat the rainbow and be glad, friends!

    61 reviews / 4.9 average

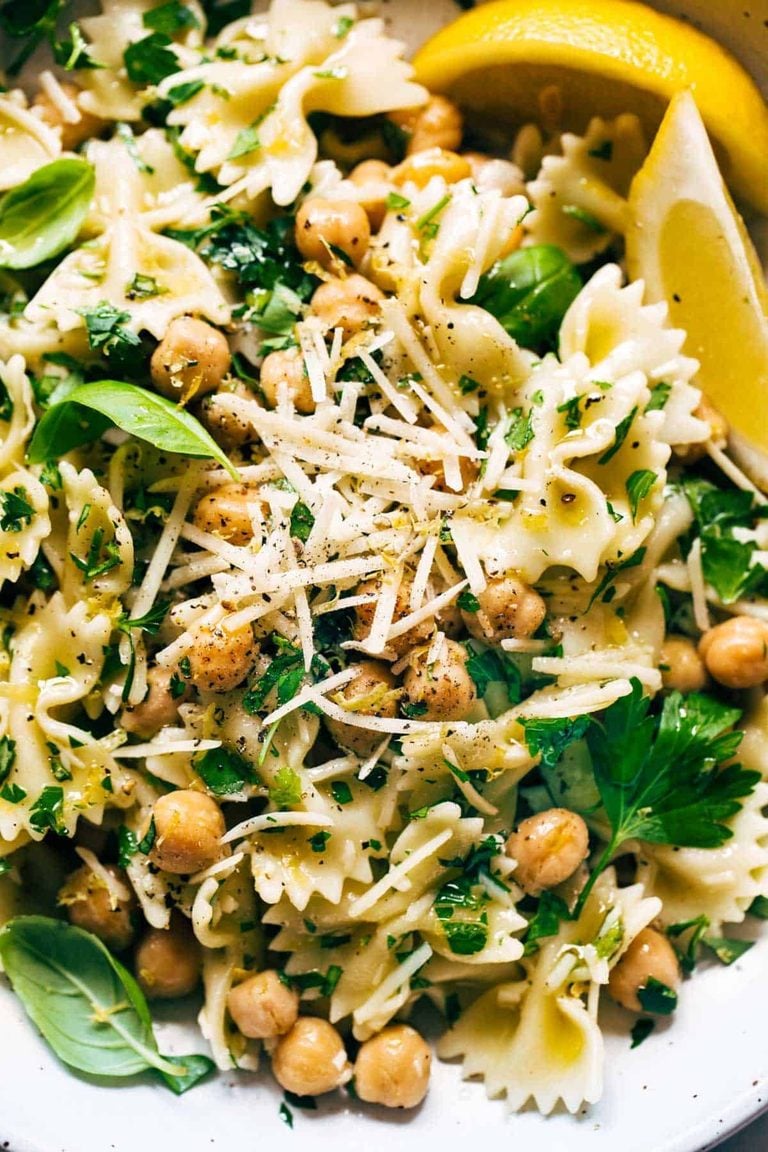
    Lemon herb pasta salad with chickpeas.

    Lemon Herb Pasta Salad with Marinated Chickpeas

    A super fresh, super summery Lemon Herb Pasta Salad! Packed with tangy marinated chickpeas, chewy pasta, lots of herbs and garlic, lemon juice and olive oil, and a handful of parmesan to top it off.

    47 reviews / 4.9 average

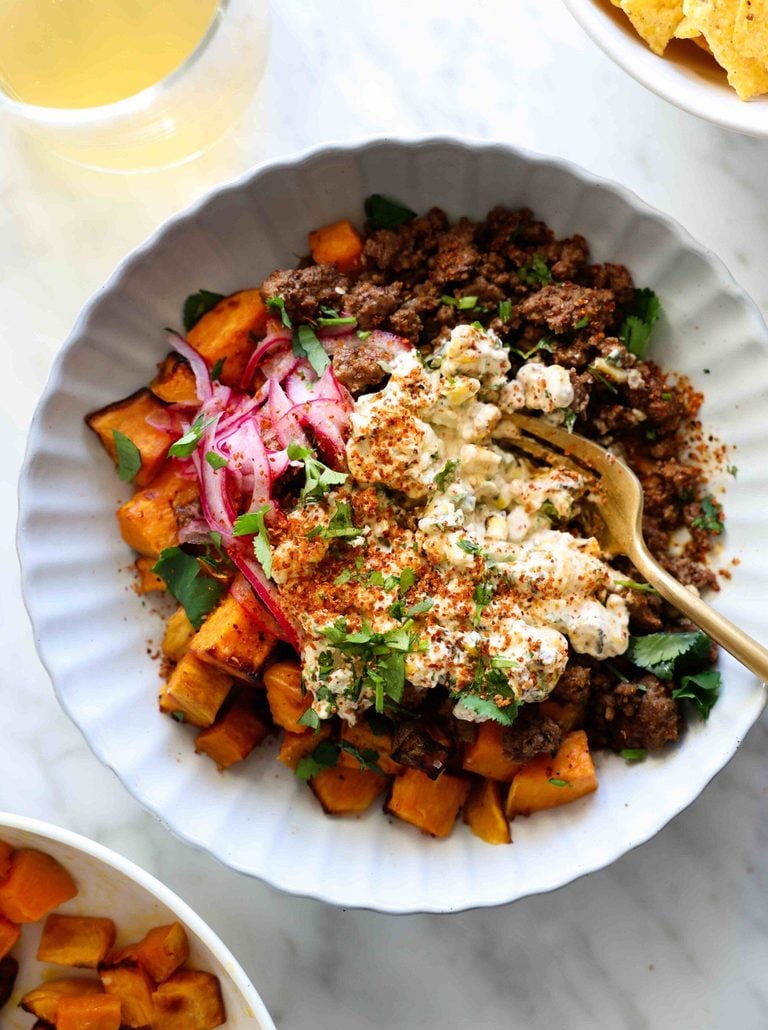
    Beef and sweet potato bowl with corn.

    Street Corn Beef and Sweet Potato Bowls

    One of my family’s favorite easy dinners that works SO well for meal prep! Sweet potatoes and ground beef get dolloped with a creamy high protein street corn style dip that is bonkers delicious.

    30 reviews / 4.9 average

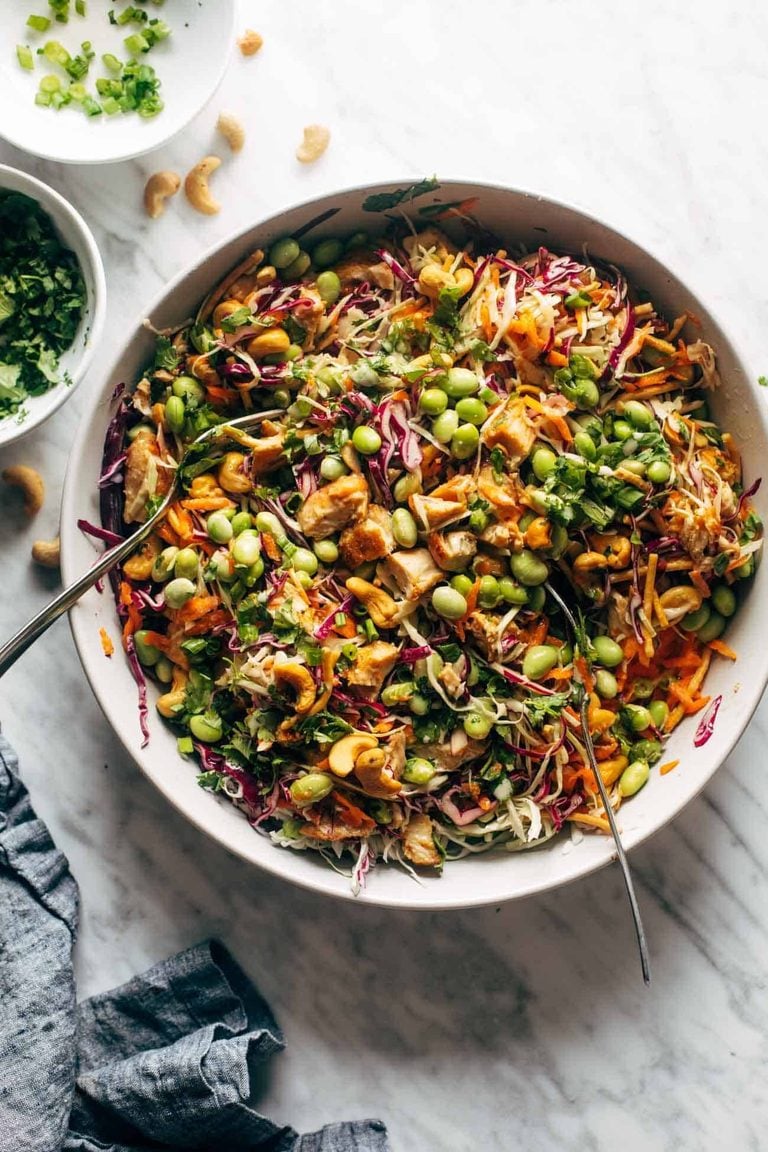
    Cashew crunch salad in a bowl.

    Cashew Crunch Salad with Sesame Dressing

    This Cashew Crunch Salad is loaded up with crunchy veg, chow mein noodles, edamame, and roasted cashews and it’ll make you ACTUALLY WANT TO EAT A SALAD. And the sesame dressing – OMG!

    124 reviews / 4.9 average

    Sesame noodle bowls in containers.

    Sesame Noodle Bowls

    Meal Prep Sesame Noodle Bowls! Fork-twirly noodles, an easy creamy sesame sauce, perfect browned chicken, and all the veg. YUM.

    50 reviews / 4.8 average

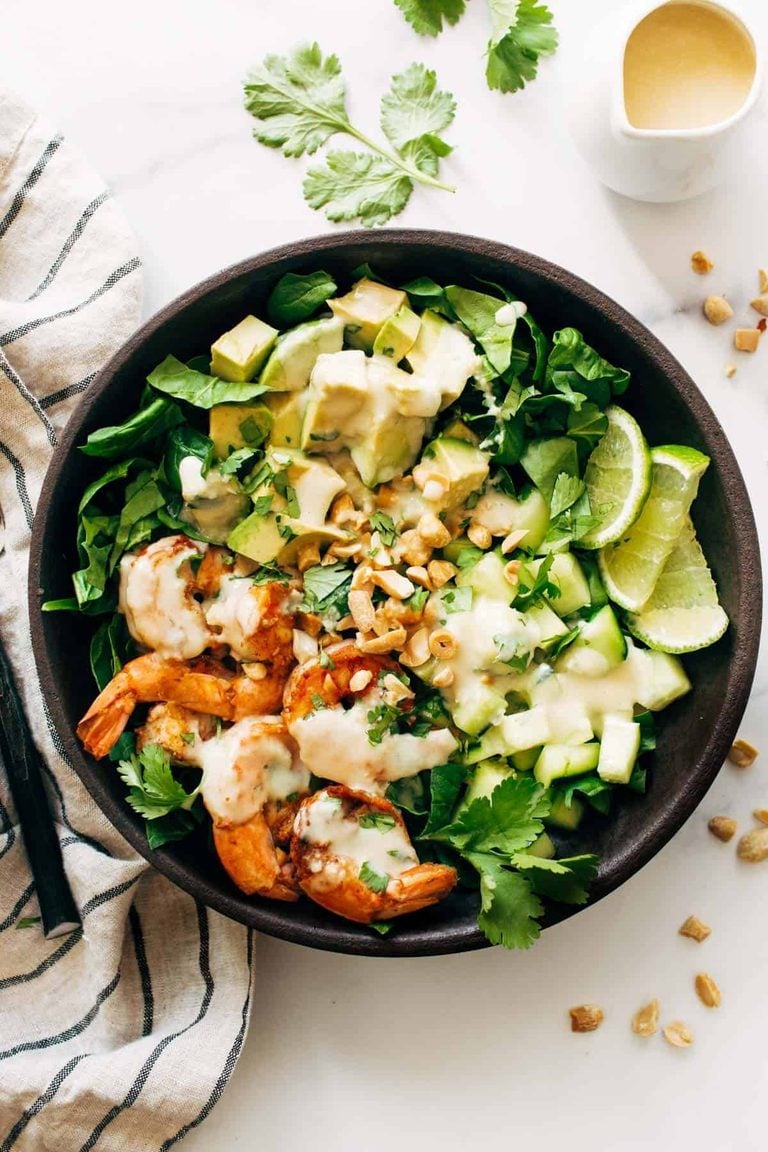
    Shrimp and avocado salad in a bowl.

    Shrimp and Avocado Salad with Miso Dressing

    This Shrimp and Avocado Salad is topped with spicy shrimp, crisp cucumbers, spinach, creamy avocado, and a generous drizzle of miso dressing. The happiest green salad ever!

    62 reviews / 4.8 average

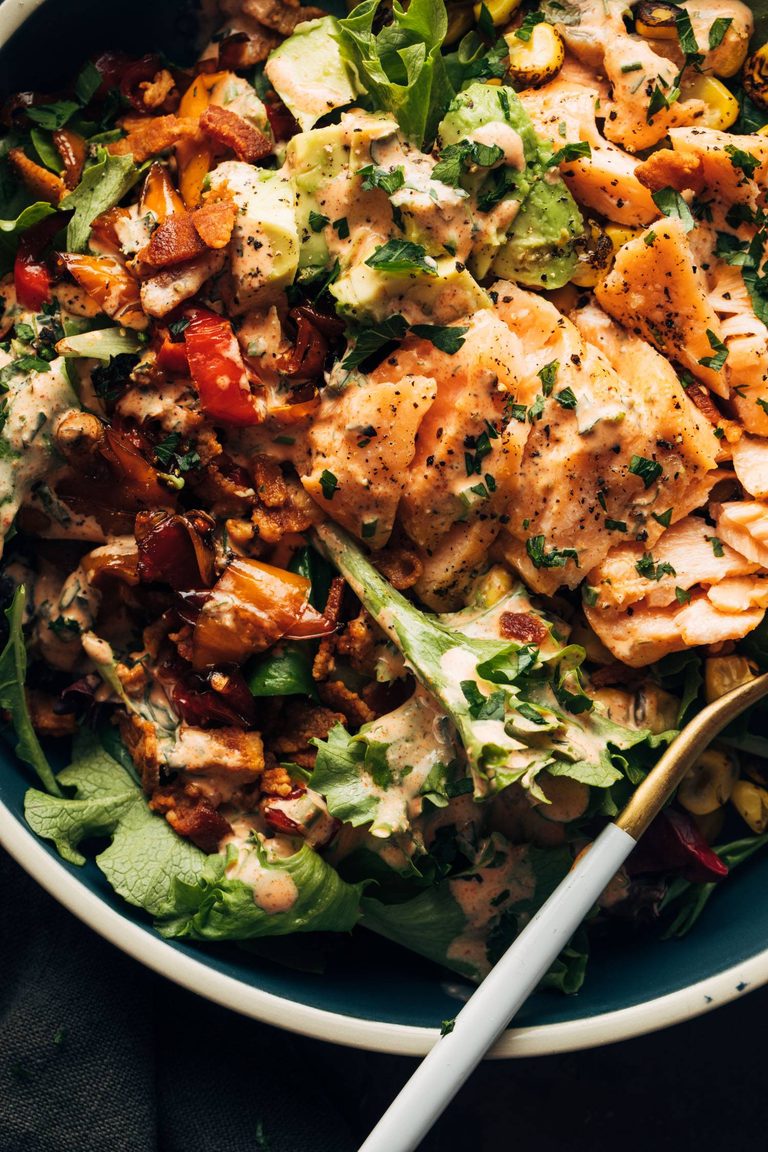
    Oliver's salad with salmon on top.

    The Oliver’s Salad

    We’re bringing you the most beautiful salad inspired by the restaurant Oliver’s in Minnesota. Tender salmon, savory peppers and garlic confit, buttery chunks of avocado, fire-roasted corn, bacon bits, and a river of homemade smoky ranch dressing.

    27 reviews / 4.9 average

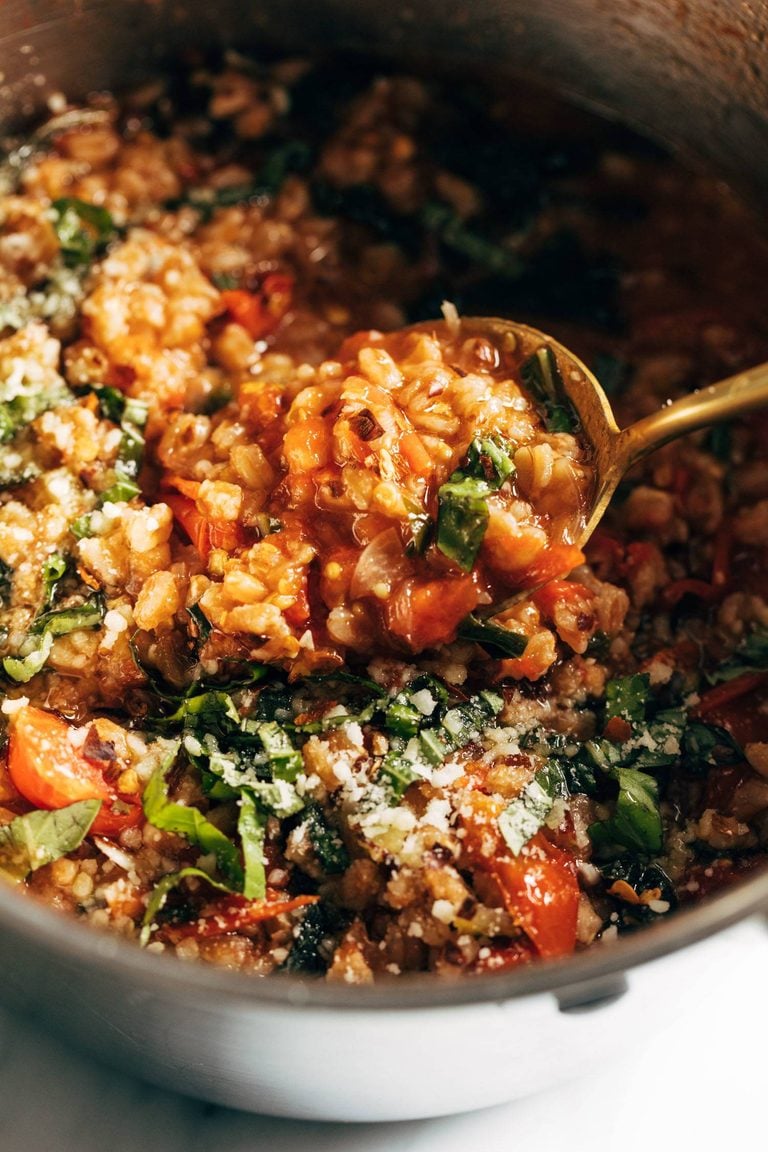
    One pan farro with tomatoes and kale.

    One-Pan Farro with Tomatoes and Kale

    This One-Pan Farro with Tomatoes and Kale is a straight-up DREAM! Rustic farro cozied up to cherry tomatoes, onions, garlic, and kale. So good and so wholesome!

    39 reviews / 4.9 average

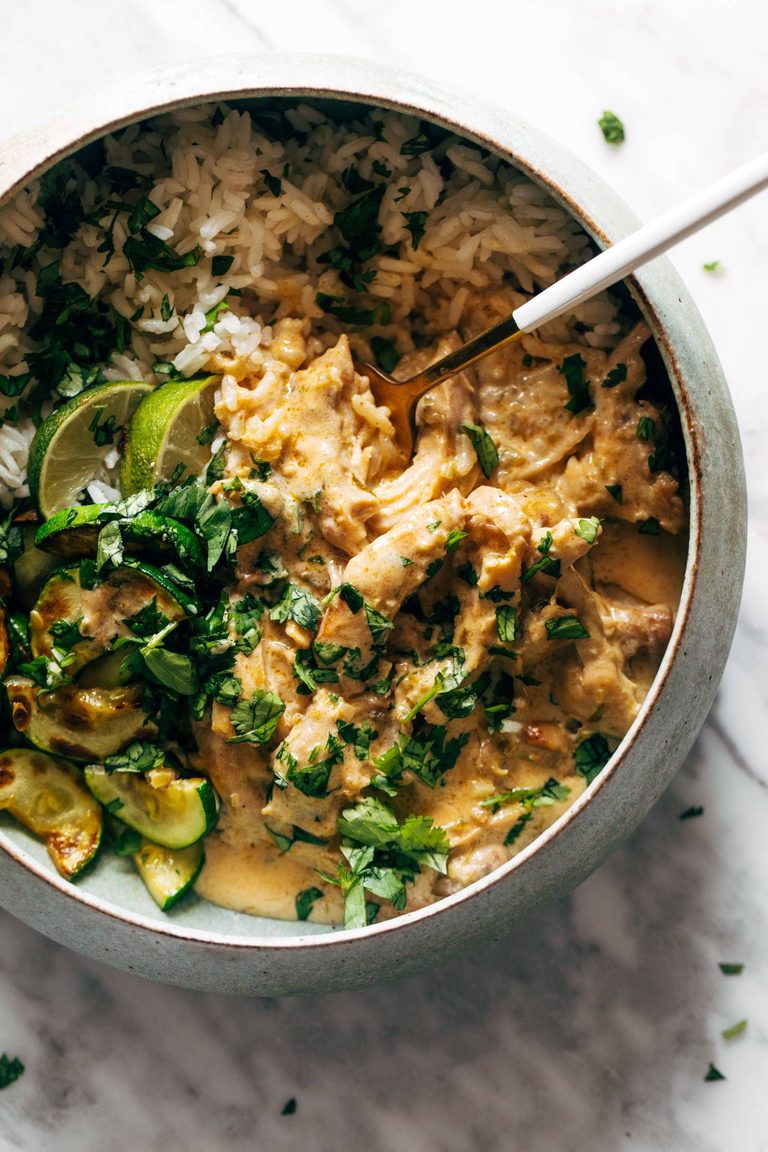
    Lemongrass chicken with rice and zucchini.

    Lemongrass Chicken with Rice and Zucchini

    This Lemongrass Chicken with Rice and Zucchini is OMG-level good! Tender chicken thighs, sautéed and then simmered in a creamy coconut and lemongrass sauce, sits next to a steamy pile of jasmine rice, fresh herbs, and your choice of veg.

    73 reviews / 4.9 average

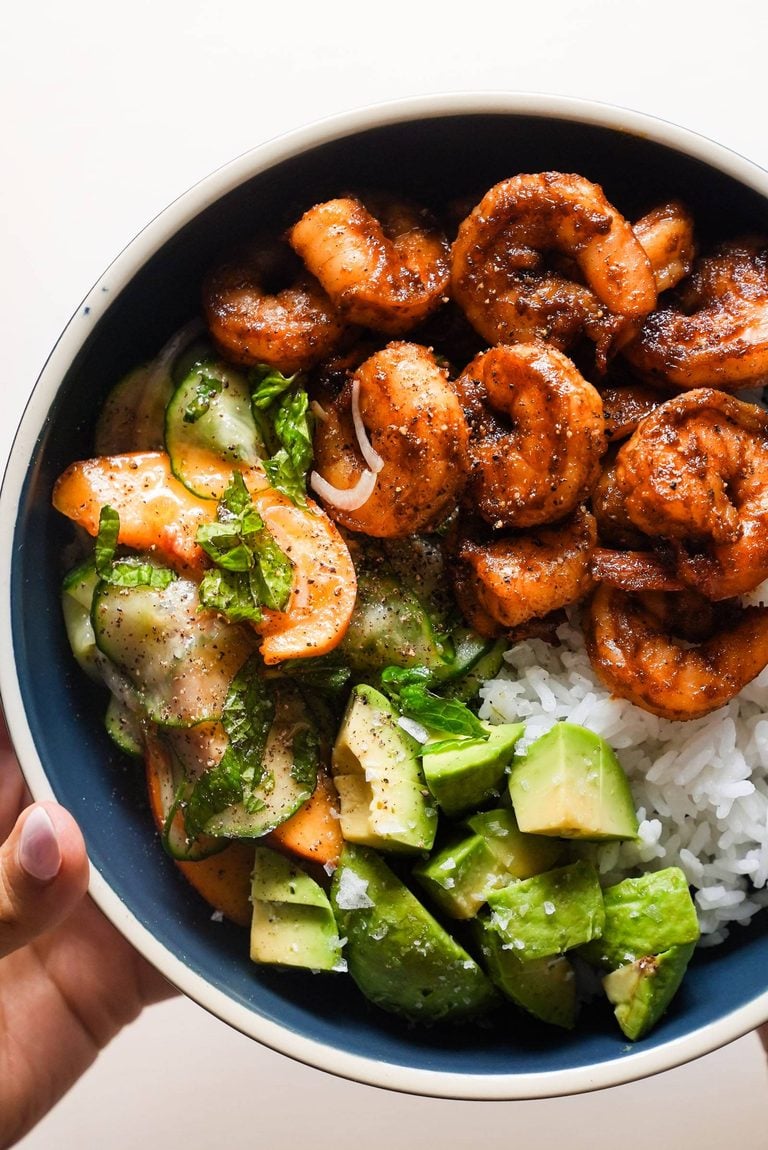
    Spicy shrimp in a bowl with rice and peach salad.

    Spicy Shrimp with Peach Salad

    This is summertime in a bowl! Spicy shrimp with all the delicious heat, smoke, and sweetness we want, alongside a fresh peach and cucumber salad.

    13 reviews / 4.9 average

    Crispy rice salad in a bowl.

    Crispy Rice Salad with Cucumbers and Herbs

    Paper-thin veggies, a shower of herbs, a pile of fried crispy red curry rice, and a limey garlicky vinaigrette all over top. This crispy rice salad is all I want to eat right now!

    50 reviews / 4.8 average

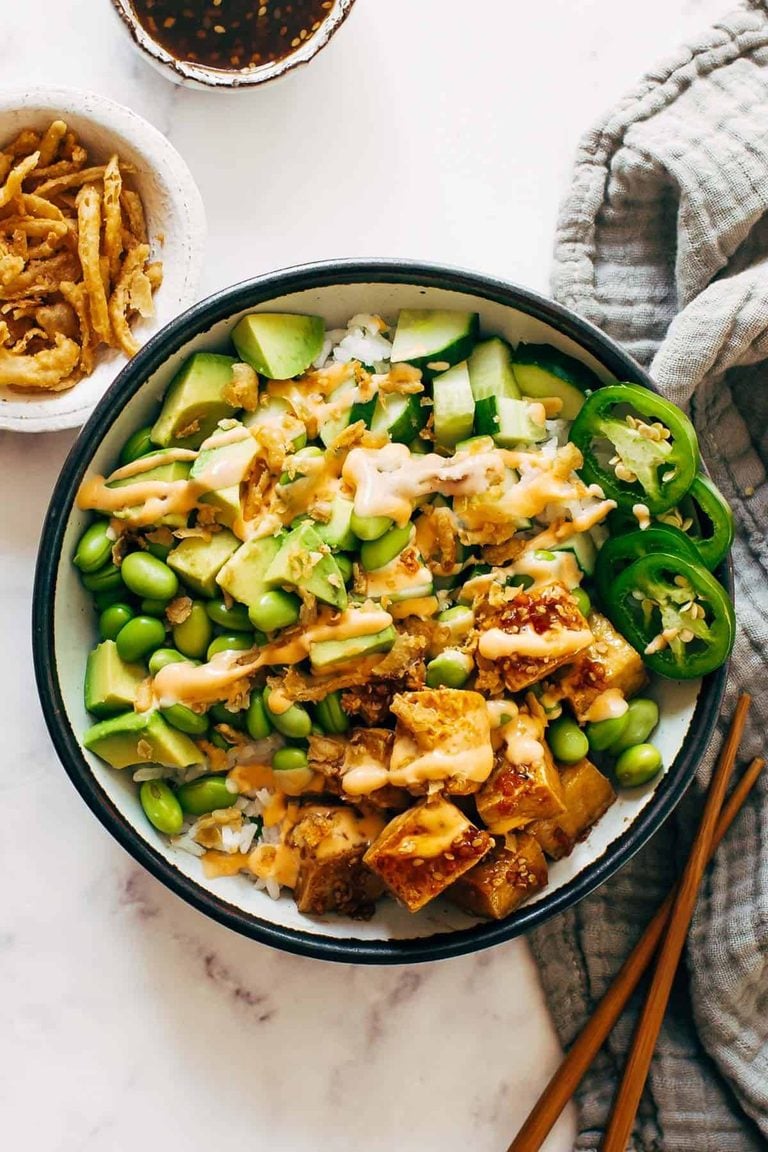
    Crunchy roll bowl.

    Crunchy Roll Bowls

    A block of tofu, nicely browned in teriyaki sauce, served on a bed of sticky rice with edamame, cucumber, avocado, jalapeño, and a handful of crushed-up crunchy onions, buried under a thick drizzle of extra teriyaki and spicy mayo. 

    475 reviews / 4.9 average

    Elote salad in a bowl.

    Elote Style Quinoa Salad

    Elote Quinoa Salad made with velvety peppers confit, juicy sweet corn, homemade dressing, cotija cheese, lime, and spices. Perfect for summer and so, so good!

    23 reviews / 4.9 average

    Sheet pan chicken pitas.

    Sheet Pan Chicken Pitas with Tzatziki

    Part bowl, part salad, part sandwich folded up into any kind of bread you like, and I’m here for it in every form.

    154 reviews / 5 average

    Chicken skewers on a plate.

    Honey Chipotle Chicken Skewers

    These chicken skewers are a family favorite! Very easy, deliciously smoky, nice and sweet, with a good amount of spice and bite. Air fryer, grill, and oven-friendly!

    31 reviews / 4.9 average

    Chipotle salmon with rice and aji verde.

    Chipotle Salmon with Orange Salsa and Aji Verde

    Sweet-and-smoky chipotle salmon topped with fresh orange salsa and creamy aji verde! An easy, delicious, restaurant-level salmon dinner.

    70 reviews / 5 average

    Grilled chicken in a bowl with hummus.

    Grilled Chicken with Pepperoncini Garlic Butter

    This is such a fun one! Grilled marinated chicken, a quick tomato cucumber salad, tangy bits of feta, and a zippy pepperoncini garlic butter sauce poured over the whole thing.

    68 reviews / 5 average

    Peanut chicken noodle bowls.

    Thai Peanut Chicken Bowls

    I love a shortcut dinner hack! These bowls feature caramelized peanut chicken, a tangle of vermicelli noodles, fresh herbs and cucumber salad, and peanut sauce all over top.

    30 reviews / 4.9 average

    Salmon burger on top of slaw.

    Yummy Salmon Burgers with Slaw

    These salmon burgers are THE YUMMIEST! and made with just five ingredients. The best for a quick + easy high protein lunch or dinner.

    109 reviews / 4.8 average

    Thai chicken salad.

    Chopped Thai-Inspired Chicken Salad

    This simple chopped Thai chicken salad has BIG flavors – peanut, lime, soy, chili, cilantro. Topped with a homemade peanut dressing! Healthy and fresh.

    146 reviews / 4.9 average

    Peach salad with cucumbers.

    Gorgeous Peach Salad

    Fresh cucumber, bitey shallots, cooling mint, and sweet fleshy peaches coming together in serious flavor harmony! I love this peach salad.

    16 reviews / 4.9 average

    Greens beans with avocado caesar dressing.

    Avocado Caesar Green Beans

    Grab a bag of green beans, blitz up a quick avocado caesar, toast some panko, and let’s go! This is some type of magic.

    21 reviews / 4.8 average

    Chicken wrap.

    Ang’s Chicken Wraps

    Hellllooo quick summer lunch! These chicken wraps have me hooked. Shredded chicken, crispy cheddar cheese, fresh veg like tomato, corn, and lettuce, some pickled red onion, and not one, but TWO sauces.

    18 reviews / 4.9 average

    BBQ salmon bowl with rice.

    BBQ Salmon Bowls with Mango Avocado Salsa

    BBQ Salmon Bowls with Mango Avocado Salsa! An easy and impressive dinner with yummy smoky-sweet flavor and a zip of zesty homemade salsa to take it over the top. The BEST weeknight dinner.

    191 reviews / 4.9 average

    Banza chicken bowl with salad.

    Banza Chicken Bowls with Calabrian Chili Sauce

    This bowl has it all! The crunch of the tomato cucumber salad, the thin slips of bitey red onion, the golden crisped air fryer chicken cut into tender little strips, a big pile of perfectly chewy Banza, and a dollop of tangy calabrian chile sauce on top.

    22 reviews / 5 average

    Chimichurri shrimp with tomatoes.

    Chimichurri Shrimp with Tomatoes

    Saucy, punchy, and delightful Chimichurri Shrimp! Served with a tomato salad, a pile of hot steamy rice, and a dollop of creamy tzatziki.

    7 reviews / 5 average

    Mediterranean quinoa bowls.

    Mediterranean Quinoa Bowls with Roasted Red Pepper Sauce

    Mediterranean Quinoa Bowls with Roasted Red Pepper Sauce! A mix of quinoa, cucumbers or kale or spinach, feta cheese, kalamata olives, and pepperoncini!

    82 reviews / 4.9 average

    Quinoa summer salad.

    Green Goddess Quinoa Summer Salad

    Green Goddess Quinoa Summer Salad – simple, healthy, and extremely adaptable to whatever veggies you have on hand! my family LOVES this recipe. vegetarian and can be made vegan.

    25 reviews / 4.8 average

    Cauliflower lettuce wraps.

    Roasted Cauliflower Lettuce Wraps with Korean BBQ-Inspired Sauce

    Roasted Cauliflower Lettuce Wraps with Korean BBQ-Inspired Sauce! Roasted cauliflower tossed in a sweet and sticky sauce, all topped with chives, peanuts, and spicy mayo.

    35 reviews / 4.8 average

    Roasted peanut kale crunch salad.

    Roasted Peanut Kale Crunch Salad

    OOOH BABY, this salad is so good! Crunchy kale and cabbage, fresh herbs and fresno peppers, chopped peanuts, and a perfect roasted peanut vinaigrette that tucks into all the salad nooks and crannies.

    34 reviews / 4.9 average

    Shrimp and grilled bread in a skillet.

    Baked Shrimp with Feta and Grilled Sourdough

    The yummiest Baked Shrimp with Feta and Grilled Sourdough! Bubble up some feta, garlic, shrimp, and tomato sauce in a pan, grill some buttery crispy bread, and dunk that right on in. The simplest fancy-ish dinner!

    19 reviews / 4.9 average

    Harissa meatballs on a plate with veggies and pita.

    Harissa Meatballs with Whipped Feta

    These Harissa Meatballs with Whipped Feta are perfect for an easy SOS dinner! Store-bought meatballs, bell peppers, zucchini, harissa, and whipped feta all in one bowl. YUMMY!

    39 reviews / 5 average

    Tofu and noodle lettuce wraps.

    Firecracker Vegan Lettuce Wraps

    HELLO YUM. Firecracker Lettuce Wraps that are happily vegan – with crispy tofu bits, saucy brown rice noodles, and a creamy sesame sauce.

    111 reviews / 4.8 average

    Kale, chicken, and quinoa bowls.

    Marinated Kale and Chicken Bowls with Sun Dried Tomato Sauce

    Marinated Kale and Chicken Quinoa Bowl with Sun Dried Tomato Sauce! This recipe is clean, simple, and nutritious!

    33 reviews / 4.8 average


    Wholesome Summer Snacks

    I think my favorite part of summer might be all the snacking that presents itself – play date snacks, running-out-the-door snacks, car ride snacks, and just normal out-back-on-the-deck snacks. These are a few of my favorite healthy snacks for summer!

    The post 45 Light + Bright Healthy Summer Dinners appeared first on Pinch of Yum.

    This post was originally published on this site.

  • 5 Ingredient Blueberry Bread

    5 Ingredient Blueberry Bread

    This 5 Ingredient Blueberry Bread is the little shortcut loaf you’ll make once and then suddenly need every weekend. It’s soft, sweet, full of juicy blueberries, and comes together with only five simple ingredients.

    Lovely Little Loaf Secrets

    • Only 5 Ingredients: Bless! You only need a few pantry staples and blueberries to make this easy quick bread happen.
    • Perfectly Soft and Moist: This blueberry bread bakes up tender and sweet, with juicy berries in every slice.
    • Breakfast, Snack, or Dessert: Serve it warm in the morning, pack it for an afternoon treat, or add a little butter and call it dessert. I support you.

    5 Ingredient Blueberry Bread Ingredients

    Overhead shot of labeled ingredients.
    • Flour: If you don’t have self rising flour, you can make your own by combining 1 cup all purpose flour with 1 ½ teaspoons baking powder and ¼ teaspoon salt.
    • Add-Ins: For more flavor, add 2 teaspoons of vanilla extract or lemon zest to the batter.
    • Oil Option: You can use a neutral oil instead of melted butter. Oil makes the bread extra moist, while butter gives it a richer flavor.
    • Sweet Crunchy Top: Sprinkle the top of the bread with some granulated sugar before baking for extra sweetness.

    How to Make 5 Ingredient Blueberry Bread

    This easy blueberry bread recipe is one you can throw together quickly when that sweet tooth hits. If you love a good moist quick bread, you’ll also want to try my lemon, orange, or pineapple bread next!

    1. Prep: Preheat the oven to 350°F. Grease an 8.5 x 4.5-inch pan with nonstick cooking spray and line with parchment paper. Set aside. In a large bowl, add melted butter, sugar, and eggs. Whisk until well combined.
    2. Add: Add self rising flour and fresh blueberries to the bowl.
    3. Stir: Stir until just combined.
    4. Bake: Pour the batter into the prepared pan and bake for 55-60 minutes. You know when it’s done when a toothpick inserted into the center comes out clean. Cool 5 ingredient blueberry bread completely before slicing.
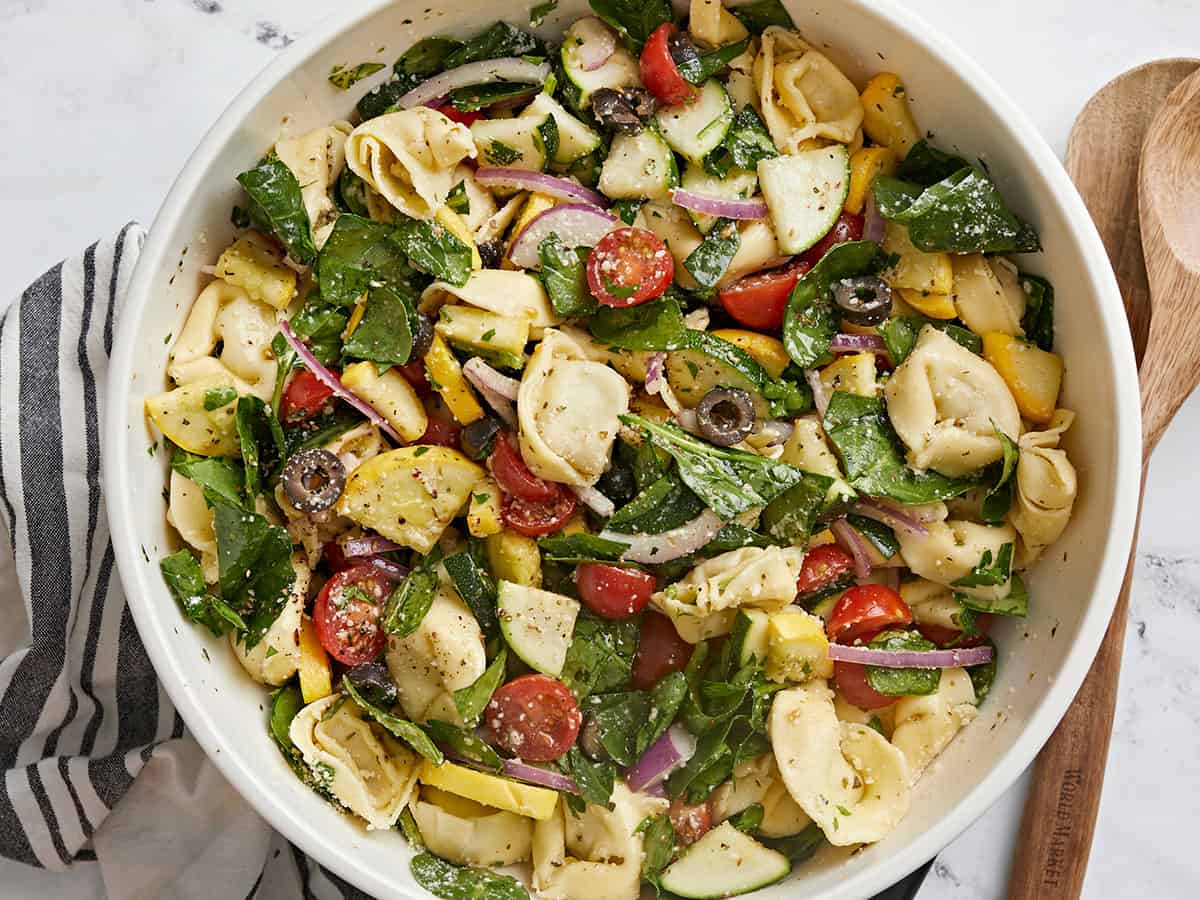
    Must Have Tools For This Recipe

    • Mixing Bowl: Holds the batter while you mix everything together.
    • Whisk: Helps combine the wet ingredients and smooth out the batter.
    • Loaf Pan: Gives the bread its shape and helps it bake evenly.

    Print

    5 Ingredient Blueberry Bread

    This 5 Ingredient Blueberry Bread is soft, moist, packed with juicy blueberries, and perfect for breakfast, snacking, or dessert.
    Course Breakfast
    Cuisine American
    Keyword 5 ingredient blueberry bread, 5 ingredient blueberry bread recipe, blueberry bread, blueberry loaf, blueberry quick bread
    Prep Time 10 minutes
    Cook Time 1 hour
    Total Time 1 hour 10 minutes
    Servings 12 slices
    Calories 246kcal

    Ingredients

    • ½ cup melted butter
    • 1 ¼ cups sugar
    • 3 eggs
    • 2 cups self-rising flour
    • 1 cup blueberries fresh or frozen

    Instructions

    • Preheat the oven to 350 degrees Fahrenheit. Grease an 8.5 x 4.5-inch pan with nonstick cooking spray and line with parchment paper. Set aside.
    • In a large bowl, add ½ cup melted butter, 1 ¼ cups sugar, and 3 eggs. Whisk until well combined.
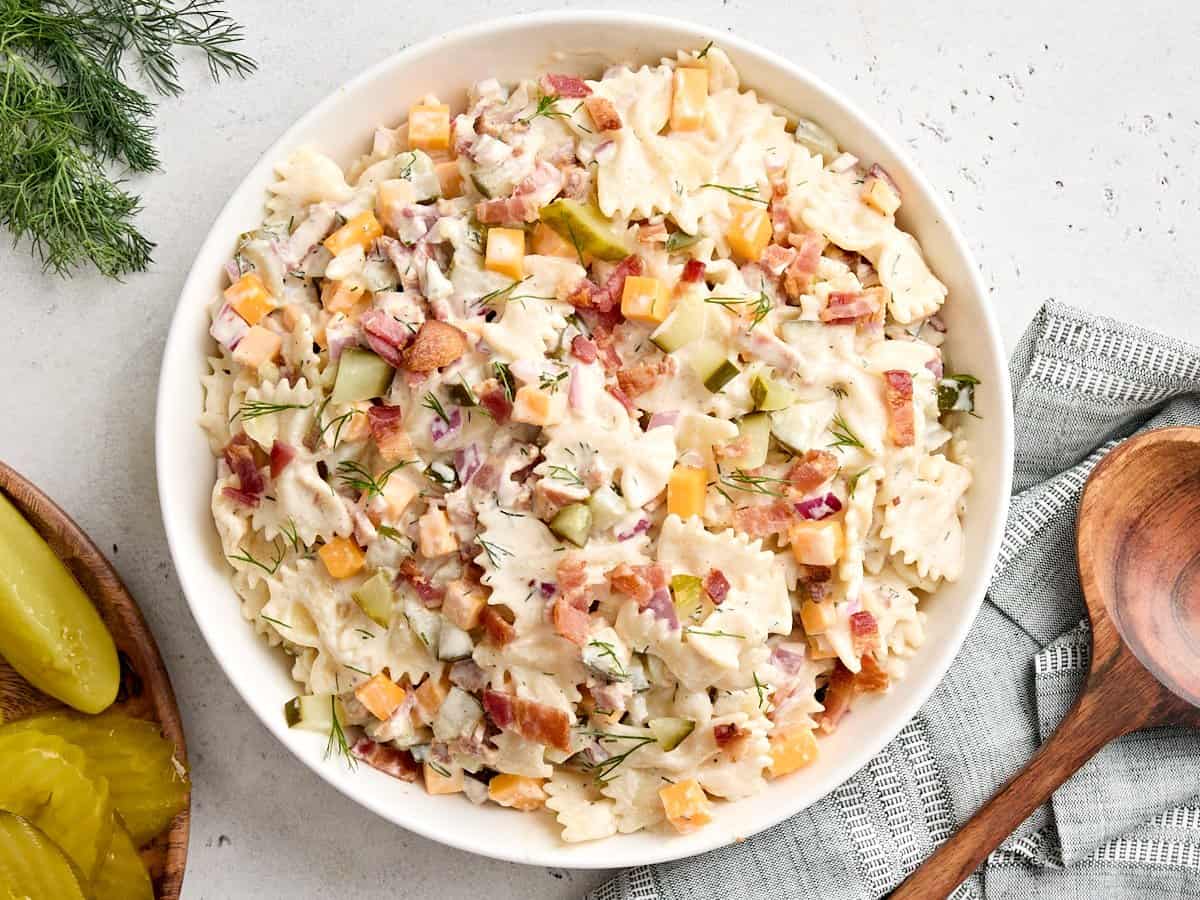
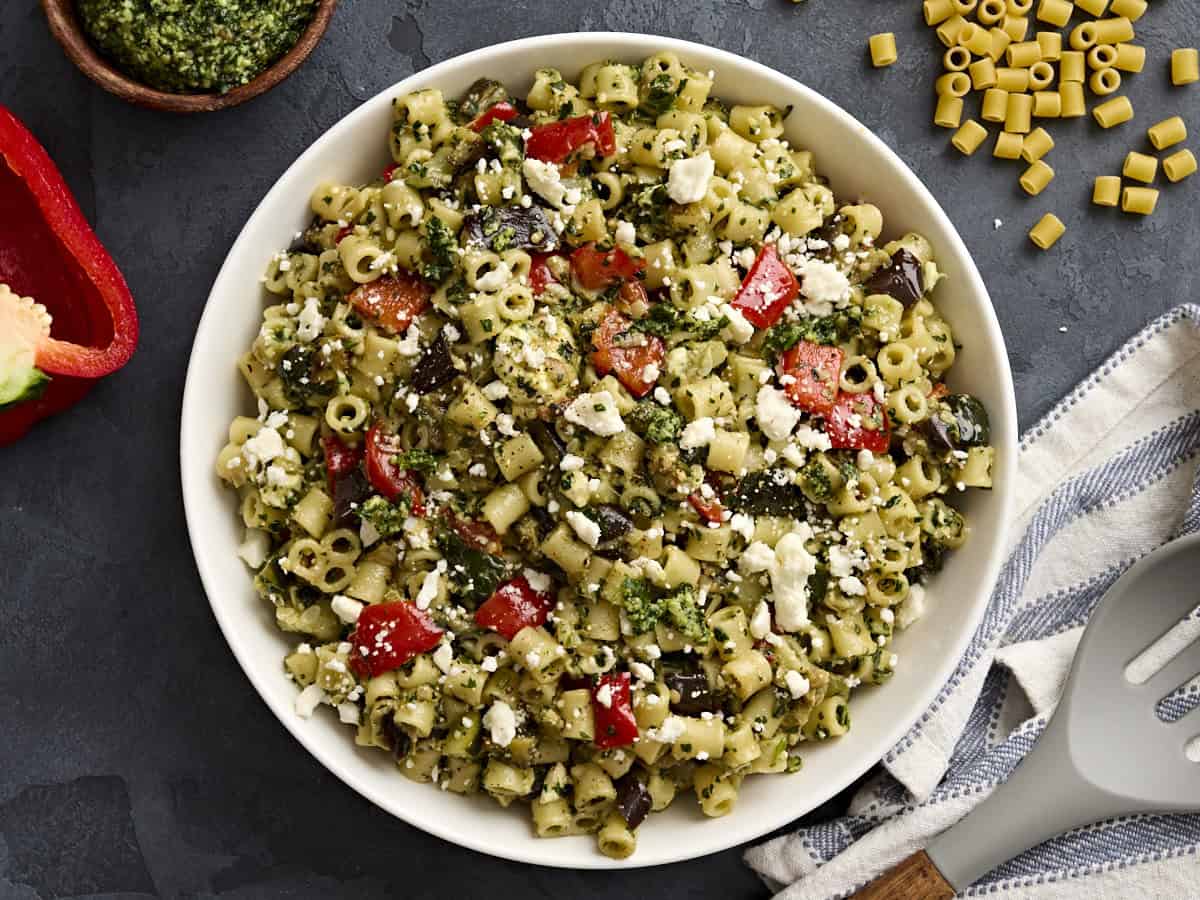
    • Add 2 cups self-rising flour and 1 cup blueberries to the bowl, then stir until just combined.
    • Pour the batter into the prepared pan and bake for 55-60 minutes, or until a toothpick inserted into the center comes out clean. Cool completely before slicing.

    Notes

    Leftover & Make Ahead Instructions

    • Room Temperature: Store leftovers in an airtight container at room temperature for up to 3 days.
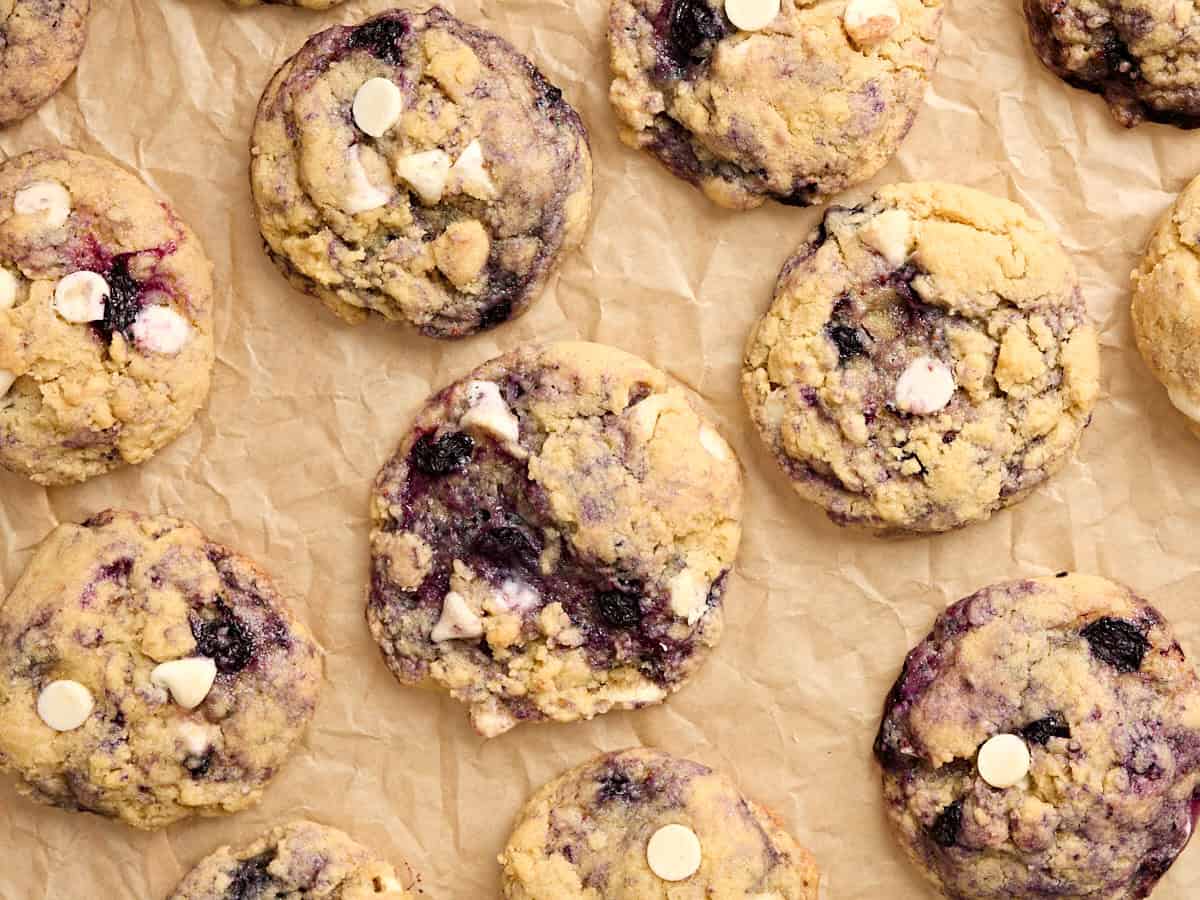
    • Freezer: Cool completely, then wrap tightly in plastic wrap and place in a freezer bag. Freeze whole or sliced for up to 3 months.

    • Make Ahead: Assemble the batter in the loaf pan, cover, and refrigerate for up to 24 hours before baking. Add about 5 minutes to the bake time.

    Nutrition

    Calories: 246kcal | Carbohydrates: 38g | Protein: 4g | Fat: 9g | Saturated Fat: 5g | Polyunsaturated Fat: 1g | Monounsaturated Fat: 2g | Trans Fat: 0.3g | Cholesterol: 61mg | Sodium: 77mg | Potassium: 48mg | Fiber: 1g | Sugar: 22g | Vitamin A: 303IU | Vitamin C: 1mg | Calcium: 13mg | Iron: 0.4mg
    Close up shot of a slice of a 5 ingredient blueberry bread slice cut in hlaf ans stacked.

    More Quick Bread Recipes

    This post was originally published on this site.