Author: Brooke Griswold

  • From tanks and rifles to Dungeons and Dragons: Veteran’s experience shaped game’s famous artwork

    From tanks and rifles to Dungeons and Dragons: Veteran’s experience shaped game’s famous artwork

    This post was originally published on this site.

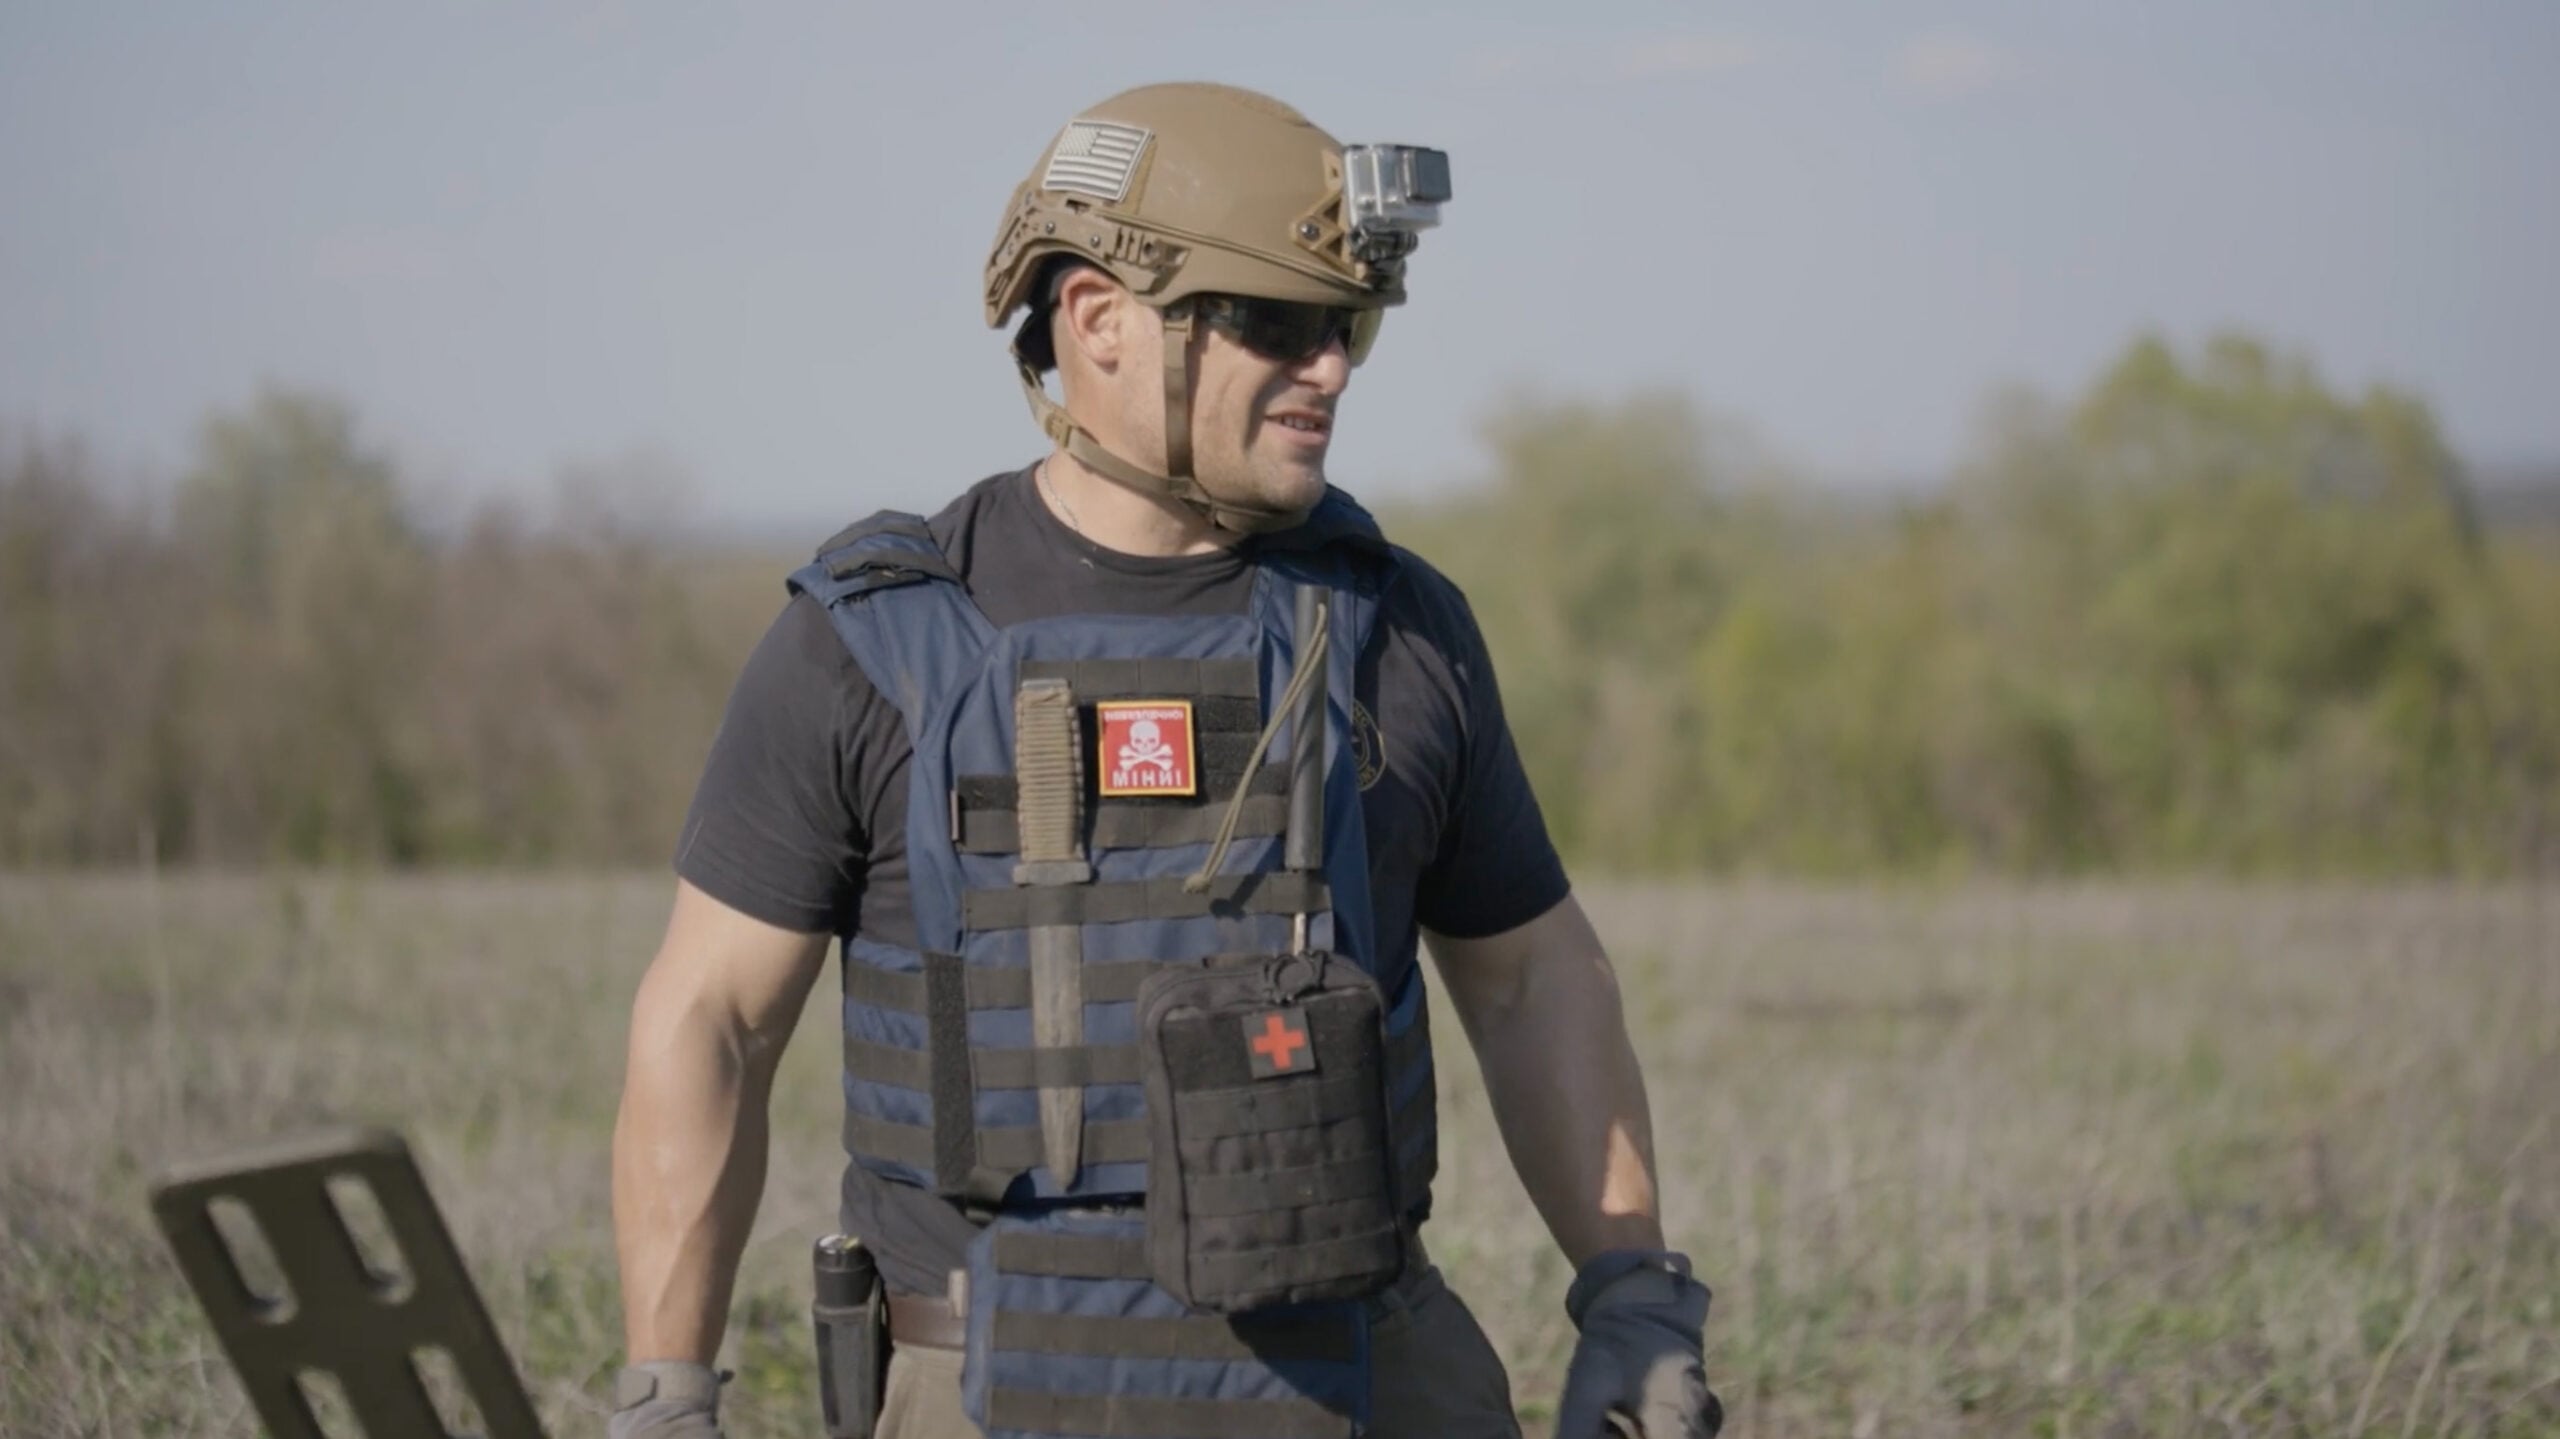
    Before Larry Elmore became one of the artists behind Dungeons & Dragons’ popular imagery, he was drawing tanks and rifles for the U.S. Army.

    Elmore has been drawing for as long as he can remember, but growing up in a family with limited means meant his family had to ration paper, he said in a conversation with Fort Knox Public Affairs Office reporter Savannah Baird.

    When Elmore was drafted into the Army after graduating with a fine arts degree from Western Kentucky University, the service gave him the resources to hone his craft, he told Baird.

    “Once I got assigned, the Army saw my portfolio and realized I could draw just about anything from memory, so they put me on illustration work,” Elmore said in the release.

    The Army changed the look of its field manuals in the 1970s to include more illustrations, and Elmore’s talents were put to use. After studying objects, Elmore could retain their images and draw them from memory, including tanks and rifles, he told Baird.

    “It was a God-given gift and I used it,” he said.

    Elmore went to basic training and was stationed at Fort Knox. During his time there, he developed skills he had not learned in college.

    “Illustrations in the ’70s were just line work, pure ink — white and black, no grays — and they didn’t teach you that in college. I developed those skills at Fort Knox,” he said in the release.

    After completing his two-year obligation, Elmore decided to stay on as a contractor, Baird reported. Around that time, a new employee joined the staff and introduced the team to Dungeons & Dragons, changing Elmore’s life.

    Despite his initial hesitation, he began playing the game with his coworkers and quickly became hooked, calling it “the king of all games.”

    Dungeons & Dragons was relatively new at the time, and its art was elementary, Elmore told Baird. He recalled that a fellow artist said he was going to submit his artwork to Tactical Studies Rules, or TSR, the company behind Dungeons & Dragons, because “our art is much better than this.”

    Elmore then decided to submit his own portfolio to TSR, which included drawings he had produced for the Army. Soon after, TSR offered to double his salary, hire his wife and move them to Wisconsin, the release stated.

    Elmore said he immediately shook the company representative’s hand and told him, “you just bought yourself an artist.”

    He went on to create one of the most recognizable images in the game’s history: the cover art for the famous “Red Box” set, which featured a warrior in combat with a red dragon.

    After six years at TSR, Elmore decided to move back to Central Kentucky and pursue freelance work for another 40 years, according to the Army’s release.

    He recognizes the impact the Army had on his career as an artist.

    “I was very lucky,” he said in the release. “Sometimes, I think to be successful you have to be good, but you got to have some of those weird breaks in life — and I got two or three.”

  • Google Photos Alternatives in 2026: A Photographer’s Guide to Getting Out

    Google Photos Alternatives in 2026: A Photographer’s Guide to Getting Out

    If you’re leaving Google Photos and want the closest thing to a straight replacement, it’s Ente. It’s end-to-end encrypted, open source, and it has a step-by-step import path for Google Takeout archives. If what you’re moving is a real photo archive rather than a camera roll, no single app will do the job. You want…

    This post was originally published on this site.

  • Our Honest Atlas Ocean Voyages Arctic Cruise Review – Is It Worth it?

    Our Honest Atlas Ocean Voyages Arctic Cruise Review – Is It Worth it?

    Our Atlas Ocean Voyages Arctic cruise took us further north than we had ever sailed, all the way to 79 degrees north into the high Arctic. Over 12 days, our Arctic adventure combined a Norwegian coastal cruise with a true polar expedition in Svalbard. 

    Even though we’ve sailed to Antarctica with Atlas, this hybrid cruise was quite different. In this cruise review, we break down what an Atlas Arctic cruise is really like, from the ship and the ports to the actual expedition and our honest verdict on who this cruise is right for.

    The Itinerary

    Atlas Ocean Voyages offers a variety of polar expedition itineraries in the Arctic. Ranging from one week to two weeks and beyond, almost no two are the same. From Norway to Iceland, Greenland, and Northern Canada, you can visit several different places on an Arctic expedition cruise. But when we envisioned the experience, one destination sat at the top of our list: Svalbard.

    This northern archipelago is known for its glaciers and 24 hours of daylight in summer. It’s also home to some 3,000 polar bears (including the territorial waters and seasonal sea ice of the Barents Sea). Especially via cruise ship, this is the place to go if you want to see these marine mammals. In fact, in much of Svalbard you aren’t allowed to leave the settlement without proper protection.

    During our 12-night Oslo to Longyearbyen itinerary, we weaved through fjords, stopping in quaint coastal villages and even reached the North Cape, the northernmost point of continental Europe. It was from there that our Norwegian fjords cruise became a full expedition, as we journeyed along the west coast of the Svalbard archipelago. 

    Life Onboard Atlas Ocean Voyages World Navigator

    Atlas Ocean Voyages has a current fleet of three nearly identical polar-class yachts. We’ve previously sailed on the line’s two other ships: World Traveller in the Mediterranean and World Voyager in Antarctica. So, we were already familiar with the layout, amenities, and overall vibe. 

    Like its sisters, World Navigator pairs a luxe cruise experience with the capabilities of an expedition. With under 200 passengers, the ship offers intimacy while still providing all the comforts of cruising.

    Yes, a smaller ship does mean fewer venues, dining options, and onboard events. However, most who choose an Atlas Ocean Voyages Arctic cruise are really coming for the itinerary. So, the ship is just the elegant backdrop. 

    Onboard Amenities

    Deck 4 is the central hub of World Navigator. It houses the Atlas Lounge, the main indoor bar where guests gather before dinner. Here, cruise director Tee also hosts trivia and game shows. Nearby sits the Dom Henrique Auditorium. This is where port talks, lectures, expedition briefings, and the occasional movie take place.

    The L’Occitane SeaSpa, plus a complimentary sauna and relaxation room, is also located on Deck 4. Around the corner, you’ll find a 24-hour fitness studio and the Navigator Choice gift shop.

    There’s also the coffee shop, Paula’s Pantry, as well as the Porto restaurant, the ship’s main dining room. 

    Up on Deck 7 sits The Dome. This forward observation lounge with floor-to-ceiling windows has some of the best views on the ship. In the mornings, it’s a quiet space. Later in the day, it hosts afternoon tea. Then in the evenings, the Java Duo play themed sets with a heavy focus on jazz. 

    Heading outside on Deck 7, there’s a heated pool and hot tubs, along with the 7Aft Grill and Pool Bar. Even though this was an Arctic cruise, southern Norway gave us several warm days. So, the pool deck was busier than you’d expect. One deck up, there’s also a jogging track. With mild weather, I even managed to get in a couple of outdoor runs.

    Prime for expedition, World Navigator features several outdoor spaces. Along with the viewing platform on Deck 7 forward (outside of The Dome), there’s the Water’s Edge on Deck 5 forward. Set right on the bow, it puts you closer to the marine life and horizon than anywhere else onboard.

    You’ll also find observation areas on Decks 5 and 6 aft, with some sun loungers, sofas, and chairs creating a relaxing spot to watch the sailaway from each port or scout for wildlife from the back of the yacht. 

    Dining During An Arctic Cruise on World Navigator

    Across the board, the food was excellent, even if the options felt limited at times especially for Heidi. Atlas Ocean Voyages menus are standard across the fleet, with occasional regional dishes, mostly featuring Arctic fish and seafood.  

    Main Dining Room on World Navigator 

    Most meals happen in Porto, the main dining room on Deck 4 aft. Breakfast runs buffet-style with some continental items, scrambled eggs, and typical sides. There’s also a made-to-order menu with omelets, pancakes, and French toast. 

    Lunch follows the same setup. The buffet offered rotating entrees and sides, along with salads, soup, and dessert. I was a fan of the roasted pork, chicken, and salmon. Also, the live cooking station featured custom options, like Asian noodles and pasta. Likewise, there’s a made-to-order menu with selections like burgers and Heidi’s personal favorite chicken sandwich.

    We were surprised that it took guests complaining that they couldn’t find Norwegian waffles in port for the chef to create a Norwegian-style spread. This eventual feast was perhaps one of the best, with fish stew, Norwegian cheese, and, of course, waffles.

    At night, Porto shifts to a sit-down restaurant and multi-course dinner. Here, the food quality really shined. 

    For me, staples like the lamb shank and lobster tail were expertly prepared. The always-available steak was flavorful and cooked just right, too. A few rotating dishes were more hit-or-miss. Even so, I really enjoyed the Mongolian beef and the glazed salmon, among other entrees. 

    Heidi had a harder time, since so many entrees featured fish or red meat. Luckily, she liked several of the nightly pasta dishes, and the always-available chicken supreme was a fallback when she couldn’t find anything. 

    Overall, the starters and desserts were somewhat limited and pretty typical cruise food quality. One treat stood out, though: the creamy, delicious ice cream. You’ll find it at a self-serve cart near the pool by day, and again at lunch and dinner. Simply put, it was the best sweet onboard. 

    7Aft Grill

    When the weather cooperated, the 7Aft Grill up on Deck 7 offered an al fresco lunch with many of the same buffet selections as down in the main dining room. Although, it did offer a unique made-to-order menu with different flatbreads, hamburgers, and shrimp tacos.

    On a warm Norwegian afternoon, it made for a nice change of scenery and menu.

    Paula’s Pantry

    One of our favorite spots on any Atlas Ocean Voyages ship is Paula’s Pantry.

    This coffee shop and cafe on Deck 4 is open from 6:30 am to 6:30 pm daily. It was our go-to spot for several espresso-based drinks throughout the cruise. It is also home to some breakfast pastries, fresh-squeezed juices, and energy shots, which were very popular. Although, Heidi’s ham and cheese toastie got a complete makeover, and not in a good way. 

    In the afternoon, snacks, quiches, sandwiches, plus sweet treats were on the menu. From cookies to giant pretzels, banana bread, and other desserts, it was hard not to walk by and grab something, even if you had just eaten!

    Room Service

    Finally, room service is included around the clock. 

    On a couple of early mornings, we ordered breakfast, and it was excellent. All items were hot, fresh, and well prepared. It was a perfect accompaniment to watching the scenery pass by, in our pajamas, from the comfort of our room. 

    However, the all-day menu is small, with just a handful of items geared more toward lunch than dinner. Still, the hamburger and pizza hit the spot one expedition day in between outings. 

    Onboard Activities and Enrichment

    Small ships aren’t known for big entertainment. Still, World Navigator offered more than we expected, and more than our past Atlas sailings.

    A lot of that came down to our cruise director, Tee. Throughout the week, he kept things lively with classic game shows like Yes or No and Majority Rules. On top of that, he hosted trivia, mixology sessions, and other events around the ship. He was friendly, energetic, and much more approachable than our previous Atlas cruise directors. We welcomed his big-ship cruise director personality, humor, and enthusiasm. 

    Evenings brought more variety, too. Up in The Dome, the Java Duo played themed music sets most nights, along with pre-dinner sets in the Atlas Lounge. In the Dom Henrique Auditorium, the ship screened movies, complete with fresh popcorn, on select nights. Add in the crew talent show and our Arctic crossing dance party, and there was usually something to do after dinner.

    Where this particular cruise fell short, though, was enrichment. On our previous Atlas voyages, the lectures and guest speakers were a real highlight. Here, the first two-thirds of the trip had nothing beyond a brief port talk. To her credit, Melany, the excursions lead, did her best with the standard preview of the next day’s stop. But, we kept wishing for more. We were sailing the Norwegian coast, after all. A few talks on Norway’s history, folklore, or geography would have gone a long way. Or some talks on the Arctic, Svalbard, or the wildlife to get us in the expedition mindset ahead of our visit. We think many guests would have even enjoyed some narration during our scenic sailing.

    Thankfully, Tee hosted some mainstream cruise activities, as we have no idea what we would have done with all the down time otherwise. 

    Things finally shifted on Day 9 of the trip. Once the expedition lead Ekaterina and her team came aboard, the daily lectures and briefings began. Suddenly, the auditorium came alive with talks on Arctic wildlife, glaciers, and the region ahead. 

    The programming was excellent, and many of the guides (especially Ekaterina, Lena, and Guiliano) were very knowledgeable. It just arrived too late. For example, we got a lecture on Norwegian birds the evening after our Bear Island Zodiac safari. Yet, Bear Island is famous for its birdlife.

    In our view, at least part of the expedition team should’ve been onboard the entire time and started the enrichment sooner. That one small change would make the slower first half far richer.

    Our Balcony Stateroom on World Navigator 

    For this cruise, we stayed in stateroom 601, a traditional balcony cabin. This Veranda Suite sits all the way forward on the starboard side of Deck 6. In fact, we had the very last stateroom before the bridge.

    At roughly 270 square feet including the balcony, it felt noticeably larger than the balcony cabins on contemporary lines.

    The layout is familiar, though. As you enter, the bathroom sits on the forward wall to your left. Across from it, the closet lines the opposite wall to your right. Then, past the bathroom and closet, you reach the bed. Beyond that, a small seating area and desk lead out to the balcony.

    The bathroom is a big upgrade over mainstream cruise lines with regard to size and amenities. It features marble finishes and a walk-in mosaic shower with a rainfall showerhead and body jets. It also stocks L’Occitane products so you can leave your toiletries at home. 

    The queen bed is draped in soft Portuguese cotton linens. Nearby, the desk boasts a Nespresso maker and the stocked mini-fridge tucked underneath, both of which are complimentary. Across from the desk sit two oversized chairs and a small table. This area was cramped with all our gear, but we managed.

    Like our previous Atlas staterooms, storage was the biggest issue. After all, we were packing for three seasons over 12 nights. So, we had to get creative. Luckily, our packing cubes and pocket organizer saved us. In the end, we found room for all our clothing and outerwear. Even so, we’d love a few more drawers or larger shelves.

    With more downtime than usual, we were thankful to have a balcony. Whether it was sailing by glaciers, fjords, or small towns, we were never far from an amazing view. Unlike typical cruise balconies, World Navigator has oversized, cushy chairs and a large table. So, we could settle in with a coffee or our laptops and admire the vistas at virtually any hour. 

    An Arctic Adventure With Atlas Ocean Voyages

    Embarking in Oslo

    Given the transatlantic flight to reach our departure port, we built in a pre-cruise night in Oslo. For our stay, we booked the Amerikalinjen, right in the heart of the city. Even though we arrived early, we simply didn’t have it in us to tour that first day.

    The next day was a different story. Since Atlas doesn’t start boarding until 3 pm, we had most of the morning and early afternoon free. That let us make the most of the hotel’s central location.

    From the hotel, we followed the pedestrian path of Karl Johans gate up to the Royal Palace. Along the way, we paused for photos at the Parliament building and a few other sights. Later, we headed the opposite direction, strolling toward the Opera House and the Munch Museum.

    We had the hotel staff flag us a taxi around 2:30 pm, and we set off for the pier.

    For a moment, we weren’t even sure we had the right spot. Then our driver rounded a corner, and there sat World Navigator at its small berth. We checked in inside a tent, waited about 15 minutes, and climbed the gangway. Just like that, our near two-week exploration of the Arctic began.

    Skagen, Denmark

    Our first stop was Skagen, the northernmost town in Denmark. It’s a charming place, known for its cheerful yellow houses and its history as an artists’ colony. To see it, we booked the Panoramic Skagen, Grenen, and the Buried Church tour.

    The clear highlight was Grenen itself. To reach the point, we hopped aboard the Sandormen, a quirky tractor-pulled wagon that carries guests across the sand. The name roughly translates to “the sand worm.” At the tip, we watched the Baltic Sea and North Sea crash together from opposite directions. 

    From there, we continued to the Buried Church. This 14th-century landmark was slowly swallowed by drifting dunes, and today only its tower still rises above the sand.

    Måløy, Norway 

    Given Heidi isn’t a wing-it kind of person, we booked a tour at every port. That’s exactly why we joined the Discover Måløy on Foot tour. Måløy is a small fishing town that carries a heavy past. During World War II, German forces seized Måløy and turned it into a coastal fortress.

    We strolled along the coast and down the main street, passing colorful murals painted across the buildings. Along the way, our guide shared the town’s history, from its fishing roots to its WWII past. We then continued out to the war monument, then back past the WWII museum. 

    Honestly, we could have done most of it on our own. During the previous evening’s port talk, Melany had already pointed out the WWII museum and the murals as easy things to see on our own.

    Crossing the Arctic Circle

    Somewhere between Måløy and the Lofoten Islands, we crossed one of travel’s great milestones: the Arctic Circle.

    On the itinerary, this day is simply labeled “Captain’s Choice,” which is a little misleading. It was really just a sea day with some scenic cruising through fjords. The actual crossing happened sometime between 9 and 10 that evening.

    To mark it, Atlas hosted an Arctic Circle Crossing Celebration in the Dome. We raised a glass to the moment while the Java Duo played. We were surprised that the cruise line did not perform the typical “blue-nose ceremony”, as on our previous Arctic cruise. However, they did have blue cocktails! 

    Leknes (Lofoten Islands), Norway

    The day after crossing the Arctic Circle, we arrived in Leknes, in the Lofoten Islands. We’d actually been here before on a Viking sailing. Our tour on that trip included a sightseeing exploration by land and sea. That trip took us past the historic red houses, dramatic ridges, and towering mountains, and it was excellent.

    The same could not be said about the Panoramic Lofoten Vistas tour we booked this time. On paper, it strings together a few of the area’s prettiest spots. Unfortunately, the weather had other plans.

    We started at Haukland Beach, a popular stop that is now even more visited because it was featured in the movie Dune. From there, we drove up to the Hagskarveien Viewpoint. This was meant to be the highlight, with sweeping views of the rugged coastline, but we couldn’t see a thing. The final stop, a small fishing village, didn’t do much to turn things around. There simply wasn’t a lot to see.

    However, during dinner we were surprised by the Captain with a scenic sail through Trollfjord. This dramatic and narrow fjord is famous for its 100-meter-wide entrance and towering mountain walls. Because it was so rainy, we were also treated to some beautiful waterfalls.

    Finnsnes (Senja Island), Norway

    After the letdown in Lofoten, Senja was a welcome rebound. Our ship docked in Finnsnes, a small mainland town linked by a bridge to Senja, Norway’s second-largest island. And Senja delivers exactly the kind of scenery you picture up here. Think jagged peaks, quaint fishing villages, and deep fjords around nearly every bend.

    To see it, we booked the Spectacular Senja Scenic Route tour. As the name suggests, this one is all about the views. Over close to three hours, we wound our way around the island with multiple stops along the way. First up was Ersfjordstranda, a white-sand Arctic beach set at the head of Ersfjord. Ringed by mountains on three sides, it looks almost tropical.

    Next came Tungeneset, a rocky coastal viewpoint reached by a wooden boardwalk that runs out over sea-smoothed boulders. From there, you face the open Norwegian Sea on one side and the jagged Okshornan peaks on the other. Our guide called them the Devil’s Teeth.

    Our final stop was Bergsbotn. Here, a cantilevered platform above the village of Skaland juts out over Bergsfjord, opening up a full panorama of the fjord and surrounding peaks.

    Skarsvåg (North Cape), Norway

    Our final mainland stop was North Cape, another stop we’d visited on our previous Into the Midnight Sun sailing. Perched atop the island of Magerøya, it’s widely billed as the northernmost point of continental Europe. Here, a dramatic cliff rises more than 1,000 feet straight out of the Arctic Ocean. 

    Last time we stopped in Honningsvåg, but we tendered into Skarsvåg this time around. Actually closer to North Cape, it’s the world’s northernmost fishing village.

    The North Cape Discovery tour is an unguided tour that basically just consists of round-trip bus transportation to and from the pier. You do need a ticket to enter the hall, which was included in our tour as well. Inside, there’s a cinema, gift shop, chapel, post office, and other exhibits.

    The real draw, though, is outside. We walked out to the iconic Globe monument, perched right on the cliff’s edge. From there, we grabbed our photos and videos, with the vast Arctic Ocean stretching to the horizon.

    Atlas Cultural Immersion – Our Northernmost Life 

    The day’s real highlight came later, back onboard the ship. Our Atlas cultural immersion (an included experience) was a live show performed by four young local artists from the Perleporten Kulturhus, titled “Our Northernmost Life”. Normally, it takes place at their theater, which doubles as a brewery.

    Through storytelling, music, dance, and song, the quartet shared the history of their small town at 71 degrees north. It was a warm, funny, and often tongue-in-cheek look at life at the edge of the world.

    The experience wrapped with a tasting of locally brewed craft beer and traditional aquavit. It was the perfect send-off for the expedition ahead.

    Bear Island (Bjørnøya)

    After a week of coastal cruising, the real adventure was about to begin. In short, the vibe on the ship had shifted into full expedition mode.

    First came our mandatory AECO briefing, which covers the rules for traveling responsibly in the Arctic, and a Zodiac safety briefing. We also picked up our expedition gear, including our parkas and boots, and passed through a biosecurity check. 

    Our first stop was Bear Island, or Bjørnøya. It’s the southernmost island in the Svalbard archipelago, sitting alone halfway between the mainland and Spitsbergen. Despite the name, though, it’s home to birds not bears. 

    We explored by Zodiac, cruising the coast at Sørhamna. Our Group D drew one of the last departure slots, and unfortunately, the fog rolled in by the time it was our turn. Our Zodiac driver did his best in the conditions, pointing out puffins, guillemots, skuas, and other seabirds in the water and dotting the cliffs. 

    Ytre Norskøya

    After another full sea day, our first full expedition day was a landing at Ytre Norskøya. But before, polar plunge!

    Our uneventful sea day en route to this next stop was unexpectedly interrupted in the late afternoon with an announcement that guests who wanted to partake in the polar plunge should get ready and make their way to the Atlas Lounge. Of course, I obliged. Now, I can officially say that I took the plunge in both poles!

    On the morning of our arrival into Ytre Norskøya, we were awakened at 6:30 am for a polar bear sighting.

    I scrambled up to the open decks as fast as I could. But by the time I got to The Dome, all I could make out were two tiny white dots bobbing in the water. Still, the captain lingered a while so everyone could get a glimpse. Honestly, it was both exciting and frustrating.

    Ytre Norskøya itself is a tiny island. Centuries ago, it was a busy Dutch whaling station. Back in the 1600s, lookouts would climb the high ground here to spot whales offshore. This morning, we retraced some of those footsteps on an unguided walk.

    The walk was moderately difficult, over uneven, rocky terrain. Just like in Antarctica, the expedition team went ashore first to scout and mark a safe path for us to follow. There wasn’t much on the ground itself, just lichen and rock. Even so, the walk was worth it. We soaked in the views of the glaciers and our ship anchored out in the cove.

    On our sail back through the same area, we spotted two polar bears walking along the shore. Once again, our phone’s zoom could barely make out a few blurry white masses moving across the land. 

    Gullybukta

    In the afternoon, we repositioned to Gullybukta, a small bay off Magdalenefjorden. At first, we simply cruised the ship along the coast, taking in the glaciers and dramatic scenery while scanning for wildlife. Guests with binoculars picked out sea lions, walruses, and a few minke whales that passed close by the ship.

    Once we arrived, we could see from our anchored position a herd of walrus on the other side of a jetty. This time, once we boarded the Zodiacs, we were able to sail across the ice and get up close. It was the kind of moment we’d come all this way for.

    The glacier too was impressive. Gullybreen spills right down into the bay, creating a massive wall of ice as a backdrop. We also drifted past Gravneset, a spot that once held a whaler grave site, though we couldn’t go ashore. The one letdown was that our Zodiac driver for this outing wasn’t very knowledgeable.

    Ny-Ålesund

    Our final expedition day began at Ny-Ålesund, one of the northernmost settlements on Earth. It’s not a typical town, though. Instead, it’s a working research station, run by 10 institutions from 11 different countries. Scientists here study the Arctic climate, and their instruments are so sensitive that visiting ships must go silent. In fact, from 5 am to 2 pm, the whole yacht observed a mandatory radio silence. That means no WiFi, no television, and no Bluetooth.

    We spent the morning walking around the settlement. While we did spot one reindeer not far from the main road, that was the only wildlife sighting of the morning. 

    During our couple hours ashore, we visited the small museum, browsed the shop for a souvenir, and stopped by the historic airship mast. Back in 1926, Roald Amundsen’s airship Norge departed from here on its flight across the North Pole. Honestly, beyond those few sights, there wasn’t much to see or do.

    Given the limited time we had in Svalbard, we would have preferred another expedition.

    Lilliehöökbreen

    In the afternoon, World Navigator repositioned to Lilliehöökbreen. At 14 miles long and 5-7 miles wide, this massive glacier complex flows into the dramatic Lilliehöökfjorden. The wall of ice was staggering, easily one of the most impressive Arctic landscapes we’d seen all trip. The sunny weather made it a picture-perfect day, too.

    We explored by Zodiac once again. Unfortunately, we drew the same guide as the day before who couldn’t answer some of our basic questions. Out on the ice, we spotted a seal playing around for a bit before slipping back into the water. While admiring the deep blue wall of ice, we witnessed a small glacier calving. Sadly, I wasn’t quick enough to capture any video.

    A Morning in Longyearbyen

    After the expedition, our journey ended in Longyearbyen, one of the world’s northernmost towns.

    Getting home from here is an adventure in itself, since Atlas flies guests out by private charter to Oslo. Our charter didn’t leave until 12:45 pm and the airport transfers didn’t start until 10 am. That left us about two hours to explore on foot. 

    But we quickly realized that much like the rest of Norway, nothing opens early. At 9 am, the town was still asleep. The only place we found open was a small coffee shop, complete with a few adorable huskies and a wall of souvenirs.

    Eventually, we caught the last transfer to the very nearby airport.

    As we waited at the gate, we watched the next wave of eager expeditioners arrive. Their adventure was just beginning. Meanwhile, ours had come to an end.

    What’s Included on an Atlas Ocean Voyages Arctic Cruise

    Like other luxury lines, Atlas Ocean Voyages offers an all-inclusive fare for its Polar Expeditions. 

    All dining is included, along with 24-hour room service. Beer, house wines, and cocktails are complimentary, as are premium non-alcoholic drinks. Your suite even comes stocked with L’Occitane products, a mini-fridge set to your preferences, and a Nespresso coffee machine.

    Atlas folds in prepaid gratuities and a cultural immersion experience as well, such as the “Our Northernmost Life” show.

    All guests get 1 GB of internet. But we exhausted that quickly and purchased a streaming plan, which cost about $25 per person, per day. 

    Once you get to the expedition portion of the journey, Atlas provides a warm parka to keep, plus loaner boots for landings. Every Zodiac safari, shore landing, and guided hike is included, all led by the full expedition team. 

    Best of all, the private charter jet that flew us from remote Longyearbyen back to Oslo is also included. And emergency medical evacuation coverage rounds out the package.

    Naturally, a few things cost extra like premium spirits, the specialty chef’s table, and spa treatments. 

    On a hybrid cruise like this one, traditional shore excursions are an additional charge as well. Pricing ranged from about $49 to $179 per person depending on the tour. Of course, you don’t need to purchase tours at these ports. Several of them were easily accessible by foot. Or you can opt for taxis or book private tours. 

    Is an Atlas Ocean Voyages Arctic Cruise Worth It?

    So, was this Atlas Ocean Voyages Arctic cruise worth it? Honestly, the answer depends on what you expect going into the trip.

    Having sailed with Atlas in Antarctica, and not paying enough attention to the itinerary, we were surprised by the hybrid nature. For roughly the first eight days, it didn’t resemble a polar expedition at all. The true expedition didn’t arrive until the very end when we reached Svalbard. This caught us, and many of our fellow travelers, off guard.

    If you’re expecting daily Zodiac safaris, hikes, and constant wildlife, part of the voyage may let you down. We’ll admit we wanted the adventure to start sooner, and the lack of enrichment early on didn’t help either. However, when the expedition finally did arrive, it delivered. Standing before the face of Lilliehöökbreen, sailing up to a herd of walrus, and scanning the horizon for polar bears, these were unforgettable moments. 

    The truth is that this particular itinerary is a Norwegian cruise with a taste of expedition. If you understand that going in, you’ll likely love it. In fact, we did talk to a few older passengers who booked specifically for this reason.

    Who Is This Atlas Arctic Expedition Cruise Right For?

    This cruise isn’t for everyone, and that’s okay. If you want the best of both worlds, look no further. This itinerary blends a comfortable, scenic cruise in Norway with a genuine, albeit brief, expedition component in majestic Svalbard. So it suits travelers who want a real taste of the high Arctic without committing to a more active voyage. 

    It’s also ideal if you value small-ship luxury. With under 200 guests and an all-inclusive fare, the ship itself is more than just a backdrop to this bucket list destination.

    On the other hand, those who have done previous expedition cruises or active travelers may find this specific itinerary a bit boring. This is a taste of the high Arctic, not a deep dive. Travelers who want to be in a Zodiac or outside hiking every day may grow restless on the quieter sea days. So, we’d suggest looking for an itinerary that spends more time in Svalbard or one that features more expedition days in other areas of the Arctic.

    Finally, budget-focused cruisers should know this is a premium product at a premium price. While it’s certainly not the most expensive Arctic cruise, it’s also not the cheapest.

    With Atlas Ocean Voyages offering a variety of Polar Expeditions in the Arctic — at various lengths, to various destinations, and with varying levels of expedition — we suspect you can find one that matches your appetite for exploration. After our short time in Svalbard, we are eager to return and discover more of what the Arctic has to offer. 

    Comments

    Are you planning an Atlas Ocean Voyages Arctic Cruise? Would you sail this far north? Drop us an anchor below with your Arctic expedition cruise reviews.

    The post Our Honest Atlas Ocean Voyages Arctic Cruise Review – Is It Worth it? appeared first on EatSleepCruise.com.

    This post was originally published on this site.

  • Coast Guard Rescues 12 People After Boat Capsizes in New York, Killing Woman and Infant

    Coast Guard Rescues 12 People After Boat Capsizes in New York, Killing Woman and Infant

    The Coast Guard (USCG) rescued 12 people after a boat overturned Saturday night near the Statue of Liberty in New York, killing one woman and a 5-month-old child.

    this site

  • Coast Guard Officer Ranks: From Ensign to Admiral

    Coast Guard Officer Ranks: From Ensign to Admiral

    Coast Guard ranks for officers are split into two tiers: officer and admiral.

    this site

  • Best Tablet for Photo Editing in 2026: A Photographer’s Verdict

    Best Tablet for Photo Editing in 2026: A Photographer’s Verdict

    I’ve been shooting travel photography professionally since 2010, and in that time I’ve bought into the tablet-as-editing-machine idea twice. Both times I ended up back at my desktop. Things have moved on a lot since then, and the tablets in this guide are far better machines than either of mine were, but my position hasn’t…

    This post was originally published on this site.

  • Eclipses, Dark Skies and Astronomy: Our Best Gear to Look Skyward in Daylight or Starlight

    Eclipses, Dark Skies and Astronomy: Our Best Gear to Look Skyward in Daylight or Starlight

    Featured image: With the right equipment, your journey will be even more memorable| Photo by Carol Patterson

    My best recommendations for cameras, binoculars and telescopes

    by Carol Patterson

    If you’ve recently developed a fascination with the sky and the objects in it, you might be looking for gear to give you a better view. As a professional photographer and member of the Royal Canadian Geographical Society who loves eclipses, dark skies and wildlife watching, these are my top equipment suggestions to make your next journey more memorable.

    (Please note: this article includes Amazon and other affiliate links, but we only ever recommend items we think are relevant for you and we’ve tried ourselves that will benefit you on your travels. If you decide to purchase a product through one of these links, we will receive a small commission that doesn’t add any cost to the purchase of an item and helps us maintain our website and other services to you!)

    Get inspiring stories just like this one delivered straight to your inbox. Join our mailing list here.

    “Astronomy taught us our insignificance in Nature.” – Ralph Waldo Emerson, Poet

    Best Binoculars, Cameras, Spotting Scopes and Gear

    1. Binoculars and Spotting Scopes

    Binoculars are handy for many reasons. Whether it’s spotting a yellow-breasted chat, a crater on the moon or reading a route sign at a distance, binos are handy.

    Experts describe binoculars by two numbers, the first is magnification, the second is objective lens size. So an 8 X 20 binocular magnifies an object eight times and the front lens is 20 milometers across. A wider lens means your binoculars let in more light and you’ll see better. A popular size for birdwatchers is 8 X 42 but if weight is an issue you can go for something smaller. I love my Leica Trinovid BCA 8 X 20 because they fit in my pocket and I never miss a cool sight.

    Spotting scopes are great if you’re looking for wolves in Yellowstone or whales offshore Pacific Rim National Park. A good unit to start might by something with a 20-60 zoom and a 65-86 mm objective lens like this Pentax PF-80ED-A and Pentax SMC XL20-60 eyepiece . You’ll need a sturdy tripod to mount it, adding to your luggage weight and cost if you’re flying. Spotting scopes can be used after dark for the moon or planets but for star gazing, you’ll want to upgrade to a telescope.

    Lecia 8x 20 binoculars

    Leica brand binoculars are highly rated / Available on Amazon.

    2. Optical Telescopes

    You might have looked though an optical telescope at a planetarium or at an astronomy event. You’ll be able to see the rings of Saturn or the bright stars of distant galaxy. A good telescope will have a large aperture, stable mount and a finder to help you locate celestial objects.

    Beginners will do well with an 8-inch Dobsonian telescope; Sky-Watcher and Celestron Star-Sense offer good models for newbies. For about $1,000CDN you can get started but because telescopes are so complex, you’ll do better to buy from a store that specializes in them. Or join an astronomy club so you can try out different equipment before you buy.

    celestun star sense telescope

    Celestun’s Star Scope telescope/ Available on Amazon.

    3. Smart Telescopes

    You might be surprised to know you can combine a love of photography and astronomy to create images worth hanging on your wall with a smart telescope. This super portable, app-controlled device let you capture images with a series of stacked photographs. You don’t even need to be near the telescope (great if you hate the cold).

    You pick your celestial object, set the telescope to start and after a few minutes, it will reveal a celestial object on your device. The DWARFLAB DWARF 3 Smart telescope was designed with beginners in mind and sells for approximately $680CAD.

    northern lights trip with hurtigruten feb 2027 banner

    JourneyWoman Ultimate Packing Guide as seen on a tablet

    4. Cameras

    You probably travel with a phone or tablet and both can take great photos and video of the sky no matter what time it is. For night sky pictures hold the camera still for several seconds or if you’ve got shaky hands, place it on a table or ledge or buy a small tripod.

    For more advanced sky photography you might want to invest in a mirrorless or DSLR camera. Each brand has its fans but for the best images, look for something that has changeable lens. For night sky photography you will want a lens with a wide aperture such as 1.4, 1.8 or 2.8. The combination I rely on is a Sony A7IV with a Laowa 10mm f2.8 lens.


    three women in iceland

    Optical equipment can add to a journey   / Credit Carol Patterson 

    5. Tripods

    If you’re shooting photos in low light, you will need a tripod for great results. For a phone, you can use a lighter tripod like a Sensyne 62” travel tripod.

    For a mirrorless or DSLR camera, you will want something sturdy enough that it doesn’t blow over. I love my Manfrotto 144B but it’s heavy. If you’re taking a tripod on a flight something like the Manfrotto Element MII may be a better choice. 

    Be aware that not all airlines allow tripods in carry-on luggage especially if you strap them to the outside so be prepared to check a bag or call your airline to find out what their policy is.


    A tripod steadies your night photography  / Photo Credit: Carol Patterson

    6. Travel Bags

    When you’re taking your gear on the road, you need a good camera bag big enough for your lens. Some people like a backpack style. I carry large lenses and don’t like the extra weight on my back so I use a OIWAS rolling backpack that I can wheel through airports and convert to a backpack on the trail.

    Packing a dry bag big enough for your camera is a must if you’re going on a boat or out in rainy conditions. I like the range of bags sold at Mountain Equipment Co-op (MEC) in Canada. 

    camera bag gear red on wheels

    A camera case on wheels is great for travel/ Find this one at Amazon

    5. Camera Settings

    If you’re using a mirrorless or DSLR camera, stop using auto at night. Try the specialized night setting if your camera has one but shoot like a pro and switch to manual mode.

    Familiarize yourself with setting aperture, ISO and shutter speed before it gets dark. Your owner’s manual can help you with this. Invest in a remote or cable shutter release so you don’t cause the camera to shake when you push the shutter button. Bring a red-light flashlight so you don’t ruin your night vision while you’re looking in your camera bag or at the ground. Charge your batteries in advance and keep them close to your body. Cold temps will drain them quickly.

    These are some starting settings for mirrorless or DSLR cameras below. Practice and remember that photos will look lighter on your phone or in your viewfinder than they really are. Overexpose slightly. You also will need to use a manual focus. For stars set your focus on infinity and refine until distant objects are in focus.

    • Milky Way or Aurora Photography – ISO1600, wide aperture (f1.4 – 3.5), 20 seconds
    • Moon – ISO100 or 200, F8 or F11, 1/125 or 1/250
    • Solar Eclipse – You MUST use a solar filter to avoid hurting your eyes during a partial eclipse and the time leading to totality. If you’re using a phone, get a filter clip holder based upon your model. Then purchase a ND 1,000,000 filter and insert into the holder. For a mirrorless or DSLR camera, use a high- quality filter from a reputable supplier like Daystar Filters.  During totality you will remove the filter or you will have a dark image. Settings are ISO 100 or 200, F8 or 11, 1/500 to 1/4000 during partial eclipse, raise shutter speed to 1/2000 to 1/4000 during transition, then vary your shutter speed during totality to capture darker and lighter parts of the sun.Unless you’re shooting an eclipse, look for interesting foregrounds. Water makes the best foreground if you can catch a reflection of the night sky.


    Apps for the Northern Lights, Dark Skies and astronomy

    Planning a trip around sky viewing can be complicated. Different apps will help forecast the best day and time to be outside. Some I recommend are:

    • Windy – Popular with birdwatchers, it has good forecasts of wind and precipitation.
      Astrospheric – Provides forecasts for cloud cover, transparency and atmospheric turbulence for night sky photography
    • My Aurora Forecast & Alerts – Tells you how likely you are to see aurora borealis in an area. Aurora can be hard to forecast more than a few hours in advance. Join a Facebook group for people watching aurora in the area you’re visiting and watch for posts suggesting the aurora is active.
      SkyView – Makes it easy to identify constellations. Point your camera at the sky and the constellations in that area are shown.

    camera bag carol patterson

    Keep your cameras in your carry-on bag  / Photo Credit: Carol Patterson

    More on Photography

    The post Eclipses, Dark Skies and Astronomy: Our Best Gear to Look Skyward in Daylight or Starlight appeared first on JourneyWoman.
    This post was originally published on this site.

  • BBQ Chicken Foil Packs

    BBQ Chicken Foil Packs

    These BBQ Chicken Foil Packs bring everything I love about summer cookouts together in one easy dinner. Each packet is filled with tender chicken thighs, Yukon Gold potatoes, bell pepper, and red onion, all coated in smoky seasonings and barbecue sauce. There’s no marinating or precooking needed; everything is ready in about 40 minutes, and each foil pack is a full meal in one (that’s what I call efficient and budget-friendly). I’ve also included directions for both the grill and oven, so you can make this recipe long after cookout season is over!

    A Full Summer Dinner Wrapped in Foil

    Nothing screams summer like grilled BBQ chicken. It’s one of those meals that instantly takes me back to backyard cookouts, paper plates piled high, and eating outside until the sun goes down. Growing up, foil packet dinners were always in rotation too. They were easy to throw together and somehow always tasted better cooked over the grill.

    These BBQ chicken foil packs combine both of those summer favorites in one meal. I cut the chicken thighs and potatoes into similarly sized pieces so they cook through at the same time, then toss them with sliced bell pepper, red onion, smoky seasonings, and BBQ sauce in one bowl. Just divide the mixture between the foil sheets, seal each packet, and let the grill do the work. The chicken stays juicy, and the vegetables soak up all that sweet, smoky flavor before each packet gets one last brush of BBQ sauce. I honestly can’t get enough of that saucy finish! And since everyone gets their own packet, serving and cleanup are about as easy as dinner gets!

    Recipe Success Tips

    1. Cut the chicken and potatoes into even pieces. For this recipe, I cut the chicken into 1-1½-inch pieces and the potatoes into 1-inch chunks. Try not to eyeball the potatoes too generously here. Larger chunks are the biggest reason the chicken will be ready before the potatoes are tender.
    2. Divide the filling between each foil sheet. Each foil sheet should get about one-quarter of the chicken and vegetable mixture. I find it helpful to portion out the chicken and potatoes first, then go back and divide everything else left in the bowl. Overfilled packets take longer to cook and are also more likely to leak!
    3. Seal the foil tightly, but don’t squash it around the food. I always make sure the foil is folded well to avoid any leaks, but you still need to leave enough space inside for steam to circulate so everything cooks properly. Bring the sides together and double-fold the center seam. Then fold the ends up to trap all that steam inside. I use heavy-duty foil here. Double up each packet if you only have regular aluminum foil to help prevent tearing.
    4. Check for doneness before brushing with extra BBQ sauce. The largest piece of chicken should reach 165°F internally, and a fork should slide easily through the center of the largest potato chunk. Since BBQ sauce can disguise the color of the chicken, a meat thermometer is the most reliable way to check it. Reseal the packet and cook it for a few more minutes if the potatoes still feel firm or the chicken isn’t quite done.
    5. Open those foil packets carefully! All that steam builds up inside the packets and comes rushing out when you open them, and it can be HOT!
    6. Want to use different veggies? You can switch out the vegetables I use here, but stick with softer, quick-cooking options so they’re ready in roughly the same amount of time. Sliced mushrooms, corn cut from the cob, diced tomatoes, canned pineapple chunks, and sliced zucchini would probably be my top choices.

    A women filling BBQ chicken foil packets in a kitchen.
    Jennie Alley prepping her BBQ chicken foil packs in our Nashville test kitchen.

    No Grill? Use the Oven!

    I love cooking these BBQ chicken foil packs on the grill when I can because it keeps the kitchen cool and makes dinner feel extra summery. But when it’s not grill weather, I’ll happily make them in the oven instead! Assemble the packets as directed, place them on a sheet pan, and bake at 425°F for 25-30 minutes, or until the chicken reaches 165°F and the potatoes are fork-tender. No other changes needed!

    Overhead view of a BBQ chicken foil packet.

    Print
    Add to Collection Go to Collections

    BBQ Chicken Foil Packs

    These easy BBQ Chicken Foil Packs are a complete grill-or-oven dinner with chicken thighs, potatoes, peppers, onions, and tangy BBQ sauce!
    Course Main Course
    Cuisine American
    Total Cost $10.45 recipe / $2.61 serving
    Prep Time 15 minutes
    Cook Time 25 minutes
    Total Time 40 minutes
    Servings 4 servings (1 packet each)
    Calories 480kcal

    Equipment

    • Large Bowl
    • Aluminum foil
    • Grill or Oven

    Ingredients

    • lb. chicken thighs boneless & skinless, (cut into 1-1.5 inch pieces) (680g) $5.58*
    • ¾ cup BBQ sauce divided, (225g) $0.76**
    • 1 Tbsp vegetable oil 0.5 oz., $0.04
    • 2 tsp smoked paprika 4.5g, $0.16
    • 1 tsp garlic powder 3g, $0.03
    • 1 tsp onion powder 3g, ($0.04
    • ½ tsp black pepper freshly cracked, $0.04
    • 1 tsp salt $0.08
    • lbs. Yukon Gold potatoes cut into 1-inch chunks, (about 4-5 medium potatoes) (680g) $1.59***
    • 1 green bell pepper sliced, (130g) $0.86
    • 1 red onion sliced, (160g) $1.27

    Instructions

    • Gather and prep ingredients. Preheat the grill to 425°F.
    • Cut chicken thighs into bite-size pieces (about 1-1½ inches). Slice red onion and green bell pepper. Cut potatoes into 1-inch cubes.
    • In a large bowl, combine the cubed chicken with ½ cup BBQ sauce, the vegetable oil, smoked paprika, garlic powder, onion powder, black pepper, and salt. Toss until evenly coated.
    • Add the Yukon Gold potatoes, bell pepper, and onion to the bowl and toss until everything is lightly coated in the sauce.
    • Cut four 12×18-inch sheets of heavy-duty foil (see notes below). Divide the chicken and vegetable mixture evenly between the 4 foil packs, placing in the middle of the foil.
    • Bringing the short sides of the foil together, fold the seams together twice and then tuck the ends in and up to seal tightly. Seal each packet tightly, leaving a little space inside for steam to circulate.
    • Grill for 20-25 minutes, flipping once halfway through, until the chicken is cooked through (165℉ internally) and the potatoes are fork tender. (Or bake at 425°F for 25-30 minutes on a sheet pan in the oven until everything is fully cooked and tender.)
    • Carefully open the packets, let the steam release, reglaze with remaining bbq sauce and serve immediately.

    See how we calculate recipe costs here.

    Notes

    *I always buy value packs of chicken thighs and freeze the extras. It keeps this recipe budget-friendly and makes weeknight cooking much easier. I prefer thighs here because they stay tender inside the hot foil packets, but boneless, skinless chicken breasts should also work. Keep the pieces evenly sized and check them earlier, since leaner breast meat is more likely to dry out. Thaw frozen chicken completely in the refrigerator before using it in this recipe.

    **Use your favorite BBQ sauce! Any type or brand will work. A honey, brown sugar, smoky, or spicy sauce is an easy way to switch things up! You can also make our homemade BBQ sauce and customize it to your taste.

    ***Yukon Gold potatoes work especially well here because their creamy texture holds up nicely as they steam inside the packets. Their skins are also thin, so there’s no need to peel them. Red potatoes are another good option and can be prepared the same way.

    ****You can use regular aluminum foil instead of heavy-duty, just double up each packet, so you’ll need eight sheets in total.

    Prep them ahead: These barbecue chicken foil packs are great for camping, cookouts, or busy evenings. I usually make them fresh because they’re so quick and easy, but you can assemble them up to 24 hours in advance if needed. Keep them refrigerated or properly chilled until you’re ready to cook. You may need to add a few extra minutes since the filling will be starting cold. 

    Nutrition

    Serving: 1foil pack | Calories: 480kcal | Carbohydrates: 57g | Protein: 38g | Fat: 11g | Sodium: 1299mg | Fiber: 6g

    how to make BBQ Chicken Foil Packs Step-by-Step Photos

    The ingredients to make BBQ chicken foil packs with labels.

    Gather all of your ingredients. Preheat your grill (or oven) to 425°F.

    Sliced red onions, green bell peppers and diced potatoes on a cutting board.

    Prep the veggies: Start by cutting 1½ lbs. Yukon Gold potatoes into 1-inch chunks, then slice 1 green bell pepper and 1 red onion.

    Diced chicken breast on a cutting board.

    Dice the chicken: Now cut 1½ lbs. boneless, skinless chicken thighs into 1-1½-inch pieces. Keep the chicken and potato pieces as consistently sized as possible so they cook evenly.

    Diced chicken, seasonings and BBQ sauce in a bowl.

    Season the chicken: Add the chicken to a large bowl with ½ cup BBQ sauce, 1 Tbsp vegetable oil, 2 tsp smoked paprika, 1 tsp garlic powder, 1 tsp onion powder, ½ tsp freshly cracked black pepper, and 1 tsp salt. Toss until every piece is evenly coated.

    Sliced peppers, red onion, diced potatoes, and bbq sauce in a bowl.

    Add the vegetables: Add the prepped potatoes, sliced bell pepper, and sliced red onion to the bowl. Toss everything together until the vegetables are lightly coated in the BBQ sauce and seasonings.

    BBQ chicken, potatoes, peppers and onions on a sheet of foil.

    Make the foil packets: Cut four 12×18-inch sheets of heavy-duty aluminum foil. Place about one-quarter of the chicken and potato pieces in the center of each sheet first, then divide the bell pepper, onion, and any sauce left in the bowl between them. Double up each packet if you’re using regular aluminum foil (meaning you’ll need eight sheets in total).

    A foil packet folded in half on a wooden cutting board.

    Bring the short sides of each foil sheet together over the filling and fold the seam over twice.

    A folded foil packet on a wooden cutting board.

    Then fold the open ends inward and up to seal each packet securely. Leave a little room between the filling and the top of the foil so steam can circulate rather than pressing the foil tightly against the filling.

    Three foil packets on a grill.

    Grill the foil packs: Place the sealed packets on the preheated grill and cook for 20-25 minutes. To use the oven instead, place the packets on a sheet pan and bake at 425°F for 25-30 minutes.

    BBQ chicken packets on a grill.

    Gently flip each pack with tongs halfway through to ensure even cooking!

    Foil packets after coming off the grill.

    Check the chicken and potatoes: Carefully open one packet, keeping your face and hands away from the hot steam. The largest piece of chicken should reach 165°F internally, and the potatoes should be tender. If either one needs more time, reseal the packet and cook for a few more minutes before checking again.

    Finished BBQ chicken foil packets after grilling.

    Brush with more BBQ sauce: Brush the chicken and vegetables with the remaining ¼ cup BBQ sauce. The filling should look glossy and smell sweet and smoky. Serve the BBQ chicken foil packets immediately while everything is hot and saucy. Enjoy!

    Front view of a BBQ chicken foil pack.

    Serving Suggestions

    These BBQ chicken foil packs are a complete meal all on their own, but you can always add a simple side if you’re feeding a hungrier crowd or putting together a summer cookout. I’d pair them with creamy coleslaw for something cool and crunchy, or add watermelon slices or any fresh fruit you have on hand. Since the grill is already hot, grilled corn on the cob is another easy choice! And for me, no cookout is complete without some form of pasta salad, so I’d add a creamy macaroni salad or a fresh and tangy classic pasta salad. These stovetop baked beans are also a great option because their sweet flavor pairs really well with the BBQ sauce. You can also finish each packet with sliced green onions, chopped fresh parsley, or a little shredded cheddar cheese for even more flavor!

    Storage & Reheating

    Let everything cool, then transfer from the foil to an airtight container. Store leftovers in the refrigerator for up to 3-4 days. I like to portion everything into individual containers so lunches are ready to grab throughout the week.

    Reheating

    Reheat individual portions in the microwave in 30-second intervals until warmed through. You can also place the leftovers in an oven-safe dish and warm at 350°F for 10-15 minutes. Add an extra spoonful of BBQ sauce before serving if everything needs a saucy refresh!

    Freezing

    Let the chicken and vegetables cool completely, then transfer them to a freezer-safe container or zip-top bag and freeze for up to 3 months. Thaw overnight in the refrigerator before reheating. The potatoes and vegetables may be a little softer once thawed, but the BBQ chicken still makes an easy meal to have tucked away in the freezer.

    Try These Foil Packet Recipes Next:

    The post BBQ Chicken Foil Packs appeared first on Budget Bytes.

    This post was originally published on this site.

  • Is the Isle of Arran Worth Visiting? Here’s Why I Think It Is

    Is the Isle of Arran Worth Visiting? Here’s Why I Think It Is

    Last Updated on August 10, 2026 by Sarah Wilson Need to Know Before You Go 📍 Best for: Wildlife, scenic drives, gentle walks and a relaxing island escape. How long to stay: I recommend spending four nights on Arran. I only had three nights because I missed my original ferry, and I really wished I’d […]
    The post Is the Isle of Arran Worth Visiting? Here’s Why I Think It Is appeared first on LifePart2andBeyond.com.

    This post was originally published on this site.

  • Turning 95 and Still Going Strong: Dr. Kenneth Cooper’s Rules for Living Longer

    Turning 95 and Still Going Strong: Dr. Kenneth Cooper’s Rules for Living Longer

    What does it actually take to reach 95 healthy, active, and still working? Dr. Kenneth H. Cooper — the physician who coined the term “aerobics” and built one of the most respected fitness research databases in the world — says the answer isn’t just in your genes.

    It’s in your habits.

    In the latest issue of Healthy Aging® Magazine, Dr. Cooper reflects on nine and a half decades of life, including 70 years of studying preventive medicine through the Cooper Clinic, home to data from more than 150,000 patients and 300,000 stress tests. He shares the surprisingly modest daily routine that keeps him sharp, mobile, and dementia-free — from what he eats for breakfast to how many minutes a day he moves.

    Along the way, he unpacks the research behind why even small improvements in fitness can add years to your life, why strength training becomes more important with every decade after 50, and why he believes “no drug can replicate the benefits of an active lifestyle.”

    It’s a rare, personal look at aging well from someone who has spent a career studying exactly that — and is now living proof of it.

    Read Dr. Cooper’s full story, only in Healthy Aging Magazine.

    This post was originally published on this site.